Master GIMP: Essential Tips & Techniques for Digital Art
“`html
GIMP, which stands for GNU Image Manipulation Program, is a powerful open-source software that has gained immense popularity among graphic designers, photographers, and hobbyists alike. If you’re looking to elevate your digital artwork or enhance your photographs, understanding how to use GIMP can be a game-changing skill. This article will guide you through essential tips and techniques to unlock GIMP’s full potential, making graphic design accessible and enjoyable for everyone.
1. Getting Started with GIMP
First things first: before diving into the intricacies of GIMP, you’ll need to download and install the software. GIMP is available for various operating systems, including Windows, macOS, and Linux. Head over to the official GIMP website (gimp.org) to get the latest version. The installation process is straightforward, but be sure to check the system requirements to ensure compatibility with your machine.
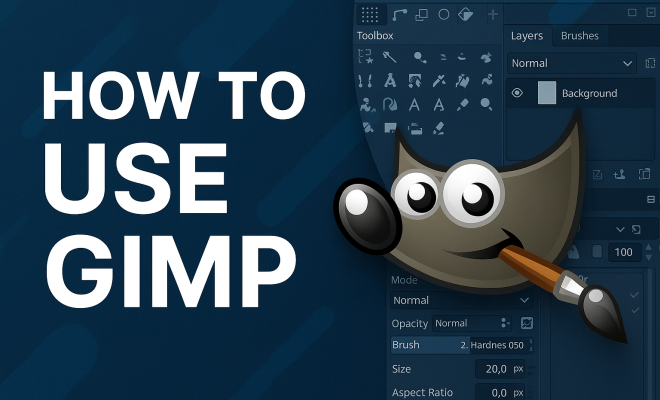
Once installed, launch GIMP to familiarize yourself with the interface. The layout includes multiple sections: the toolbox on the left, the main canvas in the center, and various panels on the right, such as the layers and paths tool. Understanding this layout is essential for smooth navigation. Take some time to explore and adjust the workspace to suit your preferences. You can even create multiple workspaces for different projects!
2. Understanding GIMP’s Tools and Features
One of the key aspects of how to use GIMP effectively is understanding its tools. The toolbox hosts a variety of tools for selection, painting, transforming, and editing images. For instance, the selection tools—like the Rectangle Select and Free Select—allow you to isolate parts of your image for editing. Meanwhile, the brush and pencil tools enable you to draw and paint directly onto your canvas.
Moreover, GIMP offers advanced features such as layers and masks. Layers allow you to stack images and elements on top of one another, which is crucial for non-destructive editing. Masks enable you to hide or reveal portions of a layer, giving you precision in editing. Familiarizing yourself with these tools is a stepping stone toward creating complex compositions.
3. Importing and Exporting Files
Learning how to import and export files is essential in GIMP. To import an image, simply navigate to File > Open and select your desired file. GIMP supports various file formats, including JPEG, PNG, GIF, and its native .XCF format, which preserves layers and other data for future editing.
When it comes to exporting, GIMP offers the option to save your work in different formats, which is vital depending on your intended use. For web images, PNG and JPEG are the most common choices, while TIFF is preferred for high-quality prints. To export, go to File > Export As and choose the format that best suits your needs. Understanding these processes ensures that you can save your work efficiently and in the right format.
4. Working with Layers
Layers are one of the most powerful features in GIMP, offering flexibility and control in your projects. When you add a new layer, it appears above or below existing ones, allowing you to position elements without affecting the rest of your work. To create a new layer, go to Layer > New from Visible or Layer > New Layer in the menu.
You can manipulate layers by adjusting their opacity, blending modes, and positions. The opacity layer slider lets you control how transparent or visible a layer is, while blending modes can create various effects by determining how a layer interacts with the layers beneath it. Experimenting with these options can lead to stunning visual results and enhance your design.
5. Utilizing Filters and Effects
GIMP comes equipped with a plethora of filters and effects that can drastically change the look of your images. Want to create a dreamy blur effect or add texture to your artwork? Filters are a quick way to achieve these effects. Go to the Filters menu to explore categories like Blur, Enhance, and Distorts.
One popular filter among users is the Gaussian Blur, which softens sharp edges in an image, creating a gentle transition between colors. To apply a filter, simply select your layer and navigate to the desired filter. Remember, filters can also be adjusted; you can often control the intensity of the effect through sliders. This functionality is a useful way to breathe life into your projects without requiring advanced techniques. (See: GIMP on Wikipedia.)
6. Text and Typography in GIMP
Adding text to your graphics can enhance communication and engagement. GIMP allows you to insert text with its Text Tool, which can be found in the toolbox. Simply click on the canvas and type your text. You can customize the font, size, and color of your text using the Tool Options dialog that appears once the Text Tool is selected.
After inserting your text, you can manipulate it further by converting it to a path. This opens up a new range of options, such as applying filters and effects unique to paths. You can also create text along a path or distort it for creative effects. Mastering typography is essential for any graphic designer, and GIMP provides ample tools to make your text stand out.
7. Resources for Learning GIMP
While this article provides a solid foundation on how to use GIMP, continuous learning is key to mastering the software. Fortunately, numerous resources are available online to help you expand your skills. Websites like GIMP.org and YouTube offer tutorials ranging from beginner to advanced levels, covering a myriad of topics.
Additionally, consider joining online forums and communities, such as Reddit’s r/GIMP, where you can ask questions, share your work, and seek feedback from other users. Engaging with fellow GIMP enthusiasts can provide insights and tips that enhance your knowledge and creativity. Remember, the only limit to what you can create in GIMP is your imagination!
8. Common GIMP Techniques
As you explore how to use GIMP, you’ll encounter some common techniques that many artists and designers utilize to get the most out of the software. Here are a few key techniques to consider:
8.1. Photo Retouching
Photo retouching is one of the most popular uses of GIMP. Whether you want to remove blemishes, enhance colors, or add filters, GIMP provides tools to achieve professional-looking results. For example, the Healing Tool can help you eliminate imperfections seamlessly. Simply select the Healing Tool, adjust the brush size, and click on the area you want to fix while holding down the Ctrl key to sample an area of skin nearby. This technique is especially useful for portrait photography.
8.2. Creating Digital Paintings
For those interested in digital painting, GIMP is a fantastic option. You can take advantage of the wide array of brushes available, from soft pastels to hard-edged ink brushes. You can also download custom brushes from online communities to expand your toolkit. Layering colors, utilizing opacity, and blending modes can help you create depth and texture in your paintings.
8.3. Image Compositing
Image compositing involves combining multiple images into one cohesive design. This technique is often used in advertising and digital art. To create a composite, start by importing all your images into GIMP. Use the selection tools to cut out parts of each image and arrange them on different layers. Adjust blending modes and opacity to create a seamless look.
9. Advanced Features of GIMP
Once you feel comfortable with the basics, it’s time to explore some of GIMP’s advanced features. These can really take your skills to the next level.
9.1. Animation
Did you know GIMP can also be used for basic animation? By creating a series of layers that represent different frames of your animation, you can export your project as a GIF. To do this, use the Filters > Animation > Optimize (for GIF) option to prepare your layers, and then export your file as a GIF. In the export dialog, make sure to select “As animation” and set the frame delay. This is perfect for creating simple animated graphics!
9.2. Custom Scripts and Plug-ins
GIMP supports scripts and plug-ins that can automate complex tasks or add new features. You can write scripts in a language called Script-Fu or use Python-Fu for more advanced options. This is especially useful for repetitive tasks like batch processing images. The GIMP Plugin Registry has many community-created plug-ins that can enhance your productivity and creativity.
10. Frequently Asked Questions (FAQ)
10.1. What are the system requirements for GIMP?
GIMP is relatively lightweight, but having a system that meets the following minimum requirements is essential for optimal performance: (See: GIMP image editing article by NY Times.)
- Windows: Windows 7 or later
- macOS: macOS 10.9 or later
- Linux: Most distributions should work, but be sure to check for compatibility with your version
- RAM: At least 2 GB (4 GB or more recommended for large projects)
- Disk Space: 200 MB for installation, plus additional space for your projects
10.2. Is GIMP good for professional use?
Absolutely! Many professionals use GIMP for various projects, including graphic design, photo editing, and digital art. While it may not have all the features of premium software like Adobe Photoshop, it offers a wide range of tools and capabilities that can meet the needs of many professionals.
10.3. Can I use GIMP for web design?
Yes, GIMP is an excellent tool for web design. You can create graphics, banners, and layouts that are web-ready. Just make sure to export your images in suitable formats like JPEG or PNG to ensure quick loading times on websites.
10.4. How often is GIMP updated?
GIMP is actively maintained and regularly updated. You can expect improvements, bug fixes, and new features to be added over time. It’s always good to check the official website for the latest version and updates.
10.5. Are there any alternatives to GIMP?
While GIMP is a powerful tool, some alternatives include Adobe Photoshop, Affinity Photo, and Corel PaintShop Pro. Each software has its unique features and pricing structures. Evaluating several options can help you choose what best fits your needs.
11. Tips for Enhancing Your GIMP Workflow
As you dive deeper into how to use GIMP, you may want to streamline your workflow for better efficiency. Here are some practical tips to enhance your GIMP experience:
11.1. Keyboard Shortcuts
Learning keyboard shortcuts can save you a significant amount of time. For example, B for the Brush Tool, Ctrl + Z to undo, and Ctrl + Shift + N to create a new layer can help speed up your editing process. You can also customize shortcuts by going to Edit > Preferences > Input Devices. This flexibility allows you to tailor GIMP to your personal workflow.
11.2. Organizing Your Workspace
Customizing your workspace layout can enhance your productivity. You can dock panels, resize them, or even hide those you don’t use frequently. Setting up your workspace for the specific task at hand—be it photo editing or painting—can make a big difference in your efficiency.
11.3. Using Templates
If you find yourself creating similar projects often, consider making templates. You can set up a GIMP file with all the layers and settings you frequently use, then save it as a template. Simply open the template whenever you want to start a new project, saving you the time of setting everything up from scratch.
11.4. Experimenting with Custom Brushes
GIMP allows you to create custom brushes. You can design unique brushes that suit your artistic style, whether for digital painting or enhancing photos. To create a custom brush, you can start with a simple shape or design it using the drawing tools, then save it as a brush file. This feature can help you add a personal touch to your work.
12. Exploring GIMP Community Contributions
The GIMP community is large and vibrant, filled with users who contribute tutorials, scripts, and plug-ins. Engaging with community resources can help you discover new techniques and tools. Some platforms where you can find these contributions include: (See: GIMP in scientific research.)
12.1. GIMP GitLab
GIMP’s official GitLab page contains repositories for GIMP development, where you can find the latest updates and contribute if you’re interested. You can also access community-created scripts and plug-ins that enhance GIMP’s functionality.
12.2. Online Courses and Webinars
Many online platforms offer courses specifically for GIMP. Websites like Udemy or Skillshare often feature in-depth courses that can help you master specific skills, from photo editing to graphic design. Live webinars can also provide real-time interaction with instructors, allowing for a more engaged learning experience.
12.3. YouTube Channels
There are dedicated YouTube channels focused entirely on GIMP tutorials. Channels like “GIMP Tutorial” or “Photo Joseph” regularly post new content that covers everything from basic techniques to advanced editing skills. Subscribing to these channels can keep you updated on the latest tips and tricks.
13. Common Mistakes to Avoid in GIMP
Everyone makes mistakes while learning a new software program. Here are some common pitfalls to avoid when working with GIMP:
13.1. Not Using Layers Effectively
Many beginners tend to work on a single layer, which can limit creative opportunities. Remember to use layers liberally to separate different elements of your design. This non-destructive editing allows for flexibility and easier corrections.
13.2. Ignoring File Formats for Export
Exporting images without understanding the implications of different file formats can lead to quality loss. Always choose the appropriate format for your end-use, whether it’s for print or web. JPEGs are great for photos, while PNGs are better for graphics with transparency.
13.3. Overusing Filters
While filters can enhance your images, overusing them can lead to unnatural results. Always apply filters subtly and in moderation. If you’re unsure, use layer masks to control how much of the filter is applied.
GIMP is a versatile and powerful tool for graphic design, allowing users to create stunning visuals without the hefty price tag of commercial software. By understanding its essential tools, mastering layers, and utilizing filters and typography, you can develop your skills effectively. Explore the resources available, practice regularly, and soon you’ll be producing professional-quality designs with GIMP. With these additional tips and resources, your journey in learning how to use GIMP will be richer and more fulfilling.
“`
Trending Now
Frequently Asked Questions
What is GIMP used for?
GIMP, or GNU Image Manipulation Program, is used for various graphic design tasks, including photo editing, image composition, and digital painting. Its powerful features make it popular among graphic designers, photographers, and hobbyists looking to create or enhance digital artwork.
How do I install GIMP on my computer?
To install GIMP, visit the official GIMP website at gimp.org, where you can download the software for Windows, macOS, or Linux. Follow the straightforward installation instructions, ensuring your system meets the software's requirements for compatibility.
What are the main tools in GIMP?
GIMP features a variety of tools in its toolbox, including selection tools like Rectangle Select and Free Select, painting tools such as brushes and pencils, and advanced features like layers and masks. These tools are essential for editing and creating images effectively.
Can I customize the GIMP interface?
Yes, GIMP allows users to customize the interface to suit their preferences. You can adjust the layout of the toolbox, main canvas, and various panels. Additionally, users can create multiple workspaces for different projects, enhancing workflow and efficiency.
Is GIMP free to use?
Yes, GIMP is a free and open-source software, making it accessible to anyone interested in graphic design and photo editing. Users can download it without any cost from the official GIMP website, allowing them to utilize its powerful features without financial barriers.
Have you experienced this yourself? We’d love to hear your story in the comments.