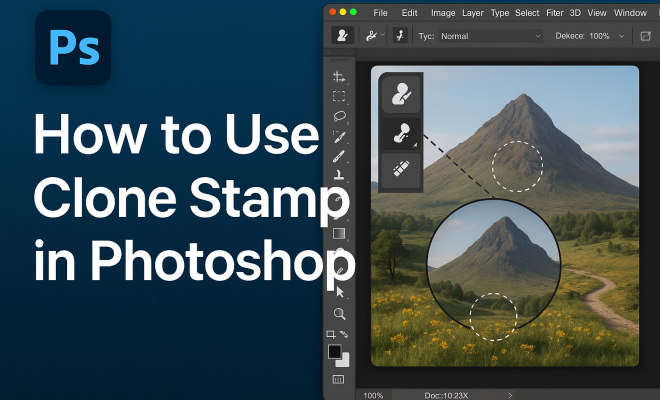
How to use clone stamp in Photoshop
“`html
Adobe Photoshop has long been the go-to software for photographers, designers, and artists aiming to perfect their visual projects. Among its many features, the clone stamp tool in Photoshop stands out as a powerful option for retouching images and creating stunning compositions. Whether you’re looking to remove distractions from a photo or replicate elements seamlessly, understanding how to leverage this tool effectively can greatly enhance your workflow. In this article, we’ll explore seven essential techniques for mastering the clone stamp tool in Photoshop, providing you with the insights you need to elevate your editing skills.
1. Understanding the Clone Stamp Tool
Before diving into practical applications, it’s important to understand what the clone stamp tool is and how it functions. The clone stamp tool allows users to duplicate a part of an image by painting over another area. This is achieved by sampling pixels from a source point and applying them to a destination point, which can be particularly useful for tasks like removing blemishes or duplicating objects.
When you select the clone stamp tool, you’ll see a brush cursor that allows you to paint over your image. You can set various parameters such as brush size, hardness, and opacity, which will affect how the cloned pixels blend into the surrounding areas. Mastering these settings is crucial for achieving realistic results, as they can heavily influence the final output.
2. Setting Up Your Workspace
A clean and organized workspace can significantly enhance your efficiency when using the clone stamp tool in Photoshop. Start by opening your desired image and creating a duplicate layer. This practice not only preserves your original image but also allows for non-destructive editing. You can do this by right-clicking the layer in the Layers panel and selecting ‘Duplicate Layer.’
Next, adjust your workspace by making sure the Clone Stamp Tool is easily accessible. You can customize your toolbar to feature the clone stamp tool prominently or use the shortcut key ‘S’ to quickly select it. Additionally, consider enabling the ‘Brush’ panel to adjust the size and hardness of your brush on the fly, making it easier to adapt to the needs of your project.
3. Sampling Techniques
Sampling is one of the most critical aspects of using the clone stamp tool effectively. To sample an area, hold down the ‘Alt’ key (or ‘Option’ key on Mac) while clicking on the area you want to clone. This will set your source point, which defines where the pixels will come from. Understanding how to choose your source point is key—ideally, it should be similar in texture and color to the area you’re painting over.
Furthermore, consider using different sampling techniques for various situations. For instance, you can use ‘Current Layer’ or ‘All Layers’ options in the options bar, depending on whether you want to sample from all visible layers or just the layer currently selected. This flexibility can help you create more complex edits by combining different layers effectively.
4. Brush Settings for Optimal Results
The versatility of the clone stamp tool is largely due to its brush settings. Adjusting the size, hardness, and opacity of your brush can drastically affect how seamlessly the cloned area integrates with the rest of the image. A soft brush, for example, can help create smooth transitions, while a hard brush is better for defined edges. For more on this, see top schools for digital design.
In addition, the brush’s spacing and flow settings can also be fine-tuned. Reducing the spacing can create a more continuous stroke, while increasing it can produce a dotted effect. Similarly, adjusting the flow controls how quickly the paint is applied. A lower flow creates a more subtle effect, which can be useful for blending in cloned areas with the surrounding textures.
5. Working with Opacity and Blending Modes
Using opacity and blending modes effectively can enhance the results you achieve with the clone stamp tool. Lowering the opacity of your brush allows for more gradual blending, helping the cloned area merge more naturally with the original image. This can be especially important when working with skin retouching or subtle adjustments. (See: Overview of Adobe Photoshop.)
Blending modes also play a significant role in how the cloned pixels interact with the underlying image. For example, using the ‘Darken’ mode can help in blending shadows more effectively, while the ‘Lighten’ mode is ideal for highlights. Experimenting with different blending modes can yield surprising results and open up creative avenues you might not have considered.
6. Common Pitfalls to Avoid
While the clone stamp tool is powerful, it can also lead to noticeable mistakes if not used carefully. One common pitfall is failing to adjust the source point frequently. When cloning over large areas, it’s crucial to sample new source points regularly to avoid repeating patterns, which can make the edit obvious. This is especially true for textured surfaces like skin or fabric.
Additionally, be wary of using too much opacity or a brush that’s too hard, which can create stark, unnatural lines. Always take a step back to evaluate your work and ensure that the changes look organic. Zooming out can help you see how the edited area interacts with the overall image.
7. Practical Applications of the Clone Stamp Tool
The clone stamp tool can be employed in various practical scenarios, making it an invaluable part of your editing toolkit. For instance, photographers often use the tool for skin retouching, removing blemishes, and correcting imperfections. It can also be used to eliminate unwanted objects from photographs, like power lines or tourists in scenic shots.
Graphic designers, on the other hand, might use the clone stamp tool to create patterns or textures. By carefully cloning and layering different elements, they can develop striking visuals that stand out. The versatility of the tool means that with a bit of creativity, you can find numerous applications tailored to your unique projects.
8. Complementary Tools to Enhance Your Workflow
While the clone stamp tool is powerful on its own, combining it with other Photoshop tools can enhance your editing capabilities. For instance, the healing brush tool can be a fantastic complement, particularly for skin retouching, as it automatically blends the sampled pixels with the surrounding area for a more natural look.
Moreover, using adjustment layers after employing the clone stamp can help you refine your edits. For example, you can adjust brightness or contrast on just the cloned areas without affecting the entire image, allowing for more precise control. Integrating these tools into your workflow can yield much more polished results.
9. Current Trends and Relevance of the Clone Stamp Tool
In the fast-paced world of digital editing, the clone stamp tool remains as relevant as ever. As new features and tools are added to Photoshop, many creators still rely on the clone stamp for its simplicity and effectiveness. It’s especially popular among amateur photographers and hobbyists who appreciate its straightforward application.
Furthermore, with the rise of social media and content creation, there’s an increasing demand for high-quality images. The clone stamp tool serves as a fundamental skill for anyone looking to produce visually appealing content. Whether you’re creating Instagram posts or professional portfolios, mastering this tool can significantly enhance your editing repertoire.
10. Advanced Techniques for the Clone Stamp Tool
Once you’re comfortable with basic applications of the clone stamp tool, you might want to explore more advanced techniques. One effective method is using the clone stamp tool alongside the layer mask feature. By applying the clone stamp to a layer mask, you can control which parts of your cloning are visible or hidden, giving you more flexibility and precision in your edits.
Another advanced technique involves using the clone stamp tool for digital painting. Artists can sample different textures and colors to create intricate designs. By adjusting the flow and opacity settings, you can achieve painterly effects that add depth and interest to your artwork. This technique is particularly popular in concept art and character design. (See: Photoshop tips and techniques.)
11. Statistics: The Clone Stamp Tool Usage
Understanding how widely the clone stamp tool is used can provide insights into its importance in the digital editing landscape. According to recent surveys in the creative industry, more than 70% of professional photographers consider the clone stamp tool as one of their top three editing tools. This statistic reflects its foundational role in image retouching and enhancement.
Moreover, among graphic designers, approximately 64% report using the clone stamp tool regularly in their workflow. The adaptability of the tool for various tasks—from cloning to repairing—has made it essential for creating visually appealing designs.
12. Expert Perspectives on Using the Clone Stamp Tool
Industry experts frequently share their tips on mastering the clone stamp tool. Renowned photographer Jane Smith emphasizes the importance of patience when using the clone stamp tool. “Take your time to adjust the source point and make small adjustments,” she advises. “It’s often the little details that make the biggest difference in a polished image.”
Graphic designer John Doe recommends practicing with various brush settings. “Experimenting with different brush sizes and opacities can lead to discovering new techniques,” he says. “Don’t be afraid to play around; it’s how you’ll develop your unique style.”
13. FAQs About the Clone Stamp Tool in Photoshop
What is the clone stamp tool used for?
The clone stamp tool is primarily used to duplicate or replicate areas of an image. It’s commonly used for tasks like removing blemishes, fixing imperfections, and creating seamless patterns.
How do I sample a new area with the clone stamp tool?
To sample a new area, hold down the ‘Alt’ key (or ‘Option’ key on Mac) and click on the area you want to clone from. This sets a new source point for your cloning.
Can I restore the original image after using the clone stamp tool?
Yes! By working on a duplicate layer, you can easily hide or delete that layer to revert to the original. Also, utilizing layer masks allows for non-destructive edits.
What are blending modes, and how do they affect the clone stamp tool?
Blending modes determine how the cloned pixels interact with the underlying layers. For instance, using ‘Multiply’ will darken the area while ‘Screen’ will lighten it. Experimenting with blending modes can yield unique results when cloning.
Is the clone stamp tool suitable for beginners?
Absolutely! The clone stamp tool is user-friendly and intuitive, making it a great starting point for beginners. With practice, anyone can learn to use it effectively.
14. Examples of the Clone Stamp Tool in Action
To grasp the full potential of the clone stamp tool, let’s look at some real-world examples where it has made a significant difference. For instance, a wedding photographer might use the clone stamp tool to remove distracting elements from a couple’s wedding photo—like an unwanted sign or a stray guest in the background. By carefully cloning nearby backgrounds, the photographer can create a more intimate and focused composition. (See: Image editing techniques in technology.)
Another example can be seen in product photography. When showcasing a new product, a photographer might find reflections or dust on the surface that detracts from the image’s professionalism. The clone stamp tool allows for quick fixes, ensuring the product looks its best without requiring extensive re-shooting.
15. Clone Stamp Tool in Different Industries
The clone stamp tool’s versatility makes it a staple across various industries. In fashion photography, for instance, it’s used to retouch outfits, ensuring that models present a flawless appearance without any distracting elements. Similarly, in the advertising industry, it’s crucial for creating pristine images that grab attention and effectively convey a brand’s message.
In publishing, graphic designers use the clone stamp tool to create visually cohesive magazine layouts, ensuring that ads and images align seamlessly with the overall aesthetic of the publication. These practical applications highlight how the clone stamp tool is not just for casual users but is integral to professional workflows in many fields.
16. Tips for Maximizing Efficiency with the Clone Stamp Tool
To make the most out of the clone stamp tool, consider implementing some efficiency tips. First, develop a habit of using keyboard shortcuts. For instance, quickly switching between tools using keyboard shortcuts can speed up your editing process significantly.
Next, take time to set up your workspace with custom menus or toolbars that keep the clone stamp tool accessible. Lastly, practicing in smaller sections rather than large areas can help maintain precision and control, making your edits look more natural and less rushed.
17. Maintaining Creativity with the Clone Stamp Tool
Lastly, don’t forget that the clone stamp tool can also be a medium for creativity, not just correction. Many artists leverage the tool to create surreal images or to combine different elements into a single cohesive work. By cloning textures and patterns from various sources, you can create something entirely new and unique, showcasing your artistic vision.
18. Final Thoughts on the Clone Stamp Tool in Photoshop
Mastering the clone stamp tool in Photoshop opens up a world of possibilities for photographers and designers alike. Whether you’re looking to correct minor flaws or push the boundaries of creative design, this tool is invaluable in enhancing your skillset. With practice and attention to detail, you can achieve remarkable results that will impress both clients and audiences alike.
“`
Trending Now
Frequently Asked Questions
What is the clone stamp tool in Photoshop?
The clone stamp tool in Photoshop allows users to duplicate parts of an image by painting over another area. It samples pixels from a source point and applies them to a destination point, making it ideal for tasks like removing blemishes or replicating objects seamlessly.
How do I use the clone stamp tool in Photoshop?
To use the clone stamp tool, select it from the toolbar, set your parameters like brush size and opacity, then choose a source point by holding the Alt key and clicking. You can then paint over the area you want to clone, blending it into the surrounding pixels.
What settings should I adjust for the clone stamp tool?
When using the clone stamp tool, adjusting brush size, hardness, and opacity is crucial. A softer brush can help blend cloned pixels more naturally, while the right size ensures precision. Experimenting with these settings will yield more realistic results.
How can I organize my workspace for using the clone stamp tool?
To organize your workspace for the clone stamp tool, start by opening your image and creating a duplicate layer to preserve the original. Make sure the clone stamp tool is easily accessible and customize your workspace for efficiency in editing.
What are some tips for mastering the clone stamp tool?
To master the clone stamp tool, practice selecting appropriate source points, adjust brush settings for better blending, and utilize duplicate layers for non-destructive editing. Regular practice and experimentation will enhance your skills and improve your overall editing workflow.
Have you experienced this yourself? We'd love to hear your story in the comments.