Mastering Arduino: Your Essential Guide to Getting Started
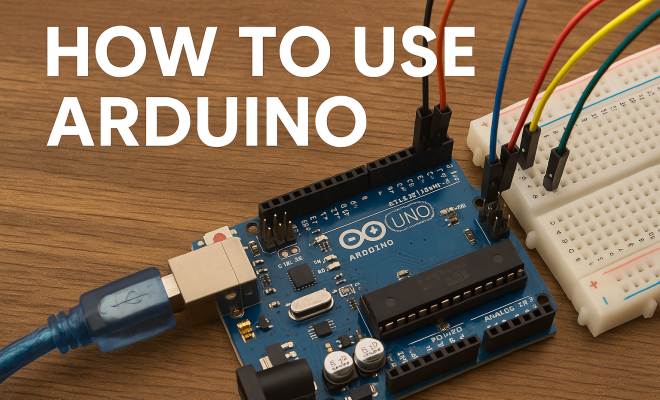
“`html
Arduino has transformed the way hobbyists, engineers, and educators approach electronics and programming. If you’re eager to dive into the world of embedded systems and learn how to use Arduino, you’ve landed in the right place. This article will guide you through the essential aspects of using Arduino, from understanding the basics to developing your own projects. Here are the top 7 things you need to know.
1. What is Arduino?
At its core, Arduino is an open-source platform designed for building electronic projects. It consists of a microcontroller—a small computer on a single integrated circuit—and an Integrated Development Environment (IDE) used for programming. The Arduino platform was created in 2005 to provide an easy and inexpensive way for students and hobbyists to create interactive objects and environments.
Arduino boards come in various forms, including Arduino Uno, Mega, and Nano, each suited for different types of projects. The platform supports a variety of programming languages, but most users stick with a variant of C/C++ in the Arduino IDE. This flexibility is part of Arduino’s charm, making it accessible for a wide range of users from beginners to experts.
2. Getting Started: Necessary Components
Before you can start working on your first project, you’ll need to gather a few essential components. Here’s a quick list of what you’ll need:
- Arduino Board: Choose one that fits your needs, such as the Uno for beginners.
- USB Cable: Used to connect your Arduino to your computer for programming.
- Breadboard: A handy tool for prototyping without soldering.
- Jumper Wires: These are essential for making connections between components.
- Basic Electronic Components: Resistors, LEDs, and sensors will help you run your initial experiments.
Once you have these components, you can download the Arduino IDE from the official Arduino website, which is available for Windows, macOS, and Linux. This software is where you’ll write, upload, and debug your Arduino code.
3. Understanding the Basic Components
To effectively use Arduino, it’s important to understand the basic components and terminology involved. Here are a few key elements:
- Microcontroller: The brain of your Arduino, responsible for executing code.
- Digital Pins: Used to read digital signals (on/off) and send outputs.
- Analog Pins: These read varying voltages, allowing you to work with sensors.
- Power Supply: The board can be powered via USB or an external power source.
- Serial Monitor: A feature in the IDE that lets you send and receive data from your Arduino.
Understanding these components will make it easier to write your code and troubleshoot any issues that arise during your projects.
4. Writing Your First Program
Now that you’re familiar with the components, it’s time to write your first Arduino program, referred to as a sketch. The structure of an Arduino sketch is relatively simple, typically consisting of two main functions: setup() and loop().
The setup() function runs once when you power up the board and is used for initializing variables, pin modes, and starting libraries. The loop() function, on the other hand, runs continuously, allowing your program to perform repetitive tasks.
Here’s an example sketch that turns on an LED connected to pin 13: (See: What is Arduino?.)
void setup() {
  pinMode(13, OUTPUT);
}

void loop() {
  digitalWrite(13, HIGH);
  delay(1000);
  digitalWrite(13, LOW);
  delay(1000);
}
This code will turn the LED on for one second and then off for another. Upload this code to your Arduino and watch your first project come to life!
5. Using Libraries for Enhanced Functionality
One of the most powerful features of Arduino is its extensive library ecosystem. Libraries are pre-written code that add functionality to your projects, saving you time and effort. For instance, if you’re working with an LCD display or a specific sensor, there’s likely a library available that simplifies the process of interfacing with that hardware.
To include a library in your sketch, you simply use the #include directive at the top of your code. For example:
#include From there, you can call functions provided by the library, making complex tasks much more manageable. Always check the Arduino Library Reference or the library’s documentation for specific usage instructions and examples.
6. Debugging: Common Issues and Solutions
As with any programming endeavor, you will encounter bugs along the way. Debugging is an essential skill for anyone wanting to use Arduino effectively. One common issue is forgetting to set pin modes, which can lead to unexpected behavior. Make sure all pins are properly configured in the setup() function.
If your project isn’t working as expected, take the time to systematically check each component. Use the Serial Monitor to output debug messages. For example, placing Serial.println() statements in your code can help you trace execution and find where the code is failing.
Additionally, be cautious about power supply issues. Ensure that you’re using the correct voltage and that your components are connected properly. If you’re using external components like sensors or motors, refer to their datasheets to verify that you’re interfacing them correctly.
7. Expanding Your Skills: Advanced Projects and Community Resources
Once you’ve mastered the basics, it’s time to explore more advanced projects. The Arduino community is vibrant and filled with resources to help you grow your skills. Websites like Instructables and Hackster.io feature step-by-step guides for countless projects, whereas forums like Arduino Stack Exchange allow you to seek help from experienced users.
Consider delving into IoT (Internet of Things) projects, where you can connect your Arduino to the internet and control devices remotely. This involves integrating Wi-Fi or Bluetooth modules, adding an exciting layer to your projects.
In addition, experimenting with robotics, home automation, or wearables can significantly enhance your understanding of electronics and programming. Don’t hesitate to push your boundaries; the sky’s the limit! (See: Arduino in education and technology.)
8. Understanding Arduino Shields
Arduino shields are modular boards that can be stacked on top of your Arduino to provide additional capabilities. These shields can help you expand the functionality of your projects without having to design your own circuit boards. Some popular types of shields include:
- Motor Shields: Enable control of motors for robotics and automation projects.
- Wi-Fi/Bluetooth Shields: Facilitate wireless communication for IoT applications.
- LCD Shields: Allow for easy integration of displays into your projects.
- GPS Shields: Enable location tracking and mapping functionalities.
Using shields can save you time and effort, allowing you to focus on the software and logic of your projects rather than the underlying hardware design.
9. Real-world Applications of Arduino
Arduino isn’t just for hobbyists; it’s widely used in various industries and applications. Here are a few examples:
- Home Automation: Arduino can control lights, heating, and security systems, creating smart home environments.
- Robotics: Many DIY robots use Arduino for motor control, sensors, and decision-making algorithms.
- Wearables: Health-monitoring devices and fitness trackers often incorporate Arduino for data collection and processing.
- Environmental Monitoring: Arduino systems can be used to collect data from environmental sensors to study pollution levels, weather patterns, and more.
The versatility of Arduino allows it to be applied in many fields, from agriculture to healthcare, demonstrating its broad impact on technology.
10. Common Arduino Projects for Beginners
If you’re looking for project ideas to kickstart your Arduino journey, consider these popular beginner projects:
- Blinking LED: The classic “Hello, World!” for Arduino programming.
- Temperature and Humidity Monitor: Use a DHT11 sensor to display temperature and humidity readings on an LCD.
- Simple Alarm System: Create an alarm system using a motion sensor and buzzer.
- Light-Tracking Robot: Build a robot that follows light using photoresistors.
- Basic Weather Station: Gather data from various sensors and display it on a web interface.
- RGB LED Controller: Control an RGB LED strip using potentiometers to adjust colors and brightness.
- Smart Plant Watering System: Automate the watering of your plants based on soil moisture readings.
- Gesture-Controlled Device: Use an accelerometer to control an object based on hand gestures.
These projects will help you practice coding and circuit design, giving you the confidence to tackle more complex challenges later on.
11. Frequently Asked Questions (FAQs)
What programming language does Arduino use?
Arduino primarily uses a simplified version of C/C++. The Arduino IDE provides an easy interface for writing and uploading your code.
Can I use Arduino for commercial projects?
Yes, many companies use Arduino boards for prototyping and even in production models. However, if you’re considering a commercial product, be sure to look at licensing and compliance requirements.
What are the differences between Arduino Uno, Mega, and Nano?
The Arduino Uno is great for beginners and simple projects. The Mega has more pins and memory, suitable for complex applications. The Nano is compact and designed for more portable projects. (See: Arduino in scientific research.)
How do I power my Arduino?
You can power your Arduino through the USB connection or via the barrel jack using an external power supply. Make sure the voltage aligns with what’s specified for your particular board.
Can Arduino be used to develop mobile applications?
While Arduino itself doesn’t directly support mobile app development, you can create Bluetooth or Wi-Fi-enabled projects that communicate with a mobile app designed separately.
12. Tips for Effective Arduino Development
As you begin your journey into how to use Arduino, consider these tips to enhance your experience:
- Start Small: Begin with simple projects to build your confidence before moving on to more complex ones.
- Document Your Work: Keep notes of your projects, including what works, what doesn’t, and any modifications you make. This can be invaluable for debugging and future reference.
- Join the Community: Engage with online forums, local maker spaces, and Arduino meetups. Sharing your experiences and learning from others can greatly accelerate your learning.
- Experiment: Don’t be afraid to modify existing projects or code. Experimenting is a great way to learn, even if it sometimes leads to failure.
- Stay Updated: The Arduino community is continuously evolving, with new libraries and tools being developed. Keeping up with the latest trends can inspire new projects.
13. Exploring Advanced Concepts in Arduino
Once you’ve got a handle on the basics, there are several advanced concepts and technologies you might want to explore:
- Real-Time Operating Systems (RTOS): Learn how to introduce multitasking capabilities to your Arduino projects by using an RTOS.
- Wireless Communication: Dive into topics like RF communication, LoRa, and using MQTT for IoT applications.
- Machine Learning: Explore how Arduino can be used with machine learning algorithms, enabling your projects to learn from data.
- 3D Printing Integration: Combine your Arduino knowledge with 3D printing to create interactive models and prototypes.
These advanced topics will expand your skill set and open up even more possibilities for what you can achieve with your Arduino.
14. Essential Tools for Arduino Development
In addition to your Arduino board, several tools can enhance your development process:
- Multimeter: Essential for measuring voltage, current, and resistance while troubleshooting circuits.
- Logic Analyzer: Helpful for debugging signals and understanding the behavior of digital communication.
- Oscilloscope: Useful for detailed analysis of waveforms in your circuits, allowing you to troubleshoot timing issues.
- Wire Strippers and Crimpers: These tools help in preparing wires for connections, making your projects cleaner and more reliable.
- 3D Printer: If you’re working on projects that require enclosures or mounts, a 3D printer can help you create custom parts.
15. Final Thoughts on How to Use Arduino
Learning how to use Arduino can be a rewarding journey, whether you’re looking to develop a new hobby, enhance your technical skills, or create innovative solutions to real-world problems. With a little patience and creativity, you can bring your projects to life and contribute to the ever-expanding world of electronics. So grab your Arduino board, start tinkering, and embrace the adventure ahead!
“`
Trending Now
Frequently Asked Questions
What is Arduino used for?
Arduino is used for building electronic projects, allowing hobbyists, engineers, and educators to create interactive objects and environments. It's an open-source platform that supports various applications, from simple LED displays to complex robotics.
How do I start using Arduino?
To start using Arduino, gather essential components like an Arduino board, USB cable, breadboard, jumper wires, and basic electronic components. Then, download the Arduino IDE from the official website to begin programming your projects.
What components do I need for Arduino?
For Arduino projects, you typically need an Arduino board (like Uno), a USB cable for connection, a breadboard for prototyping, jumper wires for connections, and basic electronic components such as resistors, LEDs, and sensors.
Is Arduino good for beginners?
Yes, Arduino is an excellent platform for beginners due to its user-friendly interface and extensive community support. It allows newcomers to learn electronics and programming through hands-on projects at their own pace.
What programming language does Arduino use?
Arduino primarily uses a variant of C/C++ for programming. The Arduino IDE provides a simplified environment that makes it easier for users to write code and upload it to their Arduino boards.
Agree or disagree? Drop a comment and tell us what you think.