How to use AirDrop
“`html
In a world where convenience is king, learning how to use AirDrop can significantly enhance how you share files between Apple devices. AirDrop, introduced by Apple in 2011, facilitates the fast transfer of photos, documents, and more, all without the hassle of email or physical connections. With so many features packed into this seemingly simple application, both new and seasoned users can benefit from understanding its full potential. Here’s a comprehensive guide to using AirDrop effectively.
1. Understanding AirDrop
Before diving into the nitty-gritty of how to use AirDrop, let’s clarify what it is. Essentially, AirDrop employs Bluetooth and Wi-Fi technology to create a peer-to-peer network between devices. This means you don’t need an internet connection to send files, making it incredibly versatile.
The process is seamless: when you want to send something, you select AirDrop from the sharing options, and nearby devices will appear. You can send files to multiple devices at once or select a specific recipient. This functionality is particularly handy for those who frequently share images, videos, or documents with friends or colleagues.
2. Setting Up AirDrop
Getting started with AirDrop is straightforward, but there are a few settings you’ll need to adjust on your devices. First, ensure that both Bluetooth and Wi-Fi are enabled on your Apple device. You can do this quickly from the Control Center: swipe down from the top right corner (or up from the bottom on older models) and toggle the icons accordingly.
Next, navigate to ‘Settings’ > ‘General’ > ‘AirDrop’ to choose your visibility settings. You can select from ‘Receiving Off,’ ‘Contacts Only,’ or ‘Everyone.’ Choosing ‘Contacts Only’ means only those in your address book can see your device, while ‘Everyone’ allows all nearby Apple devices to connect, which is great in group settings but may raise privacy concerns. For beginners, starting with ‘Contacts Only’ is often the safer route.
3. How to Use AirDrop to Share Files
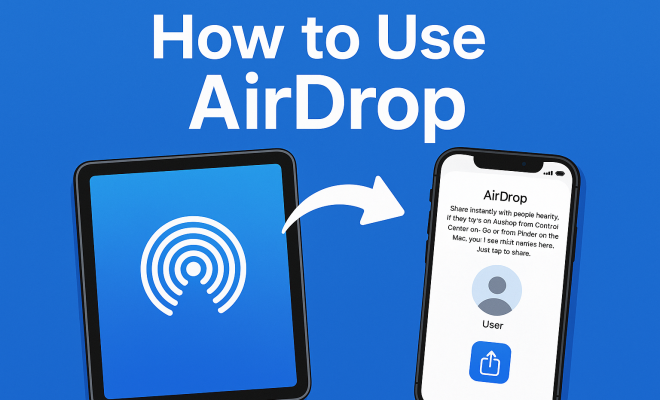
Now that you’ve set up AirDrop, let’s explore how to use AirDrop to share files. It’s surprisingly easy. For instance, if you want to share a photo from your Photos app, simply select the image, tap the share icon (a square with an upward arrow), and select AirDrop from the list of sharing options. You’ll see nearby users appear—just tap the name of the recipient to send.
In addition to photos, AirDrop works with various file types. You can share documents from apps like Pages or Keynote, send website links straight from Safari, or even share contacts. The versatility of AirDrop means you might find new ways to utilize it that you hadn’t considered before.
4. Receiving Files via AirDrop
Receiving files is just as simple as sending them. When someone attempts to share a file with you via AirDrop, a notification will pop up on your screen, displaying the sender’s name and the type of file being shared. You’ll have the option to accept or decline the transfer.
If you accept the transfer, the file will automatically save to the appropriate app—images go to Photos, documents to the relevant app, etc. If you’re ever unsure about which app received your files, you can check your recent downloads or the corresponding app to find what you’ve received.
5. Troubleshooting AirDrop Issues
Like any technology, AirDrop may occasionally encounter issues. If you find that AirDrop isn’t working, there are several steps you can take to troubleshoot. First, ensure both devices are compatible: AirDrop is available on iPhone 5 and later, iPad 4 and later, and Mac models from 2012 onward, with some exceptions.
Next, check that both devices are within Bluetooth range (roughly 30 feet) and that Wi-Fi is enabled. Restarting both the sending and receiving devices can also resolve minor glitches. If you’re still having trouble, resetting your network settings may help—just keep in mind that this will erase saved Wi-Fi passwords.
6. Using AirDrop on Mac
Many users may be surprised to learn that AirDrop is not exclusive to iPhones and iPads; you can also use it on Mac computers. To access AirDrop on your Mac, open Finder and select ‘AirDrop’ from the sidebar. Ensure that your Mac’s Wi-Fi and Bluetooth are turned on. Similar to how it works on iOS devices, you’ll see nearby devices and can drag and drop files directly into the recipient’s icon.
Sharing files from Mac can be a game-changer for those in creative fields or anyone wanting to transfer large files without relying on email or cloud services. You can send anything from images to entire folders, making it a fantastic tool for collaboration. (See: AirDrop – Wikipedia.)
7. AirDrop Security and Privacy
One significant concern for many users is the security aspect of using AirDrop. As with any technology that allows file sharing, you want to ensure your privacy is protected. Using ‘Contacts Only’ is a solid choice for maintaining a level of security, as it ensures that only people you know can send you files.
Additionally, you should always be cautious about accepting files from unknown sources. Even though AirDrop employs encryption for file transfers, there are reports of users receiving unsolicited content. If you ever feel uncomfortable with a file being sent, it’s perfectly fine to decline the transfer.
8. AirDrop Alternatives
While AirDrop is a powerful tool, there are times when it might not be the best option for file sharing, particularly if you’re dealing with non-Apple devices. For cross-platform sharing, consider alternatives like Bluetooth, email, or third-party applications like Send Anywhere, which allows you to send files across different operating systems.
However, if your contacts are using Apple devices, AirDrop remains one of the fastest and most efficient ways to share files without dealing with the complications of email attachments or cloud uploads. Still, understanding other options can broaden your sharing capabilities and ensure you’re prepared for any situation.
9. Maximizing Your AirDrop Experience
To truly master how to use AirDrop, consider integrating it into your daily routine. For instance, if you’re frequently sharing photos or documents with specific contacts, save their device in your favorites for quick access. You can also use AirDrop for collaborative projects, allowing multiple users to share files in real-time.
Lastly, staying up to date with the latest iOS updates can enhance your AirDrop experience, as Apple continually refines its features. Make it a point to regularly check your settings and explore any new functionalities introduced in updates. By doing this, you’ll ensure you’re leveraging AirDrop to its fullest potential, making file sharing not only easier but also more enjoyable.
10. Understanding AirDrop’s Limitations
While AirDrop is efficient, it’s essential to recognize its limitations. For example, AirDrop works best when the devices are physically close to each other. If you’re trying to send a file to someone who’s too far away, you might face connectivity issues.
Another limitation is file size. Although AirDrop can handle large files, there’s a practical limit. Transferring massive folders with multiple high-resolution images can sometimes lead to incomplete transfers or errors. If you find yourself frequently sharing large files, consider compressing them into a zip file or using a different method for such transfers.
Also, AirDrop requires compatible Apple devices. Therefore, if you’re working with individuals who use non-Apple products, you have to switch to other sharing methods. This limitation could hinder collaboration in diverse workplaces.
11. AirDrop in Business Settings
AirDrop isn’t just for personal use; it has practical applications in business environments as well. Imagine being in a meeting where you need to share a presentation with your colleagues on the spot. Instead of fumbling with emails or USB drives, you can quickly AirDrop your slides to everyone in the room.
For teams working on collaborative projects, the ability to share files instantly can enhance productivity. Whether it’s sharing design files, reports, or quick notes, the speed and convenience of AirDrop streamline workflows considerably. You can save time and reduce the clutter of physical storage devices.
Many companies have integrated AirDrop into their training sessions or workshops, making it easier for participants to receive materials without extensive setup. This convenience encourages more dynamic interactions and allows for a smoother transition between different activities.
12. Frequently Asked Questions (FAQ)
What devices support AirDrop?
AirDrop is supported on iPhone 5 and later, iPad 4 and later, iPad Mini, and any Mac models from 2012 onwards that are running macOS Yosemite or later.
Can I use AirDrop without Wi-Fi?
Yes! AirDrop uses Bluetooth for discovery and Wi-Fi for the actual transfer. Thus, you don’t need an active internet connection, but both Wi-Fi and Bluetooth must be enabled on your devices.
What file types can I send with AirDrop?
You can send a variety of file types, including photos, videos, documents (PDF, Word, etc.), links, and more. Essentially, any file that you would typically share through the share menu can be sent via AirDrop. (See: New York Times on AirDrop usage.)
What should I do if AirDrop isn’t working?
If you’re having trouble with AirDrop, make sure both devices have Wi-Fi and Bluetooth turned on and are within range. Check if your device’s visibility settings are appropriate, and restart both devices if needed. If problems persist, resetting network settings could also help.
Is AirDrop secure?
AirDrop transfers are encrypted, making them fairly secure. However, using the ‘Contacts Only’ option adds an extra layer of protection. Always be cautious and decline transfers from unknown individuals.
Can I AirDrop multiple files at once?
Yes, you can share multiple files simultaneously. Simply select the files you want to share, tap the share icon, and choose AirDrop. You can send them to one recipient or multiple recipients at the same time.
Do I need to accept files sent via AirDrop?
Yes, when someone sends you a file via AirDrop, you have the option to accept or decline it. This gives you control over what files are transferred to your device.
13. Future of AirDrop
As technology evolves, so too does AirDrop. Apple consistently updates its devices, and with every iOS or macOS update, we can expect improvements and enhancements to features like AirDrop. The introduction of new functionalities, such as enhanced search capabilities or the ability to share larger files more efficiently, is likely on the horizon.
Additionally, as more users adopt a hybrid work model where remote and in-office work coexist, tools like AirDrop will play a vital role in facilitating quick and effective communication and file sharing. Expect innovations that make file transfers even smoother, possibly integrating with new technologies like 5G for even faster sharing speeds.
Understanding how to use AirDrop now will not only benefit you today but also prepare you for the advancements and features that Apple will likely roll out in the future.
14. Best Practices for Using AirDrop
To maximize your experience with AirDrop, consider the following best practices. First, always ensure that both devices are updated to the latest software version. Apple frequently releases updates that enhance the functionality and security of its applications.
Second, keep AirDrop settings in mind when in public spaces. If you’re not sharing files with anyone, it’s wise to set AirDrop to “Receiving Off” to avoid unwanted requests. If you’re in a crowded area, you may want to switch to “Contacts Only” for safety while still being able to share files with friends.
For individuals who frequently use AirDrop for business, creating separate folders for files you often share can help you find and send them quickly. Organizing your documents can reduce the time spent searching for items, making your sharing process even smoother.
15. AirDrop Tips for Photos and Videos
If you’re sharing photos and videos using AirDrop, consider adjusting the quality settings for optimal transfers. High-resolution images can take longer to send and might not be necessary for quick sharing. If you’re sending a large number of media files, try selecting a few at a time instead of sending everything in one go. This can help to avoid any transfer errors and ensure that each file sends properly.
Remember, the context of the sharing matters too. For instance, if you’re sending photos from a recent trip to a friend who wasn’t there, consider adding a quick note or context in the sharing options to make it personal. This adds a layer of engagement that simply transferring files lacks.
16. AirDrop in Education
AirDrop has found a niche in educational settings, making file sharing among students and teachers easy and efficient. Imagine a classroom where students can share their projects or presentations instantly without needing to log into email or cloud services. This immediacy fosters interaction and collaboration among students. Teachers can quickly distribute handouts or multimedia resources directly to students’ devices, enhancing learning experiences.
Some educators have even used AirDrop for anonymous peer reviews, allowing students to submit work without having to approach someone directly. This encourages a supportive learning environment where students can offer feedback freely.
17. Common AirDrop Use Cases
There are countless ways to utilize AirDrop in your daily life. Here are a few common use cases:
- Sharing Event Photos: After an event, quickly send photos to friends who also attended.
- Sending Directions: If you find a good route on Maps, AirDrop the directions to a friend.
- Instant Document Sharing: At work, instantly share work documents or reports during meetings without hassle.
- Quick Contact Sharing: Transfer contact details to someone you’ve just met easily.
These examples showcase just how versatile and handy AirDrop can be in various situations, both personal and professional.
18. Understanding AirDrop’s Performance
AirDrop’s performance can vary based on several factors, including the age of the devices and environmental conditions. Newer devices typically have better-performing Wi-Fi and Bluetooth capabilities, leading to faster transfers. If you’re using older models, you might notice slower transfer speeds, especially for large files.
Environmental factors, such as interference from other electronic devices or physical barriers like walls, can also impact performance. If you find that AirDrop transfers are consistently slow, it might be worth checking your surroundings for potential sources of interference.
19. AirDrop and File Size Management
When using AirDrop, managing file sizes can be crucial, especially for those who regularly share large files. For instance, if you’re sending videos, consider editing them down to a smaller size or resolution before sharing. Tools like iMovie or QuickTime on Mac allow for quick adjustments to video files, helping to reduce their size without sacrificing quality significantly.
In the case of documents, consolidating multiple files into a single PDF or compressing them into a zip file can streamline the sharing process. This ensures that the recipient receives everything they need without having to deal with multiple transfers or larger files that might take longer to send.
20. AirDrop Etiquette
Finally, consider etiquette when using AirDrop. Since it’s an open platform, always ask someone’s permission before sending them a file, especially if you’re in a public area. This respect for others’ privacy creates a more positive environment for sharing and prevents any awkward situations.
Additionally, when using AirDrop in group settings, it’s helpful to communicate your intention clearly. A simple, “I’ll send you the photos from the event” can set expectations and reduce confusion about incoming files.
“`
Trending Now
Frequently Asked Questions
How do I use AirDrop on my iPhone?
To use AirDrop on your iPhone, ensure Bluetooth and Wi-Fi are enabled. Swipe down from the top right corner to access the Control Center, then select AirDrop. Choose your visibility setting—'Contacts Only' or 'Everyone.' When sharing a file, select the AirDrop option and choose the recipient from nearby devices.
Why is my AirDrop not working?
If AirDrop isn't working, check that Bluetooth and Wi-Fi are enabled on both devices. Ensure they are within close proximity and that the recipient's device is set to receive files. Additionally, verify that your visibility settings are correct—set to 'Contacts Only' or 'Everyone' as needed.
Can I AirDrop to multiple devices at once?
Yes, you can AirDrop files to multiple devices at once. When you select the AirDrop option while sharing a file, nearby devices will appear. Simply tap on the icons of the devices you want to send the file to, and it will be sent to all selected recipients simultaneously.
What is AirDrop used for?
AirDrop is used for quickly sharing files such as photos, documents, and videos between Apple devices without needing an internet connection. It utilizes Bluetooth and Wi-Fi technology to create a peer-to-peer network, allowing for fast and convenient file transfers.
How do I change AirDrop settings?
To change AirDrop settings, go to 'Settings' > 'General' > 'AirDrop' on your Apple device. From there, you can select your visibility options: 'Receiving Off,' 'Contacts Only,' or 'Everyone.' Adjust these settings based on your preferences for file sharing and privacy.
Have you experienced this yourself? We’d love to hear your story in the comments.