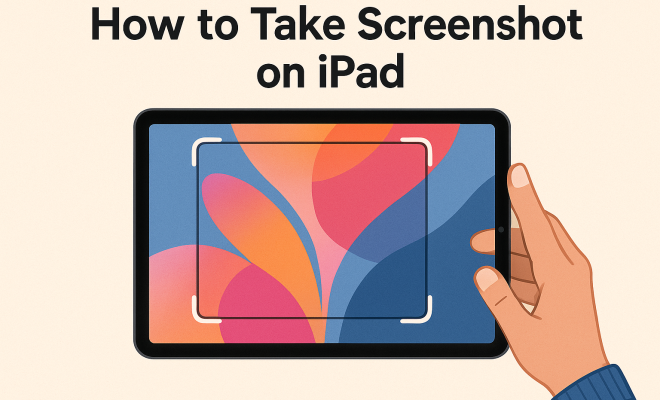
How to take screenshot on iPad
“`html
Taking a screenshot on iPad is more than just a useful skill—it’s a vital tool for sharing information, saving memories, and documenting your digital life. Whether you’re a student capturing notes, a professional needing to share a document, or just someone wanting to remember a great moment from a game, understanding the ins and outs of screenshots on your iPad can enhance your overall experience. In this comprehensive guide, we’ll explore the various methods for taking a screenshot, troubleshooting tips, and creative ways to use your screenshots effectively.
1. Understanding the Basics of Taking a Screenshot on iPad
Before diving into the specifics, let’s cover the fundamental concept of what a screenshot is. A screenshot, simply put, is a digital image taken of what’s displayed on your device’s screen at that precise moment. It’s like taking a photograph of your screen—except you don’t need a camera. Screenshots are invaluable for preserving information that may change or disappear when you navigate away from an app.
To take a screenshot on iPad, you use a combination of buttons. Depending on your iPad model, the method can slightly differ. By understanding these variations, you’ll be prepared no matter what device you’re using.
2. How to Take a Screenshot on Different iPad Models
Different iPad models come with unique hardware configurations, affecting how screenshots are captured. For iPads with Face ID, such as the iPad Pro 11-inch and 12.9-inch models, the process goes as follows:
- Press the Volume Up button and the Top button simultaneously.
- Quickly release both buttons.
- The screen will flash briefly, indicating that a screenshot has been taken.
For earlier iPad models that utilize a Home button, the method changes slightly:
- Press the Home button and the Top button at the same time.
- Quickly release both buttons.
Regardless of your model, a thumbnail preview of the screenshot appears briefly in the bottom corner of your screen, allowing you to access editing tools or share it quickly.
3. Editing and Sharing Your Screenshots
Once you’ve taken a screenshot on iPad, you’ll see a thumbnail preview appear briefly. Tapping on this preview will open the Markup interface, where you can edit your screenshot. This feature is particularly useful if you want to highlight certain areas, add text, or draw directly on the image.
You can use several tools available in Markup, including a pen, highlighter, eraser, and text box. It’s a great way to annotate screenshots, whether for work presentations or sharing quick notes with friends. After editing, you can save the screenshot directly to your Photos app or share it via various platforms such as email, social media, or messaging apps.
4. Exploring Alternative Screenshot Methods
While the button combination is the primary way to take a screenshot on iPad, there are alternative methods you might find useful. For example, if you have an Apple Pencil, you can quickly take a screenshot by swiping down diagonally from the bottom corner of the screen. This method is especially efficient for users who prefer not to use buttons.
Furthermore, iPads running iOS 14 or later come with a feature allowing you to take screenshots using AssistiveTouch. This is particularly beneficial for users with mobility challenges, as it creates a virtual button on your screen:
- Go to Settings > Accessibility > Touch > AssistiveTouch and enable it.
- Tap the AssistiveTouch menu and select Device > More > Screenshot.
This flexibility ensures that whatever your needs, there’s a method that works for you.
5. Troubleshooting Common Issues
While taking a screenshot on iPad is usually straightforward, you might occasionally run into problems. If your screenshots aren’t saving to your Photos app, there are a couple of things to check:
- Ensure that you have enough storage space on your device. If your iPad is nearing its storage limit, new screenshots may not save properly.
- Check that you’re using the correct button combination for your device. Sometimes, a simple mistake can lead to confusion.
If you’re still having trouble, consider restarting your device or updating to the latest version of iOS, as this can resolve many software-related issues.
6. Creative Uses for Screenshots on iPad
Taking a screenshot on iPad is just the beginning. Once you’ve captured your screen, the possibilities for using those images are almost endless. For instance, students can use screenshots to save important notes or sections from digital textbooks. This way, they can organize their study materials directly on their device without needing to print anything out.
Additionally, screenshots can be invaluable in customer service roles. Support teams can capture error messages or specific parts of a user interface, making it easier to communicate issues with developers or team members. Similarly, creatives can use screenshots to gather inspiration for design projects, compiling visuals that align with their vision.
7. Keeping Your Screenshots Organized
Once you start taking numerous screenshots, organization becomes crucial. Fortunately, iOS offers several built-in features to help you manage your images effectively. For instance, all screenshots are automatically saved in the Photos app under the “Screenshots” album, making them easy to locate.
For even better organization, consider creating additional folders within the Photos app to categorize your screenshots. You might have folders for work, personal, or educational images. This way, you can quickly find the screenshot you need without scrolling through countless photos. Using tags and favorites can also streamline your search process.
8. Best Practices for Taking Screenshots
To maximize your screenshot experience, adopting a few best practices can be beneficial. Here are some tips to keep in mind:
- Clear your screen: Before taking a screenshot, make sure to close any unnecessary apps and notifications that may clutter your screen. A clean image will look more professional, especially if you plan to share it.
- Use annotations wisely: When editing your screenshots, be selective about what you highlight or annotate. Too much information can overwhelm the viewer, so focus on the key points you want to communicate.
- Check your privacy: Always ensure that sensitive information isn’t visible before you take a screenshot, especially if you plan to share it online. Use the Markup feature to blur out or cover sensitive areas.
- Test different methods: Try all the screenshot methods available on your iPad to find which one feels most comfortable for you. The quicker you can take a screenshot, the more effective it’ll be in capturing those fleeting moments.
9. Advanced Screenshot Techniques
For those looking to go beyond the basics, there are several advanced techniques for utilizing screenshots effectively:
Taking Full Page Screenshots
If you’re using Safari, you can take full-page screenshots of websites. This feature is incredibly useful for capturing long articles or web pages in their entirety:
- Take a screenshot using the standard method.
- Open the screenshot in the Markup interface.
- Select the “Full Page” option at the top of the screen.
- Save or share your full-page screenshot as a PDF.
This technique is great for research or saving articles for offline reading.
Using Third-Party Apps
While the built-in screenshot function is quite robust, several third-party apps can offer additional features:
- Lightshot: This app allows you to take screenshots and provides an easy way to edit and share them online.
- Snagit: A more advanced tool, Snagit offers extensive editing capabilities and ways to organize your screenshots.
These apps can be particularly useful for professionals who need to capture high-quality images and require advanced annotation features.
10. Statistics and Trends in Screenshot Usage
Understanding how people utilize screenshots can provide insight into their effectiveness. Recent studies indicate that:
- Over 80% of smartphone users regularly take screenshots, with iPads making up a significant portion of this statistic due to their larger screens.
- In professional environments, screenshots are preferred over traditional screenshots in presentations, with approximately 60% of users suggesting they enhance communication clarity.
- The use of screenshots in social media posts has increased by 50% over the last three years, showcasing their importance in visual storytelling.
These figures underline the growing reliance on screenshots as a tool for communication and information sharing in both personal and professional contexts.
11. FAQ: Frequently Asked Questions About Screenshots on iPad
Here are some common questions users have regarding screenshots on iPad:
Q1: Can I take a screenshot while watching a video?
A1: Yes, you can take a screenshot while watching a video. However, some apps may restrict this due to copyright protections, so make sure you have the right to capture that content.
Q2: How do I find my screenshots after taking them?
A2: Screenshots are automatically saved in the Photos app. You can find them under the “Screenshots” album. You can also search for them using the search function in the Photos app.
Q3: Can I share my screenshots directly from the thumbnail preview?
A3: Absolutely! After taking a screenshot, you can tap on the thumbnail preview to access sharing options. You can share via email, social media, or messaging apps directly from there.
Q4: Is there a limit to how many screenshots I can take?
A4: There is no specific limit to the number of screenshots you can take, but your device’s storage capacity will be the determining factor. Always monitor your available storage.
Q5: What should I do if my screenshots are blurry?
A5: If your screenshots appear blurry, it could be due to the app being used or a software issue. Try restarting your iPad, ensuring the app is up to date, or testing with a different app.
12. Innovative Ways to Use Screenshots
Screenshots can serve more purposes than just capturing static images. Here are some innovative ways to utilize your screenshots:
- Create Tutorials: Screenshots can be instrumental in creating step-by-step tutorials. By capturing each step of a process, you can guide others through complex tasks with clarity.
- Highlighting Social Media Content: If you come across a post or image on social media that inspires you, taking a screenshot allows you to save that content for later reference or to share with friends.
- Developing Mood Boards: Designers and creatives can compile various screenshots of designs, layouts, or colors into a mood board, helping to visualize ideas for upcoming projects.
- Capturing Digital Art: Artists can take screenshots of their work-in-progress on their iPads, documenting the evolution of their pieces over time.
13. Understanding Privacy Concerns with Screenshots
While screenshots can be helpful, it’s crucial to be aware of privacy implications. Here are some considerations:
- Personal Information: Always check that sensitive personal information, such as passwords or account details, isn’t included in screenshots, especially if you plan to share them.
- Copyright Material: Be mindful of capturing and sharing copyrighted content. Always respect the rights of creators and obtain permission if necessary.
- Confidential Work Documents: If you’re using screenshots for work, ensure that no confidential information can be misused inappropriately.
14. Comparing Screenshot Features Across Devices
When comparing the screenshot capabilities of the iPad with other devices, it’s interesting to note the differences and similarities. For instance:
- iPhones: Similar to iPads, taking a screenshot on recent iPhone models also involves button combinations, but with variations in button placement.
- Android Devices: Many Android devices have similar screenshot functionalities but often include additional options like scrolling screenshots or specific gestures.
- Desktop Computers: On computers, screenshots can be taken with keyboard shortcuts. Still, editing and sharing options may differ significantly compared to mobile devices.
Understanding these differences can help you choose the most efficient method for your needs, depending on the device in use.
15. Future Trends in Screenshot Technology
As technology continues to evolve, so will the functionalities related to screenshots. Here are some anticipated trends:
- Enhanced Editing Tools: Future updates may include more advanced editing tools that allow for richer interactions with screenshots, like video annotations or integrated voice comments.
- AI Integration: Artificial intelligence might play a role in automatically suggesting edits or enhancements based on the content of the screenshot.
- Cloud Integration: As cloud storage becomes more prevalent, seamless integration will allow users to save and access screenshots from anywhere, making organization and retrieval even easier.
Conclusion: Embracing the Screenshot Functionality
Learning how to take a screenshot on iPad can significantly enhance how you interact with your device. Whether you’re capturing cherished memories, documenting work processes, or saving essential information, mastering this skill opens a world of possibilities. By understanding the different methods, editing options, creative uses, and best practices, you’ll make the most out of your iPad’s capabilities. So go ahead, experiment, and start capturing those moments that matter most!
“`
Trending Now
Frequently Asked Questions
How do I take a screenshot on my iPad?
To take a screenshot on your iPad, press the Volume Up button and the Top button simultaneously for models with Face ID. For earlier models with a Home button, press the Home button and the Top button at the same time. The screen will flash, indicating the screenshot has been captured.
Where do I find my screenshots on iPad?
Screenshots on your iPad are automatically saved to the Photos app. You can find them in the 'Screenshots' album, which is created specifically for storing your captured images. Alternatively, they will also appear in your main photo library.
Can I edit my screenshots on iPad?
Yes, you can edit your screenshots on iPad. After taking a screenshot, a thumbnail preview appears in the bottom corner. Tap on it to access editing tools, where you can crop, annotate, or draw on the screenshot before saving or sharing it.
How do I take a screenshot without using buttons on iPad?
If you prefer not to use physical buttons, you can enable AssistiveTouch on your iPad. Go to Settings > Accessibility > Touch > AssistiveTouch, and turn it on. You can then create a custom gesture to take screenshots using the on-screen menu.
What should I do if my iPad won't take a screenshot?
If your iPad won't take a screenshot, ensure that the buttons are functioning properly and that you're pressing them correctly. Also, check if your iPad is running the latest iOS version. Restarting your device or resetting the settings may also resolve the issue.
Agree or disagree? Drop a comment and tell us what you think.