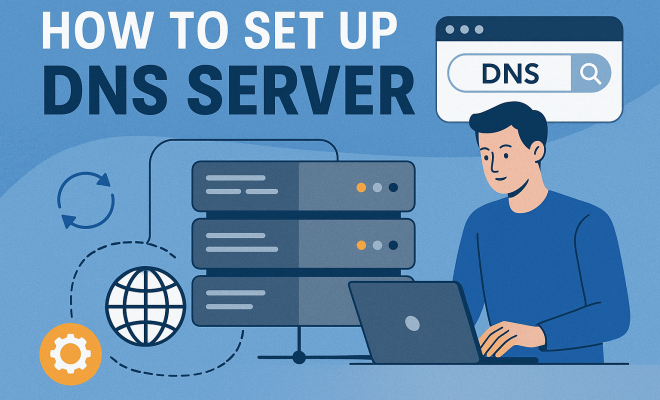
How to set up DNS server
“`html
1. Understanding DNS: The Backbone of Internet Navigation
Before we dive into the nitty-gritty of how to set up a DNS server, it’s essential to understand what DNS (Domain Name System) actually is. DNS acts like the phonebook of the internet; it translates human-friendly domain names (like www.example.com) into machine-readable IP addresses (like 192.0.2.1). This translation allows users to access websites without having to memorize complex numerical addresses.
The importance of DNS cannot be overstated. Without it, navigating the vast resources of the internet would be a tedious task. Every time you enter a web address in your browser, a DNS query is initiated to resolve that address, allowing you to connect to your desired website. This process happens in milliseconds, showcasing the efficiency and speed of DNS servers.
2. Types of DNS Servers: Which One Do You Need?
When considering how to set up a DNS server, it’s crucial to know the different types available. There are primarily four types of DNS servers:
- Primary DNS Server: This is the authoritative server that holds the complete data for a domain.
- Secondary DNS Server: This server holds a copy of the data from the primary server. It acts as a backup and helps load balance the traffic.
- Caching DNS Server: These servers store the results of previous DNS queries to speed up the resolution process for frequently accessed domains.
- Forwarding DNS Server: This type forwards queries to another DNS server for resolution, usually used in larger networks.
Your choice of DNS server will depend on your specific needs, such as whether you want a standalone server for a small website or a more complex setup for a large organization.
3. Prerequisites: What You Need to Get Started
Setting up a DNS server requires some specific prerequisites. First, you need a reliable server to host your DNS application. This can be a dedicated physical server, a virtual machine, or even a cloud-based server. Most DNS server software runs on Linux, so have a distribution like Ubuntu or CentOS ready.
You’ll also need to install DNS server software. Popular options include BIND (Berkeley Internet Name Domain), Microsoft DNS, and PowerDNS. Each has its strengths and weaknesses, so consider your environment and requirements before making a choice. Finally, ensure you have access to your domain registrar to configure the DNS settings for the domain you wish to manage.
4. Choosing the Right DNS Server Software
As mentioned, the choice of DNS server software is a crucial step when learning how to set up a DNS server. BIND is the most commonly used DNS software on the internet, known for its flexibility and extensive features. However, it can be complex for beginners.
For those who prefer a more straightforward interface, DNSMasq might be a better choice. It’s lightweight, easy to configure, and ideal for small networks. Microsoft DNS is a robust option if your environment is Windows-centric, especially since it integrates seamlessly with Active Directory.
5. Installation Steps: Setting Up Your DNS Server
Now comes the exciting part: installing your DNS server software. If you’re using BIND on a Linux server, follow these steps:
- Open your terminal and update your package manager:
sudo apt-get update - Install BIND:
sudo apt-get install bind9 - Once installed, ensure it’s running:
sudo systemctl start bind9
This simple process will get you started, but configuring your server for your specific needs is where the real work begins. You’ll need to edit configuration files to define your zones and resource records, which we’ll discuss next. (See: Domain Name System overview.)
6. Configuration: Creating Zones and Resource Records
Configuration is where you make your DNS server operational. You’ll need to define zones, which are portions of the DNS namespace managed by your server. This is typically done in the /etc/bind/named.conf.local file for BIND.
For example, to create a zone for your domain, you’ll add:
zone "example.com" IN {
	type master;
	file "/etc/bind/db.example.com";
};
Following that, you’ll create a zone file in /etc/bind/db.example.com where you’ll define various resource records, such as A records (which map domain names to IP addresses), MX records (for mail exchanges), and CNAME records (aliases for other domain names).
7. Testing Your DNS Server
After setting up your DNS server, testing its functionality is crucial. You can do this using tools like dig or nslookup. These command-line tools help you query your DNS server and check if it’s returning the correct IP addresses for your domain names.
For instance, using dig example.com, you should see the A record you set up earlier, along with additional information about your DNS server response. If everything looks good, congratulations! You’ve successfully set up your DNS server.
8. Maintaining and Securing Your DNS Server
Once your DNS server is up and running, it’s essential to maintain and secure it. Regular updates and patches are crucial for protecting against vulnerabilities. Additionally, consider implementing DNSSEC (DNS Security Extensions) to add a layer of security by digitally signing your DNS records.
Monitor your server for performance issues and traffic anomalies, as these can indicate potential security threats. Tools like fail2ban can help protect against certain types of attacks by banning IPs that exhibit malicious behavior.
Ultimately, a well-maintained DNS server is critical for ensuring reliable service and protecting your infrastructure from malicious actors.
9. Advanced Configuration: Adding Subdomains and Load Balancing
Once you’ve got the basics down, you may want to explore advanced configurations. For organizations with multiple services, setting up subdomains can help manage different parts of your web presence. For instance, you could create blog.example.com or shop.example.com, each pointing to different servers or applications.
To configure a subdomain, you would add a new zone entry similar to your main domain in your DNS configuration:
zone "blog.example.com" IN {
	type master;
	file "/etc/bind/db.blog.example.com";
};
This allows you to manage the DNS records for the subdomain independently, which is particularly useful for larger sites. You can also implement load balancing, which distributes traffic across multiple servers. You can achieve this by creating multiple A records for a single domain name, pointing to different IP addresses, making your service more resilient and reducing downtime.
10. Understanding DNS Propagation and TTL
When you make changes to your DNS records, it’s essential to understand how DNS propagation works. DNS records change doesn’t take effect immediately across the internet. This delay is often due to the Time to Live (TTL) settings that dictate how long servers cache the data before querying the authoritative server again.
Each record type in your DNS configuration can have its own TTL value, typically set in seconds. A shorter TTL means changes propagate faster but may increase the load on your DNS servers. Conversely, a longer TTL reduces queries but can delay the impact of changes. As a rule of thumb, setting a lower TTL (such as 300 seconds) during significant updates can help ensure quicker propagation, and you can later extend it for regular operation.
11. Common DNS Issues and Troubleshooting
As you become more familiar with your DNS server, you may encounter some common issues. Here are a few to watch out for:
- Incorrect Configuration: A typo in your zone files can lead to downtime. Always double-check your entries.
- Propagation Delays: After changing records, remember that it may take time for those changes to be recognized across all servers. Patience is key.
- Server Downtime: Ensure your DNS server is up 24/7. Use monitoring tools to alert you in case of failures.
- DNS Spoofing: Be aware of security threats like DNS spoofing where attackers can redirect users to malicious sites. Implementing DNSSEC can help mitigate this risk.
Using diagnostic tools like dig and traceroute, you can troubleshoot issues effectively. For example, if users are not reaching your site, you can run dig +trace example.com to see where the breakdown might be happening in the DNS resolution process.
12. DNS and SEO: How DNS Affects Your Website’s Performance
DNS plays a vital role in the performance of your website, which can significantly affect your SEO rankings. A slow DNS response time can lead to increased page load times, which is a crucial factor in user experience and search engine rankings.
Google recommends a DNS lookup time of under 200 milliseconds. If your DNS server takes longer, it can hinder the overall performance of your website. Utilizing a caching DNS server can help mitigate this by storing frequently requested domain information, thus speeding up the resolution process.
In addition, having a reliable DNS setup minimizes downtime, ensuring your website remains accessible. Downtime can be damaging to your SEO, as search engines might penalize sites that are frequently unreachable. Monitoring your DNS health and using tools like uptime checkers can help you stay on top of issues before they affect your site.
13. DNS Best Practices: Optimizing Your DNS Setup
Once you’ve successfully set up your DNS server, it’s worth considering some best practices to optimize its performance and reliability:
- Use Multiple DNS Servers: Having both primary and secondary DNS servers provides redundancy. If one server goes down, the other can still respond to queries, ensuring uninterrupted service.
- Optimize TTL Values: Be strategic about your TTL settings. For frequently updated records, a lower TTL can help propagate changes faster, while static records can benefit from a higher TTL to reduce DNS query load.
- Regularly Audit DNS Records: Over time, old or unused DNS records can accumulate. Regular audits help keep your DNS records clean, reducing the risk of misconfigurations or security vulnerabilities.
- Implement Rate Limiting: To protect against DNS amplification attacks, consider implementing rate limiting on your DNS server to control how many requests a single IP can make within a specified timeframe.
- Monitor DNS Performance: Use monitoring tools to track DNS query response times and identify any performance bottlenecks. This information can help you optimize your DNS setup further.
14. Further Learning: Resources for DNS Mastery
To become proficient in managing DNS servers, consider diving deeper with the following resources:
- Books: “DNS and BIND” by Cricket Liu and Paul Albitz is a comprehensive guide that covers all aspects of DNS management.
- Online Courses: Websites like Udemy or Coursera offer courses on DNS management that can provide hands-on learning and practical insights.
- Forums and Communities: Engaging with communities on platforms like Stack Overflow or specialized DNS forums can provide valuable insights and answers to specific questions.
- Documentation: Official documentation for your chosen DNS software (like BIND or PowerDNS) is often the best resource for troubleshooting and advanced configurations.
15. FAQ: Common Questions About Setting Up DNS Servers
What is the difference between A records and CNAME records?
A records point a domain name directly to an IP address. CNAME records, on the other hand, create an alias that points one domain to another domain name, which can then resolve to an A record.
How long does it take to set up a DNS server?
The establishment time can vary widely based on your experience level and the complexity of your setup. A simple DNS server might be up and running in about an hour, while a more complex configuration could take several hours to fully set up and test.
Can I set up a DNS server on Windows?
Yes, you can set up a DNS server on Windows using Microsoft DNS. It integrates well with Windows Server environments, making it a popular choice for organizations using Microsoft products.
What is DNSSEC and why is it important?
DNSSEC (Domain Name System Security Extensions) is a suite of extensions that add an additional layer of security by digitally signing data to prevent DNS spoofing. It’s important for protecting your domain from attacks that could redirect your traffic to malicious sites.
How can I secure my DNS server?
You can secure your DNS server by keeping software updated, implementing DNSSEC, using firewalls to restrict access, and monitoring logs for suspicious activity. Regular audits of your DNS records and configurations can also help safeguard your setup.
What tools can I use to monitor my DNS server?
There are several tools available for monitoring DNS servers, including:
- DNSPerf: This tool helps you monitor DNS performance and provides insights into response times.
- Pingdom: Known for website uptime monitoring, it also offers DNS monitoring features.
- Zabbix: An open-source monitoring solution that can track various aspects of your DNS servers.
- SolarWinds: Offers a comprehensive suite for network monitoring that includes DNS monitoring capabilities.
Can I set up a DNS server at home?
Absolutely! Setting up a DNS server at home can be a great learning experience. You can use software like BIND on a Linux machine or Windows DNS on a Windows server. Just be mindful that you’ll need to configure port forwarding on your router if you want external devices to query your DNS from outside your home network.
How can I troubleshoot DNS issues effectively?
To troubleshoot DNS issues, you can follow these steps:
- Check your DNS configuration files for typos or errors.
- Use tools like
digandnslookupto test DNS resolution. - Run
tracerouteto identify where the connection is breaking down. - Check your server’s logs for any error messages that might indicate where the issue lies.
- Consider flushing your DNS cache both locally and on the server to ensure you’re querying the most recent records.
“`
Trending Now
Frequently Asked Questions
What is a DNS server and how does it work?
A DNS server translates human-friendly domain names like www.example.com into machine-readable IP addresses such as 192.0.2.1. This process allows users to access websites without memorizing complex numerical addresses, enabling efficient navigation of the internet.
What are the different types of DNS servers?
There are four main types of DNS servers: Primary DNS Servers, which hold complete data for a domain; Secondary DNS Servers, which act as backups; Caching DNS Servers, which store previous query results for faster resolution; and Forwarding DNS Servers, which forward queries to other DNS servers.
What do I need to set up a DNS server?
To set up a DNS server, you need a reliable server to host your DNS application, which can be a physical server, a virtual machine, or a cloud-based solution. Additionally, you should have a basic understanding of DNS concepts and configurations.
Why is DNS important for the internet?
DNS is crucial for the internet as it acts as the 'phonebook' that translates domain names into IP addresses. Without DNS, navigating the internet would be cumbersome, requiring users to remember complex numerical addresses for every website they wish to visit.
How does a caching DNS server improve speed?
A caching DNS server improves speed by storing the results of previous DNS queries. When users request frequently accessed domains, the server can quickly return the cached results instead of querying the authoritative server, significantly speeding up the resolution process.
Have you experienced this yourself? We’d love to hear your story in the comments.