How to partition external hard drive
“`html
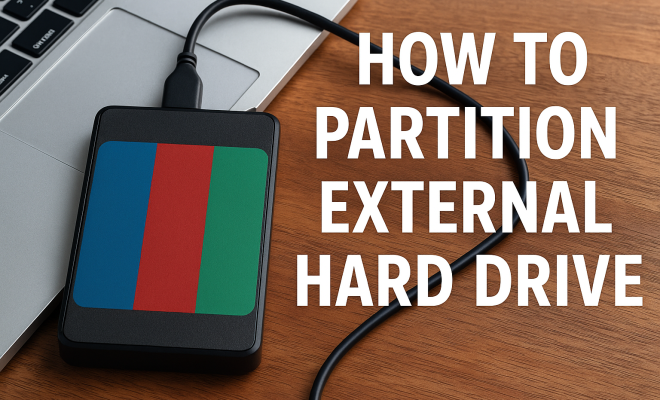
When it comes to managing data, organizing your digital life can be crucial. One effective way to achieve this is through the practice of partitioning your external hard drive. In this comprehensive guide, we’ll explore the intricacies of how to partition external hard drives, why it matters, and how you can do it efficiently. Whether you’re a tech novice or a seasoned pro, this article will provide you with valuable insights.
1. Understanding External Hard Drives
Before we dive into the nitty-gritty of partitioning, let’s first clarify what external hard drives are and their role in data management. An external hard drive is a portable storage device that connects to your computer via USB, Thunderbolt, or other interfaces. They are a popular choice for backing up important files, expanding storage capacity, and transferring data between devices.
These drives come in various sizes and formats, from traditional spinning hard disk drives (HDDs) to faster solid-state drives (SSDs). Understanding the type of external hard drive you have is essential because partitioning methods may vary slightly depending on the drive format and operating system.
2. Why Partition an External Hard Drive?
Partitioning is the process of dividing your hard drive into separate sections, effectively creating multiple ‘drives’ within a single physical device. This separation can serve various purposes. For example, you might want to keep personal files separate from work documents, or perhaps you want to create a dedicated space for backups.
Moreover, partitioning can improve the performance of your external hard drive. By organizing files into distinct partitions, you reduce the time needed for the system to locate files, as they are stored in more manageable sections. Additionally, if one partition becomes corrupted, the others can remain intact, providing an added layer of safety.
3. Key Considerations Before Partitioning
Before you set about partitioning your external hard drive, there are several key considerations to keep in mind. First, assess how you use your external hard drive. Consider the types of files you store and how you can best organize them. For example, if you frequently work with large media files, you might want a partition dedicated to these files.
Secondly, check the available space on your hard drive. Make sure that you’re not drastically reducing the space available in one partition while allocating too much to another. It’s all about finding the right balance based on your unique needs. Lastly, remember to back up your data before partitioning—safety first!
4. How to Partition an External Hard Drive on Windows
For Windows users, partitioning an external hard drive is a straightforward process using the built-in Disk Management tool. Here’s a step-by-step guide:
- Connect your external hard drive: Plug in your external hard drive and wait for Windows to recognize it.
- Open Disk Management: Right-click on the Start menu and select “Disk Management.”
- Select your external hard drive: Locate your external hard drive in the list of drives.
- Shrink the volume: Right-click on the external drive and choose “Shrink Volume.” Input the amount of space you want to allocate for the new partition.
- Create a new partition: After shrinking, you’ll see unallocated space. Right-click on it and select “New Simple Volume.” Follow the wizard to format and assign a drive letter to the new partition.
- Finish: Once completed, your external hard drive will now have multiple partitions.
Always remember to safely eject your external hard drive after use to avoid file corruption.
5. How to Partition an External Hard Drive on macOS
If you’re using macOS, the process is also user-friendly. Here’s how to do it using Disk Utility:
- Connect your external hard drive: Plug in your external drive and let macOS recognize it.
- Open Disk Utility: You can find this tool in the Utilities folder within Applications or search for it using Spotlight.
- Select your external hard drive: In the left sidebar, select the external hard drive you want to partition.
- Partition the drive: Click on the “Partition” button located in the toolbar. Then, choose the size and format for each partition you want to create.
- Apply changes: After setting your preferences, click “Apply” to complete the partitioning process.
macOS utilizes the HFS+ or APFS file systems, which are optimized for Apple devices, ensuring compatibility across your devices. (See: Understanding hard disk drives.)
6. Choosing the Right File System
When you partition an external hard drive, you’ll need to choose a file system. The file system determines how data is stored and organized on the drive. The most common file systems include NTFS, exFAT, and HFS+.
- NTFS: Ideal for Windows users, NTFS supports large files and provides security features. However, it has limited compatibility with macOS.
- exFAT: A versatile option, exFAT works seamlessly with both Windows and macOS. It’s suitable for flash drives and external drives, especially for transferring large files.
- HFS+: This is the native file system for macOS. It’s optimized for Apple devices but not easily accessible on Windows.
Selecting the right file system is crucial depending on how you intend to use your external hard drive, especially if you switch between operating systems.
7. Common Issues and Troubleshooting Tips
Partitioning an external hard drive usually goes smoothly, but issues can arise. Here are some common problems and solutions:
- Drive not recognized: Ensure the drive is properly connected and powered on. Try a different USB port or cable.
- Errors during partitioning: If you encounter errors, it could be due to existing partitions or file system issues. Try formatting the drive before partitioning.
- Data loss concerns: Always back up your data. If you accidentally lose files during partitioning, you might be able to use data recovery software.
If problems persist, consult forums or support websites related to your operating system or drive manufacturer for more tailored solutions.
8. Maintaining Your Partitions
Once you’ve successfully partitioned your external hard drive, ongoing maintenance is key to ensuring optimal performance. Regularly check the partitions to assess how much space is being used and how efficiently files are organized.
Consider defragmenting your partitions, especially if you’re using an HDD. This process helps rearrange fragmented data, allowing your drive to access files more efficiently. For SSDs, however, defragmentation isn’t necessary and can actually reduce the lifespan of the drive.
9. The Future of External Hard Drives
As technology continues to advance, the role of external hard drives evolves too. With the rise of cloud storage solutions, some may wonder if external drives will become obsolete. However, there remains a strong case for physical storage, particularly regarding speed, security, and convenience.
Partitioning will likely remain a relevant practice as users seek more effective ways to manage their data. As the sizes of external hard drives increase and technology progresses, understanding how to effectively partition external hard drives will become an essential skill for both casual users and professionals alike.
10. Final Thoughts
In today’s digital age, managing your data efficiently is more important than ever. Knowing how to partition an external hard drive can significantly enhance your storage organization and performance. Whether you’re working with personal files, multimedia projects, or professional documents, an organized approach will save you time and frustration.
So, if you haven’t already, consider partitioning your external hard drive to get the most out of your storage space. The steps are straightforward, and the benefits can be immense, ensuring your important files are safe and easy to access. Happy organizing!
11. Benefits of Partitioning Your External Hard Drive
Partitioning an external hard drive offers several advantages that can make your data management significantly more efficient. Here are some of the key benefits:
- Enhanced Organization: You can categorize files based on type or purpose, making it easier to locate specific data quickly.
- Improved Performance: With data spread across partitions, the drive can access files faster, leading to quicker read and write times.
- Data Security: In case of corruption or failure in one partition, the others remain unaffected, safeguarding your data.
- Multiple Operating Systems: If you use different operating systems, you can create partitions formatted for each OS, allowing for compatibility.
- Backup Flexibility: You can create a dedicated partition for backups, ensuring that your important files are stored securely and separately from other data.
12. Partitioning Strategies for Different Users
Depending on your needs, different partitioning strategies may be more suitable for you: (See: Data management and computer safety.)
For General Users
If you primarily use your external hard drive for personal files, consider creating partitions for media (photos, videos, music) and documents. This simple separation helps in quickly locating what you need without digging through a jumbled folder structure.
For Professionals
Professionals working with large datasets or multimedia projects might need more sophisticated partitioning. You could create partitions based on projects, clients, or file types. This way, you ensure that project files are kept organized and accessible, helping streamline workflows.
For Gamers
Gamers often need to manage large game files and updates. Creating a partition specifically for games can help in managing downloads and updates without cluttering your main storage area. You might also consider a separate partition for saved game files, making it easier to back up and restore your game progress.
For Photographers and Video Editors
For those in creative fields, partitioning by project can be immensely helpful. Creating separate partitions for different shoots or projects allows for dedicated space for raw files, edits, and final versions, making the editing process smoother.
13. Advanced Partitioning Techniques
For users looking to get more technical with their partitioning, there are advanced techniques available:
Dynamic Disks
Windows offers a feature called dynamic disks, which allows you to create volumes that span multiple disks or even set up mirrored partitions for redundancy. This is useful for those who require high availability and data protection.
Logical vs. Primary Partitions
Understanding the difference between logical and primary partitions can help you make informed decisions. Primary partitions are the main partitions that can be bootable, while logical partitions exist within an extended partition and can be useful for organizing data without the boot capabilities.
Disk Encryption
For security-conscious users, consider using encryption on your partitions. Tools like BitLocker for Windows or FileVault for macOS can help secure sensitive information. Encrypting partitions ensures that even if your drive is lost or stolen, your data remains protected.
14. Frequently Asked Questions (FAQ)
What happens if I delete a partition?
When you delete a partition, all data within that partition is lost unless you have a backup. It’s important to ensure you no longer need anything on that partition before deleting it.
Can I resize a partition?
Yes, you can resize partitions in both Windows and macOS using their respective disk management utilities. However, be cautious as resizing may lead to data loss if not done correctly. Always back up your data before making changes. (See: Partitioning in computer science.)
Is partitioning an external hard drive reversible?
Partitioning itself is not directly reversible, but you can delete, resize, or modify partitions as needed. However, any data within deleted partitions will be permanently lost unless backed up prior.
How do I check the health of my partitions?
You can use built-in tools like Windows’ Check Disk or macOS’s Disk Utility to check for errors on your partitions. It’s a good practice to run these checks periodically to ensure your drive is functioning well.
Can I use my partitioned external drive for Time Machine backups?
Yes, you can set up a partition specifically for Time Machine backups in macOS. Just make sure that the partition is formatted as APFS or HFS+ to be compatible with Time Machine.
15. Understanding Partition Types
When you think about partitioning, it’s essential to understand the different types of partitions you can create. Here’s a breakdown of the most common types:
- Primary Partitions: These are the main partitions that can be directly accessed by the operating system. Typically, you can have up to four primary partitions on a drive.
- Extended Partitions: An extended partition is a single partition that can contain multiple logical partitions. This is useful if you need more than four partitions on a single drive.
- Logical Partitions: These exist within an extended partition. Logical partitions can help you further categorize your data without being limited by the primary partition restrictions.
16. Best Practices for Managing Partitions
To keep your partitions organized and functioning optimally, consider these best practices:
- Plan Ahead: Before partitioning, spend some time planning how you want to organize your data. Consider your future needs, not just your current situation.
- Regular Backups: Always maintain a backup of your data, especially before making changes to your partitions. This ensures you won’t lose valuable files during the process.
- Monitor Disk Space: Keep an eye on how much space each partition is using. If one partition is nearing capacity, it may be time to reorganize or resize.
- Use Descriptive Names: When creating partitions, give them names that reflect their purpose. This makes it easier to remember what each partition is for.
17. Conclusion
With the right knowledge and tools, partitioning your external hard drive can lead to a more organized and efficient data management experience. By understanding the benefits, strategies, and techniques discussed, you can optimize your storage to suit your specific needs. Whether you’re a casual user or a professional, a well-partitioned external hard drive can significantly enhance your workflow and data security.
So, take the plunge into partitioning and enjoy the advantages it brings to your digital life!
“`
Trending Now
Frequently Asked Questions
How do I partition an external hard drive?
To partition an external hard drive, connect it to your computer, access the disk management tool, select the drive, and choose the option to create a new partition. Follow the prompts to allocate space and format the new partition. Make sure to back up important data before starting the process.
Why should I partition my external hard drive?
Partitioning an external hard drive allows you to organize files more efficiently, separate personal and work documents, and improve performance. It also adds a layer of safety, as issues in one partition can leave others unaffected, preserving your data.
What are the benefits of partitioning a hard drive?
The benefits of partitioning include better organization of files, improved access speed, and enhanced data security. By dividing your drive into sections, you can manage data more effectively and reduce the risk of data loss due to corruption in one area.
Can I partition an external hard drive on any operating system?
Yes, you can partition an external hard drive on various operating systems, including Windows, macOS, and Linux. However, the steps and tools used for partitioning may vary slightly between systems, so it's important to follow the specific instructions for your OS.
Is it safe to partition an external hard drive?
Yes, partitioning an external hard drive is generally safe as long as you back up your data beforehand. While the process itself does not typically cause data loss, unforeseen issues can arise, making backups essential to prevent any potential loss of important files.
Have you experienced this yourself? We’d love to hear your story in the comments.