How to freeze rows in Excel
“`html
Microsoft Excel is a powerful tool for data analysis, allowing users to manipulate and visualize information effectively. One of the key features that enhances user experience is the ability to freeze rows in Excel. This simple yet effective technique helps keep your header rows visible while scrolling through large datasets, making it easier to analyze data without losing context. In this article, we’ll explore nine essential tips to master the art of freezing rows in Excel, ensuring your data handling becomes more efficient and effective.
1. Understanding the Basics of Freezing Rows
Before diving into the technical steps, it’s crucial to understand what freezing rows in Excel actually means. Freezing rows locks specific rows in place on your spreadsheet, allowing them to remain visible while you scroll through the rest of your data. This is particularly useful when working with extensive datasets where keeping track of headings or categories is vital.
For instance, if you’re analyzing sales data spanning several months, freezing the top row where your column headers are located can save you time and frustration. You won’t need to scroll back up to see what each column represents, and this feature enhances overall data visibility. Microsoft Excel offers options to freeze either the top row or any row of your choice, providing flexibility depending on your specific needs.
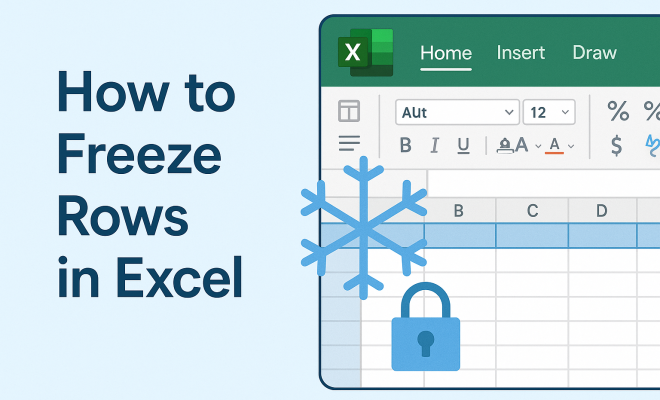
2. How to Freeze the Top Row
Freezing the top row in Excel is a straightforward process. To do this, follow these steps:
- Open your Excel spreadsheet.
- Navigate to the “View” tab in the Excel ribbon at the top of the window.
- Select the “Freeze Panes” dropdown menu.
- Choose “Freeze Top Row” from the options presented.
Once selected, your top row will remain visible as you scroll down the spreadsheet. This method is particularly useful for keeping header information in view, ensuring you can always identify the data you’re looking at. For users frequently working with large spreadsheets, this small adjustment can significantly improve workflow efficiency.
3. Freezing Multiple Rows
Sometimes, a single row is not enough. If your dataset requires visibility on multiple rows — for example, if you have subheadings or categories — you can freeze multiple rows as well. Here’s how to do it:
- Click on the row number just below the rows you want to freeze. For instance, if you want to freeze the first three rows, select row 4.
- Head to the “View” tab in the ribbon.
- Click on the “Freeze Panes” dropdown and select “Freeze Panes.”
By doing this, all rows above the selected row will remain visible as you scroll down the spreadsheet. This feature is particularly beneficial for complex data sets where multiple levels of information are present, as it allows for better context while analyzing data.
4. Unfreezing Rows
While freezing rows is a great way to enhance visibility, there may be times when you want to unfreeze them. Maybe your dataset shrunk, or you no longer need the context provided by the frozen rows. Unfreezing rows is just as easy as freezing them:
- Go back to the “View” tab in the ribbon.
- Select “Freeze Panes.”
- Choose “Unfreeze Panes” from the dropdown menu.
With that, all frozen rows will be released, allowing you to scroll freely through your data. This flexibility is vital, as it allows you to adapt your workspace to the current needs of your project. (See: Microsoft Excel overview on Wikipedia.)
5. Using Freeze Panes in Different Views
Excel offers various viewing options that can affect how frozen rows appear. For instance, if you’re using Split View or another specialized layout, you might notice frozen rows behaving differently. In Split View, the frozen rows will only remain visible in the pane where they were frozen.
This means that if you want frozen rows to apply across multiple panes, you’ll need to freeze them in each section individually. Experimenting with different views can unlock new ways of analyzing data, and understanding how freezing interacts with each view can help you maximize your organizational strategies.
6. Freezing Rows in Excel Online vs. Desktop
Many users are transitioning from Excel desktop applications to Excel online due to its accessibility. However, it’s important to understand that there are slight differences in functionality between the two. In Excel Online, the process of freezing rows is very similar to that of the desktop version, but some features might be limited.
For instance, while you can freeze rows in Excel Online, advanced features such as freezing more than one row can sometimes present challenges. Make sure to check the version you’re using, as this can affect how you implement freezing panes and your overall data management capabilities.
7. Practical Applications of Freezing Rows
The ability to freeze rows in Excel isn’t just a neat trick—it’s a practical necessity for anyone dealing with large datasets. From financial analysts to researchers, myriad professionals can benefit from this feature. For instance, project managers tracking milestones can freeze their project status bar, enabling them to keep tabs on overall progress while reviewing individual tasks.
Similarly, educators using Excel to track student performance can freeze the top rows containing student names and scores, making it easier to analyze trends without losing sight of the critical identifiers. The versatility of this feature makes it a valuable skill for anyone looking to enhance their Excel proficiency.
8. Tips for Effective Data Management with Frozen Rows
While freezing rows is helpful, there are strategies to optimize data management in conjunction with this feature. Here are some tips:
- Use Color Coding: Differentiate frozen rows through color coding or shading. This visual cue can help you easily identify them even when scrolling through long lists.
- Combine with Filters: Pair frozen rows with Excel’s filter feature. This combination allows you to maintain context while narrowing down your data set, making analysis quicker and easier.
- Regularly Update Data: Ensure that your frozen rows reflect the latest changes in your data. Regular updates help maintain accuracy and relevance in your analysis.
Employing these strategies can significantly enhance how you interact with your Excel documents, leading to more insightful data analysis and effective decision-making.
9. Advanced Techniques for Freezing Rows
As you become more comfortable with freezing rows, you might explore advanced techniques that take your Excel skills to a higher level. Here are a few suggestions:
- Combine Freezing with Conditional Formatting: Use conditional formatting to highlight rows based on specific criteria, such as sales performance. For instance, if you’re analyzing sales data, you could freeze the header row while using conditional formatting to color-code performances above or below targets. This visual layering can help you quickly grasp data trends.
- Dynamic Freezing with Macros: If you’re familiar with Excel’s Macro feature, you can create a macro to streamline your freezing process. For example, a macro could automatically freeze the top five rows whenever you open a specific spreadsheet, ensuring that your most critical data remains visible as you work.
- Utilizing Named Ranges: By using named ranges in conjunction with freezing rows, you can create a more organized approach. Naming the specific data sections you frequently deal with can enhance overall navigation and usability while maintaining the freeze on your essential rows.
10. Common Issues When Freezing Rows
Even with all the benefits, users might encounter common issues when trying to freeze rows in Excel. Understanding these challenges can save you time and frustration: (See: CDC on ergonomics and data management.)
- Accidental Unfreezing: In the process of editing or navigating your worksheet, you might accidentally unfreeze rows. Familiarizing yourself with the process of refreezing them can alleviate this issue.
- Not Seeing Frozen Rows: Occasionally, users report that frozen rows don’t seem to appear as expected. This can happen if you’ve frozen rows in one pane but are viewing another. Make sure you’re in the correct view where the rows were frozen.
- Not Enough Rows Frozen: Sometimes users think they’ve selected the correct rows to freeze, but they miss one. Double-check your selection, especially if your dataset is large or complex.
11. Statistics on Excel Usage
Understanding the prevalence of Excel can give insight into why freezing rows is such a relevant skill. According to recent statistics:
- Over 1.2 billion people use Excel globally.
- Approximately 90% of businesses utilize Excel for data management and analysis.
- Excel has over 400 functions, making it one of the most versatile spreadsheet tools available.
These figures emphasize the importance of developing skills like freezing rows, as they can greatly enhance productivity in various business environments.
12. Expert Perspectives on Freezing Rows
Incorporating expert opinions can provide a deeper understanding of best practices when using Excel. According to data analyst Jane Doe, “Freezing rows is essential for maintaining clarity in large datasets. It’s a simple yet powerful feature that enhances your ability to analyze data without confusion.”
Another expert, John Smith, a data visualization specialist, states, “When working with data, keeping context is key. Freezing rows allows users to maintain that context, which is vital for making informed decisions.” These insights underline the practical value that freezing rows brings to data analysis.
13. Frequently Asked Questions (FAQ)
1. Can I freeze columns as well as rows in Excel?
Yes, you can freeze columns in addition to rows. To freeze both, select the cell just below the rows and to the right of the columns you want to freeze, then choose “Freeze Panes.” This allows you to keep both headings visible as you scroll.
2. Is there a limit to the number of rows I can freeze?
No, there’s no strict limit on how many rows you can freeze in Excel. However, keep in mind that freezing too many rows may clutter your view and defeat the purpose of keeping context clear.
3. Will freezing rows affect printing?
Yes, when you print your spreadsheet, frozen rows will remain at the top of each printed page by default. To adjust this setting, you can go to the print layout options in the Page Layout tab.
4. Why is my frozen row not visible in Excel Online?
This could be due to the view settings you are using. Check if you are in a pane that has frozen rows. Excel Online may have some limitations with views compared to the desktop version, so ensure you are working in a compatible view.
5. How do I know if I have frozen rows?
If you see a thicker line beneath the frozen rows while scrolling, it indicates which rows are frozen. You can also check the “Freeze Panes” dropdown under the View tab to see if any rows are currently frozen. (See: Harvard University resources.)
6. Can I freeze rows in a specific worksheet only?
Yes, freezing rows applies only to the worksheet you are currently working on. Each worksheet can have its own frozen row settings, allowing for customized views based on the data within that sheet.
14. Common Use Cases for Freezing Rows
Freezing rows can be incredibly useful in a variety of scenarios. Here are some specific cases where this feature shines:
- Financial Modeling: Financial analysts often work with large spreadsheets containing multiple years of data. Freezing both the top row for headers and the first column for categories allows them to quickly reference key data points without losing their place as they scroll.
- Project Management: In project management templates, it’s common to have the project name and status in the first few rows. Freezing these rows helps project managers stay on track and ensure they always see critical information while reviewing task details.
- Inventory Tracking: Businesses that maintain inventory lists can use frozen rows to keep track of item names, quantities, and categories. This way, they can scroll through large lists without losing sight of what each number corresponds to.
15. Best Practices for Using Freeze Panes
Incorporating best practices can enhance your overall experience with freezing rows in Excel. Here are some recommendations:
- Plan Your Layout: Before you start entering data, think about which rows and columns will be most useful to freeze. This planning can save you time in the long run.
- Regularly Review Frozen Rows: Occasionally, take a moment to assess whether the rows you’ve frozen are still relevant as your data changes. Updating these can keep your workflow smooth and efficient.
- Utilize Tutorials: Excel is rich with tutorials and online resources. If you’re ever unsure, take advantage of these materials to refine your skills further.
16. Advanced Features Related to Freezing Rows
There are additional advanced features in Excel that complement freezing rows effectively:
- Grouping and Outlining: By using grouping and outlining features, you can expand and collapse sections of your data while keeping frozen rows visible. This can make navigating complex datasets much easier.
- Data Validation: Set up data validation rules that work in tandem with frozen rows. This can help maintain data integrity as you enter new information while keeping your headers visible.
- Dynamic Charts: Create charts that reference the frozen rows for better visualization. This means that, while you analyze data, you can get real-time graphical representations without losing sight of the data headers.
17. Conclusion: Mastering Excel for Better Data Handling
Freezing rows in Excel is a fundamental skill that can dramatically improve your productivity and efficiency when working with large datasets. By learning how to freeze and unfreeze rows effectively, you position yourself to analyze data without losing context, which is essential for informed decision-making.
As you continue to develop your Excel skills, remember that mastering features like freezing rows can make your work easier and more insightful. Whether you’re a business analyst, teacher, or simply someone who frequently works with spreadsheets, incorporating these tips will undoubtedly enhance your Excel experience. So, go ahead and try freezing rows in Excel—you’ll wonder how you ever managed without it!
“`
Trending Now
Frequently Asked Questions
How do I freeze rows in Excel?
To freeze rows in Excel, open your spreadsheet, go to the 'View' tab, click on 'Freeze Panes', and select 'Freeze Top Row' for the first row or 'Freeze Panes' for a specific row. This keeps selected rows visible while you scroll through your data.
What is the purpose of freezing rows in Excel?
Freezing rows in Excel allows you to keep specific rows, like headers, visible as you scroll through large datasets. This enhances data visibility and makes it easier to analyze information without losing context.
Can I freeze multiple rows in Excel?
Yes, you can freeze multiple rows in Excel. Select the row below the rows you want to freeze, go to the 'View' tab, click 'Freeze Panes', and then choose 'Freeze Panes' again. This will lock the selected rows in place.
Is it possible to unfreeze rows in Excel?
Yes, to unfreeze rows in Excel, simply navigate to the 'View' tab, click on 'Freeze Panes', and select 'Unfreeze Panes'. This will remove any frozen rows, allowing you to scroll freely through your data.
What versions of Excel support freezing rows?
Freezing rows is a feature available in most versions of Microsoft Excel, including Excel 2010, 2013, 2016, 2019, and Excel for Microsoft 365. It enhances usability across various data analysis tasks.
What did we miss? Let us know in the comments and join the conversation.