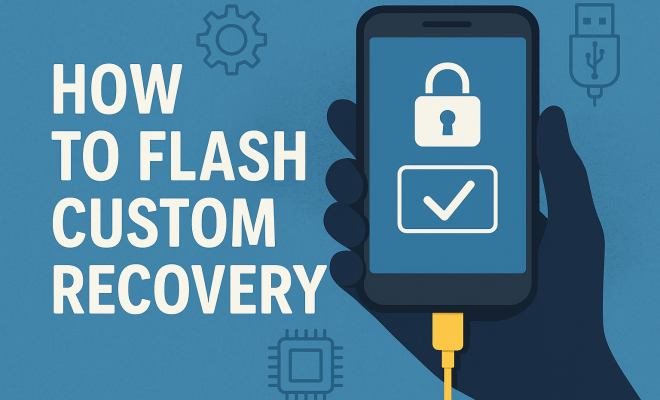
How to flash custom recovery
“`html
When it comes to Android customization, one of the most powerful tools at your disposal is the ability to flash custom recovery. This process not only provides flexibility for advanced users but also allows for enhanced functionality, making it a must-learn skill for anyone looking to optimize their Android experience. In this comprehensive guide, we’re going to delve into what custom recovery is, why you might want to flash one, and how to do it safely and effectively.
1. Understanding Custom Recovery
Before getting into the nitty-gritty of flashing custom recovery, it’s essential to understand what it is. A custom recovery is an alternate recovery environment that allows users to perform various tasks, such as installing third-party firmware, creating system backups, and wiping data partitions. Unlike the stock recovery provided by manufacturers, custom recoveries like TWRP (Team Win Recovery Project) and ClockworkMod offer a user-friendly interface and advanced options that are invaluable for power users.
The primary advantage of a custom recovery lies in its versatility. While stock recoveries typically limit users to basic options, custom recoveries often come packed with features that allow for installing custom ROMs, rooting your device, and performing full backups of your system. These capabilities can vastly improve your device’s performance, enable updates for older hardware, and provide features that manufacturers might not include.
2. Why Flash Custom Recovery?
So, why should you go through the effort to flash custom recovery? There are several compelling reasons:
- Enhanced Control: With a custom recovery, you can control your device at a granular level. This includes managing partitions and backups that stock recoveries won’t allow.
- Custom ROMs: Want to install a more recent version of Android or a completely different look? Custom recoveries make it possible to install custom ROMs that can completely change the way your device operates.
- Backup and Restore: Custom recoveries allow you to back up your entire system, ensuring you don’t lose your data if something goes wrong during a modification.
- Root Access: Flashing custom recovery is often the first step in gaining root access, which can unlock a world of additional features and tweaks.
In a nutshell, flashing custom recovery opens up a vast realm of possibilities for your Android device. It’s the gateway to customization and optimizations that can breathe new life into aging hardware.
3. Preparing Your Device for Flashing
Before you dive into the flashing process, it’s crucial to prepare your device adequately. This ensures a smoother experience and minimizes the risk of bricking your device. Here’s what you need to do:
- Backup Your Data: Always start by backing up your important data. Use cloud services or external storage to keep your files safe.
- Charge Your Device: Make sure your device is charged to at least 70% to avoid interruptions during the flashing process.
- Enable USB Debugging: Go to your device’s settings, navigate to Developer options, and enable USB debugging. This setting allows your PC to communicate with your Android device.
- Unlock the Bootloader: Most devices require an unlocked bootloader to flash custom recovery. This usually involves some steps, so check your manufacturer’s instructions.
Taking these preparatory steps will significantly reduce potential issues during the flashing process. Remember, a little caution goes a long way!
4. Choosing the Right Custom Recovery
Not all custom recoveries are created equal. You’ll want to select one that suits your needs and is compatible with your device. The two most popular options are:
- TWRP (Team Win Recovery Project): TWRP is widely regarded for its user-friendly interface and extensive features, including touch support, backup options, and file management.
- ClockworkMod Recovery: This was one of the first custom recoveries widely used, but its popularity has declined in favor of TWRP. It’s still a solid choice for some older devices.
Research your specific device to find out which recovery is the best fit. The community around your device will often have recommendations, and sites like XDA Developers can be invaluable resources.
5. How to Flash Custom Recovery: Essential Tools
Flashing custom recovery requires some tools to facilitate the process. Here’s a list of essential software and tools you’ll need: (See: Android operating system overview.)
- ADB and Fastboot: These tools are essential for sending commands from your computer to your Android device. They’re part of the Android SDK or can be downloaded separately.
- Your Custom Recovery Image: Download the appropriate recovery image (TWRP or ClockworkMod) for your specific device.
- USB Drivers: Ensure that your computer has the necessary USB drivers installed for your device. This ensures proper communication between the two.
With the right tools in hand, you’re now ready to proceed to the actual flashing process.
6. Flashing the Custom Recovery: A Step-by-Step Guide
Now that you have everything set up, let’s walk through the steps involved in flashing a custom recovery:
- Connect Your Device: Use a USB cable to connect your Android device to your computer.
- Open Command Prompt: Navigate to the folder where you have ADB and Fastboot installed. Hold down the Shift key and right-click to open a command prompt in that folder.
- Boot into Fastboot Mode: Type the command
adb reboot bootloaderto access the bootloader. From here, usefastboot devicesto ensure your device is recognized. - Flash the Recovery: Use the command
fastboot flash recovery recovery.img, replacingrecovery.imgwith the name of your downloaded recovery image. - Reboot Your Device: After flashing is complete, reboot your device using
fastboot reboot.
That’s it! You’ve successfully flashed a custom recovery onto your device. The next step is to boot into recovery mode to check if everything is functioning correctly.
7. Booting into Custom Recovery
Once you’ve flashed the custom recovery, you’ll want to boot into it to confirm that everything went smoothly. Here’s how:
- Power Off Your Device: Ensure your device is completely powered down.
- Boot into Recovery Mode: This process varies by device, but generally, you can hold the Volume Up + Power buttons simultaneously until the recovery screen appears.
Once in recovery mode, you should see the interface of the custom recovery you installed. Spend a few moments exploring the options available to familiarize yourself with the environment. This is where you can perform backups, install custom ROMs, and more.
8. Common Issues and Troubleshooting
Despite careful preparation, things can sometimes go awry during the flashing process. Here are a few common issues and their solutions:
- Device Not Recognized: Ensure USB drivers are installed and that USB debugging is enabled on your device.
- Flashing Fails: Double-check that you downloaded the correct recovery image for your device. An incorrect image can lead to flashing failures.
- Boot Loop Issues: If your device is stuck in a boot loop after flashing, you may need to perform a factory reset from the custom recovery.
If all else fails, the online community is a great resource. Forums like XDA Developers can be a treasure trove of advice and solutions from others who may have experienced similar problems.
9. Post-Flashing: Next Steps
Once you’ve successfully flashed custom recovery, the next steps are crucial for ensuring optimal performance and customization:
- Install a Custom ROM: This is one of the main reasons users flash custom recovery. Research and choose a ROM that fits your needs, then follow the flashing instructions provided by the ROM’s developers.
- Backup Your Data: Use the backup feature of your custom recovery to create a full backup of your system. This ensures you can revert to a working state if needed.
- Explore Additional Features: Experiment with features like partition wipes, system tweaks, and more to unlock the full potential of your device.
Remember, with great power comes great responsibility. Always proceed with caution, and make sure you understand what each modification does before you perform it.
10. The Future of Custom Recovery
The landscape of Android customization continues to evolve. As manufacturers push for more locked-down devices, the need for custom recoveries becomes even more crucial. New tools and methods are constantly being developed, and the community around custom recovery is vibrant and active. Tools like Magisk are gaining popularity for rooting without altering the system partition, which is a game-changer for users who want to maintain system integrity while enjoying root access. (See: Custom recovery in Android.)
Furthermore, as more users become aware of their options for device customization, the demand for tutorials and resources will continue to grow. Engaging with the community and sharing your experiences can help others navigate the complexities of flashing custom recovery and beyond.
11. Flashing Custom Recovery: Advanced Techniques
While the basic process of flashing custom recovery is relatively straightforward, advanced users may want to explore more sophisticated techniques. Here are a few advanced options that can enhance your experience:
- Custom Recovery Scripts: Many custom recoveries support scripts that can automate repetitive tasks, such as wiping caches or creating backups. These scripts can save time and ensure that you don’t forget important steps during a modification process.
- Multi-Boot Setups: If you’re interested in experimenting with multiple ROMs, some advanced recoveries support multi-boot configurations. This allows you to install and boot into different operating systems or ROMs from the same device.
- Device-Specific Tweaks: Some devices have unique hardware features that can be optimized through custom recovery. Research community forums for device-specific tweaks that may not be available in stock configurations.
Employing these advanced techniques requires a solid understanding of your device’s software and hardware capabilities, so be sure to do thorough research before diving in.
12. Popular Custom ROMs to Try with Custom Recovery
Once you’ve flashed a custom recovery, the next step is often to install a custom ROM. There are numerous custom ROMs available, each offering different features and enhancements. Here are a few popular options that users frequently recommend:
- LineageOS: A continuation of the popular CyanogenMod project, LineageOS offers a clean, bloat-free experience with regular updates. It supports a wide range of devices and provides features that enhance performance and battery life.
- Pixel Experience: If you want the stock Google Pixel experience on your device, Pixel Experience is a fantastic option. It brings the look and feel of Pixel devices, including Google’s exclusive features and apps.
- Resurrection Remix: Known for its immense customization options, Resurrection Remix blends features from various ROMs, allowing users to tailor their experience to meet their needs.
Before installing any custom ROM, ensure it’s compatible with your device and read through user reviews and feedback. This due diligence can save you from potential issues down the line.
13. Frequently Asked Questions (FAQ)
Here are some common questions regarding the process of flashing custom recovery:
What is the difference between stock and custom recovery?
Stock recovery is the recovery environment that comes pre-installed on your device, offering limited options like factory reset and cache wipe. Custom recovery, on the other hand, provides advanced features like installing custom ROMs, making complete backups, and more.
Will flashing custom recovery void my warranty?
In most cases, yes. Flashing custom recovery typically voids your warranty since it modifies the original software. However, some manufacturers may allow you to revert to stock recovery and regain your warranty.
Can I unbrick my device after flashing custom recovery?
Yes, if your device gets bricked during the flashing process, you can often recover it by flashing the stock firmware through the custom recovery, as long as the recovery is functional. (See: Guidelines for technology use.)
Is flashing a custom recovery safe?
Flashing custom recovery is generally safe if you follow the correct procedures and use the appropriate files. However, there is always a risk involved with modifying system software, so proceed with caution.
What do I do if my device gets stuck in a boot loop?
If your device is stuck in a boot loop, you can try booting into custom recovery and performing a factory reset. If that doesn’t work, you may need to re-flash the custom recovery or the stock firmware.
Can I flash custom recovery on any Android device?
While many devices support custom recovery, not all do. It’s essential to check the compatibility of your specific device model with the custom recovery you plan to use. The Android developer community often provides guides and resources tailored to specific devices.
How can I revert back to stock recovery?
To revert to stock recovery, you need to download the stock recovery image for your device and flash it using the fastboot method similar to how you flashed the custom recovery. This process usually involves command line inputs to ensure the correct image is restored.
What are the risks of flashing custom recovery?
Flashing custom recovery can lead to various risks, including bricking your device, voiding your warranty, or introducing software bugs. It’s vital to follow instructions carefully and ensure you are using the correct files for your specific device model.
Are there any prerequisites for flashing custom recovery?
Yes, before flashing, you should unlock your bootloader, have USB debugging enabled, and make sure your device’s battery is sufficiently charged. Being well-prepared can help mitigate risks during the flashing process.
Flashing custom recovery is a valuable skill for any Android enthusiast. It opens doors to a world of possibilities, from enhanced performance to complete customization. While the process may seem daunting at first, with the right preparation and understanding, you can successfully transform your Android experience. So why wait? Dive in and take control of your device today!
“`
Trending Now
Frequently Asked Questions
What is custom recovery in Android?
Custom recovery is an alternate recovery environment for Android devices that allows users to perform advanced tasks like installing third-party firmware, creating system backups, and wiping data partitions. Unlike stock recovery, custom recoveries like TWRP offer a user-friendly interface and enhanced functionalities.
Why should I flash a custom recovery?
Flashing a custom recovery gives you enhanced control over your device, allowing you to manage partitions and backups that stock recoveries do not permit. It also enables the installation of custom ROMs, which can improve performance and provide features not available in the stock firmware.
How do I safely flash a custom recovery?
To safely flash a custom recovery, you should ensure your device is fully charged, unlock the bootloader, and use reliable tools like ADB and Fastboot. Follow a trusted guide specific to your device model to avoid bricking your phone during the process.
What are the benefits of using a custom recovery?
The benefits of using a custom recovery include the ability to install custom ROMs, perform full system backups, and manage device partitions more effectively. This flexibility allows you to optimize your device's performance and access features that manufacturers may not provide.
Can I revert back to stock recovery after flashing custom recovery?
Yes, you can revert back to stock recovery after flashing a custom recovery. This typically involves using the same tools (like ADB and Fastboot) to flash the original recovery image provided by your device manufacturer, ensuring you return to the default settings.
Have you experienced this yourself? We’d love to hear your story in the comments.