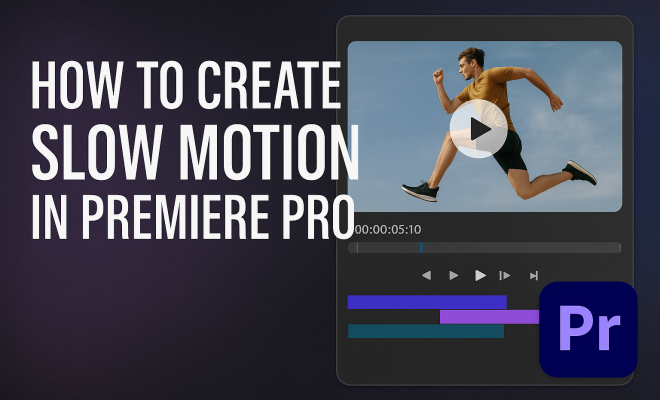
How to create slow motion in Premiere Pro
“`html
Creating slow-motion effects in your videos can add an incredible cinematic quality to your projects. Adobe Premiere Pro, as one of the industry’s leading video editing software, offers robust tools for achieving these stunning effects. Whether you’re looking to highlight a dramatic moment or create a dreamy, ethereal feel in your footage, understanding how to manipulate speed is essential. In this comprehensive guide, we’ll explore how to create slow motion in Premiere Pro, offering tips, techniques, and creative insights along the way.
1. Understanding Slow Motion: What It Is and Why Use It
Slow motion is a filmmaking technique that involves playing back footage at a slower speed than it was originally recorded. This effect allows viewers to witness intricate details that are often missed in real-time. For example, capturing a hummingbird in flight or a soccer player striking a ball can transform ordinary moments into mesmerizing visual stories.
In essence, slow motion enhances narrative impact. It helps to emphasize emotional moments, whether it’s a character’s reaction or an action-packed sequence. The strategic use of slow motion can evoke feelings of tension, nostalgia, or even comedy, depending on the context of your scene.
2. Preparing Your Footage: Frame Rates and Recording Tips
Before you even start editing, it’s crucial to understand the relationship between frame rates and slow motion. Most video is shot at a standard frame rate of 24, 30, or 60 frames per second (fps). To achieve a slow-motion effect, you generally want to record at a higher frame rate than your playback frame rate. For instance, filming at 120 fps or even 240 fps allows for a smoother slow-motion playback.
When shooting for slow motion, pay attention to your environment. Good lighting is essential, as higher frame rates can require more light. Additionally, consider camera stability; using a tripod or gimbal can help minimize shake, which is especially noticeable at slower speeds. You can also experiment with various shutter speeds — generally, a shutter speed that is double your frame rate (1/120 for 60 fps) will yield the best results.
3. Importing Footage into Premiere Pro: Getting Started
Once you have your footage, the next step is to import it into Premiere Pro. Open your project and navigate to the Media Browser. You can either drag and drop your clips from your file explorer or use the ‘Import’ option to select multiple files at once. Once imported, your clips will appear in the Project panel, ready for editing.
As a tip, organize your clips into bins for easier access. This is particularly useful if you’re working with a large amount of footage or multiple projects at once. Labeling your files clearly will save you time and reduce frustration later on. Consider creating folders for different scenes or moments to streamline your workflow.
4. Using Speed/Duration Settings: The Basics
To create slow motion in Premiere Pro, start by dragging your clip onto the timeline. Right-click on your clip and select ‘Speed/Duration’ from the dropdown menu. In the dialog box that appears, you can adjust the speed percentage. To slow down the footage, set a percentage lower than 100%. For example, setting it to 50% will make the footage play at half its normal speed.
Another useful feature in this menu is the option to maintain the audio pitch. If you’re using audio from your clip, ensuring that the pitch remains natural can enhance the overall viewing experience. Remember, altering the speed may also affect the duration of your clip on the timeline, so be prepared to adjust other elements accordingly. You might also consider splitting the audio from the video and working with each separately for finer control over the sound design. (See: Understanding slow motion techniques.)
5. Time Remapping: Advanced Techniques for Smooth Slow Motion
For more dynamic slow-motion effects, you can utilize Premiere Pro’s time remapping feature. This allows you to create speed changes within a single clip, transitioning between normal speed and slow motion. To access this, right-click on your clip and choose ‘Show Clip Keyframes,’ then ‘Time Remapping’ followed by ‘Speed.’
With this tool, you can add keyframes to define where the speed changes occur. Dragging the line up increases speed, while dragging it down slows it down. This technique offers a more fluid and creative approach to speed manipulation, giving you control over how and when the slow motion happens in your project. Experimenting with different keyframe placements can yield fascinating results, enabling you to synchronize the slow motion with specific beats in your audio for a more engaging experience.
6. Using Optical Flow: Enhancing Slow Motion Quality
When you slow down footage significantly, you may notice choppy or stuttery playback. This is where the Optical Flow feature comes into play. Optical Flow analyzes the motion in your footage and generates intermediate frames to create smoother slow motion.
To use Optical Flow, first, apply the slow-motion effect as you normally would. Then, in the Speed/Duration settings, change the ‘Time Interpolation’ option to ‘Optical Flow.’ This process can take some time, depending on your clip length and complexity, but the result is often well worth the wait. You’ll find that your slow motion appears much more fluid and natural, elevating the production quality of your video. Keep in mind that Optical Flow works best with footage that has consistent motion, so avoid using it on clips with abrupt movements.
7. Sound Design in Slow Motion: Keeping It Engaging
Sound plays an essential role in storytelling, even in slow-motion sequences. When you slow down video, the audio is also affected, which might lead to a distorted sound or awkward silences. To combat this, consider layering additional sound effects or music that complements the slow-motion visuals. Using ambient sound or sound design elements that match the mood can significantly enhance the impact of your footage.
Tools like the Essential Sound panel in Premiere Pro can help you enhance audio quality. You can adjust levels, apply effects, and even create immersive soundscapes that add depth to your slow-motion scenes. Remember, an effective sound design can elevate your slow-motion footage from good to extraordinary. Don’t shy away from using sound effects that may be exaggerated; they can help reinforce the emotional tone you’re aiming for in your project.
8. Exporting Your Slow Motion Project: Final Touches
Once you’re satisfied with your slow-motion edits, it’s time to export your project. Go to File > Export > Media. Here you can select your desired format and settings. For online sharing, H.264 is a popular choice because it offers a good balance between quality and file size.
Consider the resolution and frame rate of your export settings. If your original footage was shot at a high frame rate, exporting at the same rate can help retain the smooth slow-motion effect. Adjusting the bitrate settings will also help maintain video quality during compression. It’s also a good idea to create a few test exports at different settings to see what works best for your specific project and audience.
9. Creative Uses of Slow Motion: Inspiration for Your Projects
Slow motion can serve various creative purposes in your projects. From accentuating dramatic moments in a narrative film to enhancing the beauty of a dance routine or sports highlight, the applications are virtually limitless. Consider using slow motion to evoke a sense of nostalgia or to highlight the intricacies of a particular action.
Experiment with different contexts and genres. You could create a slow-motion montage of nature scenes, combining it with a soothing soundtrack for a meditative effect. Alternatively, slow motion can heighten the excitement of a fast-paced action sequence, making each moment feel more impactful. The key is to think creatively about how slow motion can enhance your storytelling. Consider using slow motion in unexpected places, like a conversation, to draw attention to subtle expressions or gestures that might otherwise go unnoticed. (See: The impact of slow motion in film.)
10. Common Challenges in Slow Motion Editing: Solutions and Tips
Working with slow motion in Adobe Premiere Pro can be rewarding, but it does come with its challenges. One common issue is achieving that smooth, cinematic quality. If you’re experiencing jerky playback, it might be due to insufficient frame rates at the time of recording. Always aim to shoot at higher frame rates when possible. Another challenge could be audio issues; when slowing down footage, the pitch can distort. Always consider adding background music or sound effects that can elevate the overall effect.
Additionally, editing in Premiere Pro can be resource-intensive, especially when using effects like Optical Flow. If you encounter performance issues, consider rendering the project or using proxies for smoother playback while editing. Keeping your software updated is also essential, as Adobe regularly releases patches to improve performance and add features. If you find the program running slowly, check your system specifications against Adobe’s recommendations to ensure optimal performance.
11. Integrating Slow Motion with Other Effects: Enhancing Your Footage
Combining slow motion with other effects can elevate your storytelling to new heights. For instance, consider pairing slow motion with color grading for a more dramatic effect. Bringing out the colors or giving your footage a specific tone can enhance the viewer’s emotional response. Another example is using slow motion alongside jump cuts or transitions to create a surreal or dreamlike quality.
Using slow motion in conjunction with motion graphics can also provide a unique twist. Imagine a title sequence that appears in slow motion as it enters the frame, providing a captivating introduction to your content. The possibilities are vast, and experimenting with various combinations can lead to innovative outcomes that highlight your creative vision. Pairing slow motion with fast-paced action or transitions can also create a striking contrast, drawing viewers’ attention and making key moments stand out.
12. Real-World Examples of Slow Motion Usage: Learning from the Pros
Many filmmakers and content creators have successfully utilized slow motion to enhance their projects. For instance, directors like Zack Snyder often employ slow motion in action scenes to heighten tension and drama. In his film “300,” the slow-motion sequences effectively emphasize the brutality of battle, drawing the audience deeper into the story.
Another great example is the famous “bullet time” effect used in “The Matrix.” This technique blends slow motion with dynamic camera movements, allowing viewers to experience action from multiple angles simultaneously. Learning from these examples can inspire you to use slow motion creatively, adding layers of storytelling to your own projects. Music videos, such as those by artists like Sia, often leverage slow motion to evoke emotion and create visually stunning imagery, showcasing the versatility of this technique across different genres.
13. Frequently Asked Questions about Slow Motion in Premiere Pro
What frame rate should I use to shoot for slow motion?
To achieve quality slow motion, recording at a higher frame rate is essential. A common choice is 120 fps or higher, depending on your camera’s capabilities. If your goal is to create extremely smooth slow-motion sequences, consider even higher frame rates, like 240 fps or 480 fps.
Can I use slow motion on footage that was not shot in high frame rates?
Yes, you can apply slow motion effects to any footage, but the results may vary. Footage shot at standard frame rates (like 30 fps) will not appear as smooth when slowed down compared to footage shot at higher frame rates. You can still use Optical Flow to improve the look, but the results won’t be as polished as originally intended. It’s often better to use slower speeds for less dynamic content to avoid noticeable artifacts. (See: Scientific analysis of slow motion effects.)
How does Optical Flow work?
Optical Flow analyzes the movement between frames and generates new frames to fill in the gaps when slowing down footage. This process helps create a smoother playback experience, especially in scenes with fast motion. It can take some time to process, so be patient for the best results. Be aware that it requires significant processing power, so make sure your system can handle it without crashing.
Are there any shortcuts for applying slow motion effects in Premiere Pro?
Yes! You can quickly apply a slow-motion effect by holding the ‘Alt’ key while dragging the edge of a clip in the timeline, which allows you to stretch it out. This method will apply a default slow-motion effect based on your original playback speed. Additionally, using keyboard shortcuts to navigate menus can speed up your workflow significantly.
What are some tips for sound design in slow-motion footage?
When working with slow motion, consider using sound effects that complement the visuals. Layering ambient sounds or a soft music bed can create a more immersive experience. Adjusting the pitch of audio tracks can also help them blend better with the slow-motion visuals, ensuring they don’t feel disjointed. Using stereo or surround sound can also add richness and depth to your project, enhancing the overall viewing experience.
How can I create a slow-motion effect on a live performance?
For live performances, capturing footage at a higher frame rate is ideal. If you have that flexibility, record at 120 fps or higher. If you don’t, use the Optical Flow feature to enhance regular footage. Furthermore, consider the relationship between audio and visuals; adding a dynamic soundtrack can help mask any audio distortions from the slow-motion effect.
What are common mistakes to avoid when editing slow motion?
One common mistake is not planning for slow motion during the shooting process. It’s crucial to consider lighting, frame rates, and motion when capturing footage. Additionally, overusing slow motion can detract from its impact; use this technique judiciously to maintain its effectiveness. Lastly, always preview your edits before finalizing to catch any unwanted artifacts or issues.
In summary, mastering slow motion in Premiere Pro opens up a world of creative possibilities. With the right techniques and tools, you can transform ordinary footage into extraordinary visual narratives. So grab your camera, experiment with different frame rates, and start playing with speed – the cinematic world awaits!
“`
Trending Now
Frequently Asked Questions
How do you create slow motion in Premiere Pro?
To create slow motion in Premiere Pro, first import your footage, then right-click on the clip in the timeline. Select 'Speed/Duration', and adjust the speed percentage to a lower value, such as 50% or 25%. You can also use the 'Time Remapping' feature for more control over speed variations.
What frame rate is best for slow motion?
For optimal slow-motion effects, it's best to record at a high frame rate, typically 120 fps or 240 fps. This allows for smoother playback when you slow down the footage in Premiere Pro, making the details more vivid and impactful.
Why is lighting important for slow motion video?
Good lighting is crucial for slow motion video because higher frame rates require more light to maintain image quality. Poor lighting can result in grainy footage, so ensure your scene is well-lit when shooting for slow-motion effects.
Can you adjust slow motion speed after editing?
Yes, you can adjust the slow motion speed even after editing in Premiere Pro. Simply select the clip, right-click, and choose 'Speed/Duration' to modify the speed settings, allowing for flexibility in your final edit.
What techniques can enhance slow motion effects?
Enhancing slow motion effects can be achieved through techniques such as adding sound effects that match the slow motion visuals, using color grading for mood, and incorporating dynamic camera angles. These elements can elevate the emotional impact of your slow-motion scenes.
What did we miss? Let us know in the comments and join the conversation.