How to sharpen images in Lightroom
“`html
1. Understanding Image Sharpening Basics
Before diving into the nitty-gritty of sharpening images in Lightroom, it’s essential to grasp the fundamentals of what sharpening actually means. At its core, image sharpening enhances the contrast along the edges of your photos, making them appear crisper and more defined. This process can significantly improve your final output, especially for images intended for print or online display.
There are various methods to sharpen images, but in Lightroom, the approach is particularly user-friendly. Here, you can manipulate sliders and settings that offer a visual representation of changes, allowing you to see the effects in real time. Understanding how sharpening works will help you make informed decisions about how to enhance your images effectively.
2. The Importance of Context in Sharpening
When learning to sharpen images in Lightroom, it’s vital to consider the context of the photo. Not every image requires the same level of sharpening; factors like the type of subject, photo resolution, and even the final output medium play significant roles. For instance, an image intended for web use will often require less sharpening than one meant for printing, where higher resolution can showcase more detail.
Moreover, different subjects may need distinct sharpening approaches. A landscape might benefit from global sharpening, affecting the entire photo, while a portrait may require selective sharpening, focusing on the eyes and other crucial details. Keeping these factors in mind will lead to better results tailored to your specific photography goals.
3. Using the Develop Module
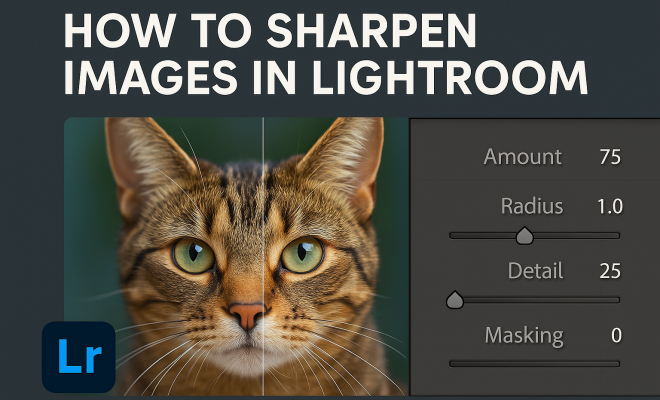
To sharpen images in Lightroom, you’ll primarily work within the Develop module. Here’s how to get started: first, import your images into Lightroom and select the photograph you want to sharpen. Once in the Develop module, navigate to the Panel on the right. You’ll find the Detail section, which contains the sharpening tools.
The primary tool for sharpening is the Amount slider, which controls the degree of sharpening applied. However, it’s essential to couple this with the Radius and Detail sliders for optimal results. The Radius determines how wide the area around an edge will be affected by the sharpening, while the Detail slider controls how much small detail is preserved. Start with moderate adjustments and fine-tune these settings until you achieve a balance that suits your image’s needs.
4. Mastering the Detail Panel
The Detail panel in Lightroom is your sharpening command center. Beyond the primary Amount slider, you’ll encounter several other controls that can help refine your sharpening process. The Masking slider is one of the most powerful tools here; it allows you to restrict sharpening to the edges of your image, reducing the impact on smoother areas like skies and skin tones.
To effectively use the Masking slider, hold down the Alt key (Option key on Mac) while dragging the slider. This will display a black and white mask, showing which areas will be sharpened. White areas will receive full sharpening, while black areas will remain untouched. This technique can significantly enhance the quality of your images and prevent unsightly halo effects.
5. Selective Sharpening Techniques
Selective sharpening is a game-changer when it comes to refining your images. Instead of applying a blanket sharpening effect across the entire photo, you can target specific areas for enhancement. This is particularly useful in portraits, where you might want to sharpen the eyes while leaving the skin soft and natural.
One effective way to achieve selective sharpening in Lightroom is by using adjustment brushes or radial filters. With the adjustment brush, you can paint over areas you want to sharpen while keeping other parts of the image untouched. This technique not only boosts detail where needed but also maintains a pleasing overall aesthetic. (See: Image sharpening basics on Wikipedia.)
6. Avoiding Common Sharpening Pitfalls
While sharpening is a powerful tool, it’s crucial to avoid common pitfalls that can lead to over-processed images. One of the most frequent mistakes is over-sharpening, which can create unwanted artifacts like halo effects around edges and an unnatural look. Always zoom into 100% to check your sharpening results on screen and evaluate if the enhancements look natural.
Another common issue is sharpening images that are already too soft due to camera shake or poor focus. Instead of applying more sharpening, consider re-evaluating the original capture. In some cases, a photo may benefit more from a different editing approach, such as cropping to eliminate distracting elements rather than forcing sharpness where it’s not warranted.
7. Exporting Sharpened Images
Once you’ve finished sharpening images in Lightroom, it’s time to export your final product. The export settings are crucial, as they dictate how your image looks once it leaves Lightroom. When exporting, pay close attention to the output sharpening options available in the export dialog box.
Lightroom provides options for various output types, including screen or print. For screen displays, select ‘Standard’ sharpening, which is usually adequate for most web use. If you’re preparing an image for print, you might want to opt for ‘Low’ or ‘High’ sharpening based on the print’s size and quality. Remember, the goal is to maintain the sharpness you’ve worked hard to achieve while ensuring it translates well across different mediums.
8. Continuous Learning and Experimentation
Sharpening images in Lightroom is not just a one-time process; it’s a skill that improves with practice and experimentation. Don’t hesitate to try different settings, and consider using Lightroom’s virtual copies to create variations of the same image. This will allow you to experiment with different sharpening techniques without committing to a single approach.
Additionally, seeking feedback from fellow photographers or online communities can provide insights into your work and help you refine your sharpening techniques further. Engaging with others will not only enhance your skills but also enrich your understanding of various photographic styles and preferences.
9. Advanced Techniques for Sharpening
As you become more comfortable with the basics of sharpening images in Lightroom, you might want to explore more advanced techniques. One such method is utilizing the ‘Dehaze’ slider found in the Basic panel. While its primary function is to reduce haze in photos, it can also enhance contrast and perceived sharpness, especially in landscape photography.
Another advanced technique is to use the ‘Clarity’ slider. Clarity enhances midtone contrast, which can give the appearance of sharper details without overly emphasizing edges. This is particularly useful in certain types of images like architectural photos or macro shots where you want to emphasize textures without making the image look harsh. Experimenting with a combination of Clarity and Sharpening can yield stunning results.
10. Real-World Examples: Before and After
To illustrate the impact of sharpening images in Lightroom, let’s consider a couple of real-world examples. A common scenario is a landscape photo taken during golden hour. Without proper sharpening, the details in the foliage may appear soft and lackluster. After applying selective sharpening to the trees and enhancing the details in the clouds, the image can transform, bringing out the vibrancy in the colors and the sharpness of the landscape.
Similarly, portrait photography often benefits from careful sharpening. A photo of a model with soft lighting might look beautiful but lack detail in the eyes and hair. By applying selective sharpening to these areas, you can bring focus to the subject’s gaze and textures in their hair without compromising the softness of their skin. The result is a polished image that retains a natural look.
11. Statistics on Image Processing Preferences
Understanding how photographers approach sharpening in Lightroom can be enlightening. A survey conducted among professional photographers revealed that over 65% rely on Lightroom for post-processing, with sharpening being one of the top three adjustments they make. Furthermore, 78% of these photographers indicated that they prefer selective sharpening over global sharpening techniques, emphasizing the importance of tailored editing approaches. (See: Scientific study on image processing.)
In terms of output, 45% stated they predominantly edit images for web use, where sharpening needs differ significantly from prints. Interestingly, 30% mentioned they always zoom into 100% to review their sharpening effects, indicating that attention to detail is a priority for many in the field.
12. Frequently Asked Questions (FAQ)
What’s the difference between sharpening for print and screen?
Sharpening for print generally requires more attention to detail and often a higher amount, as prints can reveal more soft edges compared to screens. When sharpening for the web, less aggressive settings are usually preferable to avoid artifacts.
Can I sharpen an image that is out of focus?
While you can apply sharpening to an out-of-focus image, it won’t correct the underlying issue of softness. Instead, it’s better to focus on getting sharp images during the capture phase, but if you must sharpen, use it minimally.
How can I avoid halo effects when sharpening?
To minimize halo effects, use the Masking slider in the Detail panel. Masking allows you to limit sharpening to edges, which helps maintain cleaner backgrounds and smoother areas in your image.
Is there a ‘one-size-fits-all’ sharpening setting?
Unfortunately, there isn’t a universal setting that works for all images. Each photograph has its unique characteristics that require different sharpening adjustments based on context, subject matter, and intended use.
How do I know when I’ve sharpened enough?
A good rule of thumb is to zoom in to 100% and evaluate the details. If the edges look crisp without obvious artifacts or halos, you’re likely in a good spot. If it looks unnatural, dial it back a bit.
13. Advanced Tools and Features in Lightroom
Lightroom is packed with features beyond just basic sharpening tools that can aid in enhancing image quality. One such feature is the use of Lightroom Presets. These presets can be a great starting point, providing a base level of sharpening that you can modify. You can create your own presets based on your preferred sharpening settings, making it quicker to apply to multiple images.
Another powerful tool is the Lens Correction panel. Often, lens distortion can soften images slightly, and correcting this distortion can enhance sharpness and overall detail. Enabling the profile correction for your specific lens helps in counteracting any softness caused by optical factors.
Don’t overlook the power of color grading and contrast adjustments. Adjusting these elements can add perceived sharpness to your images. Sometimes, enhancing the contrast in shadows and highlights can create a more impactful image that feels sharper and more dynamic.
14. Sharpening for Different Genres of Photography
Different photography genres require different sharpening techniques. For instance, in macro photography, where you’re often shooting close-ups of small subjects, fine-tuning the sharpening settings is crucial. You might want to increase the Detail slider to preserve tiny textures while being careful about the Amount to prevent an overly harsh look. (See: Topics on image sharpening in ScienceDirect.)
On the other hand, for sports and action photography, where capturing movement is key, a higher Amount and Radius can help enhance the dynamic edges of subjects in motion. Here, it’s essential to balance the sharpening so that it emphasizes action without creating distracting artifacts.
Architectural photography often benefits from a more subtle sharpening approach. The goal is to maintain the clean lines and details of structures without making them appear overly processed. In this case, starting with lower settings and gradually building up until you find the right balance can yield excellent results.
15. The Role of Monitor Calibration in Image Sharpening
When sharpening images in Lightroom, it’s often overlooked how crucial monitor calibration is to the process. If your monitor is not calibrated properly, the colors and sharpness you see might not reflect the true image output. Invest in a calibration tool to ensure the colors and brightness levels on your screen are accurate. This helps you judge the effects of sharpening more accurately, leading to better final images.
Regularly calibrating your monitor should become part of your workflow. This not only benefits the sharpening process but also enhances overall editing accuracy. Remember, what looks sharp on a poorly calibrated monitor might appear dramatically different on a well-calibrated screen or printed out.
16. Real-Time Feedback: Using the Before/After View
One of the beneficial features of Lightroom is the before/after view, which allows you to see the impact of your adjustments in real time. You can toggle this by pressing the backslash key (\) on your keyboard. This feature is especially useful when sharpening images, as it enables you to compare the original image with the sharpened version side by side.
Using this feature can act as a reality check. You might think you’ve gone too far in your adjustments, and this view can help you dial back if necessary. It’s an excellent way to ensure that the sharpness enhances your image without making it look artificial.
17. Final Thoughts on Sharpening Images in Lightroom
Sharpening images in Lightroom is more than a simple adjustment; it’s an art that requires understanding, experimentation, and a keen eye for detail. By mastering the tools available, recognizing the nuances of each image, and applying selective techniques, you can elevate your photography to new heights. Remember, the goal is not just to make images look sharp, but to maintain their integrity and artistic quality. As you continue on this journey, embrace the learning process, and don’t hesitate to push your creative boundaries.
“`
Trending Now
Frequently Asked Questions
What is the best way to sharpen images in Lightroom?
The best way to sharpen images in Lightroom is by using the Develop module. Here, you can adjust the sliders in the Detail section to enhance the contrast along the edges of your photos, making them appear crisper and more defined.
How do I know how much sharpening to apply in Lightroom?
The amount of sharpening to apply in Lightroom depends on the context of your photo, including its resolution and intended output. Images for print may need more sharpening compared to those for web use, and different subjects may require distinct approaches.
What is image sharpening and why is it important?
Image sharpening enhances the contrast along the edges of your photos, making them look crisper and more defined. This is important for improving the overall quality of your images, especially for prints or online displays, ensuring they stand out.
Can I sharpen specific areas of an image in Lightroom?
Yes, in Lightroom, you can apply selective sharpening by using tools like the Adjustment Brush or the Radial Filter. This allows you to focus on important details, such as eyes in a portrait, while leaving other areas less sharpened.
What settings should I use for sharpening in Lightroom?
In Lightroom, start with the Amount slider to control the strength of sharpening. The Radius slider adjusts how much area around edges is affected. Use the Detail slider to emphasize fine details and Masking to protect smoother areas from over-sharpening.
What did we miss? Let us know in the comments and join the conversation.