How to create montage in Premiere Pro
“`html
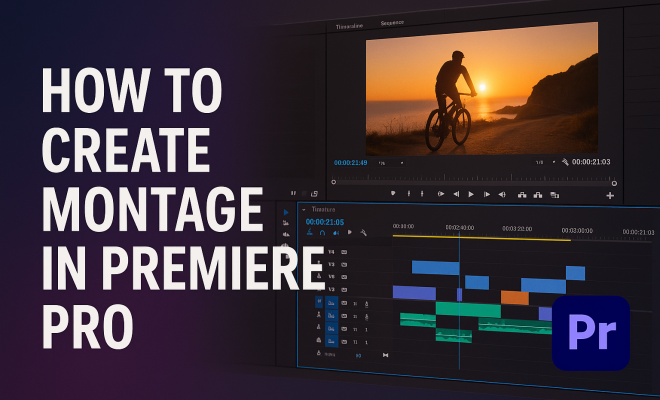
Creating a montage in Premiere Pro can be an exhilarating experience for any video editor, whether you’re a beginner or a seasoned pro. Montages allow you to convey emotions, tell stories, and connect with audiences through a series of expertly edited clips. In this article, we’ll cover everything you need to know about creating a montage in Premiere Pro, including key techniques, tips, and tricks to ensure your final product stands out.
1. Understanding the Essence of a Montage
Before diving into the technicalities of video editing, it’s essential to understand what a montage is and its impact on storytelling. A montage is a compilation of various shots that, when edited together, convey a narrative or message quickly. Think of it as a visual collage, often accompanied by music or sound effects that enhance the emotional resonance of the clips.
In films and videos, montages can serve several purposes: they can summarize time passing, show character development, or highlight key moments in a compelling way. Famous examples include the training montages in sports films or the rapid sequences that depict life changes in dramatic narratives. Understanding the narrative function of a montage will inform your editing choices and how you create your montage in Premiere Pro.
2. Gathering Your Footage
The first step to create a montage in Premiere Pro is gathering all the footage you’ll utilize. Depending on the nature of your project, you might pull clips from various sources, such as personal videos, stock footage, or even still images. Consider the story you want to tell and how each clip contributes to that narrative.
When selecting footage, focus on variety; aim for different angles, lengths, and types of shots. For instance, if you’re creating a montage that celebrates a wedding, include clips of the ceremony, candid moments, and picturesque views of the venue. This variety will create a more dynamic viewing experience. Additionally, consider the pacing of your clips — a mix of fast-paced action shots and slower emotional moments can create a more engaging montage.
3. Setting Up Your Premiere Pro Project
Once you have your footage ready, it’s time to set up your project in Premiere Pro. Open the application and create a new project by selecting ‘New Project’ from the start screen. Name your project appropriately and choose a destination folder where all your files will be stored. This will help you keep everything organized as you create your montage in Premiere Pro.
Next, import your footage by navigating to the ‘Media Browser’ or by using the ‘Import’ option found under the ‘File’ menu. You can also drag and drop files directly into the ‘Project’ panel. After importing, organize your clips into bins based on themes or sequences you envision for your montage. An organized workspace will save you time and help streamline the editing process.
4. Creating Your Sequence
The next step is to create a new sequence where you will assemble your montage. Right-click in the ‘Project’ panel and select ‘New Item’ followed by ‘Sequence.’ Choose a preset that matches your footage’s resolution and frame rate for optimal playback quality.
With your sequence set up, it’s time to start dragging your clips from the project panel onto the timeline. Arrange them in a way that tells your story effectively. Don’t hesitate to experiment with the order of clips, play with timing, and see what works best. This is where your creativity shines. You might find that rearranging clips multiple times helps find the best flow for your montage.
5. Editing for Rhythm and Pacing
Editing a montage is all about rhythm and pacing. As you create your montage in Premiere Pro, pay attention to how the clips flow into one another. Try to match the rhythm of your cuts with the music or sound design you plan to use, as this enhances the emotional impact of your montage. (See: Understanding montage in filmmaking.)
A good rule of thumb is to cut on beats or significant moments in your soundtrack; this can help create a sense of cohesion. Use Premiere Pro’s ‘Razor Tool’ to slice clips at desired points. Additionally, don’t shy away from using transitions sparingly to bridge scenes. Simple fades or wipes can enhance the flow without distracting from the content.
6. Incorporating Sound and Music
Sound plays a crucial role in elevating a montage. As you create your montage in Premiere Pro, think carefully about your audio choices. Select a soundtrack that complements the visuals and reinforces your narrative. Whether you’re using licensed music or royalty-free tracks, ensure it matches the tone and mood you’re aiming for.
Once you’ve selected your music, import it just like your video clips. Drag it onto the timeline and adjust its length to fit your montage. Consider adding sound effects for added depth. For example, if you’re showcasing a sports highlight reel, using crowd cheers or sound effects from the sport can heighten excitement. Adjust audio levels using the ‘Audio Mixer’ to ensure everything is balanced and cohesive.
7. Final Touches: Color Grading and Exporting
The last steps to creating a montage in Premiere Pro involve final tweaks that can significantly enhance your project. Color grading is essential for maintaining consistency across different clips and adding flair. Use the ‘Lumetri Color’ panel to adjust exposure, contrast, and color balance. You can apply color effects to individual clips or create a preset to apply across your entire project.
Once you’re satisfied with your montage, it’s time to export. Go to ‘File’ > ‘Export’ > ‘Media’. Choose the desired format and codec that best fits your distribution method, whether it’s for social media, a film festival, or personal use. Be sure to preview the export settings to ensure quality, then hit ‘Export’ and let Premiere Pro do the rest. Congratulations! You’ve successfully created a stunning montage that can captivate viewers with its visual storytelling.
8. Advanced Techniques for Creating a Montage
To truly stand out with your montage, consider exploring some advanced techniques that can add a professional touch. One such technique is the use of motion graphics. Incorporating text overlays, lower thirds, or animated logos can enhance the storytelling aspect of your montage. Premiere Pro has built-in tools like the Essential Graphics panel that make adding these elements easy.
Another technique is to use speed ramping, which involves changing the speed of a clip within a montage. This can create dramatic effects and emphasize key moments. For instance, slowing down a pivotal scene and then speeding up a reaction shot can heighten emotional impact. You can achieve speed ramping by right-clicking a clip in the timeline, selecting ‘Speed/Duration’, and adjusting the parameters.
For a more cinematic feel, consider utilizing layering techniques. This involves overlapping clips with varying opacities. Layering can add depth to your montage and create a more immersive experience for viewers. It’s particularly effective in sequences that show time passing or juxtapose contrasting scenes.
9. Utilizing Effects Wisely
While it’s tempting to use many effects available in Premiere Pro, it’s important to use them judiciously. An overly flashy montage can distract viewers from the story you want to tell. Subtle effects like cross dissolves or film grain can enhance your montage without overwhelming it. Experiment with the ‘Effects’ panel to find suitable effects that enhance the narrative instead of detracting from it.
Another useful effect is ‘Color Effects’, which can help establish a mood or tone throughout your montage. For instance, you might choose a warm color palette for an emotional story or a cooler palette for more dramatic content. The key is to maintain consistency throughout your montage, so viewers can easily follow along without being taken out of the experience by jarring transitions or effects. storytelling apps you’ll love offers useful background here.
10. Gathering Feedback and Iteration
After completing your initial montage, it can be incredibly beneficial to gather feedback from others. Share your work with friends, colleagues, or fellow editors and ask for their honest opinions. Fresh eyes can offer valuable insights that you might have overlooked. Look for comments on pacing, emotional impact, and clarity of your narrative.
Once you’ve collected feedback, be open to making revisions. Editing is often a cyclical process, and incorporating constructive criticism can elevate your final product. Don’t hesitate to iterate on your montage multiple times to refine it into a polished piece that resonates with your audience. (See: Harvard University resources on storytelling.)
11. Comparing Different Montage Styles
Montages can take various forms, and understanding different styles can help you decide which approach is best for your project. For example, a narrative montage tells a story through a sequence of events, often showing progression over time. This style is prevalent in documentaries and biopics, where viewers witness a character’s journey from one point to another.
On the other hand, an emotional montage focuses primarily on evoking feelings rather than telling a complete story. These montages often use a series of quick cuts to deliver powerful imagery, paired with evocative music. Think about the emotional montages in movies like “The Pursuit of Happyness,” where a series of clips show struggle, hope, and perseverance.
Finally, there’s the artistic montage, where the emphasis is on aesthetics over narrative. These montages are often found in music videos or experimental films, where visuals and rhythm take precedence. Understanding the differences between these styles can help you choose the right direction for your montage.
12. Common Mistakes to Avoid
As you create your montage in Premiere Pro, being aware of common pitfalls can save you time and frustration. One major mistake is not having a clear narrative or theme. Without a guiding purpose, your montage can feel disorganized and confusing. Always start with a clear idea of what you want to convey.
Another issue is overlooking audio quality. Poor sound can derail even the most visually stunning montage. Ensure your audio is clear and synced correctly with your visuals. Using a good microphone during recording, and ensuring sound effects and music levels are balanced will enhance the overall quality of your montage.
Lastly, be cautious with transitions. While they can enhance a montage, using too many different types can confuse viewers. Stick to a few that fit the style of your project, and use them consistently throughout.
13. Frequently Asked Questions (FAQ)
Q1: What type of music should I use for my montage?
A1: The music choice should align with the emotions you want to evoke. Consider using upbeat tracks for celebratory montages and slower, more poignant music for emotional narratives. Always ensure that you have the rights to use the music you choose.
Q2: Can I use stock footage in my montage?
A2: Yes, stock footage can be a great addition to your montage, especially if you’re looking to fill gaps or add variety. Ensure that the stock footage matches the style and theme of your original clips to maintain cohesion.
Q3: How long should a montage be?
A3: The ideal length of a montage depends on its purpose. Generally, montages range from 30 seconds to a few minutes. Keep it concise; ensure it maintains viewer engagement without dragging on.
Q4: How can I ensure my montage feels cohesive?
A4: To maintain cohesion, focus on color grading, audio consistency, and a unified narrative throughout. All clips should contribute to the overall story or theme. Using similar transitions and effects can also help create a seamless flow. (See: New York Times articles on film editing.)
Q5: Is it necessary to have a storyboard before starting my montage?
A5: While it’s not mandatory, having a storyboard can significantly streamline the editing process. It allows you to visualize the sequence of clips, making it easier to maintain a clear narrative and pacing.
14. Exploring Montage Inspirations
Taking inspiration from well-crafted montages can provide you with ideas and techniques to implement in your projects. Some renowned montages stand out due to their innovative styles and powerful emotional impact. For instance, the opening sequence of “Up” is a poignant montage that tells a character’s life story in just a few minutes, capturing love, loss, and hope without uttering a single word. This beautifully demonstrates that concise storytelling can resonate deeply with viewers.
Another great example is the “Rocky” training montage, which uses quick cuts and upbeat music to convey determination and growth. This type of montage effectively shows progress and builds anticipation for the outcome of the character’s journey. Analyzing these examples can help you understand how pacing, music, and visuals work together to create a memorable montage.
15. Understanding the Psychology of a Montage
Montages are not just about visuals; they tap into the psychology of storytelling. They engage viewers’ emotions and can influence how we perceive time and character development. The use of quick cuts can create a sense of urgency, while slower transitions can evoke nostalgia or contemplation. By understanding the psychological impact of different editing techniques, you can create montages that resonate more profoundly with your audience.
For example, studies have shown that viewers can experience a heightened emotional response when music and visuals align. This concept means that choosing the right soundtrack is crucial. A montage with a sad theme paired with an upbeat song may confuse viewers, while synchronizing cuts to the rhythm of a slow ballad can amplify feelings of melancholy.
16. Tips for Collaborating on Montage Projects
If you’re working as part of a team, collaboration can elevate your montage to new heights. Here are a few tips for a successful collaborative effort:
- Establish Clear Roles: Make sure everyone understands their responsibilities, whether it’s editing, sound design, or project management. This clarity can prevent overlap and confusion.
- Regular Check-ins: Schedule meetings to discuss progress, share feedback, and ensure everyone is aligned on the project vision. This will help keep the momentum and make adjustments as needed.
- Share Resources: If you have access to shared cloud storage, use it to upload footage, music, and any other assets. This makes it easier for team members to access what they need without losing time searching for files.
- Be Open to Ideas: Encourage all team members to contribute suggestions and ideas. Creative collaboration often leads to unexpected and exciting results.
17. Final Thoughts on Creating a Montage in Premiere Pro
Creating a montage in Premiere Pro is not just an editing task; it’s about weaving together emotions and narratives through visuals and sound. Embrace your creativity and don’t hesitate to experiment with different styles and techniques. Remember that every decision you make should serve your narrative purpose, whether that’s through the choice of clips, the rhythm of your cuts, or the sounds accompanying your visuals. With practice, you’ll find your unique voice in this compelling form of storytelling.
“`
Trending Now
Frequently Asked Questions
What is a montage in video editing?
A montage in video editing is a compilation of various shots edited together to convey a narrative or message quickly. It acts as a visual collage, often enhanced by music or sound effects to evoke emotions and tell a story. Montages are commonly used to summarize time, show character development, or highlight key moments.
How do I gather footage for a montage?
To gather footage for a montage, start by collecting clips from various sources such as personal videos, stock footage, or still images. Consider the story you want to tell and select a variety of angles, lengths, and types of shots that contribute to the narrative, ensuring a dynamic viewing experience.
What techniques can I use to create a montage in Premiere Pro?
When creating a montage in Premiere Pro, use techniques such as cutting clips to the beat of the music, varying shot lengths for pacing, and adding transitions for smooth flow. Additionally, consider color grading and sound design to enhance the emotional impact of your montage.
How can music enhance my montage?
Music enhances a montage by setting the tone and evoking emotions that complement the visuals. Choosing the right soundtrack can create a more immersive experience, helping to connect the audience with the narrative. Syncing your clips to the rhythm can further elevate the emotional impact.
What are some common uses of montages in films?
Montages are commonly used in films to summarize time passing, depict character development, or highlight significant moments. They are often seen in training sequences in sports films or rapid transitions that illustrate life changes, allowing filmmakers to convey complex narratives efficiently.
What did we miss? Let us know in the comments and join the conversation.