How to clone SSD to larger SSD
“`html
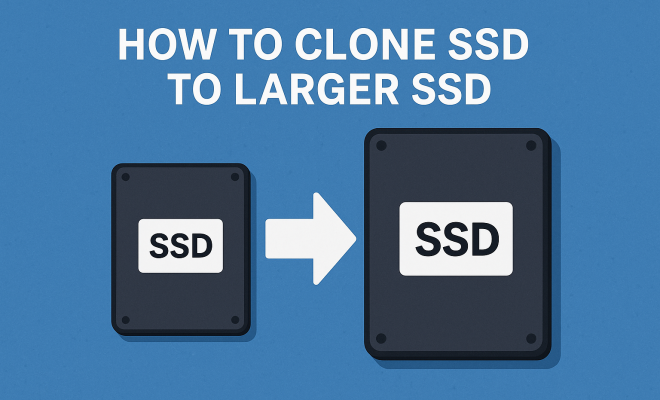
Upgrading your storage can feel like a daunting task, especially when it comes to transferring your data from an old SSD to a larger one. If you’re looking to clone SSD to larger SSD, you’re in the right place. This guide will walk you through everything you need to know about the cloning process, the tools required, and tips to ensure a smooth transition. Let’s get started.
1. Understanding SSD Cloning
Before we delve into the nitty-gritty, it’s essential to grasp what SSD cloning entails. In simple terms, SSD cloning is the process of creating an exact replica of your current SSD onto a new one. This means not just transferring files but duplicating the entire drive, including the operating system, applications, and settings.
Why clone your SSD? Upgrading to a larger SSD allows for more storage capacity, which is particularly beneficial for users who run large applications or store vast amounts of data, such as video files or high-resolution graphics. By cloning your drive, you can avoid the time-consuming process of reinstalling the OS and applications while ensuring that all your settings and files remain intact.
2. Preparation Steps Before Cloning
Preparation is key to a successful SSD cloning process. First, make sure you have all necessary tools on hand. You’ll need:
- A new SSD that is larger than your current one.
- A computer with an available SATA connection or an external USB enclosure for your new SSD.
- Cloning software (many options are available, both free and paid).
- A backup of your important data in case something goes awry during the cloning process.
Next, ensure that your current SSD is performing optimally. Run a disk check to fix any potential issues, as these can complicate the cloning process. Once you’ve verified that your old SSD is in good condition, you’re ready to proceed.
3. Choosing the Right Cloning Software
The next step is selecting a cloning software that suits your needs. There are several options available, ranging from basic to advanced features. Some popular choices include:
- Macrium Reflect: A powerful tool that offers a free version for personal use, making it suitable for most users.
- Clonezilla: An open-source option that’s great for advanced users but may have a steeper learning curve.
- Acronis True Image: This paid software provides a user-friendly interface and additional features like backup and recovery.
- EaseUS Todo Backup: Known for its simplicity and effectiveness, this tool is perfect for those who want a straightforward cloning experience.
When choosing your software, consider the user interface, speed, and additional features like scheduling backups or cloud storage integration. Most importantly, check if your selected software supports the type of SSD and operating system you’re using.
4. Connecting the New SSD
Once you’ve chosen your cloning software, it’s time to connect your new SSD. If your computer has a free SATA port, you can install the SSD internally, which might involve opening your computer case. Alternatively, if you’d prefer not to open your device, an external USB-to-SATA adapter allows you to connect your SSD externally.
After physically connecting the SSD, ensure your operating system recognizes the new drive. On Windows, you can verify this through Disk Management. If the SSD doesn’t show up, you might need to initialize it. Right-click on the new drive and select ‘Initialize Disk’ to prepare it for use.
5. Cloning the SSD
With everything in place, it’s time to start the cloning process. Open your cloning software and follow its instructions. Generally, the process involves: (See: Understanding solid-state drives.)
- Selecting your source SSD (the old one you want to clone).
- Selecting your destination SSD (the new, larger one).
- Choosing the cloning method (sector-by-sector cloning is often available, but you can also opt for a file-based transfer if you want to exclude unnecessary files).
- Initiating the cloning process and patiently waiting for it to complete.
Keep in mind that the time required for cloning varies based on the amount of data and the speed of the drives involved. Once the process is complete, you may need to verify that all your files and applications have successfully transferred.
6. Configuring the New SSD
After cloning, your new SSD may require some configuration. If your system was originally booting from the old SSD, you’ll likely want to set the new SSD as the primary boot device. Enter your system’s BIOS or UEFI settings upon startup, which usually involves pressing a key like F2 or Delete. From there, you can change the boot order to prioritize the new SSD.
Once your system boots from the new SSD, check that everything functions correctly. All your applications, files, and settings should be intact. If everything looks good, you can also consider formatting the old SSD and using it for additional storage or as a backup drive.
7. Troubleshooting Common Issues
Even with the best preparation, issues can arise during the cloning process. Here are some common problems and how to address them:
- Drive Not Recognized: If your new SSD doesn’t show up, double-check the connections and ensure it’s properly initialized in Disk Management.
- Cloning Fails: If the cloning process fails, check for errors on your old SSD. Running a disk check can help resolve any underlying issues.
- Boot Issues: If your system doesn’t boot from the new SSD, revisit the BIOS settings to confirm that the new SSD is set as the boot device.
- Space Allocation: After cloning, you may notice that the new SSD doesn’t utilize all its space. Use disk management tools to extend the partition and make full use of your new drive.
Don’t forget that online forums and technical support from your cloning software can be valuable resources if you encounter any unexpected issues.
8. Post-Cloning Recommendations
Once you’ve successfully cloned your SSD to a larger SSD, consider a few best practices moving forward. First, ensure you regularly back up your data. Having a reliable backup system in place can save you from potential data loss in the future.
Furthermore, keep your SSD clean by uninstalling applications you no longer use and deleting unnecessary files to maintain optimal performance. Tools like CCleaner can help streamline this process. Regularly updating your operating system and drivers is also crucial in keeping your system secure and performing well.
9. Understanding When to Upgrade
Determining the right time to clone SSD to larger SSD can be subjective, but certain signs indicate it’s time to consider an upgrade. If your current SSD is constantly running low on space, or if you experience slow load times for applications and files, these are clear indicators of needing more storage capacity.
Additionally, if you find yourself frequently uninstalling programs or moving files to external storage to create space, it might be time to invest in a larger SSD. Upgrading can enhance your overall computing experience, allowing you to manage larger files and run more applications simultaneously without sacrificing performance.
10. Benefits of Using a Larger SSD
Upgrading to a larger SSD not only increases your storage but also brings several advantages that enhance user experience. One of the key benefits is improved performance. Larger SSDs often employ more NAND flash memory chips, resulting in faster read and write speeds. This means quicker boot times, faster application loading, and overall more responsive system performance.
In addition, with a larger SSD, you can install more applications and store larger files without the constant worry of running out of space. This is particularly beneficial for gamers, graphic designers, and video editors who require ample space for their work. With a larger drive, these users can keep all their projects and software installed without juggling between multiple drives. (See: Health effects of computer work.)
11. Long-Term Cost Efficiency
While larger SSDs can be more expensive upfront, they can also lead to long-term cost savings. For example, the cost of additional external drives or the potential loss of productivity due to constant file management can add up over time. Investing in a larger SSD can save you from these headaches and provide a more streamlined workflow.
Furthermore, SSD prices have been steadily decreasing, making larger capacities more accessible than ever. Today’s market offers excellent value for high-capacity SSDs, so it’s a good time to consider an upgrade if you’re still working with an older, smaller drive.
12. FAQ: Cloning SSD to Larger SSD
What if my new SSD is smaller than my current SSD?
Cloning will not work if your new SSD is smaller than the current one, as the data on your current SSD will not fit onto the new one. Make sure to choose an SSD that has a larger capacity than your existing drive.
Can I clone SSD to larger SSD if I have a different operating system?
Yes, you can clone your SSD to a larger one even if they have different operating systems, but compatibility must be ensured. Check that the cloning software supports the operating systems involved. After cloning, you may need to reinstall certain drivers or perform additional configuration to ensure everything functions properly.
What should I do with my old SSD after cloning?
After successfully cloning, you can either format your old SSD for additional storage or keep it as a backup in case you encounter any issues with the new SSD. It’s generally a good practice to have a backup of important data, so repurposing the old SSD can be a great way to ensure additional data safety.
Will cloning my SSD erase my data?
Cloning creates an exact copy of your current SSD on the new drive without erasing the data from your old SSD. However, be cautious and ensure you’re selecting the correct source and destination drives during the cloning process to avoid any accidental data loss.
Is it possible to clone an SSD to an HDD?
Yes, you can clone an SSD to an HDD, but remember that you will lose the performance benefits of the SSD. The cloning process itself is similar, and as long as there’s sufficient space on the HDD, it should work without issues.
Does cloning an SSD remove the warranty?
Typically, cloning your SSD does not void the warranty of either the old or the new SSD. However, it’s always best to check the warranty terms provided by the manufacturer to ensure compliance with their policies.
How do I choose the right size for my new SSD?
Choosing the right size for your new SSD depends on several factors, including your current storage usage and future needs. A good rule of thumb is to assess how much space you currently use and add at least 25-50% more to accommodate future applications, games, and files. For users who frequently work with large files, such as video editing or gaming, opting for a larger capacity, like 1TB or more, is advisable. (See: Benefits of upgrading SSDs.)
Can I clone my SSD without reinstalling Windows?
Yes, the primary purpose of cloning is to avoid reinstalling Windows or any applications. When you clone your SSD, you create an identical copy of your existing drive, including the operating system, which allows you to boot up the new SSD as if it were the old one without any additional installations.
13. Tips for a Successful SSD Cloning Experience
To make your cloning experience as smooth as possible, consider these practical tips:
- Use a Reliable Power Source: Ensure your computer is connected to a power source during the cloning process to prevent interruptions that could lead to data corruption or failure.
- Check Drive Health: Before cloning, run tools such as CrystalDiskInfo to assess the health of your SSD. If your old SSD is failing, consider replacing it before attempting to clone.
- Disable Security Software: Some security programs may interfere with the cloning process. Temporarily disabling them can help prevent any issues during cloning.
- Read User Reviews: When choosing cloning software, check user reviews and ratings. Other users’ experiences can provide insights into the reliability and effectiveness of the software.
- Plan for Downtime: Depending on the size of your data, the cloning process may take some time. It’s wise to plan accordingly and avoid starting the process if you need to use your computer immediately.
14. Understanding SSD Types and Their Impact on Cloning
When cloning SSDs, it’s important to understand the different types of SSDs available. SSDs can differ based on their interface, such as SATA, NVMe, and M.2. Here’s a breakdown:
- SATA SSDs: These are the most common and typically slower than NVMe drives, as they use the SATA interface which has a lower bandwidth. Cloning a SATA SSD to another SATA SSD is straightforward.
- NVMe SSDs: These are faster due to their ability to connect directly to the motherboard via the PCIe interface. When cloning NVMe drives, ensure your cloning software supports this interface.
- M.2 SSDs: These can either be SATA or NVMe. When cloning, check the type of M.2 SSD you have to ensure compatibility with the new drive.
Understanding these differences can affect the performance of your system after cloning and help you choose the appropriate SSD for your needs.
15. Future of SSDs and What It Means for Users
The future of SSD technology is promising, with advancements leading to faster speeds, larger capacities, and more efficient designs. With the rise of 3D NAND technology, SSDs are becoming increasingly capable of holding more data in a smaller footprint and at lower costs. This trend means that users will have access to larger SSDs without breaking the bank, making cloning to a larger SSD more feasible and appealing.
Additionally, as more applications and operating systems require substantial storage, the importance of upgrading to a larger SSD will only grow. Keeping an eye on these advancements will help you stay ahead of the curve and make informed decisions about your storage solutions.
Final Thoughts
Cloning your SSD to a larger SSD not only improves your storage capacity but also streamlines your workflow by retaining your existing settings and applications. By following the steps outlined in this guide—from preparation to configuration—you can ensure that the process goes smoothly. Remember, the right tools, preparation, and troubleshooting strategies are key to a successful SSD upgrade. Now, go ahead and make that transition to a larger SSD and enjoy the benefits of additional space and improved performance!
“`
Trending Now
Frequently Asked Questions
What is SSD cloning?
SSD cloning is the process of creating an exact replica of your current SSD onto a new one. This includes not just transferring files but also duplicating the entire drive, including the operating system, applications, and settings.
Why should I clone my SSD?
Cloning your SSD allows you to upgrade to a larger drive without the hassle of reinstalling the operating system and applications. It ensures all your settings and files remain intact, making the transition smooth and efficient.
What do I need to clone my SSD?
To clone your SSD, you need a larger SSD, a computer with a SATA connection or USB enclosure, cloning software, and a backup of your important data in case something goes wrong during the process.
How do I prepare my SSD for cloning?
Preparation involves ensuring your current SSD is in good condition by running a disk check, gathering all necessary tools, and backing up important data. This helps avoid complications during the cloning process.
What cloning software should I use?
Choosing the right cloning software depends on your needs. There are many options available, both free and paid, which can facilitate the cloning process effectively. Look for one that is compatible with your system and easy to use.
Agree or disagree? Drop a comment and tell us what you think.