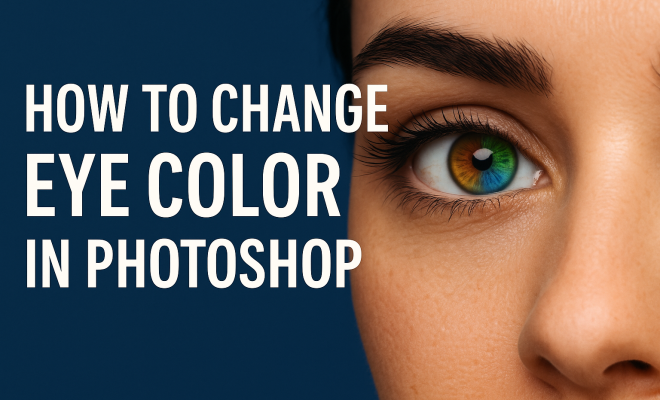
How to change eye color in Photoshop
“`html
Whether you’re a photographer looking to enhance your portrait work or a casual user wanting to experiment with different looks, knowing how to change eye color in Photoshop can elevate your editing skills to the next level. With Photoshop’s robust suite of tools, altering eye color is not just simple; it can be transformative. In this article, we’ll explore seven effective methods to change eye color, offering tips and insights along the way.
1. Using the Hue/Saturation Adjustment Layer
A classic method for changing eye color in Photoshop is by using the Hue/Saturation adjustment layer. This technique is straightforward and gives you a lot of control over the color adjustments.
To start, open your image in Photoshop and create a new Hue/Saturation adjustment layer by going to Layer > New Adjustment Layer > Hue/Saturation. This action will open a properties panel where you can manipulate the sliders. First, select the ‘Colorize’ option at the bottom of the panel. This will allow you to adjust the hue, saturation, and lightness of the entire layer. To target just the eyes, use the Quick Selection Tool to select the irises, and then apply the adjustment layer. Fine-tune the sliders until you achieve your desired eye color.
2. Using the Color Balance Adjustment Layer
The Color Balance adjustment layer offers another effective way to change eye color in Photoshop. This method allows for more nuanced color corrections, giving you the ability to shift the balance between shadows, midtones, and highlights.
Begin by creating a new Color Balance adjustment layer through Layer > New Adjustment Layer > Color Balance. In the properties panel, you can select between shadows, midtones, and highlights. Adjust the sliders to add red, green, or blue tones until you find a shade that complements the skin tones and overall image. As with the previous method, a precise selection of the eye area will ensure that your adjustments only affect the irises.
3. Using Selective Color Adjustment
The Selective Color adjustment tool is a more advanced method that gives you granular control over specific color channels. This is particularly useful for achieving realistic eye colors, especially if the original eye color is a base tone you want to modify.
To use this method, navigate to Layer > New Adjustment Layer > Selective Color. Here, you will see options to adjust the colors of the specific channels: red, yellow, green, cyan, blue, magenta, and black. The key is to experiment with the sliders while focusing on the iris. This technique allows you to create unique colors, such as deep emerald greens or vibrant blues, that pop in the final image.
4. Creating a Solid Color Layer
If you want a bold and striking change in eye color, utilizing a solid color layer is a fantastic option. This method allows you to completely overlay the iris with your chosen color while maintaining the texture of the eyes.
Start by creating a new layer and filling it with your desired color using the Paint Bucket Tool. Next, change the layer’s blending mode to Soft Light or Overlay. This adjustment will allow the original eye texture to show through while giving it a vibrant new hue. Use a layer mask to refine the edges and ensure the effect is seamless. This technique can result in eye-catching visuals that can be particularly appealing for artistic projects. (See: Photography tips from The New York Times.)
5. Using the Brush Tool for Fine Adjustments
The Brush Tool is an essential part of the Photoshop toolkit that can be particularly useful for detailed edits, such as changing eye color. This method is excellent for adding highlights or enhancing eye color on selected areas.
Select the Brush Tool and choose a soft round brush. Set the color to your desired eye color and adjust the opacity to around 30-50%. Gently paint over the areas of the iris that you wish to enhance, varying the color intensity as needed. This technique not only allows you to change eye color but can also help you highlight specific features, creating a more dynamic look in portraits.
6. Using the Clone Stamp for Natural Effects
Sometimes, changing eye color in Photoshop requires a more natural look, especially if you’re aiming for subtlety. The Clone Stamp Tool can help you achieve a genuine effect by allowing you to blend colors from the surrounding areas.
To use the Clone Stamp, select it from the toolbar and adjust the brush size to match the area you’re working on. Hold down the Alt key (or Option on Mac) to sample an area of the eye that you want to clone over. This method is particularly effective for creating gradients or softening harsh color changes, leading to a more cohesive look. This approach works well when you want to change the eye’s hue without losing the texture and depth of the iris.
7. Combining Techniques for Unique Effects
The beauty of Photoshop lies in its flexibility, allowing you to combine various techniques to change eye color in Photoshop creatively. For example, you can start with a Hue/Saturation adjustment layer for a base color, then use the Brush Tool to enhance certain areas, and finally apply a solid color layer for additional vibrancy.
This combined approach allows you to experiment and develop unique effects that can set your work apart. Don’t be afraid to play around with different blending modes and opacity settings to see what works best for your specific image. Each photo will present its own challenges, and adapting your methods will lead to a more satisfying final result.
Additional Tips for Eye Color Editing
While the main methods mentioned above are effective in changing eye color, here are a few additional tips to keep in mind for more polished results:
- Work Non-Destructively: Always use adjustment layers and masks. This ensures that your original image remains intact, allowing for easy adjustments in the future.
- Zoom In: When making selections or adjustments, zoom in closely to ensure precision. Small details can make a significant difference in the final image.
- Consider Lighting: Take note of the lighting in your image. Different light conditions can affect how colors appear, so adjust accordingly to maintain a natural look.
- Experiment: Don’t hesitate to try different techniques and color combinations. Photoshop is all about creativity, so explore various options until you find what feels right.
Current Relevance and Trends in Eye Color Editing
As digital photography continues to evolve, the demand for eye color editing remains high. With the rise of social media platforms like Instagram and TikTok, the ability to enhance one’s appearance, including eye color, has become a popular trend. Content creators and influencers often utilize Photoshop not just for retouching but also for artistic expression.
Moreover, with the development of AI-based editing tools and mobile applications, eye color changes can now be done quickly and with impressive results. However, mastering Photoshop’s traditional methods ensures that you have a solid foundation for more advanced editing techniques. Understanding these tools not only enhances your skills as an editor but also keeps you relevant in a fast-paced digital world.
Advanced Techniques for Eye Color Modification
If you’re looking to take your eye color editing skills to the next level, there are advanced techniques worth considering. These methods incorporate more complex Photoshop features that can lead to stunning, lifelike results.
Layer Styles for Eye Enhancements
Layer styles can be a game changer when it comes to eye editing. By adding effects such as shadows or glows, you can give the eyes a more three-dimensional appearance. Here’s how to do it: (See: Scientific article on image editing techniques.)
- After changing the eye color, right-click on the layer in the layers panel and select Blending Options.
- Experiment with Inner Glow or Drop Shadow to add depth.
- Adjust the settings until you achieve the desired effect; this can make the eyes pop in your portrait.
This technique is particularly useful when editing images with more dramatic lighting or when you want the eyes to stand out more than the surrounding features.
Using the Liquify Tool to Alter Eye Shape
Sometimes, it’s not just about the color but also the shape of the eyes. The Liquify Tool can help you subtly change the shape of the eyes for a more appealing look.
- Access the Liquify Tool by going to Filter > Liquify.
- Select the Forward Warp Tool to gently push the edges of the iris to create a more pleasing shape.
- Be cautious with the intensity to avoid an unnatural look.
This technique allows for a perfect blend of color and shape, making the final edit more visually appealing.
Common Challenges and How to Overcome Them
Editing eye color can be straightforward, but several challenges can arise. Here’s a look at some common issues and how to address them:
Color Mismatch
One of the most significant challenges is creating a color that matches the overall tone of the image. If the new eye color clashes with the skin tone or background, the edit can look unnatural. To avoid this:
- Use complementary color theory: Understand that certain colors work well together. For instance, blue eyes can pop against warm skin tones.
- Adjust surrounding colors: Sometimes, you may need to slightly alter other colors in the image to create harmony.
Harsh Edges
When changing eye color, you might notice harsh edges around the iris if selections were not made carefully. This can be fixed by:
- Feathering the selection: When using the Quick Selection Tool, increase the feather radius slightly to soften the edges.
- Using a soft brush: When painting the new color, use a soft brush with low opacity to blend the edges better.
Frequently Asked Questions
Q1: Can I change eye color in Photoshop without affecting the rest of the image?
Yes! Using adjustment layers allows you to specifically target the eye area while leaving the rest of the image unchanged. Just make sure you create a proper selection of the irises first.
Q2: Is it possible to revert changes made to eye color after saving the image?
If you saved your changes in a way that makes them non-reversible (like flattening the image), you won’t be able to revert. Always keep a copy of the original image and work in layers to maintain editability.
Q3: What’s the best method for changing lighter eye colors to much darker shades?
The Hue/Saturation adjustment layer is often the best for achieving dark shades from lighter ones. It allows for precise control and can create natural-looking results if applied carefully.
Q4: Can I change the eye color in Photoshop on a mobile device?
Yes, many mobile photo editing apps offer similar features to Photoshop. Apps like Snapseed and Lightroom Mobile have color adjustment tools that can help you modify eye color easily.
Q5: Are there any filters or presets that can help with eye color changes?
While filters can enhance overall image quality, specific eye color changes typically require manual adjustments. However, you can create and save presets for your favorite color adjustments to streamline future edits.
Q6: How can I make a dramatic eye color change without losing the natural appearance?
To achieve a dramatic change that still appears natural, consider using a combination of adjustment layers. Start with a subtle change using the Hue/Saturation layer, then enhance it with the Brush Tool for highlights. Finally, adjust the opacity of the solid color layer to achieve the right balance.
Q7: What are some creative uses for changing eye color in Photoshop?
Beyond simple edits, changing eye color can be used for artistic projects, fantasy portraits, character design, or even fashion photography. You can create surreal effects by using unconventional color choices, like bright pink or deep violet, to give your images a unique flair.
Q8: Is there a way to batch change eye colors in Photoshop?
While Photoshop doesn’t directly support batch editing of eye colors, you can create an action to apply your desired effects to multiple images. Record the steps you take to change eye color, and then apply this action to a batch of images for a quick edit.
Ultimately, knowing how to change eye color in Photoshop is an invaluable skill, whether for professional work or personal projects. With practice and experimentation, you can create eye-catching edits that not only enhance the beauty of your subjects but also allow you to express your creative vision effectively.
“`
Trending Now
Frequently Asked Questions
How can I change the color of eyes in Photoshop?
To change eye color in Photoshop, use the Hue/Saturation adjustment layer. Create a new layer, select the 'Colorize' option, and use the Quick Selection Tool to highlight the irises. Adjust the hue, saturation, and lightness sliders to achieve your desired color.
What tools do I need to change eye color in Photoshop?
You primarily need the Hue/Saturation adjustment layer and the Quick Selection Tool to change eye color in Photoshop. These tools allow for precise selections and adjustments, making it easy to manipulate the eye color effectively.
Can I use Color Balance to change eye color in Photoshop?
Yes, the Color Balance adjustment layer is another effective method to change eye color. It allows for nuanced adjustments by modifying shadows, midtones, and highlights, enabling you to create a complementary eye color that matches the overall image.
Is it easy to change eye color in Photoshop?
Yes, changing eye color in Photoshop is straightforward with the right tools. Using adjustment layers like Hue/Saturation and Color Balance, along with selection tools, allows users of all skill levels to achieve stunning results easily.
What is the best method to change eye color in Photoshop?
The best method often depends on your goals, but using the Hue/Saturation adjustment layer is a popular choice for its simplicity and control. For more nuanced color changes, the Color Balance adjustment layer can provide better results.
What’s your take on this? Share your thoughts in the comments below — we read every one.