How to check disk space Linux
“`html
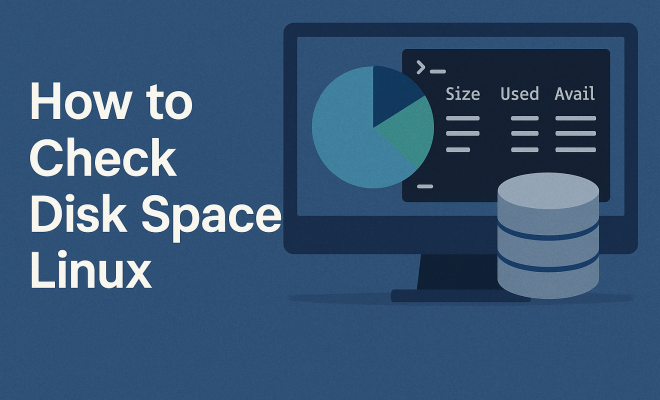
Managing disk space on Linux systems is an essential skill for anyone who administers or uses Linux-based environments. Whether you’re a seasoned sysadmin or a curious beginner, knowing how to check disk space in Linux can be crucial for system performance and data management. In this article, we’ll explore nine different methods to check disk space on Linux, providing you with both command-line techniques and graphical options. Let’s dive in!
1. Using the df Command: Your Go-To for Disk Space
The df command, short for ‘disk filesystem’, is one of the most commonly used tools to check disk space in Linux. It provides a summary of available and used disk space on all mounted filesystems. To use it, simply open your terminal and type:
df -hThe -h option stands for ‘human-readable’, allowing you to see the sizes in KB, MB, or GB instead of raw byte counts. The output includes columns for filesystem, size, used, available space, and the mount point.
If you are interested in a specific filesystem or directory, you can append that to the command, like so:
df -h /home/userThis will show you the disk space usage specifically for the specified path.
Sometimes, you might want to include the --total flag to see the total disk usage across all filesystems. This is especially useful when dealing with multiple mounted drives:
df -h --totalThis will provide a summarized view at the bottom, giving you a clearer picture of your overall disk usage.
2. Using du Command: Discovery of Disk Usage
While df gives an overview of disk space, the du (disk usage) command provides detailed information about the directories occupying space. This command is particularly valuable if you want to identify the largest directories or files on your system.
To check the disk usage of a directory, run:
du -sh /path/to/directoryThe -s option gives you a summary, and the -h option formats the output in a human-readable way. For a more detailed look, you can drop the -s option:
du -h /path/to/directoryThis will list all the subdirectories and their sizes, helping you find out which ones are consuming the most space.
For a broader analysis, running du -ah will display sizes of all files and directories, making it easier to see what’s taking up your disk space.
Another useful option is using the --max-depth=N flag, which allows you to control how deep du will descend into subdirectories. For instance:
du -h --max-depth=1 /path/to/directoryThis command will summarize the disk usage for the top-level directories only, providing a quick overview without overwhelming detail.
3. Graphical Disk Usage Analyzer: Visualize Your Space
If you’re more comfortable with graphical interfaces than the command line, many Linux distributions come with a Disk Usage Analyzer tool. For instance, in Ubuntu, you can find this tool by searching for “Disk Usage Analyzer” in the application menu. This tool provides a visual representation of disk usage, showing you which files and directories take up the most space.
Once opened, you can scan your filesystem and receive a graphical representation of disk usage in the form of charts. This visual approach can make it easier to identify large files that might need archiving or removal.
Additionally, some tools, like Baobab, allow you to explore mounted drives and see how much space each directory uses. This can be particularly handy for users who prefer visual data representation over command-line tools.
Another graphical tool worth mentioning is GParted, which not only allows you to check disk space but also manage partitions. This is useful if you need to resize, move, or format partitions while keeping an eye on disk usage.
4. Using ncdu: A Terminal-Based Disk Usage Tool
If you prefer a command-line tool that offers a more interactive experience, consider using ncdu (NCurses Disk Usage). It’s not installed by default on all distributions, but you can get it via your package manager:
sudo apt install ncdu  # for Debian/Ubuntu
sudo yum install ncdu  # for CentOS/RHEL
After installation, simply run: (See: Disk usage on Linux systems.)
ncduThis command will scan your current directory and its subdirectories, allowing you to navigate through them. You can delete files directly from this interface, making it a powerful tool for managing disk space.
Another handy feature of ncdu is its ability to generate reports, which can be redirected to a text file. This can be useful for documenting disk usage over time.
A cool trick with ncdu is using the -x option, which restricts the scanning to the current filesystem, preventing it from wandering into mounted filesystems, which can save time and keep the results focused on the relevant data:
ncdu -xThis can be particularly useful if you have multiple filesystems mounted and only want to analyze the one you are currently working with.
5. Using the ls Command: Check Individual Files
The ls command may not seem like a disk space tool, but it’s quite handy for checking the size of individual files and directories. You can use the -lh flags to get a human-readable format of file sizes.
ls -lhThis will list files and directories in the current directory, showing their sizes in a human-friendly format. If you want a sorted list based on size, use:
ls -lhSThis command will sort the files by size, helping you quickly identify the largest files in your directory.
For a more comprehensive overview, you might want to combine ls with the grep command to filter specific file types, such as:
ls -lh | grep '.txt'This will list all text files with their sizes, making it easier to manage them.
Additionally, you can also use the --block-size option with ls to change the output to specific units, like:
ls -l --block-size=MThis will show file sizes in megabytes, which can be more intuitive for larger files.
6. Using the find Command: Locate Large Files
If you’re specifically looking for large files, the find command can help you identify files over a certain size across your system. For example, to find files larger than 100MB, you can run:
find / -type f -size +100MThis command traverses the entire filesystem, which might take some time, so you can narrow it down to specific directories. The find command is incredibly powerful, and you can combine it with other commands to perform actions on the files it finds.
Additionally, by using the -exec option, you can automate tasks on the found files. For example, if you want to delete those files, you can do:
find / -type f -size +100M -exec rm {} \;Be cautious with this command to avoid unintentional deletions!
Another practical use of find is to identify large files based on modification time. For instance, to find files that haven’t been modified in over a year, you can use:
find / -type f -mtime +365This can help you clean up old files that are likely no longer needed.
7. Using System Monitor Tools: Monitor Disk Usage
Most Linux distributions come with a system monitor tool that provides detailed insights into system usage, including CPU, memory, and disk space. For example, in Ubuntu, the System Monitor application shows real-time utilization metrics, including disk space.
To access the System Monitor, simply search for it in your applications. You’ll find various tabs that not only show current disk usage but also allow you to end processes or manage system resources. This can be beneficial for troubleshooting space issues or monitoring active applications consuming excessive resources.
Some advanced users may prefer tools like htop that provide even more detailed views of system resources, including disk I/O.
For even more comprehensive monitoring, consider using glances, a cross-platform system monitoring tool that provides a wealth of information including disk usage. This can be installed via:
sudo apt install glancesOnce running, it gives you a real-time overview of various system metrics, allowing you to see disk usage at a glance, alongside CPU and memory consumption. (See: Assessing dietary guidelines.)
8. Using the fstrim Command: Free Up Unused Space
If you’re using SSDs, it’s vital to keep your storage optimized. The fstrim command helps you reclaim unused blocks on your SSD, which can indirectly assist in managing disk space. You typically won’t need to check disk space directly with this command, but understanding it helps maintain performance.
To use fstrim, simply run:
sudo fstrim -v /This command will trim the filesystem at the root directory. You can also specify other mount points as needed, ensuring your SSD remains fast and efficient.
It’s a good practice to schedule fstrim to run regularly, especially if you frequently delete or move large files. This ensures optimal performance and helps maintain the lifespan of your SSD.
Some modern systemd-based distributions even include a scheduled service for fstrim that runs automatically, but you can always verify its status with:
systemctl status fstrim.timerChecking this can provide peace of mind that your SSD is managed without your constant intervention.
9. Automating Disk Space Checks: Set Up Alerts
To ensure that you never run out of disk space, consider automating your checks. You can schedule periodic space checks using cron jobs or other automation tools. For instance, you could create a script that uses the df command and notifies you when available space dips below a certain threshold.
First, create a simple script like:
#!/bin/bash
THRESHOLD=10G
USED=$(df / | awk 'NR==2 {print $3}')
if [ $USED -gt $THRESHOLD ]; then
  echo "Warning: Disk usage exceeded threshold" | mail -s "Disk Space Alert" [email protected]
fi
Then, set your cron job to run this script daily. This proactive approach ensures you stay on top of your disk space management, preventing unexpected outages.
Another useful approach is to log disk usage over time. You can append the output of the df command to a file each day, allowing you to analyze trends in disk usage over time, which can help you predict when you’ll need to take action.
One advanced method is to integrate this monitoring with external services, such as Slack or Discord, to receive notifications directly in your communication channels. You can use webhooks to send alerts when disk usage exceeds a specific threshold, ensuring you’re always informed.
10. Understanding Filesystem Types: Impact on Disk Management
It’s important to understand that different filesystem types can affect how you manage disk space in Linux. Common filesystems include ext4, XFS, and Btrfs, each with its features, advantages, and limitations.
For example, ext4 is widely used and known for its performance and reliability, while Btrfs offers snapshotting capabilities and built-in volume management. If you’re using a filesystem that supports dynamic resizing, you can manage your disk space more effectively by adjusting partitions as needed.
Understanding these differences can help you choose the right filesystem for your needs and optimize your disk space management strategy accordingly.
Another filesystem worth mentioning is ZFS, known for its robustness and advanced features like built-in RAID and snapshots. ZFS allows for very efficient disk space usage and data integrity checks, making it a great choice for high-availability systems.
11. Common Disk Space Issues: Identifying and Resolving
Even with the best tools and strategies, you might encounter some common disk space issues. For instance, you may find your disk filling up unexpectedly. This can happen due to log files growing too large, temporary files accumulating, or even unnoticed backup processes running in the background.
To tackle these issues, regularly check log directories, such as /var/log, and use commands like:
du -sh /var/log/* | sort -hThis will help you identify which logs are using the most space. For temporary files, consider using tools like bleachbit or the tmpwatch utility to clean up old files automatically.
Moreover, if you’re running out of space on a specific partition, you may need to consider resizing it or moving some data to another drive or partition.
Checking for orphaned files can also help; using tools like deborphan for Debian-based systems can identify and remove packages that are no longer needed, freeing up space.
12. Disk Quotas: Managing User Space
For systems with multiple users, managing disk space can become a challenge. Implementing disk quotas can help allocate and limit the amount of disk space each user can utilize. This is especially useful in shared environments where one user inadvertently filling up the disk can affect all users.
To set up disk quotas, you can edit your filesystem’s entry in /etc/fstab and add the usrquota or grpquota options. After remounting the filesystem, you can use commands like edquota to define the limits for users.
Regularly monitoring quotas can prevent issues before they arise. You can check user quota usage with:
quota -u usernameThis proactive strategy keeps your system in check and ensures fair access to disk resources among users.
Consider integrating quota management with email alerts, so users are notified as they approach their limits, preventing sudden service disruptions and encouraging responsible disk usage.
13. Frequently Asked Questions (FAQ)
What is the best command to check disk space in Linux?
The df -h command is commonly recommended for a quick overview of disk space usage as it provides a summary of all mounted filesystems in a human-readable format.
Can I see disk space usage for a specific directory?
Yes! You can use the du -sh /path/to/directory command to get a summary of the disk space used by a specific directory.
How often should I check my disk space?
It depends on your usage. For critical systems, daily checks might be appropriate. For less critical systems, weekly or monthly checks can suffice. Automating checks with cron jobs can help maintain oversight.
What can I do if my disk space is running low?
If you discover that your disk space is running low, consider removing unnecessary files, cleaning up logs, using disk cleanup tools, or upgrading your storage capacity if needed.
Are there graphical tools to check disk space?
Yes! Many Linux distributions include graphical tools like Disk Usage Analyzer (Baobab) that allow you to visualize disk usage in a more intuitive way compared to command-line tools.
How can I prevent disk space issues in the future?
Regular monitoring, setting up alerts, implementing disk quotas, and maintaining a clean file system are effective strategies to prevent future disk space issues.
What are some common causes of disk space issues on Linux?
Common causes include large log files, temporary files left behind by applications, unmonitored backups, and unused packages. Regular housekeeping can mitigate these issues.
Is it possible to recover disk space after deleting files?
Yes, if you delete files, you can recover disk space immediately unless the files were held open by processes. In such cases, the space will be freed only after the process releases them.
Knowing how to check disk space in Linux is essential for maintaining a healthy system. With these thirteen methods and insights at your disposal, you’re equipped to monitor space usage effectively, keeping your system running smoothly and efficiently. Choose the tools that best fit your workflow, and you’ll find that managing disk space becomes a straightforward task!
“`
Trending Now
Frequently Asked Questions
How do I check disk space in Linux?
You can check disk space in Linux using the 'df' command. Simply open your terminal and type 'df -h' for a human-readable format. This will show you the used and available space on all mounted filesystems.
What is the difference between df and du commands?
The 'df' command provides an overview of disk space on mounted filesystems, while the 'du' command gives detailed information about disk usage for specific directories, helping you identify which folders or files are taking up the most space.
How can I check disk usage for a specific directory in Linux?
To check disk usage for a specific directory in Linux, use the 'du -sh /path/to/directory' command. The '-s' option summarizes the total size, and '-h' makes the output human-readable.
What does the -h option do in df and du commands?
The '-h' option in both 'df' and 'du' commands formats the output in a human-readable way, displaying sizes in KB, MB, or GB instead of raw byte counts, making it easier to understand the disk usage.
Can I see total disk usage across all filesystems in Linux?
Yes, you can see total disk usage across all filesystems by using the 'df -h –total' command. This provides a summarized view of your overall disk usage at the bottom of the output.
What’s your take on this? Share your thoughts in the comments below — we read every one.