How to use Raspberry Pi as media center
“`html
1. Introduction to Raspberry Pi
The Raspberry Pi, a small yet powerful computing device, has gained significant traction since its inception in 2012. It was originally designed to promote computer science education in schools but has evolved into a versatile platform for various applications, including robotics, home automation, and, notably, as a media center. The idea of turning a Raspberry Pi into a media center is captivating for many tech enthusiasts and casual users alike, thanks to its affordability and flexibility.
With a Raspberry Pi media center, you can stream movies, play music, and even watch live TV using various software options. This article will guide you through the process of setting up your Raspberry Pi as a media center, discussing the essential components, software options, and tips for optimal performance.
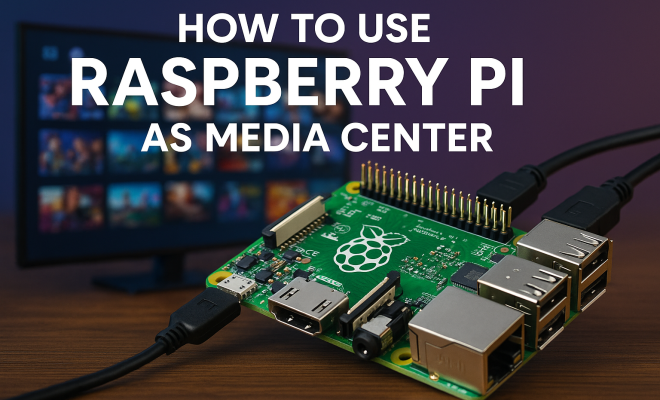
2. What You Need to Get Started
Before diving into the setup process, ensure you have the right components at hand. Here’s a list of what you’ll need:
- Raspberry Pi: Any model from Raspberry Pi 2 onward will work, but the Raspberry Pi 4 offers the best performance with up to 4GB of RAM.
- MicroSD Card: A minimum of 16GB, preferably Class 10 or UHS-1 for faster read/write speeds.
- Power Supply: A compatible power supply (5V, 3A for Raspberry Pi 4) is crucial to ensure stable performance.
- HDMI Cable: For connecting the Raspberry Pi to your TV or monitor.
- Network Connection: Either Wi-Fi or Ethernet for internet access.
- Keyboard and Mouse: These are helpful during setup but can be removed afterward if you plan to control everything remotely.
With these components ready, you’re set to explore the exciting world of Raspberry Pi media centers.
3. Choosing the Right Software
The choice of software is crucial when setting up your Raspberry Pi media center. Fortunately, there are several popular options available, each with its unique features:
- Kodi: This open-source media center software is perhaps the most popular choice for Raspberry Pi users. Kodi offers an extensive library of add-ons for streaming services, music, and more. Its user-friendly interface makes it easy to navigate.
- OSMC: This operating system is built on Debian and designed specifically for Kodi. OSMC provides a simple and clean interface, with regular updates to ensure optimal performance.
- LibreELEC: A lightweight version of Kodi, LibreELEC is designed to run Kodi efficiently without unnecessary bloat. It’s an excellent choice for those looking for a streamlined experience.
- Plex: If you have your media library and want to access it from multiple devices, Plex is an excellent choice. It organizes your media and allows remote access, but it requires more resources compared to Kodi-based options.
Each software option has its strengths, so consider your needs before making a choice. For most users, Kodi or OSMC will be the best fit.
4. Installing the Operating System
Once you’ve selected your software, the next step is to install the operating system onto your microSD card. Here’s a step-by-step guide:
- Download the OS: Visit the official website of your chosen software and download the image file. For example, if you choose OSMC, head to the OSMC website.
- Use an Imaging Tool: Use software like Balena Etcher or Raspberry Pi Imager to flash the image onto the microSD card. This process writes the operating system to the card, making it bootable.
- Insert the MicroSD Card: Once the flashing process is complete, insert the microSD card into your Raspberry Pi.
- Power Up: Connect the power supply, HDMI cable, and network connection. Your Raspberry Pi will boot up, and you should see the initial setup screen of your chosen media center software.
Following these steps will ensure a smooth installation process for your Raspberry Pi media center.
5. Initial Configuration
After installation, you’ll need to configure your media center for optimal use. Here’s how to get started:
- Language and Region: Set your preferred language and region settings during the initial startup. This helps with time settings and local content availability.
- Network Configuration: Connect your Raspberry Pi to your home Wi-Fi network or via Ethernet. This step is critical for accessing streaming services and updating your software.
- User Accounts: If you’re using software like Plex, create a user account to manage your media library. For Kodi, you can customize settings without an account, but it’s good practice to have one for add-on management.
These initial configuration steps will enhance your user experience and pave the way for further customization. (See: Raspberry Pi Wikipedia page.)
6. Adding Media Sources
Now that your Raspberry Pi is set up, it’s time to add your media sources. This process varies slightly depending on the software you chose:
For Kodi:
- Go to the main menu and select “Videos,” then “Files.”
- Click on “Add Videos,” then browse to select the location of your media files or network share. You can add local files, external hard drives, or network storage.
- Once added, Kodi will scrape the media and gather metadata, creating a visually appealing library.
For Plex:
- Open the Plex interface and navigate to the “Libraries” section.
- Choose the type of media you want to add (e.g., Movies, TV Shows) and specify the location of your media files.
- Plex will automatically organize and categorize your content, making it easy to browse.
Adding media sources optimizes your viewing experience by allowing quick access to your favorite movies and shows.
7. Exploring Add-ons and Streaming Services
One of the best features of a Raspberry Pi media center is the ability to expand its functionality through add-ons and streaming services:
For Kodi:
- Access the “Add-ons” section from the main menu. Here you can find various add-ons for streaming services like Netflix, YouTube, and Hulu.
- Browse through the official Kodi repository or install third-party repositories for even more options, but ensure you trust these sources to avoid security risks.
For Plex:
- Plex supports various channels for additional content, such as news, sports, and lifestyle channels. Simply navigate to the “Channels” section to explore.
- You can also link your Plex account to various streaming services, allowing you to manage all your content from one place.
These add-ons and services are crucial for a complete media center experience, providing access to a wealth of content at your fingertips.
8. Optimizing Performance
To ensure your Raspberry Pi media center runs smoothly, consider these optimization tips:
- Cooling Solutions: Depending on your usage, your Raspberry Pi might get warm. Installing a heatsink or fan can help maintain optimal temperatures, preventing performance throttling.
- Overclocking: If you’re comfortable with it, you can overclock your Raspberry Pi for better performance. Be cautious, as this can lead to overheating if not managed properly.
- USB Drive for Media: Using an external USB drive for your media library instead of relying on the microSD card can significantly improve loading times and overall performance.
By implementing these optimization strategies, you’ll enhance your media center’s efficiency and responsiveness, providing a better overall user experience.
9. Remote Control and Accessibility
Controlling your Raspberry Pi media center can be done in various ways, making it convenient to use:
- Mobile Apps: There are numerous mobile apps available that allow you to control Kodi and Plex from your smartphone or tablet. Apps like Kore (for Kodi) and Plex app make navigation a breeze.
- Web Interface: Both Kodi and Plex offer web interfaces that can be accessed from any web browser, allowing you to manage your media library and settings remotely.
- Universal Remote: If you prefer a physical remote, you can purchase a compatible USB remote or configure an existing one to work with your Raspberry Pi. This adds a layer of convenience for users who enjoy traditional remote controls.
These control options make it easy to access your media center from anywhere in your home, enhancing its usability.
10. Staying Updated and Expanding Features
Finally, keeping your Raspberry Pi media center updated is crucial for security and performance. Regularly check for software updates for your chosen operating system and any add-ons you’ve installed. Developers often release updates that improve functionality and fix bugs.
As you become more comfortable with your media center, you might want to explore additional features like setting up a NAS (Network Attached Storage) for your media files, integrating home automation systems, or even creating a multi-room audio setup.
Setting up a Raspberry Pi media center can be a rewarding project that enhances your entertainment experience. With the right components, software, and optimizations, you can create a powerful hub for all your media needs. So, grab your Raspberry Pi, and get started on this exciting journey!
11. Advanced Configuration Options
Once you’ve mastered the basics, you might want to explore more advanced configuration options to further enhance your Raspberry Pi media center experience. Here are a few ideas: (See: New York Times article on Raspberry Pi.)
- Integrating Network Attached Storage (NAS): Connecting a NAS allows you to store all your media in one central location, making it accessible to all devices on your network. This setup is especially useful for streaming high-quality content without putting too much strain on the Raspberry Pi.
- Using a VPN: If you want to access content from different regions or enhance your privacy while streaming, consider setting up a VPN on your Raspberry Pi. This can help you bypass geographical restrictions on content.
- Creating a Multi-Room Audio Setup: With the right software and additional Raspberry Pi units, you can set up a multi-room audio system. This lets you stream music simultaneously in different rooms, creating an immersive experience throughout your home.
These advanced options can transform your Raspberry Pi media center into a fully integrated entertainment hub tailored to your preferences.
12. Common Issues and Troubleshooting
As with any technology, you might run into some issues while setting up or using your Raspberry Pi media center. Here are some common problems and their solutions:
- Boot Issues: If your Raspberry Pi fails to boot, check that you’ve correctly flashed the OS onto the microSD card. You might also want to ensure that the power supply is adequate and the connections are secure.
- Network Connectivity Problems: If you’re having trouble connecting to the internet, double-check your network settings. Make sure your Wi-Fi credentials are correct, and try connecting via Ethernet to eliminate wireless issues.
- Streaming Lag or Buffering: If you experience lag during streaming, check your network speed. Upgrading your internet plan or using wired Ethernet can improve performance. Also, consider reducing the video quality in your streaming settings if issues persist.
Being prepared for these common issues can save you time and frustration as you enjoy your Raspberry Pi media center.
13. Expert Perspectives on Raspberry Pi Media Centers
Experts and tech enthusiasts often share valuable insights about optimizing Raspberry Pi for use as a media center. Here are a few perspectives:
- Efficiency and Cost-Effectiveness: Many experts agree that Raspberry Pi provides an affordable alternative to traditional media players. Its low power consumption and customizable nature make it an attractive option for budget-conscious consumers.
- Community Support: The Raspberry Pi community is vast and supportive, which is crucial for troubleshooting and expanding functionality. Online forums and resources provide users with extensive documentation and user experiences, enhancing the overall user experience.
- Flexibility: The ability to run different operating systems and software applications means users can tailor their media center to their specific needs. This flexibility is often cited as one of the most significant advantages of using Raspberry Pi in this capacity.
Listening to these experts can inspire you to explore new features and configurations that you may not have considered at the outset.
14. Frequently Asked Questions (FAQ)
What is the best Raspberry Pi model for a media center?
The Raspberry Pi 4 is currently the best choice due to its improved performance, with options for 2GB, 4GB, or even 8GB of RAM. This model can handle 4K video output and provides faster processing speeds compared to its predecessors.
Can I use my Raspberry Pi media center without a monitor?
Yes, you can run your Raspberry Pi headlessly (without a monitor) by using SSH to access it over your network. This allows you to manage your media center remotely.
What types of media formats can I play on a Raspberry Pi media center?
Most media formats are supported, including MP4, MKV, AVI for video and MP3, FLAC, and WAV for audio. Kodi and Plex also offer extensive codec support through add-ons.
Is it possible to watch live TV on a Raspberry Pi media center?
Yes, with the right setup, including a TV tuner and the appropriate software add-ons, you can watch live TV on your Raspberry Pi media center. Many users opt for services like TVHeadend or Plex Live TV for this purpose.
How can I improve the sound quality of my media center?
Connect your Raspberry Pi to a high-quality sound system via HDMI or optical audio output. Using settings within Kodi or Plex, you can also adjust audio output formats to suit your system better. (See: Scientific articles on Raspberry Pi.)
Can I install third-party add-ons safely?
While many third-party add-ons offer great content, it’s essential to research and install only from reputable sources to avoid malware or security risks. Always read user reviews and check for community recommendations.
How often should I update my Raspberry Pi media center?
Regular updates are important for security and functionality. Check for software updates at least once a month, and apply updates for installed add-ons as they become available to get the best performance and new features.
15. Exploring Raspberry Pi Media Center Community and Resources
The Raspberry Pi community is rich with resources that can help you maximize your media center experience. Online forums, dedicated websites, and social media groups are fantastic places to learn, share, and troubleshoot.
- Raspberry Pi Forums: These forums are a treasure trove of knowledge where users share their experiences, solutions to common problems, and innovative ideas about using Raspberry Pi as a media center.
- Reddit Communities: Subreddits like r/RASPBERRY_PI and r/Kodi offer a platform for users to discuss tips, tricks, and share their projects. You can find inspiring projects and get advice from seasoned Raspberry Pi enthusiasts.
- YouTube Tutorials: Many content creators produce detailed tutorials on setting up and optimizing Raspberry Pi media centers. These visual guides can be especially helpful if you’re a beginner and prefer step-by-step instructions.
- Blogs and Websites: Websites like Raspberry Pi Foundation, Kodi, and Plex host detailed articles that cover various aspects of using Raspberry Pi as a media center. These can provide you with insights into new features and software updates.
Diving into these community resources can significantly enhance your understanding and enjoyment of your Raspberry Pi media center.
16. Future of Raspberry Pi Media Centers
As technology continues to evolve, so does the potential for Raspberry Pi media centers. With advancements in processing power, connectivity, and software capabilities, the future looks promising for Raspberry Pi enthusiasts. Here are some trends and possibilities:
- Increased Streaming Quality: As internet speeds improve, so too will the quality of streaming content. Raspberry Pi media centers may soon support even higher resolutions and formats, such as 8K, making them a more compelling option for home theaters.
- Integration with Smart Home Systems: The Raspberry Pi can serve as a central hub for controlling smart home devices. Future iterations of media center software could include features that seamlessly integrate media playback with smart lighting, thermostats, and security systems.
- Enhanced User Interfaces: As developers continue to innovate, we can expect more intuitive and visually appealing user interfaces that enhance user experience and make navigation even easier.
- Broader Content Accessibility: With more focus on open-source solutions, users might gain access to a wider variety of content through legal and ethical channels, ensuring that your Raspberry Pi media center remains a central part of your entertainment setup.
By staying informed about these trends, you can continue to evolve your Raspberry Pi media center and keep it relevant in the changing landscape of media consumption.
17. Conclusion
Setting up a Raspberry Pi media center can significantly enhance your home entertainment system. With its affordability, flexibility, and the wealth of available software options, it allows you to create a personalized media hub tailored to your requirements. Whether streaming the latest films, enjoying your favorite music, or managing a vast library of media, the Raspberry Pi offers an impressive solution that can grow with your needs. So, take the plunge, and transform your Raspberry Pi into the ultimate media center!
“`
Trending Now
Frequently Asked Questions
What do I need to set up a Raspberry Pi media center?
To set up a Raspberry Pi media center, you'll need a Raspberry Pi (preferably model 4), a minimum 16GB microSD card, a compatible power supply, an HDMI cable, and a network connection (Wi-Fi or Ethernet). A keyboard and mouse are also helpful during setup.
Which Raspberry Pi model is best for a media center?
While any Raspberry Pi model from version 2 onward can be used as a media center, the Raspberry Pi 4 is the best choice due to its superior performance, offering up to 4GB of RAM, which enhances streaming and playback capabilities.
What software can I use for my Raspberry Pi media center?
Popular software options for a Raspberry Pi media center include Kodi, which is an open-source media player, and other platforms that support streaming movies, music, and live TV. Each software has unique features catering to different user needs.
Can I control my Raspberry Pi media center remotely?
Yes, after the initial setup of your Raspberry Pi media center, you can control it remotely. This allows you to manage your media without needing a keyboard and mouse connected, using apps or remote control software.
How do I improve the performance of my Raspberry Pi media center?
To enhance the performance of your Raspberry Pi media center, ensure you're using a Class 10 or UHS-1 microSD card for faster read/write speeds, and consider a wired Ethernet connection for more stable internet access compared to Wi-Fi.
What did we miss? Let us know in the comments and join the conversation.