How to create assembly in SolidWorks
“`html
Creating an assembly in SolidWorks is a crucial skill for any engineer or designer looking to bring their ideas to life. Whether you’re a novice just starting out or an experienced user aiming to improve your workflow, mastering this essential function can streamline your design process significantly. In this comprehensive guide, we’ll explore the steps, techniques, and best practices for creating assemblies in SolidWorks, ensuring that you have all the knowledge needed to build your projects efficiently.
1. Understanding Assemblies in SolidWorks
Before diving into the practicalities, it’s vital to grasp what an assembly in SolidWorks fundamentally is. An assembly is a collection of parts that interact with one another, representing a complete product. Unlike individual parts, assemblies allow for the simulation of real-world interactions, which is crucial for testing design concepts before manufacturing.
In SolidWorks, assemblies can consist of multiple components, which may be parts, subassemblies, or even imported models from other CAD software. The beauty of assemblies lies in their ability to illustrate complex relationships, allowing designers to visualize how different components fit and work together.
2. Setting Up Your SolidWorks Environment
Before you can create your assembly, you need to ensure that SolidWorks is set up correctly for your project. This involves adjusting the system settings and familiarizing yourself with the user interface. Open SolidWorks and navigate to the File menu to start a new assembly file.
When creating an assembly, it’s best to organize your components in a way that makes sense for your design. Use folders in the Task Pane for easy access to your part files. You can also customize your workspace by adjusting toolbars and adding shortcuts for frequently used commands, ensuring a more efficient workflow.
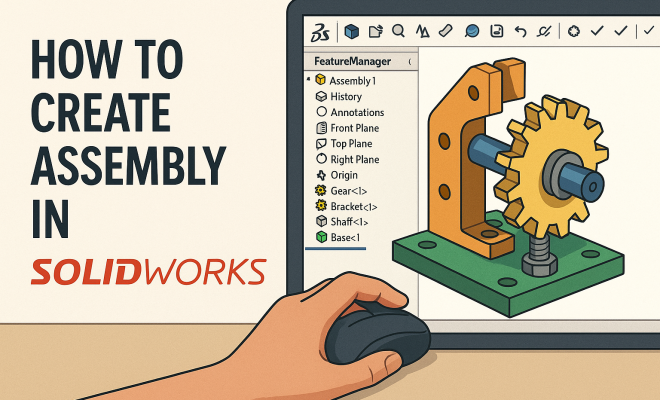
3. Creating a New Assembly Document
To create an assembly in SolidWorks, start by selecting New from the File menu and choosing Assembly from the document types. Once you’ve selected the assembly template, you’ll be prompted to add components. You can insert parts directly from your folders or create new parts on-the-fly.
It’s essential to consider the order of component insertion. Generally, start with the largest part or the base component that all other parts will connect to. This helps in establishing a solid foundation for your assembly and makes it easier to position subsequent components.
4. Inserting Components into Your Assembly
Once your assembly document is open, it’s time to insert components. Go to the Insert Components button in the Assembly tab. You can either drag parts from the Task Pane or browse through your files. SolidWorks allows for multiple components to be inserted simultaneously, which can save time if you have a complex assembly.
As you insert components, pay attention to how they are positioned. You can use the Move Component tool to position parts accurately or use the Mate feature to constrain them in relation to one another. This is where you begin to see the power of assemblies in SolidWorks, as the software helps ensure that parts fit together as intended.
5. Using Mates to Define Relationships
One of the most powerful features in SolidWorks assemblies is the Mate function. Mates define how components interact with one another, affecting their movement and positioning. You can create various types of mates, including coincident, parallel, and distance mates, each serving a specific purpose.
For instance, a coincident mate allows two faces to be flush against each other, while a distance mate specifies the distance between two components. Understanding how to apply these mates effectively will enable you to build complex assemblies with precise movements and alignments, making it crucial for any designer who wants to create assembly in SolidWorks. (See: SolidWorks overview on Wikipedia.)
6. Managing Component Positioning
As your assembly grows, managing component positioning becomes increasingly important. SolidWorks provides several tools to assist with this, including the Assembly Feature Manager, which allows you to view and reorder components easily. This tool is invaluable for keeping track of complex assemblies and ensuring everything is in its rightful place.
Additionally, using Assembly Configurations can help you manage different versions of your assembly without duplicating files. Configurations allow you to create variations of your assembly by hiding or suppressing certain components, which can be particularly useful during the design process when exploring different options.
7. Analyzing and Testing Your Assembly
Once you’ve completed your assembly, it’s time to analyze and ensure that everything functions as intended. SolidWorks offers a range of analysis tools, such as Interference Detection and Collision Detection, which allow you to identify any potential issues before moving to production.
Using these tools can save time and resources by catching problems early in the design process. You can also use the Motion Study feature to simulate how your assembly will behave in action, providing insights that help refine your design further.
8. Exporting and Sharing Your Assembly
After perfecting your assembly, you may want to share your work with colleagues or clients. SolidWorks allows you to export your assembly in various formats, including PDF and STEP files, making it easy to share your designs with users of different software.
Furthermore, consider using SolidWorks’ eDrawings feature to create interactive 3D models that others can view without needing SolidWorks installed. This feature enhances collaboration and communication, ensuring that everyone involved has a clear understanding of the design.
9. Continuing Your SolidWorks Journey
Creating an assembly in SolidWorks is just the beginning of your journey with this powerful software. As you become more comfortable with assemblies, consider exploring advanced features, such as Weldments for structural designs or Sheet Metal tools for creating complex assemblies involving sheet metal parts.
Additionally, staying updated with the latest SolidWorks releases and community forums can provide you with new tips and techniques, further enhancing your skills. The more you practice and explore, the more proficient you’ll become at creating assemblies and navigating the powerful capabilities of SolidWorks.
10. Common Mistakes to Avoid When Creating Assemblies
Creating assemblies in SolidWorks can be straightforward, but there are common pitfalls that users often encounter. Understanding these mistakes can help you avoid them and refine your assembly process.
- Not Using Mates Effectively: A common mistake is not fully constraining components with mates. Without proper constraints, parts may not behave as expected during simulation or when the model is manipulated.
- Ignoring Component Relationships: Failing to consider how parts interact in the real world can lead to designs that are not manufacturable. Always think about physical constraints and tolerances.
- Overcomplicating Assemblies: While it’s great to add detail, overly complex assemblies can slow down performance. Simplifying your design where possible can mitigate this issue.
- Neglecting to Use Configurations: Not taking advantage of assembly configurations can result in unnecessary duplication of effort. Use configurations to manage variations effectively.
11. Examples of Assemblies in SolidWorks
To better understand how to create assemblies in SolidWorks, let’s look at a few practical examples:
- Mechanical Gear System: This assembly involves multiple gears, shafts, and bearings. The use of mates to define how gears interact is crucial, as they need to rotate in relation to one another without interference.
- Automotive Chassis Assembly: A complex project involving numerous components such as the frame, wheels, and suspension systems. Utilizing subassemblies for components like the suspension can simplify the overall design process.
- Robotic Arm: This assembly requires careful consideration of motion and articulation. Each joint must be constrained properly using mates to ensure realistic movement simulations.
12. Key Features of SolidWorks Assemblies
SolidWorks is packed with features that enhance the assembly creation process. Here are some of the key functionalities you should be aware of:
- Smart Mates: This feature helps automate the mating process. When you drag a component close to the potential mate, SolidWorks suggests mates based on the geometry, saving time during assembly.
- Assembly Visualization: This tool allows you to manage and visualize components based on various parameters such as mass or transparency, which can aid in the design review process.
- Assembly Level Features: You can create features that apply to the entire assembly rather than individual parts, such as creating holes or patterns that affect multiple components simultaneously.
13. Statistics and Trends in CAD Usage
Understanding the broader context of CAD usage can enhance your appreciation of SolidWorks assemblies. According to recent studies, over 50% of engineers prefer using SolidWorks for its user-friendly interface and robust feature set.
Furthermore, about 70% of engineering firms now utilize some form of CAD software in their design processes, with SolidWorks being a predominant choice among small to medium enterprises. This trend highlights the importance of mastering assembly creation, as organizations increasingly rely on effective design practices to remain competitive. (See: National Institute of Standards and Technology.)
14. Expert Perspectives on Best Practices
Industry experts emphasize several best practices when creating assemblies in SolidWorks:
- Plan Before You Build: Take the time to sketch out your assembly and plan the order in which you’ll insert components. This foresight can save you from reworking your design later.
- Regularly Save Your Work: CAD software can be unpredictable; make it a habit to save frequently to avoid losing progress.
- Utilize SolidWorks Tutorials: SolidWorks offers a wealth of tutorials that can help you learn the ins and outs of assembly creation. Take advantage of these resources!
15. Frequently Asked Questions (FAQ)
What is the difference between a part and an assembly in SolidWorks?
A part is an individual component created in SolidWorks, while an assembly is a collection of parts that work together to form a complete product. Assemblies allow for the simulation of interactions among various parts.
Can I create an assembly from parts I’ve already designed?
Absolutely! You can create an assembly using any parts you’ve designed in SolidWorks. Simply select the parts from your files when prompted after creating a new assembly document.
How do I troubleshoot issues with parts not fitting together properly in an assembly?
Check your mate definitions first. Ensure that the mates are applied correctly and that you have not missed any necessary constraints. Additionally, use the interference detection tool to identify potential conflicts between components.
Is it possible to create an assembly with parts from different CAD systems?
Yes, SolidWorks supports importing models from various CAD systems, enabling you to create assemblies that include parts from other software. However, be aware that some features may not translate perfectly.
What types of assemblies can I create in SolidWorks?
You can create a variety of assemblies, including simple assemblies with just a few parts, complex assemblies involving hundreds of components, and subassemblies that represent a part of a larger assembly.
Are there resources for learning more about assemblies in SolidWorks?
Yes! SolidWorks provides numerous tutorials and online forums where users can exchange tips and techniques. Additionally, YouTube offers countless video tutorials that provide visual guidance on creating assemblies.
How can I optimize my assembly for performance?
To optimize your assembly, consider simplifying the geometry where possible, using lightweight components, and suppressing unnecessary parts during design iterations. This can help improve performance and reduce load times.
16. Advanced Techniques for Assembly Creation
Once you’ve mastered the basics of creating an assembly in SolidWorks, you might want to explore more advanced techniques to enhance your capabilities. Here are some strategies that can significantly improve your assembly design process:
Using Subassemblies
Breaking your assembly into subassemblies can simplify management and make it easier to focus on specific areas of your design. For example, in a car assembly, you might have subassemblies for the engine, transmission, and suspension. This modular approach allows you to work on each component independently, making it easier to troubleshoot and test each section before integrating everything together.
Leveraging Design Tables for Configurations
Design tables are a powerful feature that allows you to manage configurations of your assembly efficiently. By using Excel-type tables, you can create multiple variations of your assembly based on parameters you define. This is particularly useful when you need to generate multiple sizes or options for an assembly without duplicating effort. (See: SolidWorks topics on ScienceDirect.)
Utilizing Assembly Tools for Efficiency
SolidWorks offers several tools designed to improve efficiency when working with assemblies. The Assembly Layout tool allows you to create a 2D sketch representation of your assembly layout, making it easier to visualize space and component placement before diving into 3D modeling. This can save time and help prevent misalignment of parts during assembly.
17. Case Studies: Successful Assemblies Created in SolidWorks
Examining real-world applications of SolidWorks assemblies can provide inspiration and insight into best practices. Here are a few notable case studies:
Consumer Electronics Design
A leading electronics manufacturer used SolidWorks to design a new line of smart home devices. By utilizing assemblies, the design team was able to simulate how components interacted and functioned together, leading to a significant reduction in design flaws and an expedited prototyping process. The use of simulation tools helped them test thermal and mechanical interactions, ensuring reliability before production.
Aerospace Component Assembly
In the aerospace industry, a company utilized SolidWorks to create a complex assembly of an aircraft wing. The assembly included various components such as ribs, spars, and skins, all of which had to meet strict regulations. By employing advanced mating strategies and leveraging the assembly’s analysis tools, they achieved a lightweight and robust design that met all safety criteria while enhancing fuel efficiency.
18. Tips for Effective Collaboration on Assemblies
Collaboration is often key in assembly projects, especially when multiple team members are working on different parts. Here are some tips to enhance teamwork:
- Use Product Data Management (PDM): Implementing a PDM system can help manage version control and ensure that everyone is working on the latest files. This minimizes errors and enhances communication among team members.
- Regular Check-ins: Schedule regular meetings to discuss progress and any challenges faced. This keeps everyone aligned and can foster innovative solutions to problems.
- Document Everything: Encourage your team to document the assembly process and decisions made. This can serve as a valuable resource for future projects and aid new team members in understanding the design intent.
19. Future Trends in CAD and Assembly Design
As technology continues to evolve, so too does the field of CAD and assembly design. Here are some trends to keep an eye on:
- Integration of AI: Artificial intelligence is beginning to play a role in CAD software, helping designers automate repetitive tasks and optimize designs based on previous projects.
- Increased Collaboration Tools: With the rise of remote work, software developers are focusing on improving collaboration tools within CAD applications, allowing teams to work together seamlessly, regardless of location.
- Virtual and Augmented Reality: These technologies are becoming more prevalent in assembly design, providing immersive environments for designers to visualize and test their assemblies before production.
20. Concluding Thoughts on Creating Assemblies in SolidWorks
By developing a deep understanding of how to create assemblies in SolidWorks, you’re setting yourself up for success in the fields of engineering and design. The skills you acquire while learning to manage components, apply mates, and simulate interactions will serve as a foundation for more advanced design techniques.
Don’t hesitate to engage with the SolidWorks community through forums, webinars, and training sessions. The knowledge shared by other users can be invaluable as you continue to refine your skills. Keep practicing, stay curious, and embrace the challenges that come your way. The world of design is vast, and mastering SolidWorks assemblies is just the beginning of your journey into the exciting realm of engineering and product development.
“`
Trending Now
Frequently Asked Questions
How do I create an assembly in SolidWorks?
To create an assembly in SolidWorks, start by opening the software and selecting 'New' from the File menu. Choose 'Assembly' and organize your components in the Task Pane for easy access. Then, insert parts or subassemblies and use mating features to define how they interact.
What is an assembly in SolidWorks?
An assembly in SolidWorks is a collection of parts that work together to represent a complete product. It allows for the simulation of real-world interactions between components, helping designers visualize how different parts fit and function together.
What are the steps to create a new assembly document in SolidWorks?
To create a new assembly document in SolidWorks, open the software, go to the File menu, and select 'New.' Choose 'Assembly,' then organize your components in the Task Pane. Finally, insert parts or subassemblies and define their relationships using mating features.
How can I organize components in SolidWorks assemblies?
You can organize components in SolidWorks assemblies by using folders in the Task Pane for easy access to part files. Additionally, customize your workspace by adjusting toolbars and adding shortcuts to streamline your workflow and improve efficiency.
What are the best practices for creating assemblies in SolidWorks?
Best practices for creating assemblies in SolidWorks include properly organizing components, using mating features effectively, and customizing your workspace for efficiency. Familiarizing yourself with the user interface and adjusting system settings can also enhance your assembly creation process.
Agree or disagree? Drop a comment and tell us what you think.