How to use scenes in OBS Studio
“`html
1. Understanding OBS Studio and Its Purpose
Open Broadcaster Software (OBS) Studio is a free and open-source tool that’s become the go-to choice for many streamers, content creators, and gamers. Launched in 2012, OBS Studio allows users to capture and stream video content with a plethora of customizable options. One of the fundamental features of OBS Studio is its scene management system, which provides users the ability to mix various inputs seamlessly during live broadcasts. Understanding how to effectively use OBS Studio scenes can significantly elevate the quality of your streams. (top streaming services for learning)
The software supports multiple platforms, including Windows, macOS, and Linux, giving it a broad appeal. Its flexibility and powerful capabilities make it essential for anyone looking to produce high-quality video content, whether for gaming, presentations, or professional broadcasts.
2. The Importance of Scenes in Streaming
Scenes in OBS Studio are vital for organizing and transitioning between different visual setups during a stream. Each scene can contain various sources, including video, images, text, and even web pages. This means you can create tailored environments for different segments of your stream, enhancing the viewing experience for your audience.
By utilizing scenes effectively, streamers can switch between a full-screen gameplay view, a webcam overlay, and a chat window within seconds. This not only keeps the stream dynamic but also allows for a more professional presentation. Moreover, scenes help in managing content flow, making it easier to maintain viewer engagement.
3. Setting Up Your First Scene in OBS Studio
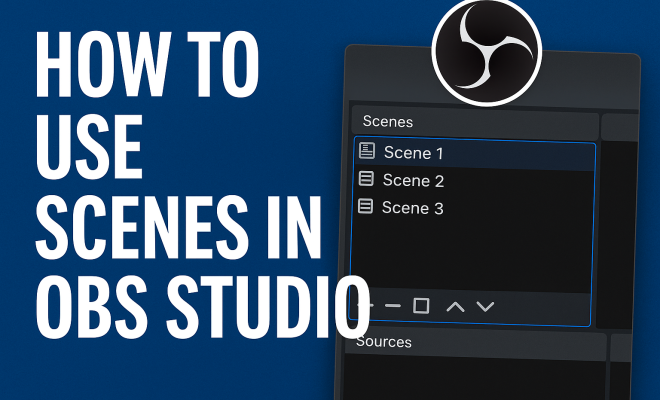
To get started with OBS Studio scenes, you first need to download and install the application from the official OBS Project website. Once you open OBS for the first time, you’ll see a blank canvas. Here’s how to create your first scene:
- In the lower-left corner, locate the “Scenes” panel. Click on the “+” button to add a new scene.
- Name your scene appropriately based on its intended use, such as “Gameplay” or “Intermission”.
- Next, move to the “Sources” panel directly next to the “Scenes” panel. Click the “+” button to add your desired sources for this scene.
Popular source types include “Display Capture” for your screen, “Window Capture” for specific applications, and “Video Capture Device” for your webcam. By adding these sources, you start building your scene, which can be customized further.
4. Adding and Managing Sources in Your Scenes
Sources are the elements that populate your scene. Each source can be resized, positioned, and modified to fit your layout. Here’s how to add and manage them effectively:
- Adding Sources: Click on the “+” in the “Sources” panel. Choose from options like “Image” for graphics, “Text” for overlays, or “Browser” for live web content. Select the source type, and follow the prompts to configure it.
- Positioning and Resizing: Once added, click on the source in the preview window. You’ll see bounding boxes — dragging these allows you to resize and position sources as needed. Holding the Shift key while dragging can help with non-proportional scaling.
- Layering Sources: The order of sources matters. You can reorder them in the “Sources” panel. The ones at the top will appear above those lower down, so arrange them to create the desired visual hierarchy.
5. Creating Scene Transitions
Scene transitions in OBS Studio add a professional touch to your streams by providing smooth visual changes between different scenes. To set up transitions:
- Navigate to the “Scene Transitions” panel, located next to the “Sources” panel.
- Click the drop-down menu to select from various transition styles like Fade, Cut, or Slide. Each option offers a different visual effect.
- Adjust the duration of the transition for a smoother or quicker swap between scenes.
By incorporating transitions, you keep your audience engaged and minimize abrupt changes that could disrupt the viewing experience.
6. Utilizing Hotkeys for Scene Management
Hotkeys are a game-changer when it comes to managing OBS Studio scenes during a live stream. They allow you to switch between scenes without the need for mouse clicks, enabling a smoother experience. Setting up hotkeys is simple:
- Go to “Settings” in the lower-right corner of OBS Studio.
- Click on the “Hotkeys” tab.
- Assign keys to each action, such as switching to a specific scene or starting/stopping the stream. Make sure to choose keys that won’t interfere with other software you might be using.
Using hotkeys can dramatically improve your streaming efficiency, allowing you to focus on engaging with your audience rather than managing the software interface. (See: Open Broadcaster Software overview.)
7. Advanced Scene Techniques to Enhance Your Streams
Once you’re comfortable with the basics of OBS Studio scenes, you can explore advanced techniques to take your streams to the next level. For example:
- Scene Collections: Use scene collections to organize different setups for varied purposes. You might create separate collections for gaming, tutorials, or podcasts.
- Dynamic Scene Changes: Explore using tools like Stream Deck or other scripting programs to automate scene transitions based on certain events or triggers.
- Custom Graphics and Overlays: Design or purchase custom overlays and graphics to create a unique brand identity, making your stream visually appealing and recognizable.
8. Common Issues and Troubleshooting with OBS Studio Scenes
Even seasoned streamers encounter challenges with OBS Studio scenes. Here are some common issues and their solutions:
- Black Screens: If a source shows up as a black screen, it might not be set correctly or could be behind another source. Check the order and properties of the source.
- Lag or Performance Issues: If your stream lags, consider reducing the resolution or frame rate in the settings. Ensure that your computer meets OBS Studio’s system requirements.
- Audio Problems: If you encounter audio issues, check your audio sources and ensure they’re active and properly configured. You can also utilize the Audio Mixer to adjust levels accordingly.
9. Final Thoughts on Using OBS Studio Scenes
Mastering OBS Studio scenes is essential for anyone looking to produce high-quality streams. The ability to organize, manage, and transition between different visual setups can significantly elevate your broadcast. By leveraging the tips and techniques outlined in this article, you can enhance viewer engagement, present a polished image, and ultimately grow your audience.
As streaming continues to grow in popularity, honing your skills in OBS Studio isn’t just beneficial—it’s necessary. So, get out there, experiment with your scenes, and watch your streaming experience transform.
10. Exploring Scene Collections in Depth
Scene collections are an advanced feature that allows you to manage multiple sets of scenes for different streaming purposes. For instance, if you’re a gamer and also create tutorial videos, you might want to have separate scene collections for each type of content. This way, you can quickly switch between setups tailored for gaming, presentation, or interactive tutorials without having to manually alter each scene every time.
To create a scene collection, go to the “Scene Collection” menu at the top of the OBS window, select “New,” and give it a name. You can always switch between scene collections as required, allowing for a seamless transition between different content formats.
11. Creating Unique Overlays for Your Scenes
Your stream’s visual appeal can significantly impact viewer retention. Custom overlays not only enhance the visual theme of your stream but also serve functional purposes, such as displaying follower notifications or chat boxes. There are various resources available online where you can either purchase or download free overlays, or you can create your own using graphic design software.
When designing your overlay, keep in mind color schemes, font choices, and overall layout to ensure that they complement your content rather than overshadow it. The goal is to make the information easily digestible for your viewers while maintaining an attractive aesthetic.
12. Using Display and Window Capture Effectively
Display Capture and Window Capture are two of the most common source types in OBS Studio, but they serve different purposes. Display Capture captures everything on your screen, which is ideal for showing off gameplay, tutorials, or browsing activities. However, it can also expose sensitive information if you accidentally reveal your desktop. Therefore, when using Display Capture, make sure to close any irrelevant or personal applications before going live.
On the other hand, Window Capture allows you to select a specific application window to display. This is great for tutorials or when streaming a particular game without showing your entire desktop. When using Window Capture, ensure that the right window is selected in the source settings and that the application you want to capture is open before starting your stream.
13. Integrating Third-Party Tools with OBS Studio
To enhance your streaming experience, consider integrating third-party tools with OBS Studio. Tools like StreamLabs or StreamElements can offer additional features such as alerts, donation tracking, and chat moderation, which can be overlayed onto your stream with ease.
StreamDeck is another popular hardware tool that streamers use. It includes customizable keys that can be programmed to perform various actions in OBS, such as switching scenes, starting or stopping the stream, or even triggering specific animations. By integrating such tools, you can create a more interactive and engaging experience for your audience.
14. Statistics and Trends in Streaming
The streaming landscape has evolved dramatically over the past few years, with millions of users engaging with platforms like Twitch, YouTube, and Facebook Gaming. According to recent statistics, Twitch had an average of 2.5 million concurrent viewers in 2022, making it one of the largest streaming platforms globally. Similarly, YouTube Gaming has seen a surge in popularity, with over 50 billion hours of gaming content watched in just one year. (See: streaming tips from CDC.)
This growth in streaming presents an excellent opportunity for content creators. Data shows that channels that implement professional setups, including well-managed scenes and overlays, tend to retain viewers longer and gain followers at a faster rate. In particular, streams that effectively utilize OBS Studio’s scene features can enhance viewer engagement, leading to more successful channels.
15. FAQs About OBS Studio Scenes
1. What are the minimum system requirements to run OBS Studio?
The minimum system requirements vary depending on your platform, but generally, you’ll need a dual-core processor, at least 4 GB of RAM, and a compatible graphics card. For optimal performance, particularly at higher resolutions, it’s recommended to have a multi-core processor and a dedicated GPU.
2. Can I use OBS Studio for recording without streaming?
Yes, OBS Studio can be used solely for recording your content. You can select “Start Recording” from the main interface, which allows you to capture your screens or gameplay without broadcasting it live.
3. How can I add music to my OBS Studio scenes?
To add music, you can use the “Audio Input Capture” source to select your media player or use a third-party tool to manage audio channels. Make sure to adjust the audio levels using the Audio Mixer to balance the sound effectively with your other audio sources.
4. Can I stream to multiple platforms simultaneously using OBS Studio?
While OBS Studio itself doesn’t support multi-streaming directly, you can use services like Restream.io, which allow you to broadcast your stream to multiple platforms at once.
5. What are the best practices for setting up scenes in OBS Studio?
Some best practices include keeping your layout organized, utilizing clear labels for each scene, and testing your transitions before going live. Always ensure your sources are properly configured and that you regularly update your overlays and graphics to keep your content fresh.
6. How can I save my scene collections in OBS Studio?
You can save your scene collections by going to the “Scene Collection” menu and selecting “Save.” This allows you to keep your setups intact, and you can easily switch back to them at any time.
7. Is OBS Studio suitable for beginners?
Absolutely! While OBS Studio has a range of advanced features, many of its basic functionalities are straightforward enough for beginners to pick up quickly. With a bit of practice, you’ll be able to create professional-looking streams.
8. Are there any tutorials available for learning OBS Studio?
Yes, there is a wealth of tutorials available on platforms like YouTube, as well as forums dedicated to OBS Studio. The official OBS website also has a comprehensive guide to help users navigate its features.
16. Expanding Your Scene Functionality with Plugins
One of the powerful aspects of OBS Studio is its extensibility through plugins. These add-ons can enhance your scenes and introduce new features that aren’t available out of the box. For example, plugins like OBS WebSocket enable you to control OBS Studio remotely or integrate with other applications. You can set up automated scene changes based on user interactions, making your stream more interactive.
An additional popular plugin is the Advanced Scene Switcher, which allows you to create complex rules for scene transitions based on specific triggers, such as chat commands or timed intervals. Utilizing these plugins can greatly expand your capabilities and streamline your streaming workflow, ensuring that you provide your viewers with a professional and engaging experience. (See: research on video streaming technologies.)
17. Using Multiple Monitors for Enhanced Scene Management
If you have the opportunity to use multiple monitors, take advantage of this setup to enhance your OBS Studio experience. With multiple displays, you can dedicate one screen entirely to your OBS interface, allowing for quick scene changes and adjustments without cluttering your main content screen. This setup is especially beneficial if you’re gaming while streaming as it allows you to keep an eye on your chat or other applications on a separate monitor.
By organizing your workspace efficiently, you can reduce distractions and ensure that you remain focused on engaging with your audience. Plus, it gives you more control over your scene transitions and overall stream management, which can be a game-changer during live broadcasts. Dr. Matt Lynch's recommendations offers useful background here.
18. Exploring OBS Studio’s Video Output Settings
Your stream’s video quality is critical to viewer retention and satisfaction. OBS Studio offers a variety of output settings that allow you to tailor your stream’s resolution, bitrate, and output format. It’s important to find a balance between quality and performance, especially if you’re streaming from a less powerful system.
For most streamers, a resolution of 720p at 30fps is a good starting point. As you gain experience and your hardware improves, you could upgrade to 1080p at 60fps for a more polished output. Keep an eye on your bitrate settings, too. A higher bitrate improves image quality but requires more upload bandwidth, so be sure to test your settings and find what works best for your internet connection and audience.
19. Understanding the Role of Bitrate and Resolution
Bitrate and resolution are foundational elements of your stream’s quality. The bitrate determines how much data is transmitted per second, directly affecting clarity. For example, a bitrate of 2500 kbps will yield lower quality than one of 5000 kbps. However, higher bitrates can lead to buffering for viewers with slower internet connections.
Resolution refers to the number of pixels displayed in your stream. A higher resolution typically offers a sharper image but demands more processing power and bandwidth. Finding the right combination of bitrate and resolution is essential, and you may want to conduct a few test streams to see how your audience receives different settings during varying internet conditions.
20. Networking and Collaborating with Other Streamers
Collaborating with other streamers can be a fantastic way to grow your audience while enhancing your streaming experience. OBS Studio allows you to bring in guest streamers easily, whether they are physically present or joining via video call. You can create a dedicated scene that incorporates both your content and your guest’s stream, which can add variety to your broadcasts.
Additionally, consider cross-promoting with others in your niche. By hosting joint streams or participating in each other’s broadcasts, you can introduce your audience to fresh content while building community engagement. Networking within the streaming community can lead to valuable collaborations that benefit everyone involved.
“`
Trending Now
Frequently Asked Questions
What are scenes in OBS Studio?
Scenes in OBS Studio are customizable visual setups that allow streamers to organize and switch between different content sources during a broadcast, such as gameplay, webcam feeds, and overlays. They enhance the viewing experience by enabling smooth transitions and tailored environments for various segments of a stream.
How do you set up a scene in OBS Studio?
To set up a scene in OBS Studio, download and install the application, then open it to find a blank canvas. In the 'Scenes' panel at the bottom left, click the '+' button to add a new scene. From there, you can add various sources like video, images, and text to customize your scene.
Why are scenes important for streaming?
Scenes are essential for streaming because they allow for organized content management and dynamic transitions during live broadcasts. By efficiently using scenes, streamers can maintain viewer engagement and create a more professional presentation by quickly switching between different visual setups.
Can you use OBS Studio on multiple platforms?
Yes, OBS Studio is compatible with multiple platforms including Windows, macOS, and Linux. This cross-platform support makes it accessible for a wide range of users, from gamers to professional content creators looking to produce high-quality video content.
What types of sources can be included in OBS Studio scenes?
In OBS Studio scenes, you can include various types of sources such as video feeds, images, text overlays, and even web pages. This versatility allows you to create engaging and visually appealing setups tailored to different segments of your stream.
What's your take on this? Share your thoughts in the comments below — we read every one.