How to use Premiere Pro on Mac
“`html
Adobe Premiere Pro has become the industry standard for video editing, loved by professionals and amateurs alike for its rich features and user-friendly interface. For Mac users, Premiere Pro offers an excellent platform to unleash creativity and produce stunning videos. Whether you’re a newcomer trying to grasp the basics or a seasoned editor looking for advanced tips, understanding how to effectively use Premiere Pro on Mac can elevate your editing game. In this article, we will explore eight critical aspects of using Premiere Pro for Mac that will set you up for success.
1. Getting Started with Premiere Pro for Mac
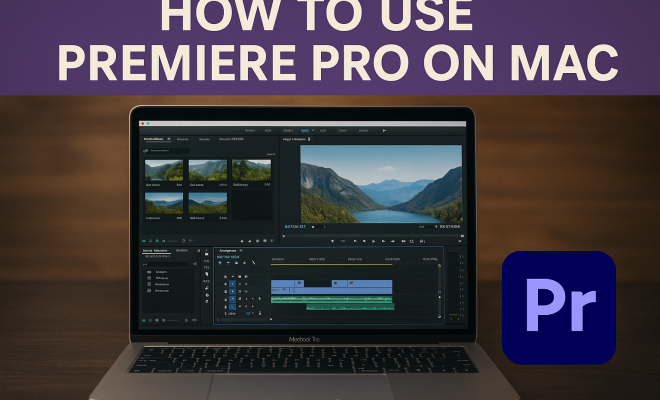
First things first, if you haven’t already, you’ll need to download and install Premiere Pro on your Mac. Adobe offers a free trial, allowing you to explore the software before fully committing. Once installed, take some time to familiarize yourself with the layout. The workspace is divided into several panels, such as the Project panel for assets, the Timeline for sequencing, and the Program Monitor for playback.
Adobe’s Premiere Pro interface is customizable, so if you find certain panels more useful than others, you can easily rearrange your workspace. For a beginner, it’s advisable to stick with the default layout until you become more comfortable with the software. Don’t shy away from using Adobe’s extensive array of tutorial resources to get the hang of the interface and basic functionalities.
2. Importing Media Efficiently
Importing your media files into Premiere Pro for Mac can be a breeze once you know how to do it right. You can either drag and drop files directly into the Project panel or use the “Import” option from the File menu. However, it’s important to manage your media efficiently, especially if you’re working on projects with large amounts of footage.
Create bins to organize different types of media such as video, audio, and images. This organization saves time and helps you locate files quickly when you’re deep into the editing process. Premiere Pro also supports various formats, but for best results, stick to high-quality video formats like ProRes or DNxHD.
3. Understanding the Timeline
The Timeline is where the magic happens. It’s the core of your editing process, allowing you to arrange clips, add effects, and manipulate audio. Understanding the timeline’s features will significantly enhance your editing workflow. You can add multiple video and audio tracks, enabling you to layer clips and create more complex projects.
Learn the shortcuts for cutting clips, adjusting clip duration, and moving items on the timeline to increase your editing speed. Mastering how to use the “Ripple Edit” tool, for example, can save you hours of manual adjustments when rearranging clips. Always remember to keep your edits non-destructive — use adjustment layers to apply effects, so your original clips remain intact.
4. Using Effects and Transitions
One of the standout features of Premiere Pro for Mac is its vast library of built-in effects and transitions. These can help to enhance your storytelling by making cuts smoother and elevating the visual quality of your project. To add an effect, simply drag it from the Effects panel onto your clip in the Timeline.
When using transitions, be mindful not to overdo it. A simple crossfade can often be more effective than elaborate transitions. Additionally, you can customize the duration of transitions to match the rhythm of your video, creating a more professional feel. Experiment with different effects to find what best fits your project’s tone.
5. Color Correction and Grading
Color correction is crucial when it comes to achieving a polished final product. Premiere Pro for Mac includes powerful color grading tools that allow you to adjust exposure, contrast, highlights, shadows, and more. The Lumetri Color panel is a comprehensive suite of tools that can help you enhance your footage dramatically. (See: New York Times article on video editing.)
Start with basic corrections to fix any exposure issues and then move onto creative grading. You can create looks that fit your narrative by applying LUTs (Look-Up Tables) or manually adjusting color wheels. Remember, color grading is subjective, and experimenting is part of the fun. Always keep a backup in case you want to revert your edits.
6. Working with Audio
Don’t underestimate the importance of audio in your video projects. Great visuals paired with poor audio can undermine your entire project. Premiere Pro offers a range of audio editing tools, allowing you to mix, adjust levels, and apply effects. Always start by ensuring that your audio is clean and free from background noise.
Use the Essential Sound panel to categorize audio clips by type, such as dialogue, sound effects, or music. This categorization simplifies the mixing process. Additionally, familiarize yourself with the Audio Effects panel to apply effects like reverb and compression, enhancing the overall sound quality of your project.
7. Exporting Your Final Project
Once you’ve completed your editing, it’s time to export your project. Premiere Pro for Mac allows for various export settings, and choosing the correct format depends on your intended distribution. For platforms like YouTube, exporting in H.264 format is often recommended for a balance of quality and file size.
In the export settings, you can adjust bitrate settings to further optimize the quality of your video. Make sure to choose the right resolution and frame rate to match your original footage. Once you’re satisfied with the settings, hit ‘Export,’ and watch your project come to life.
8. Staying Updated with Premiere Pro
Finally, to truly master Premiere Pro for Mac, it’s crucial to stay updated with the latest features and updates. Adobe frequently rolls out updates that introduce new tools and enhance existing functionalities. Make it a habit to check Adobe’s official blog and user forums for tips and tricks shared by other users.
Participating in online communities can also provide valuable insights and shortcuts that aren’t covered in official tutorials. Engaging with fellow editors can inspire you and keep your skills sharp as technology continues to evolve in the world of video editing.
9. Advanced Editing Techniques
As you grow more comfortable with Premiere Pro, it’s beneficial to explore advanced editing techniques. These can range from utilizing multi-camera editing to keyframing animations and creating sophisticated motion graphics. Multi-camera editing is especially useful for projects involving interviews or events where multiple angles were recorded. By syncing clips from different cameras, you can switch perspectives seamlessly without interrupting the flow of the story.
Keyframing allows you to create dynamic effects over time. For instance, you can animate a clip’s position, scale, or opacity to bring your videos to life. The Essential Graphics panel can be used for creating titles and lower-thirds, giving your project a polished professional look. By combining these techniques, you can produce videos that are visually engaging and effectively communicate your message.
10. Exploring Integrations and Plugins
Premiere Pro offers numerous integrations with other Adobe applications that can enhance your editing experience. For instance, using Adobe After Effects alongside Premiere Pro allows you to create intricate animations and effects that can be imported directly into your timeline. This integration creates a smooth workflow as you transition between applications without missing a beat.
Additionally, there are various third-party plugins available that can extend the functionality of Premiere Pro. For instance, tools like Red Giant Universe provide advanced effects and transitions that can make your workflow more efficient and your videos more visually striking. Always research and test these plugins to find which ones best suit your editing style and needs.
11. Learning from the Community
The video editing community is a treasure trove of knowledge. Platforms like YouTube, Reddit, and various forums host countless tutorial videos, tips, and tricks that can help you improve your skills. You can find specific channels dedicated to Premiere Pro for Mac, where experienced editors share their workflows, shortcuts, and techniques. Additionally, participating in challenges and projects organized by the community can provide practical experience and feedback on your work. (See: Scientific articles on video editing.)
Networking with other editors can also lead to collaboration opportunities, opening doors to new projects and creative partnerships. Sharing your work on social media platforms like Instagram or Vimeo can further help you gain exposure and connect with other creators. Don’t hesitate to ask questions and seek feedback as you refine your skills.
12. Frequently Asked Questions about Premiere Pro for Mac
Q: Is Premiere Pro for Mac suitable for beginners?
A: Absolutely! While Premiere Pro offers advanced features, its user-friendly interface and extensive tutorials make it accessible for newcomers. Starting with basic projects will help you build your confidence as you learn.
Q: Can I use Premiere Pro on older Mac models?
A: Premiere Pro does have minimum system requirements, and while it may run on older models, performance may not be optimal. For the best experience, ensure your Mac is updated with sufficient RAM and a compatible processor.
Q: What file formats does Premiere Pro support?
A: Premiere Pro supports a wide variety of file formats, including AVI, MOV, MP4, M4V, and more. For best results, use high-quality formats like ProRes or DNxHD, especially for final projects.
Q: Is there a way to speed up rendering times in Premiere Pro?
A: Yes, you can optimize rendering times by using proxies for high-resolution footage, adjusting your sequence settings, and utilizing the Media Encoder for background rendering. Keeping your project organized and minimizing effects can also help.
Q: How often should I update Premiere Pro?
A: It’s wise to regularly update Premiere Pro to benefit from new features, bug fixes, and performance improvements. Adobe usually notifies you of updates, and you can check the Creative Cloud app for the latest versions.
Q: Can I collaborate with others using Premiere Pro for Mac?
A: Yes, Adobe has implemented collaboration features that allow multiple users to work on a project simultaneously, provided you have a Creative Cloud subscription. This is particularly useful for team projects.
Q: How does the performance of Premiere Pro on Mac compare to Windows?
A: Generally, Premiere Pro performs well on both Mac and Windows platforms. However, some users report that the Mac version may have better optimization with Apple’s hardware and operating system, particularly with features like Metal for GPU rendering. Your experience can vary based on your specific hardware configuration.
Q: Are there any system requirements I need to consider for Premiere Pro on Mac?
A: Yes, Premiere Pro requires a Mac with macOS version 10.13 (High Sierra) or later. A minimum of 8 GB of RAM is required, though 16 GB is recommended for smoother performance. Ensure you have a compatible graphics card for optimal rendering speeds and support for GPU acceleration.
13. Tips for Efficient Workflow
To maximize your editing efficiency in Premiere Pro for Mac, consider adopting a few workflow best practices. First, establish a consistent file naming convention and folder structure for your projects. This makes it easier to locate assets and manage versions over time. You might want to dedicate separate folders for raw footage, audio, graphics, and exports.
Next, use keyboard shortcuts. Familiarizing yourself with the most common Premiere Pro shortcuts can drastically reduce your editing time. For instance, using ‘C’ to cut clips, ‘V’ to select the selection tool, and ‘M’ to add markers are essential for speeding up your workflow. You can even customize your own shortcuts to suit your editing style.
Another effective practice is to create templates for recurring projects. If you often produce similar types of videos, such as vlogs or tutorials, create a project template that includes your preferred settings, graphics, and audio tracks. This lets you hit the ground running whenever you start a new project.
14. Exploring Alternative Editing Techniques
While Premiere Pro offers a robust suite of tools, exploring alternative editing techniques can enhance your storytelling. For example, consider using cutaway shots to add context to your narrative. If you’re interviewing someone, insert B-roll that visually supports what they’re discussing. This can keep your audience engaged and provide a richer viewing experience.
Split-screen is another creative technique where you can show two or more videos simultaneously. This can work particularly well in contrast shots or when demonstrating a process. Premiere Pro provides the tools to easily achieve this effect using scaling and positioning adjustments. You can also utilize the motion graphics templates available in the Essential Graphics panel to add dynamic titles and overlay graphics without having to start from scratch.
15. Utilizing Adobe Stock Assets
Adobe Stock offers a vast library of assets, including stock footage, images, and music, that can enhance your projects. If you find that you need additional clips to fill in gaps or visuals that support your narrative, Adobe Stock is integrated directly within Premiere Pro. You can search for assets without leaving the application, making it easy to drag and drop them into your project.
Utilizing high-quality stock assets can elevate the professionalism of your video and save you time on shoots. Just remember to factor in any licensing costs associated with using stock footage, and ensure that it aligns with your project’s budget and goals. You might also explore free resources available online to complement your footage without breaking the bank.
By employing these tips and mastering the features of Premiere Pro for Mac, you’ll be well-equipped to create high-quality videos that stand out. Whether you’re editing personal projects or professional pieces, the skills you develop will serve you well in your creative journey.
“`
Trending Now
Frequently Asked Questions
How do I get started with Adobe Premiere Pro on Mac?
To get started with Adobe Premiere Pro on Mac, first download and install the software. Adobe offers a free trial for new users. Once installed, familiarize yourself with the layout, which includes the Project panel, Timeline, and Program Monitor. It's recommended to stick with the default workspace layout initially and utilize Adobe's tutorial resources for guidance.
What are the best ways to import media into Premiere Pro on Mac?
You can import media into Premiere Pro on Mac by dragging and dropping files into the Project panel or using the 'Import' option from the File menu. To manage large amounts of footage effectively, create bins to organize your media files by type, such as video, audio, and images, for easier access.
Is Adobe Premiere Pro easy to use for beginners on Mac?
Yes, Adobe Premiere Pro is designed to be user-friendly, making it accessible for beginners on Mac. The interface is customizable, which allows new users to adjust their workspace as they become more comfortable. Additionally, Adobe provides extensive tutorial resources to help beginners learn the basic functionalities.
Can I customize the Premiere Pro workspace on Mac?
Absolutely! Adobe Premiere Pro allows users to customize their workspace on Mac. You can rearrange panels according to your needs and preferences. For beginners, it’s advisable to start with the default layout until you gain confidence using the software, after which you can personalize it for better efficiency.
What features make Premiere Pro suitable for video editing on Mac?
Premiere Pro offers a rich set of features that cater to both professionals and amateurs. On Mac, its user-friendly interface, customizable workspace, and powerful editing tools enable users to create stunning videos. The software also supports various media formats and provides advanced editing options, making it the industry standard for video editing.
What did we miss? Let us know in the comments and join the conversation.