How to use Premiere Pro effects
“`html
1. Understanding Premiere Pro Effects: A Brief Overview
Adobe Premiere Pro is a powerful video editing software that has become a go-to tool for professionals and amateurs alike. At the heart of the program’s versatility are the numerous Premiere Pro effects that allow editors to enhance their projects creatively. These effects range from basic color corrections to advanced transitions and stylized overlays, enabling users to convey specific moods and narratives effectively.
When you delve into Premiere Pro, it’s essential to grasp the nature and purpose of various effects. Each effect serves a unique function, whether it’s to improve visual aesthetics, create seamless transitions, or add a stylistic flair. Familiarizing oneself with the effects available is the first step toward mastering this software and unlocking its full potential.
2. Common Types of Premiere Pro Effects: A Closer Look
Premiere Pro offers a myriad of effects, each designed for specific tasks. Here’s a closer look at some of the most common types:
- Video Effects: These can be anything from color correction tools, such as Lumetri Color, to visual stylizations like Gaussian Blur. Video effects are primarily used to enhance the footage’s visual quality.
- Audio Effects: These allow users to manipulate sound, adding reverb, compression, or equalization to improve audio quality.
- Transitions: These effects help to smoothly move from one clip to another, including crossfades, wipes, and more elaborate animated transitions.
Understanding these categories will help you navigate the Effects panel within Premiere Pro more effectively, allowing for a more tailored editing experience based on your project’s needs.
3. How to Access and Apply Premiere Pro Effects
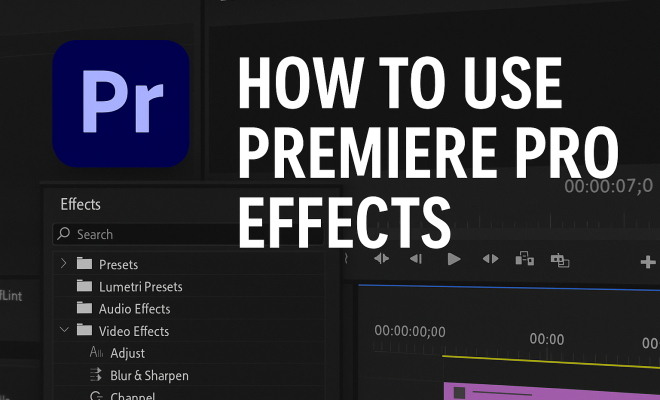
Accessing and applying effects in Premiere Pro is straightforward once you’re familiar with the interface. To begin, navigate to the Effects panel, which can typically be found in the Window menu. From there, you can search for specific effects by name or browse through categories.
To apply an effect, simply drag it onto your desired clip on the timeline. You can also double-click the effect to apply it. Once the effect is on your clip, you can fine-tune it in the Effect Controls panel. Here, you’ll find parameters that allow you to adjust the intensity, duration, and other aspects of the effect to fit your vision.
4. Utilizing Presets for Efficiency: Streamline Your Workflow
Premiere Pro also offers a range of built-in presets that can significantly enhance your editing workflow. These presets allow you to apply multiple effects simultaneously, saving both time and effort. For instance, a color grading preset can adjust exposure, contrast, and saturation with a single click.
To explore presets, go to the Effects panel and look for the Presets folder. You can apply these by dragging them onto your clips in the timeline. Additionally, users can create custom presets by adjusting an effect to your liking and saving it for future use. This feature is particularly beneficial for projects requiring a consistent look across multiple clips.
5. Experimenting with Layering Effects: Creating Unique Looks
One of the exciting aspects of Premiere Pro effects is the ability to layer them for more complex visuals. Combining different effects can yield stunning results, enabling you to create unique looks that stand out. For instance, applying a Gaussian Blur along with a Color Correction effect can create a dreamlike sequence, while layering multiple transitions can create a dynamic montage.
It’s essential to play around with the order in which you stack effects, as this can drastically change the outcome. Premiere Pro allows you to adjust the stacking order in the Effect Controls panel, giving you control over how each effect interacts with your footage. Don’t be afraid to experiment; some of the best visual effects come from spontaneous creativity.
6. Advanced Techniques: Using Keyframes
For those looking to take their editing skills to another level, mastering keyframes is crucial. Keyframes allow you to animate the properties of effects, enabling dynamic changes over time. For example, you can keyframe the opacity of a clip to create a fade-in effect or animate the scale for a zoom-in effect.
To add keyframes, you’ll find a stopwatch icon next to each adjustable parameter in the Effect Controls panel. By clicking it, you can set your starting point, move to a different time in the timeline, and adjust the property again to create movement. This technique adds a level of professionalism and polish to your projects, making them feel more dynamic and engaging. (See: Overview of Adobe Premiere Pro.)
7. Color Grading with Premiere Pro Effects: Enhancing Visual Mood
Color grading is one of the most impactful ways to change the feel of your video by using Premiere Pro effects. The Lumetri Color panel provides powerful tools for correcting and adjusting color to suit your narrative. You can adjust temperature, tint, exposure, and many other aspects to manipulate the mood of your footage.
Additionally, using color wheels and curves allows for precise adjustments. For an even more dramatic effect, consider using LUTs (Look-Up Tables), which are pre-defined color grading presets that can be applied quickly to achieve a specific look. By learning how to effectively use the color grading effects in Premiere Pro, you can transform ordinary footage into visually stunning stories.
8. Staying Updated: The Importance of Learning New Effects
Adobe frequently updates Premiere Pro, adding new effects and features that can enhance your editing experience. Staying updated with these developments is crucial for any editor who wants to remain competitive and produce cutting-edge work. Adobe’s official blog, tutorials, and community forums are excellent resources for learning about new updates and tips on utilizing them effectively.
Furthermore, exploring online courses and tutorials from platforms like YouTube, Skillshare, and LinkedIn Learning can provide practical insights. Engaging with communities and forums will also keep you informed about tips and tricks that other professionals are using, ensuring you are always at the forefront of video editing.
9. Top 10 Must-Use Premiere Pro Effects: Tools for Every Editor
While Premiere Pro offers countless effects, some stand out due to their versatility and effectiveness. Here’s a list of ten must-use Premiere Pro effects that can expand your creative options:
- Gaussian Blur: Great for softening images or creating depth.
- Color Balance: Perfect for adjusting shadows, midtones, and highlights for a polished look.
- Warp Stabilizer: Essential for smoothing out shaky footage and ensuring a professional finish.
- Brightness & Contrast: A straightforward effect to enhance footage dramatically without complicated adjustments.
- Vignette: Adds a subtle border effect, drawing attention to the center of your frame.
- Time Remapping: Allows for speed changes within a clip, enabling creative slow-motion or fast-motion effects.
- Drop Shadow: Adds depth to text or graphics, creating a more dynamic appearance.
- Mirror: A fun effect that can create symmetrical designs and visual interest.
- Fast Color Corrector: Quick adjustments to color and light to achieve a desired visual impact.
- Unsharp Mask: Enhances the sharpness of your footage, making it look more defined.
These effects can serve as a foundation for creating engaging videos, no matter the project type.
10. Tips for Combining Effects: Creating Cohesive Visuals
Combining effects effectively requires some thought and planning. Here are a few tips to keep in mind when layering effects in Premiere Pro:
- Know Your Goal: Before applying effects, clearly define the visual style you want to achieve. This clarity will guide your choices.
- Start Simple: Begin with a base effect, then gradually introduce additional effects. This prevents overwhelming your footage.
- Use Adjustment Layers: Instead of applying effects directly to each clip, consider using adjustment layers. This allows changes to apply to multiple clips simultaneously.
- Preview Regularly: As you layer effects, constantly preview your work to ensure everything is blending well.
- Experiment and Iterate: Don’t be afraid to try different combinations until you find something that resonates with your project’s vision.
These strategies will help you create professional and polished visuals that captivate your audience.
11. Premiere Pro Effects for Social Media: Tailoring Your Edits
In today’s digital landscape, social media platforms are becoming significant outlets for video content. Different platforms often require specific formatting and styles to engage viewers effectively. Premiere Pro offers effects tailored for social media, making your edits stand out. Here are some tips for optimizing your video for social media:
- Vertical Videos: Many social media platforms favor vertical formats. Use the “Transform” effect to adjust your video dimensions.
- Eye-Catching Text Effects: Utilize text animation effects to create bold headlines that grab attention quickly.
- Fast Cuts and Transitions: Keep edits snappy with quick transitions to maintain viewer engagement.
- Sound Design: Pair video with catchy sound effects or background music to enhance the overall experience.
- Brand Elements: Incorporate consistent branding with overlays or logos to maintain brand recognition.
Using these techniques, you can ensure your videos resonate with your audience across various social media platforms.
12. Exploring Third-Party Effects: Expanding Your Toolkit
Besides the built-in effects in Premiere Pro, third-party plugins can take your editing to the next level. Many developers create unique effects that can add high production value to your projects. Here are some popular third-party plugins to consider:
- Red Giant Universe: Offers a wide array of visual effects and transitions that are customizable and easy to use.
- Magic Bullet Looks: Great for color grading and adding stylized effects tailored to your project.
- Boris FX Sapphire: Known for its high-quality effects, including lens flares, lighting effects, and more.
- FilmConvert: Simulates the look of film stock, providing a unique texture and richness to your videos.
- Neat Video: A must-have for noise reduction, helping to clean up grainy footage.
Investing in these tools can broaden your creative possibilities and elevate the quality of your work.
13. Frequently Asked Questions about Premiere Pro Effects
What are Premiere Pro effects?
Premiere Pro effects are tools within Adobe’s video editing software that help enhance videos through visual and audio modifications. They include color correction, transitions, and various visual stylizations. (See: New York Times on video editing.)
How do I apply effects in Premiere Pro?
To apply an effect, navigate to the Effects panel, find the desired effect, and drag it onto the clip in your timeline. You can also double-click the effect to apply it.
Can I create custom effects in Premiere Pro?
Yes, you can create custom effects by adjusting existing ones and saving them as presets for future use, ensuring consistency across your projects.
How do I manage multiple effects on a single clip?
In the Effect Controls panel, you can adjust the order of effects and modify their parameters. Using adjustment layers can also help manage multiple effects applied to several clips at once.
Are there any free effects available for Premiere Pro?
Yes, while many premium effects exist, there are also free effects and presets available online. Check Adobe’s resources or community forums for recommendations.
How can I enhance audio in Premiere Pro?
You can use the Audio Effects panel to apply effects like reverb, equalization, and compression to improve the audio quality of your projects.
Can I undo an effect in Premiere Pro?
Yes, to remove any applied effect, click on it in the Effect Controls panel and press the delete key, or simply right-click and choose ‘Clear’.
Is it necessary to learn all the effects?
No, it’s not necessary to learn every effect. Focus on mastering the ones that best fit your editing style and project needs, expanding your knowledge as you gain experience.
How do I stay updated on new Premiere Pro effects?
Follow Adobe’s official blog, subscribe to video editing channels on YouTube, and engage with online communities to learn about new features and effects added to Premiere Pro.
14. Exploring Premiere Pro Effects in Detail: An In-Depth Analysis
When it comes to Premiere Pro effects, understanding how each effect works can greatly enhance your creative capabilities. Effects like ‘Lumetri Color’ are not just simple color correction tools; they incorporate advanced color science and allow for intricate adjustments. You can manipulate shadows, highlights, and midtones independently, which can help in creating a specific mood or atmosphere in your projects.
On the other hand, effects like ‘Warp Stabilizer’ provide users the ability to correct shaky footage, making it a favorite among vloggers and filmmakers capturing live events. By analyzing how these effects interact with one another, you can achieve more than just a basic application; you can create a cohesive visual storytelling experience.
For example, combining ‘Warp Stabilizer’ with ‘Gaussian Blur’ can soften the focus of shaky footage, giving it a dreamy quality while maintaining the desired stabilization. This nuanced understanding of how effects can complement each other is key in elevating your editing skills. (See: Video editing techniques and effects.)
15. Statistics and Trends in Video Editing Effects
Video editing has evolved dramatically over the last decade, and statistics show that the demand for high-quality video content continues to rise. According to a report from Wyzowl, 86% of businesses now use video as a marketing tool, with 93% of marketers believing that video is an essential part of their marketing strategy. With such a high demand, knowing how to effectively utilize Premiere Pro effects can give you a competitive edge.
Moreover, a recent survey by HubSpot indicated that video content is likely to receive 1200% more shares than text and image content combined. This is why editors need to focus on creating visually engaging content by maximizing the potential of effects within Premiere Pro. The statistics highlight the importance of mastering video editing tools to connect with your audience effectively.
16. Expert Perspectives: The Role of Effects in Video Editing
Industry experts often emphasize that the use of effects should be purposeful rather than merely decorative. Renowned filmmaker and editor, Joe Walker, states, “Effects are the icing on the cake; they should enhance the story rather than distract from it.” Understanding the narrative you want to convey is crucial when selecting effects. This means aligning the visual style with the project’s message, ensuring a cohesive viewing experience.
Moreover, award-winning editor, Thelma Schoonmaker, suggests that the emotional tone of a project can be dramatically altered through effects. Through careful manipulation of color grading and transitions, editors can evoke specific feelings from the audience, guiding their reactions throughout the film. Keeping these insights in mind can help you harness the full potential of Premiere Pro effects in your projects.
17. Best Practices for Using Premiere Pro Effects
While experimenting with effects is essential, adhering to certain best practices can greatly enhance your editing process. Here are a few recommendations:
- Maintain Consistency: Ensure that the effects you apply align with the overall visual style of your project. This can help create a polished and professional look.
- Avoid Overuse: Too many effects can overwhelm your audience. Strive for a balance where effects enhance rather than dominate the footage.
- Plan Your Edits: Pre-visualize how and where you want to use effects in your timeline. Storyboarding can help to outline your creative direction.
- Gather Feedback: Share your work with peers or mentors and seek constructive criticism. Fresh perspectives can highlight areas for improvement.
- Stay Organized: Label your effects and layers clearly in the timeline to streamline your editing process and avoid confusion later on.
Following these practices can help you create visually stunning content while keeping your editing process efficient and enjoyable.
18. Final Thoughts on Premiere Pro Effects: Embrace the Power of Creativity
Mastering Premiere Pro effects can seem daunting at first, but with practice and experimentation, you’ll find that they become an integral part of your editing toolkit. The possibilities are endless, whether you’re enhancing narrative storytelling through color grading or drawing viewers in with eye-catching transitions. Keep challenging yourself to learn new effects and techniques to stay relevant in the ever-evolving world of video editing.
So go ahead, explore the rich landscape of Premiere Pro effects, and let your creativity flow. The next time you sit down to edit, remember that each effect is a brushstroke on your canvas, and you have the power to create something extraordinary!
“`
Trending Now
Frequently Asked Questions
What are the different types of effects in Premiere Pro?
Premiere Pro offers various types of effects, including video effects for visual enhancements like color correction and stylizations, audio effects for sound manipulation, and transitions for smooth clip changes. Understanding these categories helps in effectively navigating the Effects panel.
How do I access effects in Premiere Pro?
To access effects in Premiere Pro, navigate to the Effects panel, which is typically found under the Window menu. Once there, you can browse through different categories of effects to apply to your video projects.
What is the purpose of video effects in Premiere Pro?
Video effects in Premiere Pro are designed to enhance the visual quality of your footage. They include tools for color correction, visual stylizations, and other enhancements that contribute to the overall aesthetic of your video.
Can I apply audio effects in Premiere Pro?
Yes, Premiere Pro allows you to apply audio effects to manipulate sound quality. You can add effects like reverb, compression, and equalization to enhance the audio in your video projects.
What are transitions in Premiere Pro and how are they used?
Transitions in Premiere Pro are effects that help create smooth changes between clips. They include options like crossfades, wipes, and animated transitions, which are essential for maintaining flow and continuity in video editing.
Have you experienced this yourself? We'd love to hear your story in the comments.