Master Figma Auto Layout: Responsive Design Made Easy
“`html
Figma has rapidly become one of the most popular design tools among UI/UX designers, and for good reason. One of its standout features is the auto layout functionality, which revolutionizes the way designers approach responsive layouts. If you’re looking to streamline your design process and create flexible, adaptive layouts, this Figma auto layout guide is for you. We’ll dive deep into how auto layout works, its key components, practical applications, and tips to make the most out of this powerful feature.
1. Understanding Figma’s Auto Layout Feature
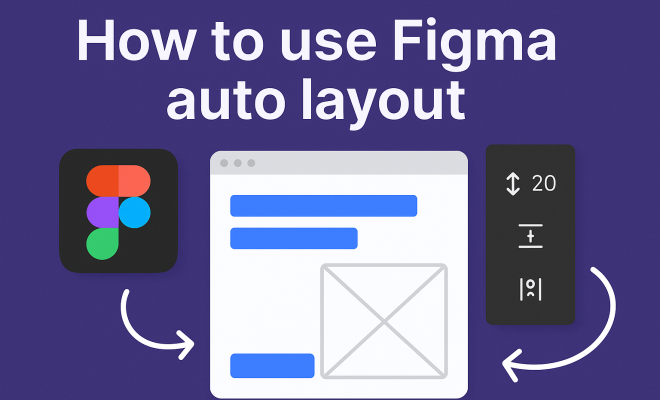
Figma’s auto layout is a feature designed to enable designers to create dynamic layouts that automatically adjust to changes in content. Imagine a system where elements can resize, reorganize, or shift based on the content you input. Instead of manually adjusting each element, auto layout simplifies the process by automating these changes. This not only saves time but also minimizes errors.
When you apply auto layout to a frame or an object, you can control its spacing, padding, and alignment. This feature is especially useful for designing components that need to adapt to different screen sizes, such as buttons, cards, or entire UI sections. As responsive design has become essential in our multi-device world, understanding and implementing auto layout is crucial for any modern designer.
2. Setting Up Your First Auto Layout
To get started with auto layout, first, select an existing frame or create a new one. After selecting the layer, navigate to the right sidebar and look for the Auto Layout section. Click on the + icon to enable auto layout for that frame. You can then define the direction of the layout: horizontal or vertical.
Next, you can set the spacing between items, which will dictate how much space is maintained between elements within your auto layout. You can also add padding around the frame to control the distance between the edge of the frame and its content. This initial setup will form the foundation for how your elements behave as you adjust their sizes or contents.
3. Key Properties of Auto Layout
Once you have enabled auto layout, you’ll find several key properties that define how your layout behaves:
- Direction: Determine whether items are arranged horizontally or vertically.
- Spacing: Adjust the space between items within the auto layout frame.
- Padding: Specify the space between the frame boundary and its contents.
- Alignment: Align items within the frame to the left, center, or right.
- Resizing: Control how individual items resize when the parent frame is adjusted.
Understanding these properties allows you to manipulate your layouts precisely, ensuring that your design will look great regardless of the content size. For instance, if you’re designing a button, you can set it to grow in width as the text changes, maintaining consistent padding and alignment.
4. Responsive Design with Auto Layout
One of the most significant advantages of using auto layout in Figma is its ability to facilitate responsive design. As web and mobile applications must render correctly on a variety of screen sizes, auto layout makes it easier for designers to create adaptable components. By using constraints and resizing properties, you can ensure that elements maintain their proportions regardless of the container size.
For example, when designing a grid of cards, you can set each card to stretch to fill the available space while maintaining consistent spacing between them. This responsiveness significantly reduces the amount of time spent adjusting layouts for different device sizes, enabling a more efficient design workflow.
5. Creating Complex Components with Auto Layout
Figma’s auto layout isn’t just limited to simple layouts; it can also be used to create complex components that can handle a variety of content types. For instance, you might design a navigation bar that adjusts based on the number of menu items. By applying auto layout, each menu item can automatically adjust its size and spacing based on the available space. (See: Responsive web design overview.)
Additionally, auto layout can be nested. This means you can have an auto layout frame inside another auto layout frame, creating intricate hierarchies that maintain consistent styling and behavior throughout. This feature is invaluable for maintaining design consistency across various components and pages.
6. Best Practices for Using Auto Layout
While auto layout can simplify your design process, there are some best practices to keep in mind to ensure efficiency:
- Plan Your Layout: Before implementing auto layout, sketch or map out your design. This planning ensures you know how elements should interact and resize.
- Use Nested Auto Layouts Wisely: While nesting can be powerful, avoid overcomplicating your layers. Keep your structure organized to avoid confusion.
- Preview Often: Regularly preview your designs to see how they respond to changes. This allows you to catch any issues early on and adjust your layout accordingly.
By following these practices, you can maximize the potential of auto layout and ensure your designs are both functional and aesthetically pleasing.
7. Collaboration and Feedback with Auto Layout
Figma is built with collaboration in mind, and auto layout enhances this by allowing teams to work more efficiently together. When multiple team members are involved in a project, having a flexible layout that adjusts automatically means everyone can contribute without the fear of breaking the design.
Feedback becomes much more streamlined as well. Designers can present their layouts to stakeholders and get immediate feedback on specific elements without redoing work. This collaborative aspect is critical in today’s fast-paced design environment, where changes can happen at a moment’s notice.
8. The Future of Figma and Auto Layout
As design trends continue to evolve, so will the features available in tools like Figma. Auto layout is likely to see further enhancements and integrations with features like smart components and design systems. The demand for responsive design will only grow, and Figma is well positioned to lead the charge with robust features that support this need.
Already, Figma has been integrating AI and machine learning capabilities into its platform, which could lead to even smarter auto layout functionalities. Imagine a future where your designs could suggest optimal layouts based on user interactions and content trends. As designers, keeping an eye on these developments will be crucial for staying relevant in a rapidly changing field.
9. Common Challenges with Auto Layout
While auto layout is a powerful tool, it can also present some challenges. Here are a few common issues designers face when using this feature:
- Overlapping Elements: In some cases, if not carefully set up, elements might overlap when resizing. This can happen if the constraints and padding are not configured correctly, leading to a messy design.
- Understanding the Hierarchy: Nested auto layouts can become difficult to manage if there are too many layers. Designers need to be cautious and maintain an organized structure to avoid confusion when editing.
- Performance Issues: For very complex layouts with many nested frames, performance can lag. It’s essential to keep an eye on the performance and simplify when necessary.
To overcome these challenges, consider establishing a clear naming convention for your layers and using Figma’s components feature to reuse layouts without redundancy. Regularly checking your designs and testing them across devices can also help mitigate these issues.
10. Real-World Applications of Auto Layout
To fully grasp the power of Figma’s auto layout, let’s take a closer look at some real-world applications:
- E-commerce Sites: In e-commerce designs, product cards must adapt based on screen size. Auto layout allows designers to create cards that rearrange or resize based on available space, ensuring a seamless shopping experience across devices.
- Mobile Applications: In mobile app design, auto layout can be used to create responsive elements like buttons and input fields that adjust based on the amount of text inputted by users. This ensures a clean and user-friendly interface.
- Dashboards: Data visualization tools often require layouts that can adapt to different data sets. Auto layout can help ensure that graphs, charts, and key metrics remain aligned and properly spaced, regardless of the data output.
These examples illustrate just how versatile and powerful Figma’s auto layout can be when applied to various design challenges, proving its worth as a critical tool in any designer’s arsenal. (See: Figma's impact on design tools.)
11. Tips and Tricks for Maximizing Auto Layout
To truly master auto layout, it helps to have a few insider tips up your sleeve:
- Use the “Fit” Option: When applying auto layout, make use of the “Fit” option for elements like images. This will ensure that images scale and maintain their aspect ratio without distorting the layout.
- Utilize Constraints: Constraints can help dictate how elements behave in relation to their parents. This is crucial for maintaining a cohesive look across varying screen sizes.
- Keyboard Shortcuts: Familiarize yourself with keyboard shortcuts related to auto layout. This can significantly speed up your design process and make it more intuitive.
- Experiment with Variants: Use component variants to create multiple states for buttons or cards within your auto layout frames. This can make it easier to manage designs with different states and interactions.
By integrating these tactics into your workflow, you can drastically improve both the efficiency and quality of your designs.
12. Frequently Asked Questions (FAQ)
Here are some frequently asked questions regarding Figma’s auto layout feature:
What is the main advantage of using auto layout?
The primary advantage is the ability to create responsive designs that adjust automatically based on content changes, saving time and ensuring design consistency.
Can I use auto layout with existing designs?
Yes, you can convert existing frames or components to use auto layout without needing to recreate them from scratch. Select the frame and enable auto layout to apply it.
How does auto layout handle text resizing?
Auto layout can be set to adjust the size of elements based on the text within them. By configuring the resizing options, you can ensure that text is contained neatly within buttons or cards.
Is there a performance cost to using auto layout?
While auto layout enhances flexibility, very complex nested layouts can sometimes lead to performance issues. It’s best to keep designs as streamlined as possible.
Can I use auto layout with components and instances?
Absolutely! Auto layout works seamlessly with components, allowing you to create reusable designs that maintain their responsive properties across instances.
Are there any restrictions with auto layout?
Auto layout primarily deals with the content and spacing of frames. It may not work as effectively with certain types of complex vector graphics or intricate designs that require more control. (See: Harvard University resources on design.)
How do I learn more about auto layout?
Figma offers extensive resources, including official documentation and community forums. Engaging with design communities can also provide insights and tips from experienced users.
13. Common Use Cases of Auto Layout
Understanding some specific scenarios where auto layout shines can enhance your ability to leverage its capabilities effectively. Here are a few common use cases:
- Forms: Auto layout can be a game-changer for creating forms that need to be both functional and sleek. By applying auto layout, you can ensure that input fields, labels, and buttons automatically adjust to fit different amounts of text, providing a better user experience.
- Notifications and Alerts: Designing notification banners or alert messages can benefit from auto layout. These components often need to adapt based on the length of the message. Auto layout helps in maintaining a consistent design even when the text varies.
- Social Media Posts: For designers creating templates for social media, auto layout can help in defining how text and images should align, ensuring that the visual hierarchy remains intact across different content lengths.
14. Comparing Auto Layout with Traditional Layout Techniques
While auto layout provides a modern approach to handling responsive design, it’s valuable to understand how it compares with traditional layout methods:
- Flexibility: Traditional layouts often require you to manually adjust elements when changing content, leading to potential inconsistencies. Auto layout handles these adjustments automatically, saving time and effort.
- Time Efficiency: In traditional layouts, designers spend significant time tweaking margins, padding, and alignments. Auto layout streamlines this process, allowing for quicker iterations and adjustments.
- Collaboration: With auto layout, team members can make changes with confidence, knowing that the layout will adjust accordingly. Traditional methods often lead to conflicts where one change might disrupt another designer’s work.
15. Real-World Examples: Brands Using Figma’s Auto Layout
Several leading brands have integrated Figma’s auto layout into their design processes. Here are a few examples:
- Airbnb: The design team at Airbnb utilizes auto layout to create a seamless experience across their web and mobile platforms, ensuring that listings look great regardless of the content.
- Slack: Slack’s design team employs auto layout for their messaging interface, allowing messages to adjust automatically as users type, resulting in an intuitive experience.
- Dropbox: Dropbox uses auto layout for its dashboard, enabling users to have a dynamic view of their files and folders that adjusts based on their selections.
16. Mastering Auto Layout: Advanced Techniques
Once you feel comfortable with the basics of auto layout, you can explore advanced techniques to further enhance your designs:
- Custom Spacing: You can create custom spacing between elements to achieve a unique layout. This is done by setting different spacing values for individual elements rather than a uniform value.
- Asymmetrical Layouts: Auto layout isn’t just for symmetrical designs. You can create asymmetrical layouts that still maintain a grid-like structure by carefully adjusting the spacing and sizing of elements.
- Interactive Components: Combine auto layout with Figma’s interactive components to create dynamic prototypes. This allows you to showcase how elements will behave in real-time, providing clarity to stakeholders.
17. Conclusion: Mastering Auto Layout for Effective Design
Mastering Figma’s auto layout feature can significantly enhance your design workflow, enabling you to create responsive, adaptable layouts with ease. By understanding its core functionalities, applying best practices, and leveraging its collaborative benefits, you can not only improve your efficiency but also elevate the quality of your designs.
In this fast-evolving digital landscape, tools like Figma are more than just design applications — they are essential components in a designer’s toolkit. Embracing features like auto layout will allow you to stay ahead of the curve and create designs that meet the needs of today’s users, regardless of device or screen size.
“`
Trending Now
Frequently Asked Questions
What is Figma auto layout?
Figma auto layout is a feature that allows designers to create dynamic layouts that automatically adjust based on content changes. It simplifies the design process by resizing and reorganizing elements without manual adjustments, making it essential for responsive design.
How do I set up auto layout in Figma?
To set up auto layout in Figma, select a frame or object, then navigate to the right sidebar and click the '+' icon in the Auto Layout section. You can choose the layout direction (horizontal or vertical) and set spacing and padding for your design.
Why is auto layout important in design?
Auto layout is important because it streamlines the design process by automating the adjustment of elements in response to content changes. This feature is crucial for creating responsive designs that work across various devices, enhancing usability and efficiency.
Can I customize spacing in Figma's auto layout?
Yes, you can customize spacing in Figma's auto layout. When setting up auto layout, you can define the spacing between items and add padding around the frame to control the distance between the frame's edge and its content.
What types of designs benefit from Figma auto layout?
Figma auto layout benefits various design types, especially components like buttons, cards, and entire UI sections that need to adapt to different screen sizes. It's ideal for creating flexible, adaptive layouts in modern web and app design.
Have you experienced this yourself? We'd love to hear your story in the comments.