How to stream on Twitch with OBS Studio
Streaming on Twitch is more than just playing video games; it’s an opportunity to connect with audiences around the globe. And if you’re looking to stream on Twitch with OBS, you’re in the right place. Open Broadcaster Software, or OBS Studio, is a powerful open-source streaming and recording program that has gained immense popularity among streamers of all levels. This guide will take you through everything you need to know to start streaming successfully on Twitch using OBS Studio.
1. Understanding OBS Studio
OBS Studio is widely used due to its flexibility and user-friendly features. Launched in 2012, this software allows users to capture real-time streaming and recording from various sources, including video games, webcams, and desktop screens. Unlike many paid streaming software options, OBS is free and open-source, enabling a community of developers to contribute to its continuous improvement.
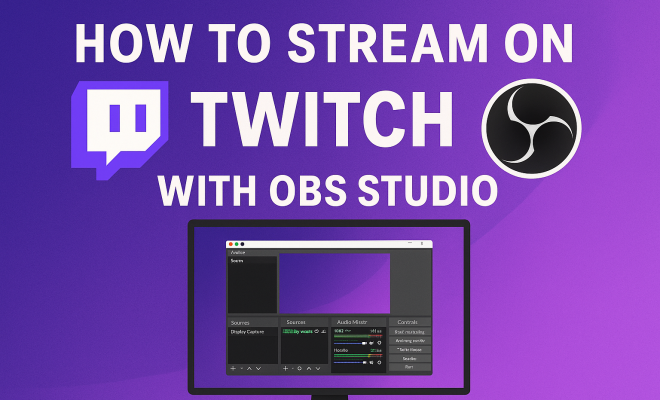
The intuitive interface of OBS Studio comprises several key components: a scene editor for managing your visual layouts, audio controls, and various settings to customize your streaming experience. This versatility is what makes OBS a top choice for those wanting to stream on Twitch with OBS. Your stream can be as simple or as complex as you want, depending on your preferences.
2. Setting Up Your OBS Studio
Before you can stream on Twitch with OBS, you need to install the software and configure it properly. Start by downloading OBS Studio from the official website. It’s available for Windows, macOS, and Linux, allowing a broad range of users to access it easily. Once installed, open the program and follow these steps:
- Configure Settings: Navigate to the ‘Settings’ tab. Here, you can adjust general settings, including stream options, output resolution, and audio settings.
- Set Up Your Stream: Under the ‘Stream’ section, choose ‘Twitch’ as your service. You’ll need to input your stream key, which you can find in your Twitch account settings. This key allows OBS to connect to your Twitch channel.
- Adjust Video and Audio Settings: Set your video bitrate, frame rate, and encoder type according to your internet speed and computer capabilities. A common video resolution for streaming is 1920×1080 with a frame rate of 30 or 60 FPS.
A solid setup ensures a smoother streaming experience and reduces the chances of lagging or buffering. streaming video games tips offers useful background here.
3. Creating Your First Scene
Scenes are the heart of OBS Studio, allowing you to create different layouts for your stream. A scene can include various sources like your game capture, webcam feed, and overlays. To create your first scene, follow these steps:
- Add a Scene: Click the ‘+’ button under the ‘Scenes’ box to create a new scene and name it.
- Add Sources: Click the ‘+’ button in the ‘Sources’ box. You can add different sources, such as:
- Display Capture: Captures everything on your screen.
- Game Capture: Specifically captures a game window.
- Video Capture Device: Allows you to include your webcam.
- Image/Media Source: Add overlays or alerts.
- Arrange Sources: You can arrange the layers of your sources by dragging them in the ‘Sources’ box. The order affects how they appear in the stream.
Creating scenes is crucial for a professional look and feel. You may also consider incorporating layout designs that reflect your brand or personality.
4. Enhancing Your Stream with Overlays and Alerts
Overlays and alerts can elevate the viewer experience significantly. Overlays can include your logo, chat windows, and recent follower notifications. Here’s how you can enhance your stream: (See: Open Broadcaster Software overview.)
- Using Overlay Packs: Many streamers opt for overlay packs available online, both free and paid. These packs can give your stream a polished and professional appearance.
- Setting Up Alerts: Services like Streamlabs or StreamElements provide customizable alerts for followers, donations, and subscriptions. Integrate these into your OBS by adding them as a ‘Browser Source’ and entering the URL provided by the service.
- Customizing Alerts: Modify the appearance and sound of your alerts to match your branding. It’s critical to make them engaging, as they can encourage viewer interaction.
These elements not only make your stream visually appealing but also enhance engagement with your audience.
5. Testing Your Stream
Before going live, it’s crucial to test your settings to ensure everything works as intended. Here’s a checklist to follow:
- Run a Test Stream: Use the ‘Start Streaming’ option in OBS, but set the stream to private or use a secondary account. This way, you can check if everything appears correctly without broadcasting to the public.
- Adjust Audio Levels: Make sure your game audio, microphone, and any other sound sources are balanced. You don’t want your voice to be drowned out by game noise.
- Check Your Internet Connection: A stable internet connection is critical for a smooth streaming experience. Tools like speedtest.net can help verify your upload speed.
Testing is non-negotiable. It saves you from embarrassing moments when you go live and something crucial goes wrong.
6. Going Live on Twitch
With everything set up and tested, you’re ready to go live! Here’s how to make the most of your first live session:
- Engage with Your Audience: Encourage viewers to chat and interact. Respond to comments and questions as they come in; it builds a sense of community.
- Set a Schedule: Consistency is key in building an audience. Try to stream at the same time and days each week.
- Keep an Eye on Feedback: Use OBS’s built-in features to monitor stream quality and viewer engagement. Consider adapting your content based on real-time feedback.
Remember to promote your stream on social media and other platforms to attract viewers.
7. Analyzing Your Stream Performance
After your stream, take time to analyze the performance. This will help you improve and grow your channel. Key metrics to consider include:
- Viewer Count: Track how many viewers you had at different times during your stream. This can help identify peak engagement times.
- Chat Activity: Pay attention to chat interactions. High chat activity usually indicates a successful engagement.
- Stream Quality: Review the quality of your video and audio. If viewers mention issues, consider adjusting your settings accordingly.
Streaming is a learning process, and reflecting on your performance can guide your future efforts.
8. Additional Tools to Enhance Streaming
While OBS Studio is powerful on its own, there are several additional tools and resources that can enhance your streaming experience: (See: CDC on using Twitch for health communication.)
- Stream Deck: Devices like the Elgato Stream Deck allow you to manage scenes, audio, and other OBS functions through customizable buttons, making it easier to switch between various elements while streaming.
- Chatbots: Consider using chatbots to moderate your chat and provide automated responses to common questions. This can keep your chat organized, especially when you have a large audience.
- Editing Software: After your streams, you might want to edit highlights or create clips. Software like Shotcut or DaVinci Resolve can help you create polished content for YouTube or social media.
Exploring these tools can significantly enhance your streaming capabilities and allow you to focus more on your content.
9. Staying Updated with Twitch and OBS Changes
Twitch and OBS Studio are constantly evolving, with regular updates that introduce new features and enhancements. Keeping yourself informed about these changes is crucial for maintaining a high-quality stream:
- Join Online Communities: Reddit, Discord, and other community forums can be excellent sources for tips, troubleshooting help, and news about updates.
- Follow Official Channels: Both Twitch and OBS have official blogs and social media accounts where they announce updates and new features. Staying connected means you won’t miss out on valuable changes.
- Experiment and Adapt: Don’t be afraid to try out new features and settings. Your streaming journey is unique, and what works for one streamer may not work for you.
Embracing change can be the key to growing your Twitch channel and keeping your audience engaged.
10. Common Streaming Issues and Troubleshooting
Even the most experienced streamers encounter issues from time to time. Here are some common problems you might face while streaming on Twitch with OBS, along with troubleshooting tips:
- Stream Lag or Buffering: This can often be due to a slow internet connection. Check your upload speed; a speed of at least 3-6 Mbps is generally recommended for 720p streaming. If your speed is adequate, consider lowering your bitrate settings in OBS.
- Audio Sync Issues: If your audio is out of sync with your video, you can adjust the audio delay in OBS. Go to the audio mixer, right-click your audio source, and select ‘Advanced Audio Properties’ to set a sync offset.
- Crashes or Freezes: If OBS crashes while streaming, ensure your graphics drivers are up to date. Also, make sure your computer’s hardware meets the minimum requirements for streaming, especially the CPU and GPU.
- Black Screen Issues: This may occur when using game capture. Ensure that your game is running in fullscreen mode and that OBS has the necessary permissions to capture your screen. You may also need to run OBS as an administrator.
Having a basic understanding of these common issues can save you a lot of frustration and help keep your streams running smoothly.
11. FAQs About Streaming on Twitch with OBS
As you embark on your streaming journey, you may have a few questions. Here are some frequently asked questions about using OBS for Twitch streaming:
- What are the minimum system requirements for OBS? Typically, OBS requires at least 4GB of RAM, a dual-core processor, and a decent graphics card. For better performance, 8GB of RAM and a dedicated GPU are recommended.
- Can I stream using OBS on a laptop? Yes, many laptops can handle OBS, especially if they have a dedicated graphics card. However, performance may vary based on your laptop’s specifications.
- Do I need a powerful computer to stream? While a more powerful computer can enhance performance and allow for more complex scenes, many streamers have successfully started with mid-range systems. Optimize your settings for your hardware to get the best results.
- How do I keep my audience engaged during my streams? Interact with your viewers through chat, ask questions, and encourage them to share their thoughts. Playing a variety of games or trying different content can also help keep things fresh.
- Is it necessary to have a webcam? While a webcam can add a personal touch and help viewers connect with you, it’s not mandatory. Many successful streamers start without one and add it later.
12. Building a Community on Twitch
Streaming on Twitch is not just about the content; it’s about building a community. Here are some effective strategies to foster a supportive and engaged audience:
- Be Authentic: Share your personality and be genuine with your viewers. Authenticity builds trust and allows viewers to connect with you on a personal level.
- Host Events: Consider hosting special events, such as game nights, tournaments, or themed streams. These can draw in new viewers and keep your existing community engaged.
- Network with Other Streamers: Collaborating with fellow streamers can introduce you to their audience and vice versa. Look for opportunities to co-stream or shout each other out.
- Utilize Social Media: Promote your streams and engage with your audience on platforms like Twitter, Instagram, or TikTok. Sharing clips or highlights can attract new viewers and keep your community engaged when you’re offline.
Building your community takes time and effort, but it can lead to a loyal fanbase that supports you in your streaming endeavors. (See: Research on streaming and audience engagement.)
13. Monetizing Your Twitch Channel
Once you’ve established yourself on Twitch and built an audience, you might be considering ways to monetize your efforts. Here are some common methods:
- Twitch Affiliate Program: Once you meet certain criteria, you can join the Twitch Affiliate Program, allowing you to earn money through subscriptions, Bits (virtual goods), and game sales.
- Twitch Partner Program: As you grow, you might aspire to become a Twitch Partner, which provides additional benefits like higher revenue sharing, custom emotes, and community support.
- Donations: Many streamers use platforms like PayPal or Ko-fi to accept donations from viewers who want to support their content. Make sure to promote this option clearly and respectfully.
- Sponsorships and Ads: As your channel grows, companies may approach you for sponsorships. You can also take advantage of Twitch’s ad system to earn revenue during your streams.
Understanding how to monetize your channel can turn your passion for streaming into a viable income source.
14. Maintaining a Healthy Streaming Routine
Streaming can be a demanding activity, so it’s important to maintain a healthy routine. Here are some strategies to consider:
- Set Reasonable Streaming Hours: Avoid streaming for excessively long hours. Instead, establish a schedule that allows you to take breaks and rest your voice.
- Stay Hydrated and Nourished: Keep water and snacks nearby during your streams. Staying hydrated helps maintain your energy and focus.
- Take Time Off: Regular breaks from streaming help prevent burnout. Schedule days off to recharge and focus on other aspects of your life.
- Engage in Offline Activities: Balance your streaming with offline hobbies or activities. This helps maintain your mental health and can provide fresh content ideas.
Taking care of yourself is essential for long-term success as a streamer. (considerations for classroom livestreaming)
In summary, streaming on Twitch with OBS Studio is an exciting venture that requires the right mix of preparation, creativity, and engagement. By following the steps outlined in this guide, you’re on your way to creating an engaging and successful Twitch channel. Whether you’re streaming gameplay, creative content, or just chatting, the potential to connect with people worldwide is at your fingertips. So, gear up, hit that ‘Start Streaming’ button, and let your journey begin!
Trending Now
Frequently Asked Questions
How do I start streaming on Twitch with OBS Studio?
To start streaming on Twitch with OBS Studio, first download and install OBS from the official website. After installation, configure your settings in the 'Settings' tab, select 'Twitch' as your streaming service, and input your stream key from your Twitch account. Finally, set up your scenes and sources to begin streaming.
What are the benefits of using OBS Studio for Twitch streaming?
OBS Studio offers numerous benefits for Twitch streaming, including being free and open-source, which allows for continuous community-driven improvements. It features a user-friendly interface, customizable settings, and supports various sources like games and webcams, making it ideal for both novice and experienced streamers.
Is OBS Studio easy to use for beginners?
Yes, OBS Studio is designed to be user-friendly, making it accessible for beginners. Its intuitive interface includes a scene editor and simple audio controls, allowing new users to easily set up their streams. Additionally, there are many online resources available to help beginners get started.
What do I need to stream on Twitch?
To stream on Twitch, you'll need a stable internet connection, a computer capable of running OBS Studio, and a Twitch account. Additionally, you'll require a microphone and webcam for better audience interaction, as well as a stream key from your Twitch settings to connect OBS to your Twitch channel.
Can I use OBS Studio on different operating systems?
Yes, OBS Studio is compatible with various operating systems, including Windows, macOS, and Linux. This broad compatibility allows a wide range of users to access the software and stream on Twitch, regardless of their preferred operating system.
Agree or disagree? Drop a comment and tell us what you think.