How to safely remove USB without icon
“`html
Have you ever found yourself in a situation where you needed to safely remove a USB drive from your computer but couldn’t find the icon to do so? You’re not alone. Many users encounter this common hiccup, and it can lead to concerns about data loss or corruption. In this comprehensive guide, we’ll explore the various methods to safely remove USB without icon, providing you with practical insights, solutions, and tips to avoid potential pitfalls.
1. Understanding the ‘Safely Remove Hardware’ Function
The ‘Safely Remove Hardware’ function is a crucial aspect of using USB devices effectively. This feature allows users to disconnect USB drives and other external storage devices without risking data corruption. When you click on the icon in the system tray, it prompts Windows to complete any read or write operations before the device is ejected. However, if the icon is missing, it’s essential to know alternative methods to achieve the same goal.
Understanding why this feature exists can help you appreciate its importance. When USB devices are removed abruptly, it can lead to file corruption or even damage the drive itself. To avoid these situations, knowing how to safely remove USB without icon is essential for any computer user.
2. Using the Task Manager to Eject USB Drives
If you can’t find the ‘Safely Remove Hardware’ icon, one effective method to eject your USB drive is through the Task Manager. Begin by pressing Ctrl + Shift + Esc to open the Task Manager. Once there, navigate to the ‘Processes’ tab and look for any applications that might be using the USB drive. Close these applications to ensure that no files are currently being accessed.
After ensuring that the drive is not in use, click on the ‘File’ menu in the Task Manager and select ‘Run new task.’ Type devmgmt.msc and press Enter. This action will open the Device Manager, where you can locate your USB drive under the ‘Disk drives’ section. Right-click on the USB device and select ‘Eject’ to safely remove it.
3. Command Line Method for Ejecting USB Devices
For the tech-savvy among us, using the Command Prompt is another way to safely remove USB without icon. To start, press Windows + R to open the Run dialog box, then type cmd and press Enter to open the Command Prompt. Once the Command Prompt is open, type the command diskpart and hit Enter. This command launches the Disk Partition tool.
In the Diskpart interface, type list volume to display all available drives. Identify your USB drive from the list, noting its corresponding volume number. To eject the USB drive, type select volume X (where X is the number of your USB drive) and then remove. This command will safely disconnect your USB drive from the computer.
4. Using Third-Party Software for USB Ejection
If you frequently encounter issues with the ‘Safely Remove Hardware’ icon, third-party software might be a suitable solution. There are several tools available that provide a user-friendly interface for ejecting USB devices. Software like USB Safely Remove or Unlocker offers additional features, including the ability to see which processes are using the USB drive, making it easier to safely disconnect it.
Using these tools typically involves downloading and installing the software, then using their built-in functionalities to eject your USB drive. Many of these applications provide notifications when it’s safe to remove the device, further ensuring data integrity and preventing corruption.
5. Checking for Open Files and Processes
Before attempting to safely remove USB without icon, it’s essential to check if any files on the USB drive are open. If you have opened documents, images, or applications directly from the USB, this can prevent you from ejecting the device safely. Always make sure you close any files or applications using the USB before initiating the ejection process. (See: Understanding USB technology and usage.)
A common oversight is having a file explorer window open that displays the contents of the USB drive. Closing all instances of file explorers and applications that access the USB will minimize the risk of corruption and ensure a smooth ejection process.
6. Configuring Windows Settings for USB Safety
Windows has built-in settings that can affect how USB devices are ejected. By adjusting your settings, you can potentially enhance the reliability of your USB ejection process. Navigate to ‘Control Panel’ > ‘Hardware and Sound’ > ‘Devices and Printers,’ right-click on your USB device, and select ‘Properties.’ Under the ‘Policies’ tab, you’ll find options for ‘Quick removal’ and ‘Better performance.’
Selecting ‘Quick removal’ allows you to remove the device without using the ‘Safely Remove Hardware’ icon, as Windows will automatically stop all file operations. This setting can be beneficial, especially if you find the icon frequently missing. However, be aware that this may impact performance when transferring files, as it disables write caching.
7. Using a Keyboard Shortcut to Eject USB Drives
If you prefer a more immediate solution, there’s a keyboard shortcut you can use to eject your USB drive quickly. While it may not work for all configurations, many Windows users can achieve this by selecting the drive from the file explorer and pressing Shift + Delete. This combination prompts a warning message asking if you want to delete the selected drive. While this is technically about deletion, it can sometimes trigger the ejection process without needing the icon.
However, be cautious with this method, as it may not always work as intended and could lead to data loss if not executed properly. Always double-check that no files are in use before attempting this shortcut.
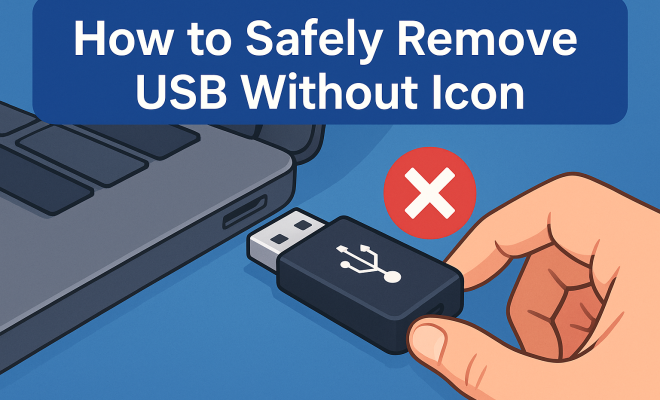
8. Physical Disconnection: What to Avoid
While it might be tempting to simply pull out your USB drive when you’re done using it, doing so without proper ejection can lead to data corruption or even device failure. It’s crucial to avoid this practice altogether. Always take the time to use one of the aforementioned methods to ensure that all processes are completed and that the data on the drive remains intact.
Physical damage can also occur if you pull out the USB drive while it’s still in use. Frequent misuse can lead to the connector wearing down, making it difficult for the USB to function properly in the future. In short, taking a moment to safely eject your USB can save you potential headaches and protect your data.
9. Final Thoughts on USB Safety
With so many methods available to safely remove USB without icon, you don’t have to be left in a lurch when the standard option is missing. From using the Task Manager to command line prompts, and even third-party software, there’s always a way to ensure your data remains secure. By following the practices outlined in this article, you can minimize the risk of data corruption and maximize your USB drive’s lifespan.
Making it a habit to properly eject USB drives will not only protect your data but also ensure a smoother computing experience overall. So next time you’re in a pinch, remember these tips, and you’ll be able to disconnect your USB safely, icon or not!
10. Common Mistakes When Using USB Drives
Even with the best practices in place, users often make mistakes that can lead to data loss or USB drive malfunctions. Here are some of the most common pitfalls to avoid:
- Assuming All Transfers Are Complete: Just because you’ve copied a file doesn’t mean the transfer is finished. Always wait for confirmation that all files have been copied before removing the USB drive.
- Forgetting to Close Programs: Many users forget that programs accessing files on the USB must be closed. Ensure every application that uses the USB drive is closed before you attempt to eject it.
- Not Using Eject Options: Some users opt to skip ejection altogether, believing it’s unnecessary. This can lead to corruption, particularly if files are being written to the drive during removal.
11. Statistics on USB Drive Usage and Risks
Understanding the prevalence of USB drive usage can emphasize the importance of safe removal practices. According to recent studies, over 60% of computer users have at least one USB device connected to their machines at any given time. Furthermore, up to 30% of users report experiencing data loss due to improper ejection of USB drives. These statistics highlight a critical need for education on safe removal methods. (See: Safe computer usage guidelines.)
12. Expert Perspectives on USB Usage
Experts in data security stress the importance of proper USB usage. Cybersecurity professionals often note that improper ejection can lead not only to data loss but also to vulnerabilities. When USB drives are frequently removed without proper procedures, users risk exposing data to potential malware or corruption. Experts recommend taking the time to ensure drives are safely removed to safeguard both data integrity and overall device health.
13. Frequently Asked Questions (FAQ)
Q1: Can I remove a USB drive without using the ‘Safely Remove Hardware’ option?
A1: While it’s technically possible to remove a USB drive without using the ‘Safely Remove Hardware’ option, doing so can lead to data corruption or loss. It’s always best to ensure that the drive is not being accessed and to use one of the safe removal methods.
Q2: What happens if I pull out my USB drive without ejecting it?
A2: If you pull out your USB drive without ejecting it, you risk corrupting files that were in use or not fully written to the drive. This can make the files unreadable or cause permanent data loss.
Q3: How can I tell if my USB drive is still in use?
A3: You can check Task Manager to see if any applications are using the USB drive. If you have file explorer windows open displaying the USB’s contents or if you’re running applications that access files on it, the drive will still be in use.
Q4: Why can’t I find the ‘Safely Remove Hardware’ icon?
A4: The icon might be hidden in the system tray or disabled due to software settings. You can try reopening the taskbar settings or using alternative methods such as Task Manager or Command Prompt to safely eject your drive.
Q5: Are there any risks to using third-party software for USB ejection?
A5: While third-party software can be useful, it’s essential to use reputable programs. Some lesser-known tools might not function correctly or could pose security risks. Always research and choose well-reviewed software for USB management.
Q6: What should I do if my USB drive becomes unresponsive?
A6: If your USB drive becomes unresponsive, try closing all applications accessing it, then use Task Manager to end any processes that may be using it. If the drive is still unresponsive, you may need to restart your computer to resolve the issue.
Q7: What are the benefits of using ‘Quick removal’ settings?
A7: The ‘Quick removal’ setting allows users to safely remove USB devices without going through the ‘Safely Remove Hardware’ icon, making it convenient. However, this may affect transfer speeds, so users should weigh the convenience against performance needs.
14. Alternative Methods for Ejecting USB Drives
While we’ve covered several methods for safely removing USB drives without the icon, there are a few more approaches that can be helpful, depending on your system setup and user preferences. Here are some additional methods to consider:
Using File Explorer to Eject USB Drives
One straightforward way to safely remove a USB drive is through File Explorer. Start by opening File Explorer and navigating to ‘This PC’ or ‘My Computer’. Locate your USB drive in the list of devices and drives. Right-click on the USB drive icon and select ‘Eject’ from the context menu. This method works similarly to the ‘Safely Remove Hardware’ icon, giving you a quick and easy way to remove your device. (See: Best practices for using USB drives.)
Using Windows PowerShell to Eject USB Drives
If you’re comfortable with command-line tools, Windows PowerShell offers another method to safely remove USB devices. Open PowerShell by right-clicking on the Start menu and selecting ‘Windows PowerShell (Admin)’. Once it’s open, you can use the command Get-PnpDevice to list all connected devices. Find your USB drive in the list, take note of its name, then use the command Remove-PnpDevice -InstanceId “Your USB Instance ID” to eject it. This method is particularly handy for advanced users who prefer scripting and automation.
15. How to Troubleshoot Common USB Ejection Issues
Sometimes you may run into issues when trying to eject a USB drive. Here are some common problems and solutions that can help you troubleshoot:
USB Drive Not Ejecting
If your USB drive refuses to eject, it may be due to open files or applications still using it. Use Task Manager to check for any active processes associated with the drive. If you can’t identify any, try restarting your computer, which should close any lingering processes and allow for safe ejection.
Windows Prompting Error Messages
Occasionally, you may encounter error messages when attempting to eject your USB drive. If you receive a message stating that the device is in use, ensure that all files are closed and that any applications using the drive are shut down. If the problem persists, consider disconnecting the USB drive and reconnecting it to see if that resolves the issue.
USB Drive Showing as Write Protected
If your USB drive appears to be write-protected, you won’t be able to safely eject it. This issue can arise if the drive has a physical write protection switch. Check the drive for a toggle switch and set it to the ‘unlocked’ position. If it’s a software-related issue, you may need to format the drive or use disk management tools to remove the write protection before you can eject it.
16. Best Practices for USB Drive Maintenance
Taking care of your USB drive can prevent many issues down the road. Here are some best practices for maintaining your USB drive:
- Regular Backups: Always maintain a backup of important files stored on your USB drive. This ensures that even if something goes wrong during ejection or the drive fails, your data remains safe.
- Avoid Overloading: Don’t fill your USB drive to capacity. Keeping some free space allows for smoother operation and reduces the chance of corruption.
- Safeguard Against Physical Damage: Use a protective case for your USB drive to prevent physical damage. Always handle it with care, especially when inserting or removing it from ports.
17. Conclusion: Keeping Your Data Safe
Now that you’re equipped with a variety of methods for safely removing USB without icon, it’s essential to implement these practices regularly. With the right approach and techniques, you can significantly reduce the risk of data loss and ensure your USB drive remains in good working condition. Whether you find yourself relying on Task Manager, Command Prompt, or third-party software, staying informed and cautious will serve you well in your computing endeavors. Remember, taking a moment to safely eject your USB drive is always worth it!
“`
Trending Now
Frequently Asked Questions
How do I safely remove a USB drive without the icon?
If the 'Safely Remove Hardware' icon is missing, you can safely eject your USB drive using the Task Manager. Open it with Ctrl + Shift + Esc, close any applications using the USB drive, then access Device Manager to right-click and safely remove the drive.
What happens if I remove a USB drive without ejecting it?
Removing a USB drive without ejecting can lead to data corruption or loss. The operating system may still be writing or reading files, and abrupt removal can damage both the data and the USB drive itself.
Why is the safely remove hardware icon missing?
The 'Safely Remove Hardware' icon may be missing due to system settings, updates, or if the USB drive is in use by an application. It's important to troubleshoot these issues to ensure safe removal of the device.
Can I use Task Manager to eject USB drives?
Yes, you can use Task Manager to eject USB drives. Open Task Manager, ensure no applications are using the USB, then access Device Manager to find and safely remove the USB device.
Is it safe to just unplug a USB drive?
It is not safe to just unplug a USB drive without ejecting it first. Doing so can cause data corruption or damage to the drive. Always use the 'Safely Remove Hardware' function or alternative methods to avoid risks.
What did we miss? Let us know in the comments and join the conversation.