Reupholster Your Chair: A DIY Guide to Stunning Furniture
“`html
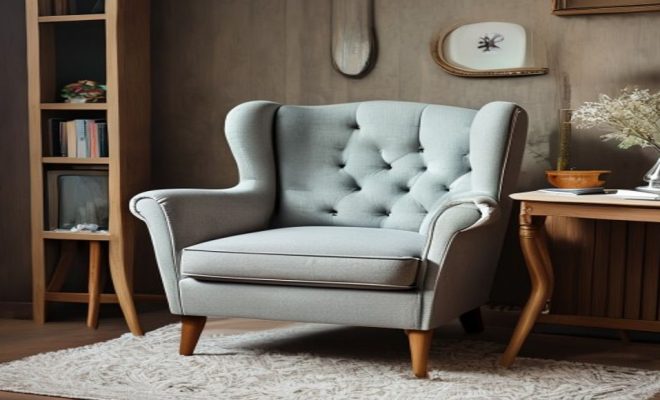
Reupholstering a chair might seem daunting, but with the right tools and techniques, it can transform an old piece of furniture into a stunning focal point for your home. Whether you’re looking to refresh a vintage find or simply want to match your current decor, knowing how to reupholster a chair can save you money and give you a sense of accomplishment. Let’s dive into the essential steps involved in this rewarding DIY project.
1. Understanding the Need to Reupholster
Before you start tearing apart your chair, it’s crucial to understand why reupholstering might be the right choice for you. Over time, fabric can fade, tear, or become outdated, detracting from the beauty of your furniture. Additionally, a chair may have structural issues or simply not match your aesthetic anymore.
Reupholstering not only gives you a chance to revitalize an old piece but can also extend its lifespan. Many chairs, especially those with solid frameworks, are worth the investment of time and effort. It’s an eco-friendly option, too, as it reduces waste by keeping old furniture out of landfills.
2. Gathering Your Supplies
Once you’ve decided to reupholster your chair, it’s time to gather the necessary supplies. Here’s a handy list to get you started:
- Fabric (enough for the chair, typically 1-3 yards depending on size)
- Upholstery foam (if needed)
- Batting
- Staple gun and staples
- Scissors
- Measuring tape
- Screwdriver
- Pulling tool (like pliers)
- Needle and thread (heavy-duty)
- Optional: upholstery tacks or decorative nails
Choose your fabric wisely. Consider durability and color, as you want something that complements your space while being able to withstand daily wear. For high-traffic areas, opt for fabrics like microfiber or canvas, which are known for their resilience.
3. Preparing the Chair
The first hands-on step in your reupholster chair journey is to remove the old upholstery. Begin by flipping your chair upside down and examining how it is put together. Use a screwdriver to remove any screws and a pulling tool to take out staples or tacks holding the fabric in place.
As you take apart the chair, take notes or pictures of how the fabric is attached. This will serve as a guide when you put everything back together. Be careful while removing old upholstery; if it’s in good shape, you might be able to use it as a template for cutting the new fabric.
4. Choosing the Right Fabric
Fabric selection can make or break your reupholstery project. Besides aesthetics, consider the fabric’s weight, texture, and durability. Fabrics like cotton blends, denim, canvas, and synthetics are often good choices for upholstery due to their sturdiness and ease of maintenance.
Before making a purchase, buy a swatch to test how it looks in your space. Lighting can change the perception of color and texture. Once you’ve selected your fabric, it’s time to measure and cut it to size, ensuring you have enough material for all parts of the chair. (See: Understanding reupholstery techniques.)
5. Adding New Padding
If your chair requires extra comfort or the existing padding is worn out, this step is essential. Start by measuring the seat and back to cut the foam to fit. Use high-density upholstery foam for a more durable and comfortable seat. Layering batting over the foam can add a softer touch.
Secure the foam in place with a staple gun, ensuring it is evenly distributed. When applying batting, wrap it around the foam and secure it at the bottom of the chair frame to tuck it neatly under the upholstery later. This extra layer not only provides comfort but also gives a professional finish to your chair.
6. Upholstering the Chair
This is the moment you’ve been waiting for—the actual reupholstering! Start with the seating area. Lay your cut fabric over the seat and center it properly. Pull the fabric tight, and begin stapling it onto the chair frame, starting from the center of one side and working your way out to the corners.
When reaching the corners, fold the fabric neatly and pull it tight for a clean look. It’s important to ensure that the fabric is taut but not overstretched to avoid warping. After the seat, repeat the process for the backrest and any additional parts of the chair that need reupholstering.
7. Finishing Touches
After the fabric is securely fastened, it’s time to reassemble your chair. If you removed any screws or parts, now is the time to put them back according to your notes or photos. Once assembled, check for any loose staples or uneven fabric, making adjustments as necessary.
You might also consider adding decorative touches, such as upholstery tacks or a fresh coat of paint on the legs, to enhance its look. Finally, step back and admire your handiwork. With a little patience and creativity, you’ve successfully learned how to reupholster a chair, breathing new life into your furniture!
8. Different Techniques for Reupholstering
While the basic steps of reupholstering a chair are relatively straightforward, several techniques can enhance your project’s quality and style. Depending on the chair’s style and the desired outcome, you might consider these options:
8.1. Traditional Upholstery Techniques
For more classic chairs, you may want to use traditional upholstery methods such as hand-stitching or using horsehair padding. This method requires a bit more skill but can result in a chair that not only looks beautiful but also lasts longer. Traditional methods often include sewing the upholstery fabric to the base using heavy-duty thread, which can add a tailored finish.
8.2. Modern Techniques
If you’re interested in a more contemporary look, techniques such as slipcovers or using a staple gun exclusively can simplify the process. A slipcover can be a stylish way to cover your chair without the commitment of traditional reupholstering. They’re easy to remove and wash, making them practical for families with kids or pets.
8.3. Mixed Materials
Don’t shy away from combining different materials! For example, you can mix leather with fabric for a chic look. A leather seat with a patterned fabric back can create an eye-catching contrast, while also offering durability where it’s needed most. (See: Health benefits of furniture care.)
9. Cost Considerations
Before diving into your reupholstering project, it’s important to consider the costs involved. While reupholstering can be cheaper than buying new furniture, expenses can add up. Here’s a breakdown of potential costs:
- Fabric: Depending on the type and quality, upholstery fabric can range from $10 to $50 per yard.
- Foam: Quality upholstery foam can cost between $20 to $100, depending on thickness and density.
- Tools: If you don’t already own them, tools like staple guns, scissors, and screwdrivers might add another $50 to $100 to your budget.
- Professional Help: If you’re considering hiring a professional, labor costs can range from $50 to $150 per hour, depending on your location and the complexity of the job.
By evaluating these costs upfront, you can decide whether to take on the project yourself or hire a professional, helping you stick to your budget.
10. Maintenance Tips for Reupholstered Chairs
After you’ve successfully reupholstered your chair, the next step is maintenance. Proper care can prolong the life of your reupholstered chair significantly. Here are some helpful tips:
- Regular Cleaning: Vacuum your chair regularly to remove dust and debris. For fabric chairs, use an upholstery attachment to avoid damage.
- Spot Cleaning: Address stains as soon as they occur. Use a damp cloth with mild soap and water, then blot dry. Always check the fabric care instructions before applying any cleaners.
- Protect from Direct Sunlight: If possible, keep your reupholstered chair out of direct sunlight to avoid fading. If it must be in a sunny spot, consider using window coverings.
- Rotate Cushions: If your chair has removable cushions, rotate them regularly to ensure even wear.
11. FAQs About Reupholstering a Chair
11.1. How do I know if my chair is worth reupholstering?
If the chair has a solid frame, is comfortable, and has sentimental value, it’s worth reupholstering. Also, if the cost of new furniture is significantly higher than reupholstering, it makes financial sense to invest in your current piece.
11.2. Can I reupholster a chair without previous experience?
Absolutely! Many beginners successfully reupholster chairs by following online tutorials or guides. Start with simple designs, and you’ll gain confidence as you practice.
11.3. What type of fabric is best for reupholstering a chair?
Fabrics like cotton blends, canvas, and polyester are excellent for upholstery due to their durability and ease of cleaning. For high-traffic areas, consider fabrics with a higher thread count for added strength.
11.4. Is reupholstering a chair a time-consuming process?
The time it takes to reupholster a chair varies based on the complexity of the chair and your experience level. On average, you might spend anywhere from a few hours to a couple of days, including preparation, upholstery, and drying time.
11.5. Should I remove the old fabric completely or leave it on?
It’s generally best to remove the old fabric entirely, as this allows you to inspect the frame and foam for any damage. However, if the old fabric is in good condition and provides extra padding, you may leave it as a base layer.
12. Common Mistakes to Avoid When Reupholstering
Even if you follow all the steps, mistakes can happen during a reupholstering project. Here are some common pitfalls to avoid: (See: New York Times on furniture reupholstering.)
- Not Measuring Properly: Double-check your measurements before cutting your fabric. Once it’s cut, you can’t go back! Use a measuring tape consistently and record measurements carefully.
- Choosing the Wrong Fabric: Ensure your fabric is suitable for upholstery. Some fabrics may look beautiful but lack durability or are difficult to clean.
- Rushing the Project: Take your time. Rushing can lead to mistakes, and you might overlook important details, like ensuring the fabric is stapled in evenly.
- Ignoring Comfort: While aesthetics are important, don’t forget about comfort. Make sure the padding is sufficient and the upholstery is soft enough for regular use.
- Skipping Testing the Material: Always test your fabric swatch in your space to see how it works with your light and décor before committing to a large purchase.
13. Advanced Techniques for Experienced DIYers
Once you’ve mastered the basics of reupholstering, you might want to consider some advanced techniques to elevate your projects. Here are a few ideas:
13.1. Tufting
Tufting adds a sophisticated look to upholstered pieces. This process involves creating a button effect that pulls the fabric tight over the padding. It can be a bit tricky for beginners, so it’s advisable to practice on a smaller project first.
13.2. Using a Sewn Cover
For a more tailored look, consider sewing a fitted cover for your chair. This method requires sewing skills and an accurate pattern to ensure everything fits perfectly. A sewn cover can provide a more custom and polished appearance than stapled fabric.
13.3. Reupholstering with Padded Arms
If your chair has arms, think about how you want them to feel and look. Adding padding to chair arms can enhance comfort and style. Make sure to wrap the foam and fabric tightly around the arms to maintain a clean line.
14. Comparison: Reupholstering vs. Buying New
Many people wonder if it’s worth the time and effort to reupholster a chair compared to simply buying a new one. Here’s a quick comparison:
| Criteria | Reupholstering | Buying New |
|---|---|---|
| Cost | Often cheaper, especially for high-quality chairs | Can be more expensive, especially for high-end brands |
| Customization | Full control over fabric and style | Limited to available designs |
| Quality | Retains the original quality of craftsmanship | Varies widely by manufacturer |
| Emotional Value | Can preserve sentimental pieces | New items may lack personal connection |
| Time | Requires a significant investment of time | Immediate gratification |
15. Final Thoughts
Reupholstering a chair is a gratifying project that can provide a rewarding sense of accomplishment. By understanding the process, gathering the right materials, and following the right steps, you can create a beautiful piece that complements your home perfectly. So, roll up your sleeves and give your chair the makeover it deserves!
“`
Trending Now
- A Visitors Guide to Northshore, New Zealand
- the complete explanation
- this guide on “5 evidence-based strategies to improve math fluency in middle school classrooms”
- How Nonverbal Communication Impacts Conflict Resolution…
- this guide on the role of fine motor skills in kindergarten readiness and academic success
Frequently Asked Questions
What tools do I need to reupholster a chair?
To reupholster a chair, you will need several tools including a staple gun, scissors, measuring tape, a screwdriver, a pulling tool like pliers, and heavy-duty needle and thread. Additionally, gather upholstery foam, batting, and fabric to complete the project.
How do I prepare a chair for reupholstering?
Preparing a chair for reupholstering involves flipping it upside down and removing the old upholstery carefully. Inspect the frame for any structural issues and assess the condition of the cushioning before proceeding with new materials.
What type of fabric is best for reupholstering a chair?
When choosing fabric for reupholstering, consider durability and color. For high-traffic areas, materials like microfiber or canvas are ideal due to their resilience. Ensure the fabric complements your existing decor while being able to withstand daily use.
Is it worth it to reupholster a chair?
Reupholstering a chair can be worth the investment, especially for solidly built pieces. It revitalizes old furniture, extends its lifespan, and is an eco-friendly option that reduces waste by keeping furniture out of landfills.
How much fabric do I need to reupholster a chair?
The amount of fabric needed to reupholster a chair typically ranges from 1 to 3 yards, depending on the chair's size and design. It's essential to measure your chair accurately to ensure you have enough material for the project.
What did we miss? Let us know in the comments and join the conversation.