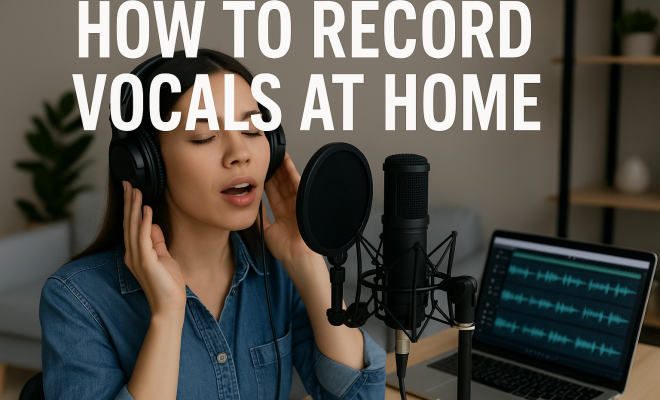
How to record vocals at home
“`html
With the rise of technology and the proliferation of home studios, the ability to record vocals at home has never been more attainable. Whether you’re a budding musician, a voiceover artist, or just someone who wants to capture their singing talent, mastering this skill can open doors to numerous creative opportunities. Let’s dive into the essential elements that will transform your home recording experience.
1. Choosing the Right Equipment
The first step in your home recording journey is outfitting your studio with the right equipment. While professional studios boast high-end gear, you can achieve great results with some thoughtful choices on a budget. At the core of your setup should be a quality microphone. Consider options like the Shure SM58 for a dynamic mic or the Audio-Technica AT2020 for a condenser mic, both providing excellent sound quality without breaking the bank.
Next, you’ll need an audio interface to connect your microphone to your computer. An interface like the Focusrite Scarlett 2i2 or PreSonus AudioBox USB is popular among home recordists for their reliability and sound clarity. Additionally, invest in good headphones to monitor your recordings accurately. Closed-back headphones are ideal, as they prevent sound leakage that could interfere with your tracks.
Don’t overlook the importance of a good mic stand and pop filter either. A sturdy mic stand will allow you to maintain the correct positioning of the microphone, which is crucial for consistent sound quality. A pop filter can help eliminate plosives, enhancing the clarity of your recordings.
Consider expanding your equipment list with an external preamp. Preamps can dramatically improve the sound of your recordings by providing a clean boost to your microphone signal. Brands like DBX and Art offer budget-friendly options that can elevate your vocal recordings.
2. Setting Up Your Recording Space
The acoustics of your recording space can greatly influence the quality of your vocals. Ideally, you’ll want a quiet room with minimal outside noise and echoes. If your space has hard surfaces like tile or glass, consider using sound-absorbing materials to dampen sound reflections. You can use foam panels, carpets, or even heavy curtains to help manage the acoustics effectively.
Creating a makeshift vocal booth can be as simple as draping blankets around your mic setup to create a cozy, soundproof environment. This will help you capture cleaner vocals and minimize ambient noise, ensuring your recordings are professional-grade. Remember, your goal is to create an environment that enhances your voice without unwanted interference.
For better sound isolation, you might want to invest in acoustic treatment solutions, such as bass traps and diffusers. These materials help control low-frequency sounds and reflections, allowing your voice to shine through in the mix.
Additionally, consider the lighting and comfort of your recording space. A well-lit and comfortable area can boost your mood and help you perform better. Make sure to adjust your workspace ergonomics, so you’re not straining your back or neck while you record.
3. Understanding Microphone Techniques
Once you have your equipment and space ready, it’s time to focus on your microphone technique. The distance between your mouth and the microphone can significantly affect the sound quality of your recordings. A good starting point is about six inches; however, this can vary based on your vocal style and the mic’s sensitivity.
Experiment with angles and distances to find what works best for your voice. Singing directly into the mic captures a powerful sound, while angling it slightly can soften harsh sibilances. Additionally, using a pop filter can help reduce plosive sounds caused by hard consonants, ensuring a smoother recording. Taking the time to develop these techniques will enhance your recordings and help you achieve a polished sound. (See: Learn about different types of microphones.)
Consider incorporating some vocal warm-up exercises to prepare your voice before recording. Just a few minutes of scales or light humming can make a difference in the clarity and power of your vocals. It’s all about finding what gets your voice ready to perform at its best.
Listening to your recordings and adjusting your technique based on what you hear can be invaluable. Take notes on what sounds good and what might need improvement, as this will guide your future sessions.
4. Software for Recording and Editing
Choosing the right software, or Digital Audio Workstation (DAW), is crucial when you record vocals at home. Popular DAWs like Ableton Live, Logic Pro X, and GarageBand offer user-friendly interfaces and powerful tools for vocal recording and editing. Many of these platforms provide built-in effects and plugins that can help enhance your voice with reverb, compression, and EQ adjustments.
Spend time familiarizing yourself with your chosen DAW. Watching online tutorials can be tremendously helpful in understanding the various features and capabilities. As you become comfortable with the software, you’ll be able to edit your vocals seamlessly, adding layers, harmonies, and effects that will elevate your recordings to a new level.
In addition to the basic functions, explore third-party plugins as well. Plugins like iZotope Nectar and Melodyne can offer advanced vocal processing capabilities, helping you achieve a professional sound without the need for a studio. These tools can help you manipulate pitch, add harmonies, and even correct vocal imperfections.
Don’t forget to back up your projects regularly. Cloud storage services can provide an extra layer of security for your recordings, so you won’t lose hours of hard work due to a technical glitch.
5. Recording Techniques That Make a Difference
When it comes to actually hitting record, there are several techniques that can help improve your vocal sessions. First, consider recording multiple takes of the same vocal line. This allows you to choose the best performance for your final track or even combine elements from different takes to create the perfect blend.
Additionally, don’t hesitate to experiment with vocal layering and harmonies. Adding a second or third vocal track can create a rich, full sound that captures the listener’s attention. Pay attention to the dynamics of your performance as well; varying your volume and intensity can convey emotion and keep your audience engaged.
Another technique to enhance your vocals is to use a technique called “vocal doubling.” This involves recording a second track of the same vocal line with the exact performance but slightly offset in timing. This creates a thicker vocal sound that adds depth and richness to your recordings.
Consider the use of backing vocals as well. Recording a few harmonized lines can add layers and emotion to your tracks, making them feel more complete. In genres like pop or rock, this technique is especially effective in creating a memorable hook.
6. Editing Your Vocal Tracks
After you’ve captured your vocals, the editing process can make or break your final product. Begin by listening through your recordings and selecting the best takes. Don’t be afraid to cut out unwanted sections, breaths, or mistakes to create a more polished sound.
Utilize your DAW’s editing tools to adjust timing and pitch if necessary. Many DAWs offer pitch correction features that can help correct minor pitch issues, ensuring your vocals sit perfectly in the mix. Finally, applying effects like reverb and compression can add depth and character to your vocals, making them sound more professional. (See: Understanding noise levels and hearing protection.)
Another important aspect of editing is the use of automation. Automating volume levels and effects can help create dynamic shifts throughout your track, ensuring your vocals stay engaging and balanced at all times. This can be especially useful during choruses or emotionally charged parts of a song.
Take your time with the editing process. Sometimes, it can help to step away from a project for a few hours or even a day. When you return, you might hear things you want to adjust that you didn’t notice before.
7. Mixing and Finalizing Your Track
The last step in your home recording process is mixing your track. Mixing involves balancing all the elements of your song, ensuring that your vocals sit well alongside the instrumentation. Begin by adjusting the volume levels of each track to find a balance that feels right. Pay attention to panning, too; placing vocals slightly off-center can create a more dynamic soundscape.
Don’t forget to add finishing touches, such as EQ adjustments to carve out your vocal frequency range, and mastering effects to give your track a polished, cohesive sound. Once you feel satisfied with the mix, it’s time to export your project and share it with the world. With practice and patience, you’ll be able to produce high-quality vocal recordings right from your home studio.
Consider seeking feedback from trusted peers or mentors before finalizing your track. Fresh ears can provide insights that you may have overlooked, and constructive criticism can guide your improvements for future recordings.
8. Common Mistakes to Avoid
Even experienced recorders can fall into traps that can impact the quality of their recordings. One common mistake is neglecting room acoustics. If your space is cluttered or filled with reflective surfaces, your recordings may not sound as clear as they could. Always take a moment to assess your recording environment before starting.
Another mistake is being overly aggressive with effects during mixing. It’s easy to get carried away with EQ and compression, but subtlety is key. Too much compression can squash the life out of your vocals, while excessive reverb can muddy the mix. Aim for a balanced sound that enhances your voice without overshadowing it.
Lastly, don’t rush the recording process. Give yourself time to warm up, experiment, and adjust your setup before hitting record. The time spent refining your technique will pay off in the quality of your recordings.
Don’t skip the practice phase either; the more familiar you are with your song, the better your performance will be. Rehearse until you feel comfortable with your delivery, adjusting your approach based on how you hear it in your recordings.
9. Expert Tips for Home Recording
To help you get the most out of your home recording experience, we’ve gathered some expert tips that can make a significant difference: (See: Tips for home recording from The New York Times.)
- Invest in a good mic and interface: Quality equipment doesn’t have to be expensive, but it does make a noticeable difference. Check online reviews and ask for recommendations to find the best fit.
- Listen critically: Develop your ear by listening to professionally mixed tracks. Compare their vocal clarity, dynamics, and effects to your own recordings to identify areas for improvement.
- Take breaks: Long recording sessions can lead to fatigue, negatively affecting your performance. Take short breaks to rest your voice and stay fresh.
- Collaborate: Don’t hesitate to bring in a friend or fellow musician. Fresh ears can offer valuable feedback, and collaboration can spark new ideas.
- Keep a consistent workflow: Establishing a routine for your recording sessions can help streamline the process, making it easier to get into the creative zone.
- Document your settings: Keep track of your mic placements, DAW settings, and effects used for each recording. This will help you replicate good results in future projects.
10. FAQ About Recording Vocals at Home
What is the best microphone for home recording?
The best microphone really depends on your personal preferences and the sound you’re aiming for. For beginners, a condenser mic like the Audio-Technica AT2020 is often recommended for its versatility. However, dynamic mics like the Shure SM7B are also great for vocals, especially in untreated rooms.
Do I need an audio interface to record vocals?
While you can use your computer’s built-in sound card, an audio interface provides better sound quality and lower latency. It’s a worthwhile investment for anyone serious about recording vocals at home.
How do I reduce background noise when recording?
To minimize background noise, record in a quiet room, close windows, and turn off any noisy appliances. Using sound-absorbing materials like foam panels, carpets, or blankets can also help create a more isolated recording environment.
Can I record vocals with just my computer and a microphone?
Yes, you can. Many DAWs allow you to record directly into your computer using a USB microphone. However, the sound quality may not be as high as what you’d achieve with a dedicated audio interface and professional microphone.
What is vocal layering and how do I do it?
Vocal layering involves recording multiple tracks of the same vocal line or different harmonies and blending them together. To layer effectively, record several takes of the same phrase and then adjust their volumes and timing to create a fuller sound.
What are some essential vocal techniques to improve my recordings?
Practicing proper breathing techniques can significantly enhance your vocal performance. Learning to control your breath not only helps with stability but also adds power and clarity to your voice. Consider working with a vocal coach or using online resources to refine your technique.
How should I prepare for a vocal recording session?
Preparation is key. Warm up your voice with exercises, stay hydrated, and make sure you’re in a good emotional state. Familiarize yourself with your song and even run through it a few times before you start recording. This preparation can make a noticeable difference in your performance.
In summary, learning how to record vocals at home involves careful consideration of equipment, space, technique, and post-production. By investing time into understanding these key elements, you’ll be on your way to creating music that showcases your talent and creativity. So grab your gear, find your voice, and start recording!
“`
Trending Now
Frequently Asked Questions
What equipment do I need to record vocals at home?
To record vocals at home, you'll need a quality microphone, such as the Shure SM58 or Audio-Technica AT2020, an audio interface like the Focusrite Scarlett 2i2, good closed-back headphones, a sturdy mic stand, and a pop filter to reduce plosives.
How do I set up my home recording space?
Setting up your home recording space involves considering the acoustics of the room. Use soft furnishings to absorb sound, eliminate background noise, and position your microphone away from reflective surfaces to enhance recording quality.
What is the best microphone for recording vocals at home?
For home vocal recording, the Shure SM58 is a great dynamic option, while the Audio-Technica AT2020 is an excellent condenser choice. Both microphones offer quality sound at an affordable price, making them popular among home recordists.
Do I need an audio interface to record vocals?
Yes, an audio interface is essential for connecting your microphone to your computer. It converts the microphone's analog signal into digital audio, ensuring better sound quality and clarity in your recordings.
How can I improve the sound quality of my vocal recordings?
To improve the sound quality of your vocal recordings, invest in a good microphone and audio interface, use closed-back headphones for monitoring, and consider adding an external preamp to enhance your microphone signal for clearer sound.
What did we miss? Let us know in the comments and join the conversation.