How to make cutting board
“`html
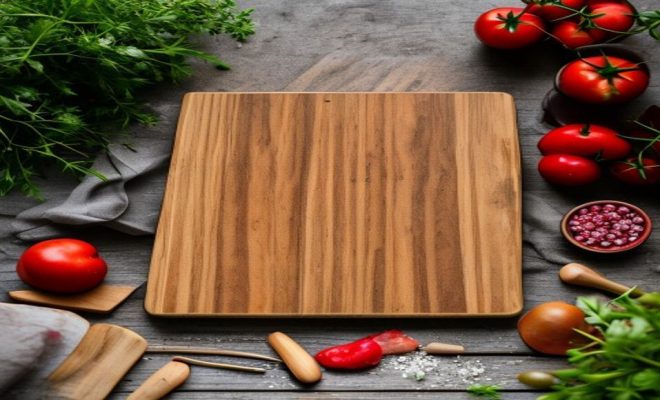
Creating your own cutting board can be a rewarding project that combines craftsmanship with functionality. From selecting the right materials to understanding the proper techniques for assembly and finish, this guide will walk you through the entire process of how to make a cutting board that not only serves a practical purpose in your kitchen but also adds a personal touch to your culinary space.
1. Understanding the Importance of Cutting Boards
Before you dive into the creation of your cutting board, it’s essential to grasp why a good cutting board is vital in any kitchen. Cutting boards serve as a protective barrier between your countertops and your knives. They prevent damage to your kitchen surfaces and keep your knives from dulling too quickly.
In addition to their practical benefits, cutting boards can also be aesthetically pleasing. A well-crafted board can serve as a beautiful serving platter, bringing elegance to your meals. Choosing the right wood, size, and finish can transform a mundane kitchen tool into a stunning centerpiece.
2. Selecting the Right Materials
When it comes to making a cutting board, the choice of material is critical. The two most common materials are hardwood and bamboo. Hardwoods such as maple, walnut, and cherry are favored for their density and resistance to knife marks. Bamboo, while technically a grass, is another great option that is sustainable and has natural antibacterial properties.
Softwoods like pine should be avoided for cutting boards, as they can harbor bacteria and tend to scar easily. When choosing your wood, look for pieces that are free of knots and blemishes to ensure durability and longevity. Additionally, it’s essential to consider the size of the board; a standard size is around 18×24 inches, but you can customize it according to your kitchen space and personal preference.
3. Gathering Your Tools
To successfully create your cutting board, you’ll need a few tools and supplies. Essential tools include a table saw or circular saw, a router or sander, clamps, and a measuring tape. If you’re looking to create more intricate designs, you may also want to consider having a wood planer and chisels on hand.
Beyond tools, you’ll also require wood glue, food-safe mineral oils for finishing, and sandpaper in various grits (80, 120, and 220) for smoothing the surface. Make sure to have protective gear like goggles and a dust mask to ensure safety while working.
4. Designing Your Cutting Board
Before cutting your wood, sketch out your design. You can go for a simple rectangular board or a more complex pattern, such as a checkerboard style that combines different types of wood. Once you have the design in mind, take precise measurements of each piece, considering how they will fit together.
If you’re feeling adventurous, you can even incorporate unique shapes like rounded edges or handle slots. Remember to account for wood shrinkage; it’s wise to leave a little extra space in your measurements. Planning the layout beforehand will save you time and effort during assembly.
5. Cutting and Shaping the Wood
Now that you have your materials and design ready, it’s time to cut the wood. Use a table saw or a circular saw to cut your pieces according to your sketches. If you’re creating a more complex design, be patient and cut each piece with precision to ensure they fit together seamlessly.
Once cut, use a router to round the edges for a smoother finish and to prevent splintering. If you’re opting for a simple rectangular design, this step may be less critical, but it can still enhance the overall look of the board.
6. Assembling the Cutting Board
With all pieces cut and shaped, the next step is assembling your cutting board. Apply wood glue to the edges of each piece and clamp them together tightly. Ensure that there are no gaps between the pieces, as this can lead to weak points in the finished product.
Let the glue cure according to the manufacturer’s instructions, typically for about 24 hours. After the glue has set, it’s time to sand the surface. Begin with coarse sandpaper to remove any excess glue and rough edges, then gradually move to finer grits for a smooth finish.
7. Finishing Touches
Once you are satisfied with the surface of your cutting board, it’s crucial to finish it properly. A food-safe finish is essential, as you’ll be using this board for food preparation. Applying a generous amount of mineral oil will help seal the wood, preventing moisture from entering and causing warping or cracking. (See: Antibacterial properties of bamboo.)
After applying the oil, let it soak in for about 20 minutes, then wipe off any excess. It’s advisable to repeat this process several times until the wood no longer absorbs oil. Some people also choose to finish their cutting boards with beeswax for added durability and a nice sheen.
8. Care and Maintenance
After you’ve crafted your cutting board, taking care of it will ensure its longevity. Always wash it with warm soapy water and avoid soaking it to prevent damage. After washing, dry it immediately and store it in a dry place.
Regularly applying mineral oil will keep the wood from drying out and cracking. It’s also good practice to avoid using harsh chemicals or soaking the board in the sink, as this can degrade the wood over time. By maintaining your cutting board properly, you’ll not only preserve its functionality but also keep it looking great.
9. Exploring Advanced Techniques
If you feel confident in your cutting board-making skills, you might want to explore some more advanced techniques, such as incorporating different wood types for contrasting patterns or experimenting with epoxy resin inlays for a unique touch. Additionally, consider crafting custom handles or integrating juice grooves for added functionality.
As you gain more experience, the possibilities become practically endless. You could even take on projects to create personalized gifts for friends or family, adding an extra layer of thoughtfulness to your craftsmanship.
Making a cutting board can be a fulfilling project that enhances your cooking experience while allowing you to express your creativity. Whether you keep it for yourself or give it as a gift, you’ll appreciate the satisfaction that comes with creating something truly unique. So, roll up your sleeves, gather your materials, and get started on how to make a cutting board that you can cherish for years to come!
10. Understanding Different Wood Types
When selecting wood for your cutting board, it’s essential to understand the characteristics of various types of wood. Each wood species behaves differently under knife pressure and retains moisture uniquely.
Maple: This is a classic choice for cutting boards due to its durability and fine grain. Maple is a hard wood that resists knife marks and is less likely to harbor bacteria, making it an excellent option for food preparation.
Walnut: Known for its rich, dark color, walnut is not only beautiful but also has a natural oil content that makes it resistant to moisture. While softer than maple, it’s still a popular choice among chefs who appreciate its aesthetic appeal.
Cherry: Cherry wood darkens beautifully over time, providing a unique character to your cutting board. It is moderately hard and has a warm tone that can add elegance to your kitchen. Cherry also possesses natural antimicrobial properties, making it a safe choice for food preparation.
Bamboo: As a rapidly renewable resource, bamboo is an eco-friendly option. It’s harder than many hardwoods and naturally resists bacteria, making it a popular choice for those looking for sustainability without compromising on durability.
Consider the grain patterns, color, and personal preference when selecting wood. Combining different types can create stunning designs and patterns, enhancing both the visual appeal and functionality of your cutting board.
11. Creating Unique Patterns
One of the most exciting aspects of making your own cutting board is the ability to create unique patterns. The end result can showcase your personal style, and it can also enhance the practicality of the board itself.
Checkerboard Pattern: This design utilizes alternating blocks of different types of wood, creating a striking visual effect. To construct this pattern, you typically start with thicker pieces of wood and cut them into smaller squares. Make sure to glue them together with precision to maintain the design’s integrity.
End Grain vs. Edge Grain: Cutting boards can be constructed using either end grain or edge grain. End grain boards are made by arranging the wood so that the ends of the fibers are exposed. This construction method is easier on knives and can hide scratches more effectively. Edge grain boards are more traditional and are made by gluing the long edges of the wood pieces together, providing a sleek surface.
Experiment with different patterns and arrangements to discover a style that resonates with you. The process of creating a unique cutting board can be as enjoyable as using it in your kitchen. (See: Importance of cutting boards in food safety.)
12. Frequently Asked Questions
How long will my cutting board last?
With proper care and maintenance, a well-made cutting board can last for many years. Regularly oiling and cleaning it will help prevent warping and cracking.
Can I put my cutting board in the dishwasher?
No, it’s not advisable to put wooden cutting boards in the dishwasher. The heat and moisture can cause the wood to warp or crack. Instead, hand wash with warm soapy water and dry immediately.
How often should I oil my cutting board?
It’s best to oil your cutting board every month or whenever the wood appears to be dry. Regular oiling will help maintain the board’s integrity and prevent it from absorbing moisture.
What should I do if my cutting board starts to smell?
If your cutting board develops an odor, you can sprinkle it with coarse salt and rub it with half a lemon. This method helps remove smells and leaves your board smelling fresh.
Are there any types of wood I should avoid?
Yes, avoid softwoods like pine and untreated woods that may harbor bacteria. Additionally, woods with high resin content, like cedar, should also be avoided for cutting boards.
Can I customize my cutting board?
Absolutely! Personalizing your cutting board can include engraving initials, designs, or even adding unique shapes. This makes for a wonderful gift or keepsake.
13. Choosing the Right Finish
The finish you choose can significantly affect the appearance and durability of your cutting board. While mineral oil is a popular choice due to its food-safe properties, you might also consider other options for enhancing both aesthetics and protection.
Beeswax and Mineral Oil Blend: This combination offers a more durable finish than mineral oil alone. It creates a protective barrier that is resistant to moisture and stains while providing a beautiful sheen. To use this blend, melt beeswax and mix it with mineral oil in a 1:4 ratio. Once cooled, apply it to your board and buff it in.
Carnauba Wax: Known as the “queen of waxes,” carnauba wax provides a harder finish than beeswax, making it ideal for cutting boards that will see heavy use. This wax can be used alone or combined with mineral oil for added moisture resistance and shine.
Food-safe Varnishes: While varnishes are less common for cutting boards, some food-safe options are available that can provide a hard, protective finish. However, be cautious with these products, as they can be challenging to repair if scratched. Always verify that any product you choose is explicitly labeled as food-safe.
14. Understanding the Benefits of End Grain vs. Edge Grain Boards
When deciding how to make a cutting board, you might wonder about the difference between end grain and edge grain boards. Each type has its advantages and disadvantages in terms of durability, knife friendliness, and maintenance requirements.
End Grain Boards: These boards are constructed with the ends of the wood fibers facing up. This means that when you cut on the board, your knife will slice between the fibers rather than against them, which can prolong the life of your knife. End grain boards are also less prone to visible scratches, as the wood fibers can close around the cut marks, making them great for aesthetic longevity. However, they can be more challenging to construct and tend to be more expensive due to the amount of wood used.
Edge Grain Boards: These boards are made with the long edges of the wood pieces facing up. They are usually easier to build and often cost less than end grain boards. While they can show knife marks more readily, they still offer good durability and can be made from a variety of woods. Edge grain boards are a solid choice if you’re looking for an attractive and functional option without the complexity of an end grain design.
15. Incorporating Personal Touches
Part of the joy of learning how to make a cutting board is the ability to incorporate personal touches that reflect your style or those of the person receiving the board. Some ideas include: (See: Overview of cutting boards.)
Engravings: Use a laser engraver to add names, dates, or meaningful quotes on your board. This can turn a functional item into a treasured keepsake.
Color Stains: While traditional wood finishes are warm and natural, adding color stains can make your board uniquely yours. You can use food-safe dyes to inject pops of color that align with your kitchen décor.
Shaped Boards: Instead of a traditional rectangular shape, consider creating boards in unique shapes such as animals, trees, or other thematic designs. This can be especially appealing for themed kitchens or as gifts for special occasions.
16. Cost Considerations
While making your own cutting board can be cost-effective, it’s essential to consider the expenses involved in sourcing quality materials and tools. High-quality hardwoods can vary in price, and investing in good tools will yield better results.
Here’s a rough breakdown of costs you might encounter:
- Wood: Depending on the type of wood, costs can range from $2 to $20 per board foot.
- Tools: If you’re starting from scratch, a good table saw can cost anywhere from $300 to $1000, while hand tools like chisels and sanders may range from $30 to $200.
- Finishes and Glues: Food-safe mineral oil is relatively inexpensive, usually around $10 for a quart. Beeswax and other finishes can add $5 to $20 to your total costs.
Overall, while initial costs can seem significant, the investment pays off in the long run with a beautifully crafted, durable cutting board that you can enjoy for years or pass down as a family heirloom.
17. Engaging with the Woodworking Community
As you embark on your cutting board-making journey, consider reaching out to the woodworking community for support and inspiration. Online forums, local woodworking clubs, and social media groups can be excellent resources for advice, project ideas, and feedback on your work.
Participating in community events or workshops can also enhance your skills and introduce you to new techniques. You might even discover a local craft fair where you can showcase your creations or sell your cutting boards, connecting with others who share your passion for woodworking.
Learning from those with more experience can not only improve your skills but also foster a sense of belonging within a community that appreciates the art of making functional pieces from wood.
18. Final Thoughts
Whether you’re crafting a cutting board for personal use or as a thoughtful gift, every piece you create tells a story. The journey from raw wood to finished product is filled with opportunities for creativity and self-expression. With the right materials, tools, and care instructions, you can create a cutting board that not only performs beautifully but also resonates with your unique style. So, gather your materials, unleash your creative spirit, and enjoy the satisfaction of knowing that you’ve made something truly special!
“`
Trending Now
- A Visitors Guide to Northshore, New…
- this guide on what’s on a high school transcript? understanding the components
- our breakdown of “5 evidence-based strategies to improve math fluency in middle school classrooms”
- our breakdown of how nonverbal communication impacts conflict resolution
- our breakdown of the role of fine motor skills in kindergarten readiness and academic success
Frequently Asked Questions
What materials do I need to make a cutting board?
To make a cutting board, you'll need hardwood like maple, walnut, or cherry, or bamboo for a sustainable option. Avoid softwoods like pine. Additionally, ensure you have tools such as a saw, sandpaper, and food-safe finish for assembly and finishing touches.
How do I choose the right cutting board size?
The standard size for a cutting board is around 18×24 inches, but you can customize it based on your kitchen space and personal preference. Consider how much prep space you need and the types of foods you typically prepare when selecting the size.
Why are hardwood cutting boards better?
Hardwood cutting boards, such as those made from maple or walnut, are denser and more resistant to knife marks than softwoods. They also provide a durable surface that helps keep knives sharp and can be more hygienic if properly maintained.
Can I use bamboo for a cutting board?
Yes, bamboo is an excellent choice for cutting boards as it is sustainable and has natural antibacterial properties. It offers a durable surface while being eco-friendly, making it a popular alternative to traditional hardwoods.
What is the importance of a good cutting board?
A good cutting board protects your countertops from damage and helps maintain the sharpness of your knives. Beyond functionality, a well-crafted cutting board can also enhance your kitchen's aesthetic and serve as an elegant serving platter.
Have you experienced this yourself? We’d love to hear your story in the comments.