How to Make a Map in Minecraft
Minecraft is a game that thrives on creativity and exploration, and one of the best ways to explore your world is by making a map. A map not only helps you navigate your world, but also provides a visual representation of your progress and achievements. In this article, we will discuss how to make a map in Minecraft.
Step 1: Gather Materials
To make a map in Minecraft, you will need the following materials:
– 8 paper
– 1 compass
You can obtain paper by crafting it from sugar cane. Sugar cane can be found near water sources, and can be crafted into paper by placing three of them horizontally in a crafting table.
A compass can also be crafted from four iron ingots and one redstone dust, but it is easier to find one in a chest or by trading with villagers.
Step 2: Craft the Map
Once you have the required materials, you can craft a map by opening your crafting table and placing the 8 sheets of paper in a square formation. This will create an empty map.
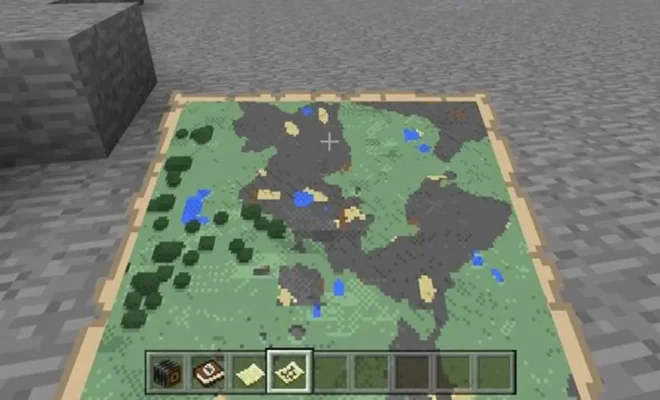
Step 3: Use the Map
To use the map, hold it in your hand and right-click. The map will fill in with the terrain around you. However, the map will only cover a certain area, and will not show anything beyond its edges.
Step 4: Expand the Map
If you want to expand the map, you can do so by crafting multiple maps and placing them in a grid formation. This will combine the maps into a larger map that covers a larger area.
Step 5: Label the Map
To label your map, you can open your inventory and select the map. Right-clicking the map will open up a screen that allows you to add a title and description. This can be useful for keeping track of different areas of your map.
Step 6: Use the Compass
If you have a compass, it will point towards the world spawn point. This can be useful for getting back home or finding your friends.
Conclusion
Making a map in Minecraft can be a fun and useful tool for exploring and navigating your world. By following these simple steps, you can create and use a map to help you on your adventures. Happy exploring!