How to install baseboards
“`html
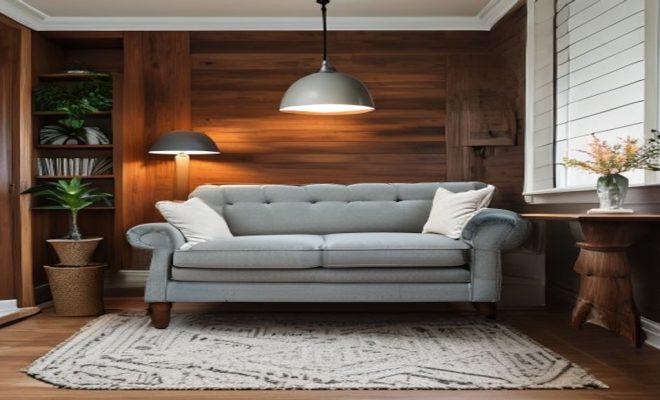
Installing baseboards is more than just a finishing touch; it’s an opportunity to enhance your home’s aesthetics and protect your walls from damage. Baseboards, also known as skirting boards or mop boards, bridge the gap between the wall and the floor, offering a polished look to any room. But how do you tackle this project effectively? In this guide, we’ll delve into how to install baseboards, covering everything from preparation to finishing touches.
1. Understanding Baseboards
Before diving into the installation process, it’s essential to understand what baseboards are and their functions. Typically made from wood, MDF, or PVC, baseboards come in various styles and sizes, allowing homeowners to choose options that best fit their interior design scheme. They serve multiple purposes: protecting walls from furniture scuffs, covering gaps at the bottom of walls, and adding a decorative element to your space.
Baseboards can vary in height, shape, and profile. Standard baseboards are usually 3 to 5 inches tall, while taller versions, often referred to as “crown baseboards,” can reach 7 inches or more. Selecting the right style complements your room’s decor and can even make your ceilings appear higher. With various profiles available, from simple designs to more intricate molding, homeowners have plenty of choices that can add character to their spaces.
2. Gathering the Necessary Tools and Materials
Before beginning your project, gathering the right tools and materials is crucial. Here’s a handy checklist to ensure you’re prepared:
- Baseboard material (wood, MDF, or PVC)
- Miter saw or hand saw
- Nail gun or hammer and finishing nails
- Measuring tape
- Level
- Pry bar (for removing old baseboards)
- Caulk and caulk gun
- Wood filler or spackle
- Sandpaper
- Paint or stain (if finishing is needed)
Having everything on hand before you start will save time and keep the project running smoothly. If you’re replacing old baseboards, consider the condition of the wall behind them; it may need repair or painting before installing the new ones.
3. Removing Old Baseboards
If you’re replacing existing baseboards, the first step is to remove them carefully. Use a utility knife to score along the top edge where the baseboard meets the wall. This step helps break the paint seal and reduces the risk of damaging the wall. Next, use a pry bar to gently pull the baseboard away from the wall. Start at one end and work your way along the board, being cautious not to gouge the drywall.
In some cases, the old baseboard may be nailed in with a lot of nails. If so, it might be necessary to use the pry bar to pull out the nails, or you can simply cut the board into smaller sections for easier removal. Be sure to patch any holes or damage to the wall after removing the old baseboard to prepare for the new installation.
4. Measuring and Planning
Accurate measurements are key when learning how to install baseboards effectively. Begin by measuring the length of each wall where the baseboards will go. Write down these measurements and add a little extra length to each piece to allow for cutting errors—about 1/8 inch should suffice. Once you have your measurements, draw a sketch of your room, indicating where each baseboard will go. This visual guide will help you plan your cuts and installation sequence.
When measuring, take note of any obstacles like door frames, windows, or electrical outlets that may affect how the baseboards fit. For corners, you’ll typically opt for either inside or outside cuts depending on the layout of the room. Understanding how to handle these corners is critical, as this can make or break the professionalism of your installation. (See: Learn more about baseboards.)
5. Cutting Baseboards with Precision
Once you have your measurements and plan in place, it’s time to cut your baseboards. It’s advisable to use a miter saw for this task, as it allows for precise angled cuts needed for corners. Set your saw to the appropriate angle—usually 45 degrees for inside and outside corners. Double-check your measurements before making the cuts, as making mistakes here can lead to wasted materials.
When cutting baseboards, always cut with the finished side facing down. This method ensures that the cut edge is clean and that any imperfections won’t be visible when installed. After cutting, dry-fit the pieces together to ensure everything aligns correctly before moving on to installation.
6. Installing the Baseboards
Now comes the crucial step: installing the baseboards. Begin at one corner of the room and work your way around. If you’re using a nail gun, it makes this process easier as it allows for quick and firm placement. Attach the baseboard to the wall by nailing it into the studs—a stud finder can help locate these hidden supports. If using a hammer, ensure each nail is driven in correctly and flush with the surface.
For corners, apply wood glue to the cut edges before nailing them together for a tighter fit. Ensure that each piece is level as you go, adjusting as necessary. If you encounter any gaps between the baseboard and the wall, use caulk to fill them in for a seamless look. This step is critical in achieving a professional finish.
7. Finishing Touches: Caulking and Painting
After successfully installing the baseboards, it’s time for the finishing touches. Start by caulking along the top edge where the baseboard meets the wall. This step not only hides imperfections but also provides a cleaner look. Use a caulk that’s paintable to ensure the final finish meets your expectations.
If your baseboards are unfinished or you want to change their appearance, now is the time to paint or stain them. Ensure that the paint is fully dried before applying a second coat if necessary. A fresh coat can breathe life into your baseboards, making them a stunning focal point of your rooms.
8. Maintenance and Care for Baseboards
Once your baseboards are installed and finished, it’s essential to care for them properly. Regular cleaning can prevent dirt and grime buildup, ensuring they remain an attractive feature in your home. A simple wipe down with a damp cloth or a gentle cleaner is often sufficient.
If you notice any scuffs or scratches, a little touch-up paint can work wonders. For wood baseboards, consider using a furniture polish to keep them looking their best. It’s also a good idea to check for any gaps or damage over time, as minor adjustments can prolong the life of your baseboards.
9. Common Mistakes to Avoid
Even seasoned DIYers can make mistakes when learning how to install baseboards. Here are some common pitfalls to watch out for:
- Incorrect Measurements: Always double-check your measurements before cutting. An inch here or there can lead to significant issues during installation.
- Poor Wall Preparation: Ensure the wall is clean and free of debris before attaching baseboards to avoid adhesion problems.
- Skipping Caulk: Caulking is often overlooked. This simple step can make a huge difference in the finished look.
- Forgetting to Check for Level: Ensure each piece is level as you install, as misalignment can lead to an unprofessional appearance.
Avoiding these mistakes will help ensure your baseboard installation is as smooth and professional as possible. (See: Understanding lead in housing.)
10. Material Options for Baseboards
When learning how to install baseboards, understanding the different materials is crucial. Each option has its pros and cons, depending on your budget, style preferences, and the conditions of your home. Let’s break down some popular materials:
- Wood: This classic choice offers warmth and elegance. It’s available in various types, including pine, oak, and maple. While wood baseboards can be painted or stained, they may be more susceptible to damage from moisture, making them less ideal for bathrooms or basements.
- MDF (Medium-Density Fiberboard): An affordable and versatile option, MDF is a manufactured product that mimics the look of wood. It’s easy to paint and doesn’t warp like wood, making it a good choice for areas with fluctuating humidity. However, it can be more prone to dents and scratches.
- PVC (Polyvinyl Chloride): This plastic material is durable and moisture-resistant, perfect for high-humidity areas. PVC baseboards require little maintenance and can be cleaned easily. They come in various styles, although they may not have the same aesthetic appeal as wood or MDF.
- Composite: A good middle ground, composite materials combine wood fibers and resins. They offer some of the benefits of wood without the price tag but can be heavier and may require special tools for cutting.
11. Design Trends in Baseboards
Baseboards aren’t just functional; they can also be a design statement. Here are some current trends in baseboard design that can elevate your interior:
- Oversized Baseboards: Larger baseboards can create a sense of grandeur in a room. This trend complements high ceilings and adds architectural interest.
- Flat and Simple Profiles: Minimalist styles are gaining popularity, with flat and simple baseboards offering a sleek look that pairs well with modern decor.
- Contrasting Colors: Many homeowners are now opting for baseboards that contrast with their wall colors. This technique can create a striking visual effect and draw attention to the baseboards themselves.
- Custom Designs: Personalized baseboard designs, including decorative carvings or unique profiles, can make a home stand out. Custom options can be tailored to match any interior style.
12. Cost Considerations
Budgeting for your baseboard installation project is essential to avoid unexpected costs. Here’s what to keep in mind:
- Material Costs: Depending on your choice of material, costs can vary significantly. Wood is typically the most expensive, while MDF and PVC are more budget-friendly.
- Labor Costs: If you’re hiring a contractor to install baseboards, labor costs can add to the overall expense. DIY installation can save money but requires time and effort.
- Finishing Costs: Don’t forget to factor in the costs of paint, stain, or additional materials like caulk and wood filler. These items can add up but are crucial for achieving a polished look.
On average, homeowners might spend anywhere from $1 to $7 per linear foot for materials, excluding labor. It’s wise to get quotes from various suppliers and contractors to ensure you’re getting the best deal.
13. Frequently Asked Questions
As you prepare to tackle your baseboard installation project, you may have some questions. Here are answers to some common queries:
- Q: How long does it take to install baseboards?
A: The time required can vary based on the size of the room and your experience level. A simple installation in a small room could take a few hours, while larger spaces may take a full day or more. - Q: Can I install baseboards without a nail gun?
A: Yes, you can use a hammer and finishing nails instead. However, a nail gun speeds up the process and makes it easier to drive nails in at the right angle. - Q: Do I need to use caulk on my baseboards?
A: While it’s not absolutely necessary, caulking helps to fill gaps and creates a cleaner look. It’s particularly recommended for painted baseboards. - Q: How do I deal with uneven walls?
A: If your walls aren’t perfectly straight, you can use a flexible caulk to fill in any irregular gaps after installation. This will give a cleaner look and hide imperfections. - Q: Can I install baseboards in a bathroom or kitchen?
A: Yes, but be sure to use moisture-resistant materials like PVC or painted MDF to withstand humidity and splashes.
14. Environmentally Friendly Options
For those conscious about their environmental impact, there are eco-friendly baseboard options available. Reclaimed wood, for instance, can add character while being sustainable. It’s sourced from old buildings or furniture, reducing the need for new lumber. Additionally, eco-friendly MDF is manufactured using recycled wood fibers and non-toxic adhesives, making it a safer choice for indoor air quality.
Another option is bamboo, which is a rapidly renewable resource. Bamboo baseboards are durable, resistant to moisture, and can provide a unique aesthetic. Choosing environmentally friendly materials not only helps the planet but can also complement a modern, eco-conscious interior design.
15. Custom vs. Pre-Manufactured Baseboards
When considering how to install baseboards, you have the option of choosing between custom and pre-manufactured baseboards. Pre-manufactured options are often less expensive and readily available at most home improvement stores. They come in standard sizes and profiles, which can simplify your installation process.
On the other hand, custom baseboards allow for more creativity and personalization. You can work with a carpenter to design baseboards that perfectly fit your home’s style and dimensions. While custom options might come with a higher price tag, they can add significant value and uniqueness to your home’s interior. Weighing these options based on your budget and design aspirations is essential. (See: Baseboards in home renovation.)
16. Tools for DIY Enthusiasts
If you’re a DIY enthusiast, investing in quality tools can make the installation process smoother and more enjoyable. A good miter saw is essential for accurate cuts, while a laser level can help ensure your baseboards are perfectly straight. An air compressor paired with a pneumatic nail gun can speed up the installation, making it easier on your wrists than manual nailing.
Consider also getting a corner clamp, which can hold mitered joints together while you nail them, and a dust mask if you’re sanding or cutting materials. Having the right tools not only saves time but also contributes to a more professional finish.
17. Creative Uses for Baseboards
Baseboards don’t just belong at the floor level; they can be creatively used in various ways throughout your home. Some homeowners repurpose baseboards as decorative elements in other areas, such as creating chair rails or picture frames. This can add depth and texture to a room without a significant investment.
In children’s rooms, shorter, colorful baseboards can serve as a playful touch, breaking up wall colors while keeping the space fun and inviting. You can also use baseboards as crown molding in small spaces for a unique twist. These creative applications highlight the versatility of baseboards beyond their traditional function.
18. Final Thoughts on Baseboard Installation
Learning how to install baseboards might seem daunting at first, but with the right tools, preparation, and a bit of patience, you can transform your space. Not only will you enhance the aesthetic appeal of your rooms, but you’ll also gain a sense of accomplishment from completing a project that adds value to your home. Baseboards can play a significant role in tying the elements of a room together, so take your time to choose materials and designs that reflect your personal style.
So gather your materials, roll up your sleeves, and get started on your baseboard installation journey! With the right approach, you’ll achieve a professional-looking finish that enhances your home for years to come.
“`
Trending Now
Frequently Asked Questions
What tools do I need to install baseboards?
To install baseboards, you will need a miter saw or hand saw, a nail gun or hammer with finishing nails, measuring tape, a level, a pry bar for removing old baseboards, caulk and a caulk gun, wood filler or spackle, sandpaper, and paint or stain for finishing.
How do I choose the right baseboard style?
Choosing the right baseboard style involves considering the height, shape, and profile that best complements your room's decor. Standard baseboards range from 3 to 5 inches tall, while taller options can create an elegant look and make ceilings appear higher.
Can I install baseboards myself?
Yes, you can install baseboards yourself with the right tools and preparation. This DIY project allows you to enhance your home's aesthetics while protecting your walls, making it a rewarding task for homeowners.
What materials are baseboards made from?
Baseboards are typically made from wood, MDF (medium-density fiberboard), or PVC. Each material has its advantages, such as durability, ease of installation, and aesthetic appeal, allowing homeowners to choose based on their preferences.
What is the purpose of baseboards?
Baseboards serve multiple purposes, including protecting walls from scuffs caused by furniture, covering gaps at the bottom of walls, and adding a decorative element to enhance the overall look of a room.
What did we miss? Let us know in the comments and join the conversation.