How to create table in Google Docs
“`html
Creating a table in Google Docs might seem like a basic task, but it can greatly enhance the way you present information. Whether you’re a student looking to organize your data, a professional preparing a report, or just someone who wants a clearer way to display content, mastering tables can elevate your document’s clarity and professionalism. Here, we will explore how to efficiently create tables in Google Docs, along with some tips and tricks to make your tables stand out.
1. Understanding the Basics of Tables
Before diving into the technicalities of creating a table in Google Docs, it’s essential to understand what tables are and why they’re useful. A table consists of rows and columns, allowing you to arrange data systematically. This format is particularly beneficial for comparing different sets of information side by side. For instance, when writing a report, a table can succinctly summarize findings or present survey results in a way that’s easy for readers to digest.
Google Docs is a versatile tool that allows you to create tables effortlessly. Unlike traditional word processors, Google Docs is cloud-based and collaborative, meaning multiple users can work on the same document simultaneously. This feature is particularly useful for group projects, where creating tables can help keep everyone on the same page.
2. Starting with Google Docs
To create a table in Google Docs, the first step is to open a new or existing document. If you don’t already have a Google account, you’ll need to create one to access Google Docs. Once you’re logged in, navigate to Google Drive and click on the “+ New” button to create a new document. Alternatively, you can open an existing document by navigating through your Drive.
After opening your document, you’ll want to familiarize yourself with the toolbar menus at the top of the screen. This toolbar is your gateway to various functionalities, including the option to insert tables. Understanding where these features are located will streamline the process when you decide to create a table in Google Docs.
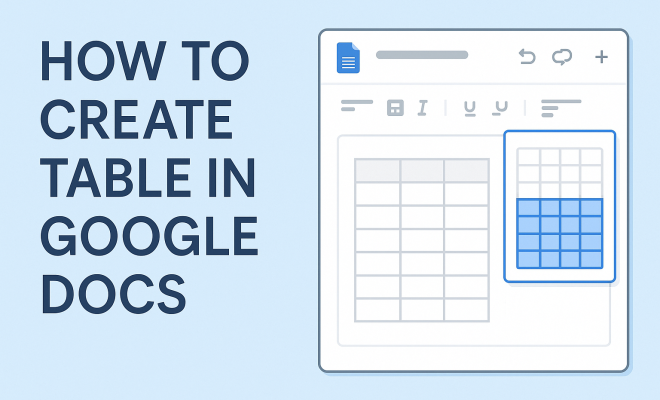
3. How to Create a Table in Google Docs
Creating a table in Google Docs is a straightforward process. Here’s a step-by-step guide:
- Click on the “Insert” tab in the toolbar.
- From the dropdown menu, select “Table.”
- A grid will appear, allowing you to select the number of rows and columns for your table. Hover over the grid to highlight your desired dimensions.
- Once you’ve highlighted the correct number of rows and columns, click to insert the table into your document.
That’s it! You’ve successfully created a basic table. You can now start filling in the cells with data. Google Docs tables allow for editing text, inserting links, and adding images, providing a flexible environment for your information.
4. Customizing Your Table
Once your table is created, you might want to customize it to fit your document’s aesthetic or make the data more readable. Google Docs provides several ways to modify your table’s appearance:
- Cell Background Color: To add some flair, you can change the background color of specific cells. Right-click on a cell, choose “Table properties,” then select the fill color you prefer.
- Border Color and Style: You can customize the borders by right-clicking on the table and selecting “Table properties.” Here, you can adjust the border color, width, and style, allowing you to create a more visually appealing table.
- Row and Column Size: Adjusting the height of rows and the width of columns can make your table more structured. Simply click and drag the lines of the rows or columns to resize them as per your needs.
Take your time with these adjustments; they can make a significant difference in how your table is perceived.
5. Adding and Deleting Rows and Columns
Your initial table may not always fit your needs perfectly. Fortunately, Google Docs makes it easy to add or delete rows and columns. Here’s how: (See: Understanding tables in information.)
- To Add Rows: Right-click on a row where you want to insert additional rows. Choose “Insert row above” or “Insert row below” based on your requirements.
- To Add Columns: Similar to rows, right-click on a column and select “Insert column left” or “Insert column right.”
- To Delete Rows or Columns: If you find that you’ve added too many rows or columns, right-click on the respective row or column and select “Delete row” or “Delete column.”
This flexibility is one of Google Docs’ strengths, allowing you to easily modify your tables on the fly as your content evolves.
6. Utilizing Table Styles and Formatting
To enhance your table further, you can use various formatting options available in Google Docs. This includes text alignment, font style, and size adjustments:
- Text Alignment: Select the cell or cells you want to adjust, then use the alignment options in the toolbar to center, left, or right-align your text.
- Font Style and Size: Highlight the text within your table and choose a different font style or size from the toolbar. This can help important data stand out.
- Text Color: Changing the text color can also add emphasis. Use the text color option in the toolbar to enhance readability.
These formatting tools allow you to create professional-looking tables that can meet various visual standards, whether for school, work, or personal projects.
7. Collaborating and Sharing Your Table
One of the significant advantages of using Google Docs is the ability to collaborate with others in real-time. After creating your table, sharing it with teammates or classmates can streamline group projects. To share your document:
- Click on the “Share” button in the top right corner.
- Enter the email addresses of those you want to share with. You can also adjust their permission settings to allow them to view, comment, or edit the document.
- Click “Send.”
Collaborators can then make changes to the table, add comments, and provide feedback, making it a dynamic environment for group work. This collaborative feature not only enhances engagement but also fosters a sense of community among team members.
8. Common Table Mistakes to Avoid
Even experienced users can make mistakes when creating tables. Here are some common pitfalls to avoid:
- Overly Complicated Tables: Keep your tables simple. A cluttered table with excessive information can confuse readers. Stick to the essential data and keep it easy to read.
- Ignoring Consistency: Ensure uniform formatting throughout your table. Inconsistent fonts, colors, and sizes can distract from the data and lead to a disjointed look.
- Not Testing for Readability: Before finalizing your document, zoom out and view the table as a whole. Ask yourself if it’s easy to read and whether the data is presented clearly.
Avoiding these mistakes can make your tables more effective in conveying information.
9. Frequently Asked Questions (FAQ)
9.1 What formats can I use within a table in Google Docs?
Google Docs tables allow for a variety of formats. You can insert text, images, and links directly into table cells. Additionally, you can format text using different fonts, colors, and sizes, as well as align text within cells. This versatility makes tables highly customizable for any type of content.
9.2 Can I import tables from other documents into Google Docs?
Yes, you can import tables from other documents. If you have a table in a Microsoft Word document, for instance, you can copy and paste it directly into Google Docs. However, be mindful that some formatting may change during the transfer, so double-check the table after pasting.
9.3 Is there a limit to the number of rows or columns in a Google Docs table?
Google Docs doesn’t officially specify a maximum number of rows or columns you can create in a table. However, very large tables may impact performance. As a rule of thumb, keeping tables manageable and visually appealing will help maintain document usability.
9.4 Can I merge cells in a Google Docs table?
Yes, merging cells in Google Docs is quite simple. Select the cells you want to merge by clicking and dragging over them. Then, right-click and choose “Merge cells.” This feature is particularly useful for creating headers or grouping related information together. (See: Using tables for data presentation.)
9.5 How can I print a table from Google Docs?
Printing a table from Google Docs is straightforward. Make sure your table fits well within the margins of the document. Click on “File” in the menu, then select “Print.” A print preview will appear, allowing you to make any necessary adjustments before printing.
10. Advanced Table Techniques
Once you’re comfortable with the basics of creating a table in Google Docs, you might want to explore some advanced techniques to improve your tables even further.
10.1 Using Conditional Formatting
While Google Docs doesn’t have built-in conditional formatting like Google Sheets, you can still create visual cues by manually formatting cells based on their content. For example, if you’re tracking sales data, you could change the cell color to red for numbers below a certain threshold, making it easy to spot underperforming items at a glance.
10.2 Creating Complex Tables
Sometimes, you may need to create more complex tables that involve subtotals or merged headers. You can achieve this by combining the techniques discussed earlier, like merging cells for headers and using different background colors to distinguish between sections. This approach is especially useful for financial reports where clarity is critical.
10.3 Embedding Tables in Other Google Apps
If you’re incorporating data from Google Sheets, you can embed a table that automatically updates when the data changes. This is done by copying the table from Google Sheets and pasting it into Google Docs. When pasting, choose the option to link to the spreadsheet. This ensures that your table in Google Docs always reflects the latest data.
11. Practical Examples of Table Use
Let’s look at some practical examples of how tables can be effectively utilized in various scenarios:
11.1 Academic Research
Students often use tables to present research findings. For instance, a biology student might create a table comparing the effects of different fertilizers on plant growth. This visual representation allows readers to quickly grasp the comparison being made, making it easier to draw conclusions from the data.
11.2 Project Management
In project management, tables can help track progress and assign responsibilities. A project manager could create a table listing tasks, assignees, deadlines, and completion status, providing a clear overview of the project’s progress. This helps stakeholders quickly see what’s on track and what needs attention.
11.3 Marketing Campaigns
Marketing teams can utilize tables to compare campaign performance across different channels. For example, a table could showcase metrics such as click-through rates, conversion rates, and costs per acquisition for email marketing, social media ads, and SEO strategies. This type of comparison is vital for optimizing marketing budgets and efforts. (See: Google Docs features and functionality.)
11.4 Event Planning
When planning an event, tables can be an excellent way to organize details. A table might include columns for event details like date, time, location, and tasks assigned to team members. This organization helps ensure nothing is overlooked as the event approaches.
12. Enhancing Table Accessibility
Accessibility is a crucial aspect of document creation that shouldn’t be overlooked. When you create a table in Google Docs, consider the following tips to enhance accessibility for all users:
- Use Clear Headers: Always include headers for your columns and rows. This helps screen readers identify the structure of your table and allows users to navigate the content more easily.
- Provide Alternative Text for Images: If your table contains images, make sure to add alternative text descriptions. This ensures that users who rely on screen readers can understand the visual content you’re presenting.
- Check Color Contrast: Ensure that there is enough contrast between text and background colors. This is important for users with visual impairments. You can use online tools to check color contrast ratios.
By prioritizing accessibility, you’re making sure that your tables are usable and comprehensible to everyone, which is especially important in collaborative environments.
13. Future Trends in Document Collaboration
As technology continues to evolve, so do the tools we use for document creation and collaboration. Here are some trends that may shape how we create tables and use Google Docs in the future:
- AI-Driven Features: Incorporating AI tools can offer smart suggestions for organizing data within tables, automating tasks, or even generating insights based on the information presented.
- Improved Integration: We may see enhanced capabilities for integrating Google Docs with other platforms and applications, allowing for seamless data transfer and real-time updates across multiple tools.
- Enhanced Collaborative Features: Future updates may include more advanced collaboration tools, such as live editing suggestions, automated comment tracking, and improved version control, making teamwork more efficient.
Staying informed about these trends will help you harness new features and techniques, keeping your document creation skills sharp and effective.
14. Conclusion: Enhancing Your Document with Tables
Knowing how to create a table in Google Docs can significantly improve your document’s clarity and aesthetics. Tables help organize data effectively, making it easier for your audience to understand complex information. With the tools and techniques outlined in this guide, you can create tables that not only serve a functional purpose but also enhance the overall appearance of your work.
So, whether you’re a student, a business professional, or just someone who loves organizing information, don’t underestimate the power of good table design. Take the time to experiment with the features available in Google Docs, and you might be surprised at how much more effectively you can communicate your ideas. With practice, you’ll have the skills to create tables that inform, engage, and impress your readers.
“`
Trending Now
Frequently Asked Questions
How do I create a table in Google Docs?
To create a table in Google Docs, open a new or existing document, then go to the menu and click on 'Insert.' From there, select 'Table' and choose the number of rows and columns you need. The table will be inserted into your document, ready for you to fill in with data.
Can I customize tables in Google Docs?
Yes, you can customize tables in Google Docs. After inserting a table, you can adjust the cell size, change the background color, add borders, and modify text alignment. Use the table properties option to access more customization features for a tailored look.
What are the benefits of using tables in Google Docs?
Tables in Google Docs help organize and present information systematically. They are especially useful for comparing data, summarizing findings, and enhancing document clarity. Tables also facilitate collaboration in shared documents, making it easier for teams to work together on data presentation.
Can multiple users edit tables in Google Docs simultaneously?
Yes, Google Docs allows multiple users to edit tables simultaneously. This collaborative feature enables real-time updates, ensuring that all team members can contribute to and view changes instantly, which is particularly beneficial for group projects.
Is there a limit to the number of rows and columns in Google Docs tables?
While there is no strict limit to the number of rows and columns you can add to a table in Google Docs, practical limits may arise based on document readability and formatting. It's best to keep tables manageable for clarity and ease of use.
What’s your take on this? Share your thoughts in the comments below — we read every one.