How to authorize computer for iTunes
“`html
In the realm of digital music and media, iTunes has long been a cornerstone for Apple users. If you’re one of the millions who enjoy managing your music library through this platform, knowing how to authorize your computer for iTunes is essential. This process not only allows you to access and download your purchased music, movies, and apps but also enables you to sync your media across all your devices. In this comprehensive guide, we’ll explore what it means to authorize a computer for iTunes, why it’s necessary, and how you can do it effectively.
1. Understanding iTunes Authorization
Before we dive into the steps of authorizing your computer for iTunes, it’s crucial to understand what this authorization entails. iTunes allows users to authorize up to five computers to access their purchased content. This means that once a computer is authorized, it can play content that was purchased or downloaded from the iTunes Store linked to your Apple ID. Without proper authorization, you may encounter restrictions on playing or downloading your content.
This authorization serves as a safeguard for your purchases, ensuring that only your trusted devices can access your media. It also allows you to manage your content effectively, making it easy to transfer or sync media across your devices, such as iPhones, iPads, and iPods.
2. Why You Need to Authorize Your Computer
Having the ability to authorize your computer for iTunes is important for several reasons. First, it grants you access to purchased music, movies, and other media. Apple has designed this system to protect your purchases from unauthorized access, so if you have recently purchased a new computer or reinstalled your operating system, you’ll need to authorize it to regain access to your library.
Second, if you prefer to manage your media directly from your computer, authorization is a must. It allows you to sync devices seamlessly, making it easier to listen to your favorite songs or watch your favorite movies without hiccups. Plus, if you want to share your purchased content with family members, understanding how to authorize multiple computers is essential.
3. How Many Computers Can You Authorize?
As mentioned earlier, you can authorize up to five computers using a single Apple ID. This limit is important to know, especially if you have multiple devices in your household. If you reach the limit, you won’t be able to authorize additional computers until you deauthorize one of the existing machines.
This limitation is put in place to prevent sharing of accounts beyond what Apple deems reasonable. However, if you find yourself needing to authorize an additional computer, you can always manage your authorizations through iTunes or the Music app, depending on your system.
4. Steps to Authorize Your Computer for iTunes
Now that you understand the importance of authorization, let’s walk through the steps to authorize your computer for iTunes. The process is straightforward and takes just a few moments.
- Open iTunes or the Music app: First, launch iTunes on Windows or the Music app on macOS.
- Sign in: Ensure you’re signed in with your Apple ID. Go to the “Account” menu and select “Sign In” if you aren’t already logged in.
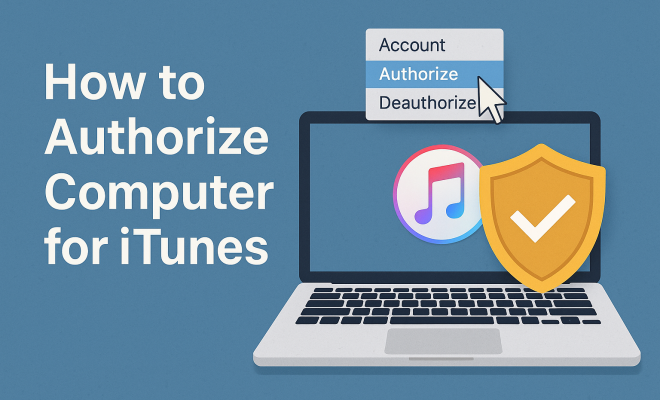
- Authorize your computer: Navigate to the “Account” menu again, select “Authorizations,” and then click on “Authorize This Computer.”
After completing these steps, you’ll receive a confirmation message indicating that your computer has been authorized.
5. Deauthorizing Your Computer
In some cases, you may need to deauthorize a computer, especially if you’re selling or giving it away. Deauthorization is just as crucial as authorization in managing your Apple ID’s accessibility. To deauthorize a computer, follow these steps:
- Open iTunes or the Music app: Access the application on the computer you wish to deauthorize.
- Sign in: Make sure you’re logged in with your Apple ID.
- Deauthorize: Click on the “Account” menu, go to “Authorizations,” and select “Deauthorize This Computer.”
It’s important to note that you can only deauthorize a computer while you’re logged into it. If you ever lose access to a computer that is authorized, you can deauthorize all your computers from your account settings on the Apple ID website. (See: New York Times on iTunes.)
6. Managing Your Authorizations
Managing your authorizations effectively can save you a lot of trouble down the line. If you find yourself needing to authorize or deauthorize computers frequently, there are a few best practices to keep in mind. Always keep track of which computers you’ve authorized to streamline the process.
If you purchase a new computer or upgrade your existing one, remember to deauthorize the old machine before proceeding with the new one. This ensures you don’t hit the five-computer limit unexpectedly. Apple’s support site provides a way to view and manage your authorizations, supporting a smoother experience.
7. Troubleshooting Authorization Issues
Even with a straightforward process, users may encounter hiccups while authorizing their computers. If you’re having trouble authorizing your computer for iTunes, here are a few common issues and their solutions:
- Incorrect Apple ID: Make sure you’re using the correct Apple ID and password. If you’ve forgotten your credentials, you can reset them through Apple’s account recovery process.
- Connection issues: Ensure that your internet connection is stable. Sometimes, weak connectivity can prevent iTunes from completing the authorization process.
- Authorization limit reached: If you’ve already authorized five computers, you’ll need to deauthorize one before adding a new one. Check your authorized devices through your account settings.
By addressing these common issues, you can quickly get back to enjoying your music and media without interruptions.
8. Current Relevance of iTunes Authorization
While some users may be shifting toward streaming services, the relevance of iTunes and its authorization system remains strong. For many, owning music outright rather than streaming it is still preferred. Additionally, the rise of digital purchases in films and TV shows means that understanding how to authorize your computer for iTunes is still critical.
Furthermore, with the introduction of Apple Music and its integration with iTunes, knowing how to manage your authorizations has become even more important. With Apple Music, users can download songs for offline listening, which necessitates authorization to access the downloaded content. Thus, the authorization process supports both traditional iTunes users and those moving into Apple’s broader ecosystem.
9. Alternative Methods for Media Management
For those looking for alternatives to iTunes authorization, there are various media management tools available. While iTunes remains popular, options like MusicBee, VLC, and MediaMonkey offer users different approaches to organizing their media libraries. These platforms can help manage music files without the need for Apple’s authorization, appealing to those who prefer a more flexible system.
However, it’s vital to understand that if you’re purchasing media through the iTunes Store, you’ll still need to follow the authorization process. The benefits of using alternative media management tools can be substantial, but they might not completely replace the need for iTunes when it comes to authorized content.
10. Frequently Asked Questions (FAQ)
10.1 How Do I Know if My Computer is Authorized?
You can check if your computer is authorized by opening iTunes or the Music app, navigating to the “Account” menu, and selecting “View My Account.” Under the “iTunes in the Cloud” section, you will see the number of computers currently authorized with your Apple ID.
10.2 Can I Authorize a Computer Without iTunes Installed?
No, you must have iTunes or the Music app installed to authorize a computer. If you don’t have these apps, you won’t be able to complete the authorization process.
10.3 What Happens If I Hit the Authorization Limit?
If you hit the five-computer limit, you will need to deauthorize one of the existing computers. You can do this through the “Account” menu within iTunes or the Music app. If you don’t have access to any of those computers, you can deauthorize all computers associated with your Apple ID from the Apple ID account page.
10.4 Why Is My Authorization Request Being Denied?
Your authorization request might be denied due to incorrect Apple ID or password, issues with your internet connection, or if you’ve previously reached the authorization limit. Double-check your credentials and ensure your internet connection is stable.
10.5 How Often Do I Need to Authorize My Computer?
You typically need to authorize your computer when you first install iTunes or the Music app or when you replace or format your computer. If you haven’t changed your setup, you shouldn’t need to authorize it again.
11. Advanced Tips for Managing Your iTunes Library
Once you’ve mastered the basics of authorizing your computer, consider these advanced tips for managing your iTunes library:
- Keep Your Library Organized: Regularly update your library by removing duplicate tracks and incomplete files. This not only makes your library easier to navigate but can also save storage space.
- Backup Your Library: Always have a backup of your iTunes library, especially if you have a significant investment in your media. Use external drives or cloud storage solutions to keep your library safe.
- Explore Smart Playlists: Use Smart Playlists to automate the organization of your music. For example, you can create a Smart Playlist that only includes songs you’ve played in the last month or tracks that have a specific rating.
- Utilize Family Sharing: If you have a family, consider using Family Sharing so all members can access each other’s purchases without needing to authorize multiple computers for the same Apple ID.
12. Future of iTunes and Media Management
The future of iTunes and digital media management will likely continue evolving, especially as Apple integrates more services into its ecosystem. With services like Apple Music and iCloud, the need for a robust system of authorizations will remain essential. It’s important to stay updated with Apple’s developments in this area to make the most of your digital purchases.
As technology advances, we may see even more seamless integration between various Apple devices and software. Watching how Apple evolves its services will be key for users who want to stay ahead of the curve and ensure their media is easily accessible across platforms.
13. Making the Most of Your iTunes Experience
Being able to authorize your computer for iTunes is a key component in maximizing your music and media experience with Apple. With the right knowledge and steps, you can ensure your library is accessible across devices. As you embrace digital media, understanding this authorization process will enable you to manage your content efficiently, whether you’re a casual listener or a dedicated audiophile.
Remember, the simplicity of this process is designed to enhance your experience, so don’t hesitate to take advantage of it. Whether you’re syncing devices, managing downloads, or troubleshooting issues, knowing how to navigate iTunes authorization will keep your media experience seamless and enjoyable.
14. Understanding Digital Rights Management (DRM)
Digital Rights Management (DRM) is a critical component of the iTunes ecosystem, especially when it comes to authorization. DRM is a set of access control technologies used by content owners to restrict the usage of digital media. This means that when you purchase music or movies from iTunes, you’re not just buying a file; you’re also being granted limited rights to use that file in specific ways.
By authorizing your computer, you’re essentially validating that you have the right to access and play that content on the devices you’ve authorized. This system helps protect artists and producers from piracy while ensuring that you, as a consumer, can enjoy a rich media experience legally.
However, it’s essential to be aware of the implications of DRM. For instance, if you authorize a computer and then decide to switch to a different machine, you may need to reauthorize your new device and potentially deauthorize the old one to continue enjoying your purchased content. Understanding how DRM interacts with your authorization process will give you better control over your media library.
15. How to Share Your iTunes Library with Family
If you have family members who want to enjoy the music and media you’ve purchased, sharing your iTunes library is a great option. Using Family Sharing, you can allow up to six family members to share iTunes and App Store purchases without needing each member to authorize a separate computer.
To set this up, you need to enable Family Sharing through your Apple ID settings. Here’s a simple way to do that:
- Go to Settings on your iPhone or iPad, or System Preferences on your Mac.
- Select your Apple ID and choose “Family Sharing.”
- Follow the prompts to invite family members using their email addresses.
- Once they accept the invitation, you can all share music, movies, and more.
With Family Sharing, each member can have their own Apple ID while sharing purchases, making it an efficient and simple way to manage digital media across multiple devices.
16. Common Pitfalls When Authorizing Your Computer
While authorizing your computer for iTunes is generally a smooth process, there are a few pitfalls that users should watch out for:
- Forgetting your Apple ID: It’s easy to lose track of your Apple ID, especially if you have multiple accounts for different services. Keep it written down in a secure place or stored in a password manager.
- Not logging out of previous accounts: If you used a different Apple ID previously, ensure you log out of that account before signing into the one you wish to authorize. This will prevent conflicts and errors.
- Assuming all devices are authorized: Many users think their devices are authorized if they’ve used them before. Regularly check your authorized devices to avoid surprises when accessing your library.
A little attention to these details can save you time and frustration as you navigate your digital media landscape.
17. Understanding the Importance of Software Updates
Keeping your iTunes and Music app updated is crucial for smooth operation, including the authorization process. Apple frequently releases updates that address bugs, improve functionality, and enhance security. Ensuring you have the latest version of iTunes or the Music app reduces the likelihood of encountering issues while authorizing your computer.
To check for updates on your computer:
- On Windows, open iTunes and click on “Help” in the menu bar, then choose “Check for Updates.”
- On macOS, open the App Store and click on the “Updates” tab to see if iTunes or Music needs an update.
By staying up to date, you can enjoy the best performance and security, ensuring a worry-free experience when managing your media and authorizing your devices.
“`
Trending Now
Frequently Asked Questions
How do I authorize my computer for iTunes?
To authorize your computer for iTunes, open the iTunes application, click on 'Account' in the menu, select 'Authorizations', and then choose 'Authorize This Computer'. Enter your Apple ID and password when prompted. This allows your computer to access your purchased content.
Why do I need to authorize my computer for iTunes?
Authorizing your computer for iTunes is essential because it enables access to your purchased music, movies, and apps. It ensures that only your trusted devices can play or download content associated with your Apple ID, protecting your purchases from unauthorized access.
How many computers can I authorize for iTunes?
You can authorize up to five computers for iTunes using your Apple ID. This allows you to manage and sync your media across multiple devices while ensuring that your purchased content remains secure.
What happens if I don't authorize my computer for iTunes?
If you don't authorize your computer for iTunes, you won't be able to play or download any content purchased from the iTunes Store linked to your Apple ID. This restriction applies to music, movies, and apps, limiting your access to your media library.
Can I revoke authorization from my computer in iTunes?
Yes, you can revoke authorization from your computer in iTunes. To do this, go to 'Account', select 'Authorizations', and then choose 'Deauthorize This Computer'. This is useful if you no longer use that computer or need to manage your authorized devices.
Agree or disagree? Drop a comment and tell us what you think.