How to add circuit to breaker box
“`html
If you’re looking to expand your home’s electrical system, you might be wondering how to add a circuit to a breaker box. Whether it’s for a new appliance, lighting, or additional outlets, knowing how to safely add a circuit can save you time and money. This guide will break down the process into manageable steps, while also highlighting essential safety practices and practical insights. Let’s jump in!
1. Understanding the Basics of Circuit Breaker Boxes
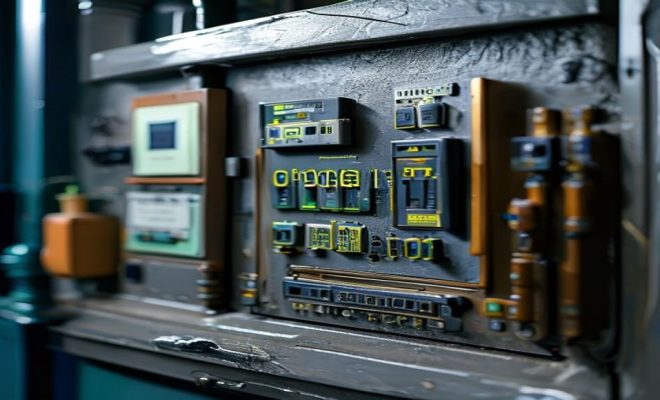
A circuit breaker box, also known as a distribution board or panel, is the central hub of your home’s electrical system. It distributes electrical power throughout your home and protects your circuits from overloads. Before you dive into how to add a circuit to a breaker box, it’s crucial to familiarize yourself with its components. The main parts include:
- Main Breaker: This is the big switch that controls power to the entire panel.
- Circuit Breakers: These smaller switches protect individual circuits from overloads.
- Bus Bars: Metal strips that connect the breakers to the incoming electrical supply.
- Neutral and Ground Bars: Where the neutral wires and ground wires are connected.
Understanding these components will help you navigate the installation process more easily, ensuring you’re prepared for what lies ahead.
2. Assessing Your Electrical Needs
Before embarking on your project, take a moment to assess your electrical needs. Are you looking to power a new appliance, or do you need extra outlets for devices? Knowing the purpose of the circuit will guide your decisions moving forward.
Next, calculate the load requirements. Most circuits in homes are rated for 15-20 amps. For example, a standard fridge typically requires a dedicated 20-amp circuit. Make sure to check the specifications of any devices you plan to connect to avoid overloading your circuit. You can use a load calculator online to ensure you’re within safe limits.
3. Gathering the Right Tools and Materials
Equipping yourself with the correct tools and materials is vital for a successful installation. Here’s a list of what you’ll need:
- Tools: Wire cutters, wire strippers, screwdriver, circuit tester, and a drill.
- Materials: Circuit breaker (appropriate amperage), electrical wire (type and gauge based on your load), wire nuts, and an electrical box.
Investing in quality tools not only makes the task easier but also ensures your safety throughout the process. Don’t forget personal protective equipment like gloves and safety glasses!
4. Shutting Off the Power
Safety should always be your first priority. Before you start any work on the breaker box, make sure to shut off the main power supply. This can typically be done by switching off the main breaker. Use a circuit tester to confirm that the power is off before touching any wires.
It’s also a good idea to inform anyone in your household that you’re working on the electrical system. You wouldn’t want someone accidentally turning the power back on while you’re working!
5. Removing the Panel Cover
Once the power is off, it’s time to remove the cover from the breaker box. Typically, this involves unscrewing a few screws or bolts. Be cautious, as some wires may still be live if they’re connected to circuits that haven’t been turned off. (See: Understanding circuit breakers.)
After removing the cover, take a moment to inspect the interior. Look for any signs of damage or wear that might indicate a larger electrical issue. If everything looks good, you’re ready to proceed!
6. Installing the New Circuit Breaker
Now comes the exciting part — installing the new circuit breaker. First, find an empty slot on the bus bar for your new breaker. Snap the breaker into place firmly; it should fit snugly. Make sure it’s the correct type for your system — standard options include single-pole and double-pole breakers.
After securing the breaker, you’ll need to connect the corresponding electrical wire. This typically involves stripping the wire and attaching it to the breaker terminal. Follow the manufacturer’s instructions for your specific breaker to ensure a safe connection.
7. Running the Wiring
The next step in how to add a circuit to a breaker box is running the wiring to your new outlet or appliance. Start by drilling a hole through the wall where you want to install the new outlet. Make sure to follow local building codes for wiring, as these often dictate the allowed wire types and installation methods.
Once you’ve drilled the hole, feed the electrical wire through. Secure it to the studs and ensure it’s properly insulated. The wire gauge you need will depend on the amperage of your circuit. For most household circuits, a 14-gauge wire is appropriate for 15-amp circuits, while a 12-gauge wire is suitable for 20-amp circuits.
8. Connecting the New Outlet
With the wiring in place, it’s time to connect the new outlet. Start by attaching the wire to the outlet’s terminal screws. There are typically three terminals: one for the hot wire (usually black), one for the neutral wire (usually white), and one for the ground wire (usually green or bare copper).
Once everything is connected, secure the outlet in its electrical box. Use a cover plate to finish it off, giving it a clean, professional look. Before closing up the panel, double-check all connections in the breaker box to ensure nothing is loose.
9. Testing Your New Circuit
After everything is connected, it’s time for the moment of truth. Put the panel cover back on and turn the main power back on. Next, flip the new circuit breaker to the “on” position. Use a circuit tester to check that power is flowing to your new outlet or appliance. Test the functionality to ensure everything works as intended.
If any issues arise — like tripping breakers or burning smells — turn everything off immediately and recheck your connections. If you’re unsure about any aspect of the installation, don’t hesitate to consult a professional electrician.
Adding a circuit to a breaker box not only enhances your home’s electrical capacity but also opens the door for new possibilities in how you use your space. By following these steps, you can complete the task safely and effectively. Remember, safety is paramount — when in doubt, consult with professionals to ensure that your electrical work is up to code and safe for your home.
10. Common Mistakes to Avoid
When adding a circuit to your breaker box, it’s easy to make mistakes that can have serious consequences. Here are a few common pitfalls to be aware of:
- Not Checking Electrical Load: Make sure to calculate the total load of all devices that will be on the new circuit. Exceeding the circuit’s capacity can lead to overheating and fires.
- Using the Wrong Wire Gauge: Using a wire that is too thin for the amperage can cause overheating. Always follow local codes and manufacturer recommendations.
- Ignoring Local Codes: Always check your local building codes before starting. Non-compliance can lead to fines and safety hazards.
- Neglecting Ground Connections: Proper grounding is crucial for safety. Make sure to connect ground wires appropriately.
- Overtightening Connections: While it’s important to have secure connections, overtightening can damage wires and connections, leading to future issues.
11. Understanding Circuit Types
Knowing the different types of circuits can help you decide how to add a circuit to a breaker box effectively. Here’s a quick overview: (See: Electrical safety guidelines.)
- General Purpose Circuits: These circuits are used for lighting and outlets throughout the home. Usually rated at 15 amps.
- Dedicated Circuits: These are reserved for specific appliances like refrigerators or washing machines. They typically require 20 amps.
- GFCI Circuits: Ground Fault Circuit Interrupters are essential in areas where water and electricity might mix, such as bathrooms and kitchens.
- Brand Circuits: These circuits serve specific appliances that may require higher power. Be sure to use the appropriate breakers and wires.
Understanding these types can help you plan your circuit installations more effectively.
12. Safety Practices When Working with Electricity
Working with electrical systems can be dangerous if proper safety procedures are not followed. Here are some best practices:
- Always Use PPE: Wear safety glasses and gloves to protect yourself from electrical shock and debris.
- Use Non-Contact Voltage Testers: These can help ensure that there is no live voltage before you start working.
- Keep Your Work Area Dry: Water and electricity don’t mix. Make sure your workspace is dry to avoid accidents.
- Do Not Work Alone: If possible, have someone around in case of an emergency.
- Keep Children and Pets Away: Ensure that kids and pets are at a safe distance while you’re working on electrical projects.
13. Understanding Local Electrical Codes
Electrical codes can vary significantly from one region to another. Before you start any project, it’s essential to consult your local building authority or a licensed electrician to determine the specific codes that apply to your area. Here’s why it matters:
Local codes ensure that electrical installations are safe, can withstand weather conditions, and don’t pose fire risks. They often include regulations on wiring types, grounding practices, and circuit capacities. Ignoring these codes can lead to unsafe installations and potential legal issues if you ever decide to sell your home.
14. Frequently Overlooked Tools and Supplies
When preparing to add a circuit, you may think you have everything you need. However, there are often overlooked tools and supplies that can make the process smoother:
- Fish Tape: This tool can help you run wire through walls, especially in tight spaces.
- Label Maker: Labeling wires and breakers can save you a lot of headaches in the future.
- Wire Nuts: These are crucial for making secure connections between wires, and it’s always good to have extras on hand.
- Electrical Tape: Use this to provide additional insulation on wire connections.
- Drill Bits: Different sizes of drill bits may be necessary depending on the type of box and wall you’re drilling into.
15. When to Call a Professional
While many people can successfully add a circuit themselves, there are situations where calling a professional is the best option:
- Complex Installations: If you’re dealing with multiple circuits, high amperage circuits, or complicated wiring, a professional can ensure everything is done safely.
- Local Code Compliance: If you’re unsure about your local codes or how to comply with them, a licensed electrician will be well-versed in these regulations.
- Existing Electrical Issues: If your home has old wiring or you suspect there are existing electrical problems, it’s wise to have a professional assess the situation.
- Time Constraints: If you’re short on time or looking for a quick installation, hiring an electrician can save you the hassle and get it done right.
16. FAQs
What do I need to know before adding a circuit to my breaker box?
Before adding a circuit, you should understand the necessary tools, materials, and local electrical codes. It’s also important to assess load requirements to avoid overloading circuits.
Can I add a circuit to a breaker box myself?
While many homeowners can handle this task, it requires a good understanding of electrical systems. If you’re unsure about your skills, it’s best to consult a professional electrician.
How can I tell if my breaker box can handle a new circuit?
Check the available slots in your breaker box, and ensure your main service panel can support the additional load. You may also need to consult an electrician for a more thorough assessment.
What type of breaker should I use for my circuit?
The type of breaker you need depends on the amperage of the circuit you are adding. For example, a 15-amp circuit typically uses a single-pole breaker, while a 20-amp circuit may require a double-pole breaker for larger appliances.
What gauge wire should I use?
For most household circuits, a 14-gauge wire is suitable for 15-amp circuits, whereas a 12-gauge wire is appropriate for 20-amp circuits. Always refer to local codes and regulations.
How can I ensure my installation is safe?
Double-check all connections, follow local codes, and ensure your circuit is properly grounded. Testing your work with a voltage tester can also help confirm safety before turning the power back on.
What should I do if my new circuit trips the breaker?
If your new circuit trips the breaker, turn off all connected devices and check for any wiring issues. If unsure, consult a professional to assess the situation.
What if my breaker box is full?
If your breaker box is full, you can consider a few options. One solution is to replace existing breakers with tandem breakers, which allow you to fit more circuits into the panel. Alternatively, you might need to upgrade to a larger breaker box to accommodate additional circuits. Always consult with a professional to explore what works best for your specific situation.
How often should I check my breaker box?
It’s a good idea to visually inspect your breaker box every few months for signs of wear, corrosion, or other issues. If you notice tripped breakers frequently, buzzing noises, or a burning smell, consult a professional immediately.
Can I use old wiring for a new circuit?
It’s not advisable to use old wiring for a new circuit unless it’s in good condition and meets current electrical codes. Old wiring may not handle new loads effectively and can pose safety hazards.
What are the signs that I need to upgrade my breaker box?
If you’re constantly tripping breakers, your breakers feel warm to the touch, or you have outdated fuses, it may be time for an upgrade. Additionally, if you’re adding new high-power appliances, consider consulting with an electrician to ensure your system can handle the load.
“`
Trending Now
Frequently Asked Questions
What is a circuit breaker box?
A circuit breaker box, also known as a distribution board or panel, is the central hub of your home’s electrical system. It distributes electrical power throughout your home and protects circuits from overloads. Key components include the main breaker, individual circuit breakers, bus bars, and neutral and ground bars.
How do I know if I can add a circuit to my breaker box?
To determine if you can add a circuit, assess your electrical needs and check the available space in your breaker box. Ensure that the total load does not exceed the panel's capacity, typically rated in amps, and consider the specific requirements of the new circuit based on the devices you intend to power.
What tools do I need to add a circuit to a breaker box?
To add a circuit to a breaker box, you'll typically need a screwdriver, wire strippers, a voltage tester, and electrical wire appropriate for the circuit's amperage. Additionally, having a circuit breaker that matches the new circuit's specifications is essential for safe installation.
Is it safe to add a circuit to a breaker box myself?
Adding a circuit to a breaker box can be done safely if you have a good understanding of electrical systems and follow safety protocols. However, if you're unsure or lack experience, it's advisable to consult a licensed electrician to ensure compliance with local codes and safety standards.
What should I consider before adding a circuit?
Before adding a circuit, consider your electrical needs, the load requirements of the devices you plan to use, and the available capacity in your breaker box. Additionally, ensure you understand the safety measures and local electrical codes to avoid potential hazards.
What did we miss? Let us know in the comments and join the conversation.