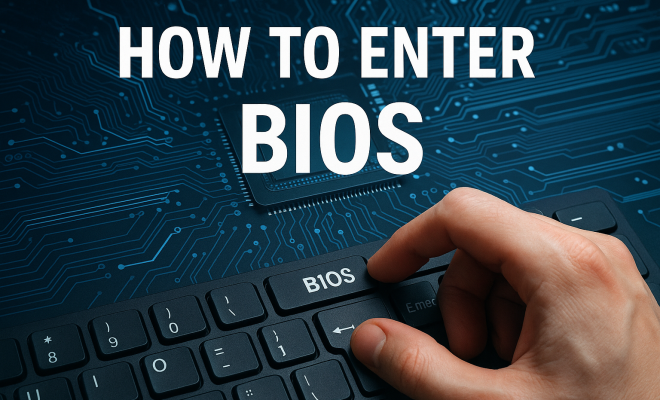
How to enter BIOS
“`html
Understanding how to enter BIOS is crucial for anyone looking to customize their computer’s settings or troubleshoot issues. The Basic Input/Output System (BIOS) is a low-level software that initiates your hardware before the operating system loads. It plays a vital role in managing the communication between the operating system and the hardware components of your computer. In this guide, we’ll explore everything you need to know about accessing the BIOS, including methods for different manufacturers, its significance, and tips for effectively navigating its settings.
1. What is BIOS?
BIOS, or Basic Input/Output System, is firmware embedded on a computer’s motherboard. This vital software component acts as an interface for communication between the operating system and the hardware. When you power on your computer, BIOS executes a Power-On Self-Test (POST) to ensure all necessary hardware components are functioning correctly before booting the operating system.
The BIOS settings allow users to configure hardware settings, manage system time and date, and prioritize boot devices. Modern systems may also have a Unified Extensible Firmware Interface (UEFI), which serves a similar purpose but offers more advanced features, such as graphical interfaces and support for larger hard drives.
2. Why Knowing How to Enter BIOS is Important
Understanding how to enter BIOS is essential for several reasons. First, it provides a gateway to customize hardware settings, such as adjusting the CPU clock speed, enabling or disabling integrated peripherals, and configuring RAID arrays. These adjustments can enhance the performance of your machine or help troubleshoot specific hardware issues.
Moreover, entering BIOS can be crucial during system upgrades or installations. For instance, if you’re installing a new operating system or setting up a different boot device, accessing BIOS allows you to adjust the boot order, ensuring your computer starts from the correct drive. This understanding empowers you to take control of your system’s performance and functionality.
3. Common Keys to Access BIOS
Different manufacturers use various keys to access BIOS. Familiarizing yourself with the specific key for your brand can save you time and frustration. Here are some common keys:
- Acer: F2 or Delete
- ASUS: F2 or Delete
- HP: F10 or Esc
- Dell: F2 or F12
- Lenovo: F1 or F2 (specific models may vary)
- Gigabyte: Delete
- MSI: Delete or F2
It’s best to press the designated key repeatedly immediately after powering on your computer to ensure you access BIOS successfully. If you miss the window, you may need to restart and try again.
4. Step-by-Step Guide on How to Enter BIOS
Now that you know the common keys, let’s walk through a step-by-step guide on how to enter BIOS. This method is applicable for most desktop and laptop computers:
- Turn Off Your Computer: Begin by shutting down your machine completely.
- Power On: Press the power button to turn on your computer.
- Press the BIOS Key: As soon as you see the manufacturer’s logo, start tapping the BIOS key (like F2, Delete, or Esc) repeatedly until the BIOS menu appears.
- Navigating BIOS: Once in BIOS, you can navigate using your keyboard’s arrow keys. The Enter key selects options, while the Esc key generally goes back.
Once you’re comfortable with the layout, you can start exploring the various settings available to you.
5. Accessing UEFI Settings
Modern systems may use UEFI instead of traditional BIOS, which offers more features and a more user-friendly interface. Accessing UEFI is often similar to BIOS but may require different steps. For Windows 10 and 11 users, you can access UEFI settings without needing to tap the BIOS key during startup:
- Open Settings: Click on the Start menu and select Settings.
- Update & Security: Go to the Update & Security option.
- Recovery: In the Recovery tab, select Restart now under the Advanced startup section.
- Troubleshoot: Choose Troubleshoot, then Advanced options, and finally UEFI Firmware Settings.
- Restart: Click Restart, and your system will boot directly into the UEFI interface.
This method simplifies the process, especially for those who may struggle with timing their key presses correctly at startup. (See: Wikipedia article on BIOS.)
6. Common BIOS Settings to Explore
Once you’ve accessed the BIOS, you’ll find a variety of settings to modify. Here are some of the most common settings you might want to explore:
- Boot Order: This configures the order of devices your system checks to boot from. Adjusting this setting is crucial when installing a new OS.
- CPU Settings: In some BIOS versions, you can adjust CPU performance settings, including overclocking features.
- Security Settings: You can set up passwords to prevent unauthorized access to the BIOS and the system.
- Integrated Peripherals: Enable or disable features like onboard sound or network cards.
- Fan Control: Monitor and adjust the speeds of system fans to manage cooling.
This is just a brief overview, but each setting can significantly impact your system’s performance and usability. If you’re unsure about a setting, it’s wise to consult your motherboard’s manual or research online.
7. Tips for Navigating and Modifying BIOS Settings
Entering BIOS can initially seem daunting, but with practice, it becomes manageable. Here are some tips to navigate and modify settings effectively:
- Take Your Time: Read on-screen instructions carefully. BIOS interfaces can be cryptic, so don’t rush through.
- Back Up Settings: If you’re unsure about making changes, note down the current settings in case you need to revert.
- Know What You’re Changing: Research any setting you plan to modify. Random changes can sometimes lead to instability.
- Exit Safely: After making changes, ensure you save your settings before exiting. This is typically done by selecting “Save and Exit” in the BIOS menu.
With these tips, you’ll be better prepared to approach BIOS settings with confidence.
8. Troubleshooting: Can’t Access BIOS?
If you find yourself unable to access the BIOS, don’t panic. Here are some common issues and solutions:
- Incorrect Key: Double-check the key used for your specific manufacturer. Timing is crucial; try tapping the key repeatedly.
- Fast Startup: Some systems have a feature called Fast Startup, which can skip BIOS. Disabling this in the operating system might help.
- Hardware Issues: Faulty peripherals or hardware can sometimes prevent BIOS access. Disconnect non-essential devices and try again.
- Clear CMOS: If all else fails, resetting the CMOS battery can restore BIOS settings to default and might allow access.
These troubleshooting steps can often resolve common access issues, allowing you to enter BIOS and make necessary changes.
9. The Future of BIOS: What Lies Ahead?
As technology continues to evolve, so does the role of BIOS. The transition from traditional BIOS to UEFI has already paved the way for enhanced features, such as faster boot times and improved security protocols. Looking ahead, we may see even greater integration of firmware with cloud services, enabling remote management and updates.
With the rise of artificial intelligence, future BIOS versions might even employ AI algorithms to optimize performance automatically based on user behavior and system requirements. Such advancements could make the process of entering BIOS and adjusting settings even more intuitive for users, removing much of the guesswork involved today.
In summary, knowing how to enter BIOS is a fundamental skill for anyone who wants to harness their computer’s full potential. Understanding its nuances opens doors to customization and troubleshooting that can enhance your overall user experience.
10. BIOS vs. UEFI: Key Differences
When discussing how to enter BIOS, it’s essential to understand the differences between BIOS and UEFI. While both serve similar purposes, they have distinct features and functionalities. Here’s a quick comparison to help clarify:
- Interface: Traditional BIOS features a text-based interface, while UEFI often comes with a graphical user interface (GUI), making it more user-friendly.
- Boot Times: UEFI can boot faster than BIOS due to its ability to initialize hardware before passing control to the OS.
- Storage Support: UEFI supports larger hard drives (over 2 TB) and more partitions (up to 128) compared to the 2.2 TB and 4 partitions limit of BIOS.
- Secure Boot: UEFI includes Secure Boot functionality, which helps prevent unauthorized access to the OS during the boot process.
Understanding these differences can help users make informed decisions regarding system upgrades and configurations.
11. Frequently Asked Questions (FAQ)
What should I do if I forget my BIOS password? (See: CDC FAQ on computer hardware.)
If you’ve set a BIOS password and forgotten it, you might need to reset the BIOS. This can usually be done by removing the CMOS battery from the motherboard for a few minutes or using a jumper to clear the BIOS settings. Refer to your motherboard’s manual for specific instructions.
Can I enter BIOS from within Windows?
Yes, in Windows 10 and 11, you can access UEFI directly through the Settings menu without needing to press a key at startup. This is a convenient feature for those who find timing their key presses challenging.
Can I damage my computer by changing BIOS settings?
Yes, improper changes in the BIOS can lead to system instability or failure to boot. It’s important to only modify settings you understand. If you’re unsure, it’s best to consult documentation or seek assistance.
Is it necessary to update my BIOS?
Updating BIOS is not always necessary unless you’re experiencing specific issues or the update provides new features or support for new hardware. Always follow the manufacturer’s guidelines when performing a BIOS update, as incorrect updates can render your system unbootable.
How often should I check my BIOS settings?
There’s no set schedule for checking BIOS settings, but it’s a good idea to review them when you upgrade hardware, install a new operating system, or if you experience issues with your system. Regular checks can help ensure optimal performance.
12. The Role of BIOS in Overclocking
Overclocking is a practice that many enthusiasts pursue to gain additional performance from their hardware. BIOS plays a significant role in overclocking, providing users with the necessary settings to tweak CPU, RAM, and GPU parameters. Here’s how to effectively use BIOS for overclocking: (See: New York Times article on BIOS.)
- Access the BIOS: Follow the steps mentioned earlier to enter the BIOS menu.
- Locate the Overclocking Section: This section may be labeled as “OC,” “AI Tweaker,” or similar, depending on your motherboard manufacturer.
- Adjust CPU Multiplier: This setting controls the CPU’s speed. Gradually increase the multiplier and test for stability after each adjustment.
- Modify RAM Settings: You can also adjust the speed, timings, and voltage. Ensure your RAM is rated for the speeds you’re trying to achieve.
- Monitor Temperatures: Keep an eye on temperatures during stress testing to avoid overheating. Tools like HWMonitor can be useful for this.
Overclocking can significantly enhance performance, but it requires careful adjustments and monitoring to avoid damage.
13. The Importance of Backups Before Modifying BIOS
Before making changes in the BIOS, it’s essential to have a backup plan. This could mean creating a restore point in the operating system or backing up critical data. While BIOS changes can enhance performance, they can also lead to unbootable systems if misconfigured. Keeping a backup can save you time and trouble in case things don’t go as planned.
14. Understanding BIOS Updates
BIOS updates can be a double-edged sword. On one hand, they can fix bugs, improve compatibility with new hardware, or even boost performance. On the other hand, an unsuccessful update can brick your motherboard. Here’s how to safely execute a BIOS update:
- Identify Your Current Version: Before updating, check which version of BIOS you currently have. This can usually be found within the BIOS interface itself or by checking your system information in your operating system.
- Download the Update: Visit the official website of your motherboard manufacturer to find the latest versions available. Make sure to select the correct model.
- Follow Instructions Carefully: Each manufacturer has specific steps for updating the BIOS. This may involve using a USB flash drive or updating directly from within the BIOS.
- Power Stability: Ensure your computer is plugged in and stable during the update process to prevent interruptions.
By following these steps, you can minimize the risks associated with BIOS updates.
15. BIOS Settings for Gamers
For gaming enthusiasts, adjusting BIOS settings can make a significant difference in performance. Key areas to focus on include:
- Memory XMP Profiles: Enabling XMP (Extreme Memory Profile) can automatically set your RAM to run at its rated speed, improving performance.
- CPU Overclocking: As mentioned earlier, tweaking CPU settings can lead to better frame rates and overall speed during gaming sessions.
- Virtualization Support: If you use virtual machines for gaming or development, enabling virtualization can enhance efficiency.
- Power Management Settings: Adjusting power settings can ensure your CPU and GPU are not throttled during intense gaming sessions.
Customizing these settings can lead to smoother gameplay and reduced lag, allowing you to enjoy your gaming experience fully.
16. Conclusion
Knowing how to enter BIOS opens a world of possibilities for computer customization and troubleshooting. Equipped with this knowledge, you can optimize your system’s performance, manage hardware settings, and ensure your machine runs smoothly. Whether you’re a novice or an experienced user, understanding these concepts enhances your ability to manage your computer effectively.
“`
Trending Now
Frequently Asked Questions
How do I access the BIOS on my computer?
To access the BIOS, restart your computer and immediately press the designated key during the boot process. Common keys include F2, F10, DEL, or ESC, depending on your manufacturer. If you're unsure, check your computer's manual or the manufacturer's website for specific instructions.
What is the purpose of BIOS in a computer?
The BIOS, or Basic Input/Output System, is firmware that initializes hardware components during startup and provides an interface for the operating system. It performs a Power-On Self-Test (POST) to ensure all hardware is functioning before loading the operating system.
Why would I need to enter BIOS?
Entering BIOS is necessary for customizing hardware settings, troubleshooting issues, or changing boot order. It allows users to configure system settings like CPU speed, boot devices, and integrated peripherals, which can enhance performance or resolve specific problems.
What key do I press to enter BIOS setup?
The key to enter BIOS setup varies by manufacturer but is often F2, F10, DEL, or ESC. You can usually see a prompt on the screen during startup indicating which key to press. Refer to your computer’s manual for the exact key.
Is BIOS the same as UEFI?
No, BIOS and UEFI are not the same. While both serve similar purposes in initializing hardware and managing boot processes, UEFI (Unified Extensible Firmware Interface) offers advanced features like a graphical interface, faster boot times, and support for larger hard drives compared to traditional BIOS.
What did we miss? Let us know in the comments and join the conversation.