How to initialize new hard drive
“`html
When you acquire a new hard drive, the first crucial step before using it is to initialize the new hard drive. This process prepares the hard drive for use in your operating system, allowing you to store files and install programs. Whether you’re upgrading your existing storage or adding additional drives, understanding how to initialize a new hard drive is vital. Below, we’ll explore the steps involved, the different types of partitions, and some troubleshooting tips you might need along the way.
1. Understanding Hard Drive Initialization
Before diving into the steps to initialize a hard drive, it’s essential to understand what this process entails. Initialization creates a partition table on the hard drive, which the operating system uses to manage the drive’s data. Without this step, your new hard drive will not be recognized by your operating system.
When you initialize a hard drive, you essentially prepare it for formatting. This means setting up how data will be organized and accessed. Initialization is crucial for both mechanical hard drives (HDDs) and solid-state drives (SSDs), as it translates to proper functionality and storage utilization.
2. Choosing the Right File System
One of the key aspects of initializing a new hard drive is selecting the appropriate file system. Common options include NTFS, exFAT, and FAT32. NTFS is the standard for Windows systems and supports larger files and volumes, making it ideal for most users. In contrast, exFAT is compatible with both Windows and macOS, which makes it a good choice for external drives.
FAT32, while older, can be useful for smaller drives but comes with limitations, such as a 4GB maximum file size. It is important to analyze your storage needs and compatibility requirements before making this decision, as it can affect performance and file access.
For example, if you plan to store high-definition videos or large software applications, NTFS would be a better choice due to its larger file size limits. Alternatively, for USB drives intended for use across multiple operating systems, exFAT is ideal, providing versatility without the size restrictions of FAT32.
3. Tools Required for Initialization
To initialize a new hard drive, you’ll need some basic tools and software, all of which are commonly available. Most operating systems come with built-in disk management utilities that allow you to perform the initialization.
For Windows users, the Disk Management tool is a straightforward option. Mac users can utilize the Disk Utility. Both tools facilitate the initialization process, including formatting and partitioning. Alternatively, third-party software can offer additional features and flexibility for those seeking advanced options.
Applications such as EaseUS Partition Master or AOMEI Partition Assistant provide more advanced options like cloning existing drives, resizing partitions, and managing multiple drives. This can be especially useful if you’re setting up a complex storage system or migrating data from an old drive.
4. Step-by-Step: Initializing Your Hard Drive on Windows
Initializing a new hard drive on Windows is a straightforward process. Here’s how to go about it:
- Open Disk Management: Right-click on the Start Menu and select Disk Management.
- Locate Your New Drive: You’ll see a list of drives; your new hard drive should appear as unallocated space.
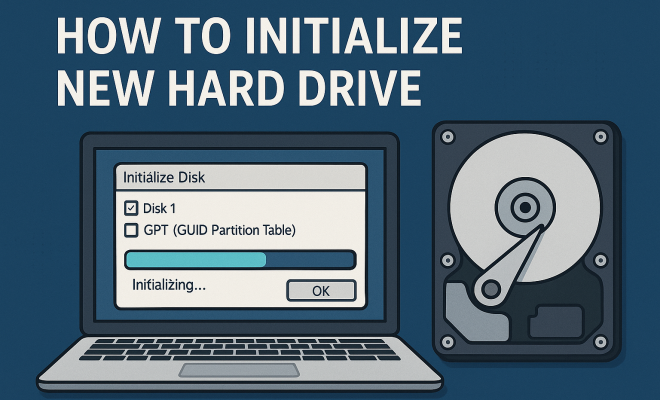
- Right-click and Initialize: Right-click on the unallocated space and select Initialize Disk. Choose between MBR (Master Boot Record) or GPT (GUID Partition Table) as your partition style.
- Create a New Volume: After initialization, right-click on the unallocated space again and select New Simple Volume. Follow the wizard to complete the formatting process.
This method will set up your hard drive for use. Remember to choose the right file system that suits your requirements during the formatting process. (See: Overview of hard disk drives.)
5. Step-by-Step: Initializing Your Hard Drive on Mac
For Mac users, the process is equally simple but follows a different set of steps.
- Open Disk Utility: Go to Applications > Utilities > Disk Utility.
- Select Your New Drive: In the sidebar, locate and select the new hard drive.
- Erase and Format: Click on the Erase button. Choose the format (APFS or Mac OS Extended) and name your disk.
- Complete the Process: Click Erase, and once the process finishes, your hard drive will be initialized and ready to use.
After these simple steps, your new hard drive is ready for storing files, software, and more. Always ensure that you back up important data regularly.
6. Understanding Partition Styles: MBR vs. GPT
When initializing a new hard drive, you will encounter two primary partition styles: MBR and GPT. Each has its advantages and disadvantages. MBR is an older partitioning scheme that works with drives up to 2TB and can have up to four primary partitions. It’s widely supported, but its limitations are noticeable for modern storage needs.
On the other hand, GPT is the newer standard that supports larger drives (over 2TB) and allows for more partitions. It is more resilient to corruption and is required for UEFI booting, making it the better choice for newer systems. Choosing the right partition style during the initialization process can significantly affect your drive’s future use and performance.
Statistics show that more than 80% of new hard drives sold today are over 2TB, making GPT an essential choice for many users. On Windows systems, GPT also enables features like secure boot and Windows recovery, which can be major advantages in maintaining system integrity.
7. Troubleshooting Common Issues
Despite following the steps to initialize a new hard drive, you may encounter some common issues. One of the most prevalent problems is the drive not being recognized by your operating system. This can occur due to improper connections or even BIOS settings. Ensure that the hard drive is securely connected to the motherboard and that the power supply is adequate.
If your drive is still not visible, checking the Disk Management tool (for Windows) or Disk Utility (for Mac) can provide insights. If the drive appears as unallocated or offline, you may need to initialize or bring it online. Additionally, look for driver updates or firmware from the manufacturer that could resolve compatibility issues.
Sometimes, the issue can stem from the hard drive itself being faulty or damaged. You can run a SMART analysis (Self-Monitoring, Analysis and Reporting Technology) to check the health of the drive. Many tools, including CrystalDiskInfo for Windows, can provide this diagnostic information and help you assess whether the drive is functional.
8. Data Safety: Importance of Backups
After you’ve successfully initialized your new hard drive, it’s essential to consider data safety. Unexpected failures can happen, and accidents can lead to data loss. Regular backups can save you from losing crucial information. Implementing a comprehensive backup strategy, including cloud storage and external hard drives, can provide peace of mind.
Consider using backup software that can automate the process, thus ensuring that your data is consistently updated. Having a reliable backup plan safeguards against hardware failures, accidental deletions, and other unforeseen issues. Remember, data recovery can be costly and sometimes impossible, so it’s better to be proactive.
According to a survey, nearly 30% of users experience data loss due to hardware failure. This emphasizes the importance of backing up data routinely. Consider employing a 3-2-1 backup strategy, which involves having three copies of your data: one primary copy and two backups, with one backup stored offsite.
9. Future-Proofing Your Storage Solution
As technology advances, the demands for storage are evolving. When initializing your new hard drive, think beyond immediate needs. Investing in larger capacity drives or faster SSDs can accommodate future data demands. Additionally, consider the possibility of RAID configurations for redundancy and performance improvements.
Keep an eye on emerging storage technologies, as they may offer significant benefits in speed, reliability, and cost-effectiveness. Understanding your options and planning for future expansions will ensure your storage solution remains efficient and effective as your requirements grow. (See: Health and safety in computer usage.)
10. Frequently Asked Questions (FAQ)
What does “initialize new hard drive” mean?
Initializing a new hard drive means preparing it for use by creating a partition table and formatting it with a file system. This allows your operating system to recognize and manage the drive effectively.
Can I initialize a new hard drive without losing data?
If the hard drive is brand new, it won’t have any data on it, so initializing it won’t result in data loss. However, if you’re initializing a previously used hard drive, make sure to back up any data before proceeding, as initialization typically formats the drive and erases existing data.
How long does it take to initialize a new hard drive?
The time required to initialize a new hard drive can vary based on its size and the speed of your computer. Typically, it can take anywhere from a few minutes to an hour to complete the process, depending on the file system and partitioning methods used.
Why is my new hard drive not showing up after initialization?
If your new hard drive isn’t showing up, check that it’s properly connected and powered. Additionally, ensure that the drive is initialized and that the partition is assigned a drive letter. Sometimes, Windows may need a restart to recognize newly added hardware.
Is it better to use MBR or GPT for a new hard drive?
It generally depends on your needs. For drives over 2TB or if you plan to use UEFI booting, GPT is the better choice. For smaller drives or older systems, MBR may still be sufficient. Always consider future needs before making a decision.
What happens if I forget to initialize my new hard drive?
If you don’t initialize your hard drive, it won’t be recognized by your operating system, and you won’t be able to store or retrieve data from it. Initialization is a necessary step for the drive to be accessible.
Can I initialize a new hard drive on Linux?
Yes, Linux also provides utilities for initializing hard drives, such as GParted or the command line tool ‘fdisk’. These tools allow you to partition and format your hard drive similar to Windows and Mac utilities.
What should I do if my hard drive fails after initialization?
If your hard drive fails post-initialization, check the warranty and support options provided by the manufacturer. If data recovery is critical, consider consulting a professional data recovery service, as they may have specialized tools to retrieve lost data.
11. Advanced Partitioning Techniques
While most users may only need to initialize a drive with a single partition, advanced users often find it beneficial to create multiple partitions. This can help organize data more efficiently. For example, you might want a separate partition for your operating system, applications, and personal files. This setup not only helps in managing files but also facilitates easier backups, as you can back up and restore entire partitions independently.
When working with multiple partitions, you can also consider logical versus primary partitions. Logical partitions can be a good solution for users needing more than four partitions on an MBR disk. Utilizing a proper partition scheme can make navigating your files easier and improve system performance.
Statistics show that organized data management can improve productivity by up to 20%. A well-structured partitioning scheme allows for faster access to files and efficient use of disk space. (See: Scientific insights on hard disk technology.)
12. Monitoring Drive Health
Once your hard drive is initialized, it’s important to regularly monitor its health. Hard drives can fail unexpectedly, and having early warnings can save you from potential data loss. Tools like CrystalDiskInfo, HD Tune, and manufacturers’ diagnostic tools can provide real-time monitoring of drive health. These tools often report on temperature, read/write errors, and overall drive status.
SMART (Self-Monitoring, Analysis, and Reporting Technology) data provides insights into the longevity and reliability of your drive. Many modern drives will alert you to potential issues before they lead to failure, so keeping an eye on these reports can help you act proactively.
13. Using Your New Hard Drive Effectively
After initializing your new hard drive, consider how you can optimize its use. If you’re using a mechanical HDD, defragmentation can help maintain performance over time. Solid-state drives, on the other hand, don’t require defragmentation, as they access memory cells differently. Instead, you should look into TRIM commands that improve SSD longevity by managing unused data blocks.
Another best practice is to regularly clean up your hard drive by removing unnecessary files and programs. Consider using built-in tools such as Disk Cleanup in Windows or third-party software to help identify what can be removed. Keeping your drive clean not only improves performance but also maximizes storage space.
14. External Hard Drives and Initialization
Initializing a new external hard drive follows similar steps as internal drives but may also include unique considerations. External drives are often plug-and-play, meaning you can connect them directly to your computer and begin using them without extensive setup. However, if the drive is new, you’ll still need to initialize it.
When initializing external drives, consider their use cases. For instance, if you’re using the drive for backups, you might want to format it using NTFS to support large files. However, if you’ll be transferring files between different operating systems, exFAT provides the best compatibility.
Additionally, keep in mind that some external hard drives come with pre-installed software for backup or security purposes. Familiarize yourself with these options, as they can enhance how you use your drive effectively.
15. Conclusion
Initializing a new hard drive is a fundamental process that sets the stage for its usage. By understanding the steps involved, the different file systems, and partitioning techniques, you can make informed decisions that meet your storage needs. Whether you are a beginner or an advanced user, being proactive about drive health, data organization, and backup strategies will ensure a smooth experience with your hard drive for years to come.
“`
Trending Now
Frequently Asked Questions
How do I initialize a new hard drive?
To initialize a new hard drive, connect it to your computer, open Disk Management, right-click the unallocated space, and select 'Initialize Disk.' Choose a partition style (MBR or GPT), then create a new volume and format it with your desired file system.
What does it mean to initialize a hard drive?
Initializing a hard drive involves creating a partition table, which prepares the drive for formatting and usage by the operating system. This step is essential for both HDDs and SSDs to ensure they are recognized and functional.
What file system should I choose when initializing a hard drive?
The choice of file system depends on your needs: NTFS is ideal for Windows users requiring large file support, exFAT works well for drives used across Windows and macOS, and FAT32 is suitable for smaller drives but has a 4GB file size limit.
Can I use a new hard drive without initializing it?
No, a new hard drive must be initialized before it can be used. Without initialization, the operating system will not recognize the drive, and you won't be able to store or access any data on it.
What happens if I don't initialize my hard drive?
If you don't initialize your hard drive, it will remain unallocated and unusable by your operating system. You won't be able to store files or install programs until you complete the initialization process.
What did we miss? Let us know in the comments and join the conversation.