
Master Your Mac: A Beginner’s Guide to Terminal Commands
“`html
1. What is Terminal?
Terminal is a powerful command-line interface found on all Mac computers, enabling users to interact with the operating system at a deeper level than what traditional graphical user interfaces can offer. At its core, Terminal lets you execute commands directly, manipulate files and folders, and perform tasks that would otherwise require a series of mouse clicks. Think of it as a way to access the inner workings of your Mac without the visual distractions of icons and windows.
While it might seem daunting to some, learning how to use Terminal on Mac can significantly enhance your productivity and give you more control over your system. If you’re accustomed to using a graphical interface, the transition might take some getting used to, but the efficiency gained is often well worth the effort.
2. Opening Terminal: Your First Step
To get started with Terminal, you first need to open the application. Here’s how:
- Open your Finder.
- Navigate to Applications > Utilities.
- Find and double-click on Terminal.
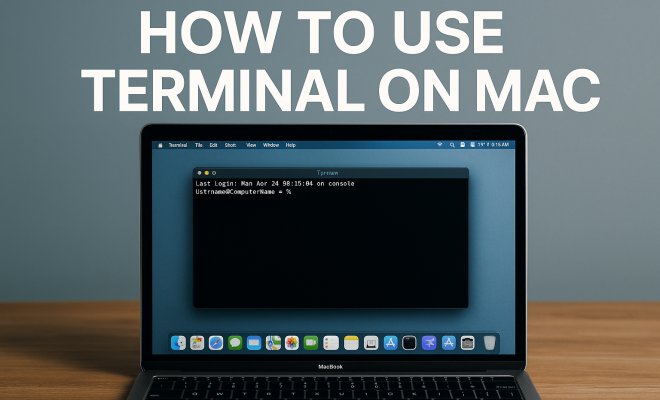
Alternatively, you can use the Spotlight Search feature by pressing Command + Space, typing “Terminal,” and hitting Enter. Once opened, you’ll see a black window with a blinking cursor, ready for your commands.
3. Basic Command Structure
Understanding the command structure is crucial for effective use of Terminal. Each command typically follows this format:
command [options] [arguments]The command specifies the operation you want to perform (like ls for listing files), options modify the command’s behavior (like -l for a long listing format), and arguments are the targets of the command (like a specific file or directory).
For example, the command ls -l /Users/YourUsername/Documents lists all files in the Documents directory in a detailed format. Familiarizing yourself with this structure will make it easier to remember commands as you progress.
4. Essential Commands to Know
As you explore how to use Terminal on Mac, there are several foundational commands that every user should know:
- ls: Lists files and directories in the current directory.
- cd: Changes the directory you’re currently in. For example, cd Documents moves you into the Documents folder.
- mkdir: Creates a new directory. For instance, mkdir myFolder makes a new folder called myFolder.
- rm: Deletes files or directories. Use with caution! rm filename will remove the specified file.
- cp: Copies files or directories. For example, cp file1.txt file2.txt will create a copy of file1.txt named file2.txt.
- mv: Moves or renames files or directories. mv oldname.txt newname.txt renames oldname.txt to newname.txt.
These commands form the backbone of your interactions in Terminal, and as you grow comfortable with them, you’ll find yourself performing tasks with speed and efficiency.
5. File System Navigation
Navigating the file system is a critical skill when learning how to use Terminal on Mac. The command pwd (print working directory) indicates your current location in the file system. Understanding the hierarchy of directories is key to managing files. For instance:
- /: The root directory of your entire system.
- /Users: Contains all user home directories.
- /Applications: Where all installed applications are stored.
- /Library: Contains application support files.
By mastering navigation commands such as cd and ls, you can easily move through your Mac’s file system and manage your files more efficiently. Use cd .. to go up one directory level, and cd ~ to return to your home directory.
6. Customizing the Terminal Experience
Terminal is not just a functional tool; it can also be customized to suit your preferences. From changing text colors to adjusting the font size, here’s how to make Terminal feel more like your personal workspace:
- Change Background and Text Color: Go to Terminal > Preferences > Profiles. Here, you can select a profile and adjust colors and fonts.
- Keyboard Shortcuts: Assign custom shortcuts to make your commands faster. This can be done in the Settings menu.
- Command Prompt Customization: You can customize your command prompt to display different information like your username or current directory using the PS1 variable.
Personalizing your Terminal not only enhances your productivity but also makes it a more enjoyable environment to work in. (See: Terminal on macOS.)
7. Advanced Commands for Power Users
Once you feel confident with the basics, you can explore some advanced commands that unlock even more capabilities:
- grep: A powerful search tool that allows you to filter text. For instance, grep ‘Hello’ file.txt will search for the word “Hello” in file.txt.
- find: Helps locate files within the file system. For example, find / -name filename.txt searches for filename.txt from the root directory.
- ssh: Secure Shell allows you to access other computers securely. Use ssh user@host to connect to another machine remotely.
- chmod: Changes file permissions. For instance, chmod 755 script.sh sets the permissions of script.sh.
These commands are indispensable for performing more complex operations and can significantly enhance your productivity as you gain more experience with Terminal.
8. Using Scripts to Automate Tasks
One of the best ways to harness the power of Terminal is through scripting. Shell scripts allow you to automate repetitive tasks, saving you time and effort. Here’s a brief overview of how to get started:
Start by creating a new text file with a .sh extension. For instance, using nano myscript.sh will open a text editor where you can write your script. Begin your script with the shebang line:
#!/bin/bashThis line tells your system that the script should be run using the Bash shell. You can then write a series of commands just as you would in the Terminal. Once you’ve finished your script, make it executable using the command chmod +x myscript.sh, and you can run it by typing ./myscript.sh.
Automating tasks with scripts not only boosts efficiency but also allows you to execute complex sequences of commands with ease.
9. Common Pitfalls and Troubleshooting
Even seasoned users encounter challenges while navigating Terminal. Here are some common pitfalls and troubleshooting tips to keep in mind:
- Accidental Deletion: Using the rm command without caution can lead to data loss. Always double-check your command before hitting Enter.
- Permissions Issues: If you encounter “Permission denied” messages, you might need to use sudo (super user do) before your command, granting you administrative privileges.
- Command Not Found: If you see this error, it might mean you mistyped the command or that it’s not installed on your system. Double-check for typos or install the required software.
Being aware of these common issues can save you a lot of headaches and help you recover quickly from errors.
10. Resources for Continued Learning
Mastering how to use Terminal on Mac can be an ongoing journey. Fortunately, there are numerous resources available for further learning:
- Online Tutorials: Websites like Codecademy and freeCodeCamp offer interactive courses focused on command-line skills.
- Books: Consider reading “The Linux Command Line” by William E. Shotts, Jr., which, while Linux-focused, is highly relevant for Mac users.
- Forums and Communities: Engage with communities on platforms like Stack Overflow or Reddit’s /r/mac for support and insights from fellow users.
By continually expanding your knowledge and staying engaged with the community, you’ll refine your skills and discover even more ways to leverage Terminal for your needs.
11. Understanding Terminal’s Environment
Terminal operates in an environment defined by shell settings and configuration files. Understanding these elements can help you tailor your Terminal experience even further.
- Bash vs. Zsh: macOS used to rely on Bash as the default shell, but since macOS Catalina, Zsh has taken its place. While both shells share similarities, Zsh offers some additional features such as improved globbing, better command completion, and more customization options.
- Environment Variables: These are variables that affect the behavior of your shell and programs. Common environment variables include
PATH, which tells the shell where to look for executables, andHOME, which points to your home directory. You can view your current environment variables by typingenvin Terminal. - Configuration Files: Configuration files such as
.bash_profile,.bashrc, and.zshrcallow you to set up your terminal environment. Here, you can add aliases (shortcuts for commands), set environment variables, and define custom prompt appearances. Modifying these files can greatly enhance your efficiency. For instance, addingalias ll='ls -la'gives you a quick way to list files in long format.
Understanding and customizing your environment can make your Terminal usage more efficient and tailored to your specific needs.
12. Useful Tips and Tricks
Mastering Terminal is not just about knowing commands; it’s also about utilizing tips and tricks that can save you time and enhance your workflow. Here are some you might find useful:
- Tab Completion: When typing commands or file names, press the Tab key to auto-complete. This can save time and reduce errors.
- History Navigation: Use the up and down arrow keys to cycle through previously entered commands. You can also type
!!to repeat the last command. - Command Chaining: You can chain commands together using && or ;. For example,
mkdir myNewFolder && cd myNewFoldercreates a new directory and then navigates into it, but only if the first command succeeds. - Viewing Command Outputs: Use
|(pipe) to send the output of one command to another. For example,ls -l | grep 'txt'lists files in long format and filters only those that have ‘txt’ in their name.
Incorporating these tips into your daily Terminal use can enhance your efficiency and make your experience much smoother.
13. Frequently Asked Questions (FAQ)
What can I do with Terminal on Mac?
Terminal allows you to control almost every aspect of your Mac, from file management to system settings and installed applications. You can create scripts, automate tasks, manage network settings, and even install software via command-line tools like Homebrew.
Is Terminal safe to use?
Yes, Terminal is safe as long as you understand the commands you’re executing. Be cautious with commands that alter or delete files, particularly the rm command, as they can lead to data loss if used improperly. Always double-check your commands before running them.
What is Homebrew, and how do I use it?
Homebrew is a package manager that simplifies the installation of software on macOS. You can install it by executing the following command in Terminal:
/bin/bash -c "$(curl -fsSL https://raw.githubusercontent.com/Homebrew/install/HEAD/install.sh)"Once installed, you can use commands like brew install to install various software packages easily.
How do I change the shell back to Bash?
If you prefer using Bash over Zsh, you can change your default shell back to Bash by using the following command:
chsh -s /bin/bashYou may need to restart your terminal or log out and back in for the change to take effect.
Can I run Windows commands in Terminal?
No, the Terminal in macOS is designed to execute commands compatible with Unix-based systems. However, you can run Windows commands using virtualization software (like Parallels or VirtualBox) or by installing Windows Subsystem for Linux (WSL) if you have a dual-boot setup.
14. Embracing Scripting: A Deeper Dive into Automation
As you become more comfortable with Terminal, diving deeper into scripting can open up an entirely new level of efficiency and capability. Scripts can range from simple to highly complex, depending on your needs. Here’s a brief overview of some advanced scripting concepts:
Creating Functions
Functions in shell scripts allow you to encapsulate reusable blocks of code. This makes it easier to manage larger scripts by organizing related commands into functions. Here’s how to define a simple function:
my_function() {
    echo "Hello, World!"
}
You can then call this function by simply typing my_function in your script. Functions help keep your code clean and modular, making it easier to debug and maintain.
Conditional Statements
Conditional statements enable your scripts to perform different actions based on certain conditions. The if statement is fundamental in scripting. For example:
if [ -e myfile.txt ]; then
    echo "myfile.txt exists."
else
    echo "myfile.txt does not exist."
fi
This structure allows your scripts to respond intelligently to the state of the file system, providing dynamic behavior based on real-time conditions.
Loops for Repetition
Loops allow you to repeat actions until a specific condition is met. The for loop is particularly useful for iterating over lists. Here’s an example:
for file in *.txt; do
    echo "Processing $file"
done
This script will process each text file in the current directory, making it easy to apply commands across multiple files.
Using External Scripts
You can also call external scripts or commands within your scripts. This is especially useful for leveraging existing tools without reinventing the wheel. For example:
./myOtherScript.shThis command allows you to execute another script from within your current script. Just ensure any scripts you call have the appropriate execution permissions.
15. Performance and System Monitoring
Terminal can also be utilized for monitoring system performance and resources. Understanding commands that provide insights into your system can help diagnose issues or optimize performance. Here are a few key commands:
- top: Displays a dynamic view of system processes, showing CPU and memory usage in real time.
- htop: An enhanced version of top, providing a more user-friendly interface. You can install it via Homebrew with
brew install htop. - df -h: Displays disk space usage for all mounted filesystems in a human-readable format.
- du -sh * : Shows the size of directories and files in the current directory, helping you identify space hogs.
Familiarizing yourself with these commands can help you manage your system’s performance, ensuring smooth operation and efficient resource allocation.
16. Networking Commands
Understanding networking commands in Terminal can be incredibly beneficial, especially if you’re managing servers or troubleshooting network issues. Here are some commands to get you started:
- ping: Tests the reachability of a host on an Internet Protocol (IP) network. For example,
ping google.comwill send packets to Google to check connectivity. - traceroute: Displays the route and measures transit delays of packets across the network. Use
traceroute google.comto see the path your data takes to reach the server. - ifconfig: Displays the network configuration of your machine, helping you understand your current IP address and network status.
- netstat: Provides information about network connections, routing tables, interface statistics, masquerade connections, and multicast memberships.
These commands are vital for diagnosing network issues and understanding how data flows through your Mac and beyond.
17. Conclusion: Embracing Terminal for Enhanced Productivity
Learning how to use Terminal on Mac may feel intimidating at first, but as you become more familiar with the commands and features, you’ll realize the incredible potential it offers. Whether you’re looking to automate tasks, manage files more efficiently, or dive deeper into your system’s capabilities, Terminal is an indispensable tool in your tech arsenal. Embrace the learning curve, and soon you’ll find yourself leveraging Terminal for a more productive and efficient workflow.
“`
Trending Now
- 7 Proven Strategies to Boost Your Brand Visibility in ChatGPT for 2026
- this guide on are you missing out? top 10 amazon ai tools for sellers in 2026
- the complete explanation
- our breakdown of why iran oil prices aren’t spiking: the market’s surprising reaction explained
- the complete explanation
Frequently Asked Questions
What is Terminal on Mac used for?
Terminal on Mac is a command-line interface that allows users to interact with the operating system directly. It enables you to execute commands, manipulate files and folders, and perform tasks that may require multiple mouse clicks in a graphical interface, enhancing productivity and control over your system.
How do I open Terminal on my Mac?
To open Terminal on your Mac, go to Finder, navigate to Applications > Utilities, and double-click on Terminal. Alternatively, you can use Spotlight Search by pressing Command + Space, typing 'Terminal,' and hitting Enter to launch the application.
What are some basic commands in Terminal for Mac?
Some essential commands to know in Terminal include 'ls' for listing files, 'cd' for changing directories, and 'cp' for copying files. Understanding the command structure, which typically includes options and arguments, will help you use these commands effectively.
Is using Terminal on Mac difficult for beginners?
While using Terminal on Mac may seem daunting at first, it offers a powerful way to manage your system. With practice, beginners can learn to execute commands efficiently, and the productivity benefits often outweigh the initial learning curve.
What is the command structure in Terminal on Mac?
The command structure in Terminal typically follows the format: command [options] [arguments]. The command specifies the operation, options modify the command's behavior, and arguments are the targets. For example, 'ls -l /Users/YourUsername/Documents' lists files in a detailed format.
Have you experienced this yourself? We’d love to hear your story in the comments.