Mastering Excel on Mac: A Comprehensive Guide
“`html
Microsoft Excel has long been a staple in the world of data management, but how you utilize it can vary significantly depending on your operating system. For Mac users, navigating Excel can feel a bit different compared to their Windows counterparts. With its unique interface and features, Excel for Mac caters specifically to the needs of Apple users. In this comprehensive guide, we’ll explore eight crucial aspects of using Excel on a Mac, ensuring you’ll make the most of this powerful tool.
1. Getting Started with Excel for Mac
First things first, if you don’t already have Excel installed on your Mac, you’ll need to go through the setup process. Excel for Mac is part of the Microsoft 365 suite, which you can purchase as a subscription. Once installed, familiarize yourself with the interface. While it may look similar to Excel on Windows, there are subtle differences.
For instance, the Ribbon interface may appear a bit different — with some features organized differently or located in alternative tabs. It’s crucial to explore the menus to find the functionalities you need. Take time to adjust to the layout, and soon you’ll find that the differences are easy to manage.
2. Understanding the Interface
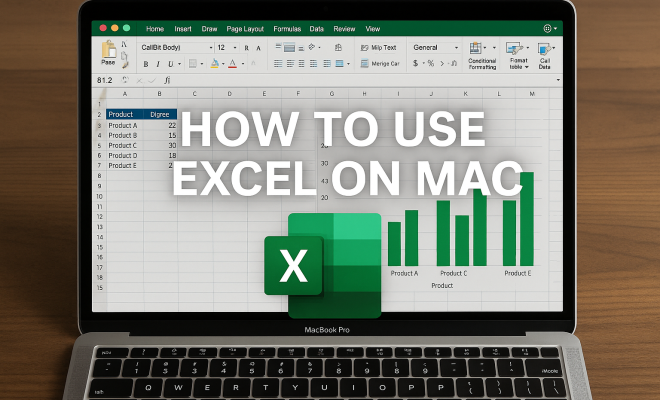
Excel for Mac features a user-friendly interface that integrates well with macOS. The Ribbon consists of tabs such as Home, Insert, Page Layout, Formulas, Data, Review, and View. Each tab contains specific tools and commands. For example, the Home tab includes commonly used functions like formatting options, cell styles, and clipboard commands.
Moreover, navigating through the Excel for Mac interface can be effectively managed with the use of keyboard shortcuts. While these shortcuts may differ from Windows, learning them can drastically increase your efficiency. For instance, Command + C for copy, Command + V for paste, and Command + Z for undo are just a start. Familiarizing yourself with these shortcuts will enhance your spreadsheet experience.
3. Creating and Managing Workbooks
Creating a new workbook in Excel for Mac is as simple as selecting the ‘File’ tab and choosing ‘New Workbook.’ You can also access numerous templates that cater to various needs, like financial planning or project management. These templates can save you time and effort, especially if you’re new to using spreadsheets.
Managing your workbooks is just as crucial. You can save your work to OneDrive, which allows you to access your files across different devices. Alternatively, you may choose to save your work locally on your Mac. Remember to frequently save your work to prevent any data loss — a common pitfall for many users.
4. Data Entry and Formatting
Entering data into Excel for Mac is straightforward. Click on a cell and start typing. However, formatting that data to make it visually appealing and easier to understand is an essential skill. Excel for Mac provides various formatting options: you can change fonts, colors, borders, and number formats with just a few clicks.
Moreover, using conditional formatting can be a game-changer. This feature allows you to highlight cells based on their values, providing instant visual insights. For instance, you can set certain thresholds for sales figures and color code them accordingly. This visual cue helps you quickly identify trends or outliers in your data.
5. Leveraging Formulas and Functions
Excel is renowned for its powerful formulas and functions, and Excel for Mac is no exception. Basic functions like SUM, AVERAGE, and COUNT are essential for any user. However, delving deeper into Excel’s capabilities can significantly enhance your data analysis.
For instance, learning how to use VLOOKUP and HLOOKUP can help you pull data from large datasets efficiently. Additionally, the IF function can be used for logical comparisons, allowing for more dynamic spreadsheets. Excel for Mac also supports array formulas, which can perform multiple calculations on a set of values — a must-know for advanced users. (See: Microsoft Excel overview on Wikipedia.)
6. Charts and Graphs: Visualizing Your Data
One of the most powerful features of Excel for Mac is its ability to create stunning visual representations of your data. Whether you’re preparing a presentation or simply want to analyze results visually, creating charts can make your data more digestible. To insert a chart, you simply select your data, go to the ‘Insert’ tab, and choose from various chart types, including bar graphs, line charts, and pie charts. (top schools for office tech)
Beyond just inserting a chart, Excel for Mac offers customization options to enhance the appearance of your charts. You can modify colors, styles, and data labels to make your chart not only informative but also aesthetically pleasing. Customizing your charts helps in communicating your data story more effectively, especially when sharing with colleagues.
7. Collaboration and Sharing
In today’s remote working environment, collaboration is key. Excel for Mac has robust sharing options that allow multiple users to work on the same workbook simultaneously. You can share your workbook through OneDrive, enabling real-time collaboration with others. This is particularly useful for teams that need to analyze data together or generate reports.
Additionally, utilizing the comments and notes features can help streamline communication among collaborators. Instead of sending back-and-forth emails, you can leave comments directly in the spreadsheet, making it easier to track feedback and revisions.
8. Staying Up-to-Date with New Features
Microsoft regularly updates Excel for Mac to include new features and improvements. To stay ahead, it’s essential to regularly check for updates. This not only ensures you have the latest features but also provides security improvements and bug fixes.
Additionally, Microsoft offers a plethora of online resources, including tutorials and forums, to help you learn about new functionalities. Engaging with these resources will allow you to maximize your use of Excel for Mac and stay informed about best practices in data management.
9. Advanced Data Analysis Techniques
As you become more comfortable using Excel for Mac, diving into advanced data analysis techniques can take your skills to the next level. One such technique is PivotTables, which allow you to summarize large datasets effortlessly. With a PivotTable, you can quickly manipulate your data to view it from various perspectives, making it easier to analyze trends and patterns.
For instance, if you have sales data across various regions, a PivotTable can help you aggregate totals by region, product, or time period. This makes it an invaluable tool for business analysts and anyone needing to derive insights from data.
Another powerful feature is Power Query, which allows you to connect, combine, and refine data from multiple sources. This is particularly useful when working with data from different databases or files. By using Power Query, you can automate many data preparation tasks, so you can focus on analysis rather than data wrangling.
10. Integration with Other Apps
One of the advantages of using Excel for Mac is its ability to integrate with other Apple applications and services. You can easily export data to Numbers or Keynote for enhanced presentations. Additionally, if you’re using other Microsoft applications, such as Word or PowerPoint, you can seamlessly embed Excel charts and tables into these documents.
This integration can save you time and improve productivity, especially when creating reports or presentations that require data visualizations. You can copy and paste charts from Excel into your presentations, ensuring that your data remains up-to-date and consistent across all platforms.
11. Excel for Mac vs. Excel for Windows: Key Differences
While Excel for Mac and Windows share many functionalities, there are notable differences that can impact user experience. For instance, the Mac version lacks some advanced features found in the Windows version, such as certain data analysis tools and add-ins that are more commonly used in corporate settings. This builds on user-friendly designs in edtech.
On the other hand, the Mac version typically has a more streamlined interface that aligns with macOS aesthetics, making it easier for Apple users to navigate. For many users, the choice between Excel for Mac and Windows boils down to personal preference and specific needs, such as the necessity for certain functions or compatibility with other software. (See: CDC on data management and Excel.)
Another difference is keyboard shortcuts. As mentioned earlier, the shortcuts differ significantly, which can be a hurdle for users switching between platforms. However, the design philosophy of both versions remains the same, focusing on enhancing productivity and data management.
12. FAQs About Excel for Mac
What are the system requirements for Excel for Mac?
To run Excel for Mac, you need a Mac with macOS Sierra or later. It’s crucial to keep your operating system updated to ensure compatibility and access to new features.
Can I use Excel for Mac without an internet connection?
Yes, you can use Excel for Mac offline. However, certain features like OneDrive integration and real-time collaboration will require an internet connection to function.
Is there a free trial version of Excel for Mac?
Microsoft typically offers a free trial of Microsoft 365, which includes Excel for Mac. Check their official website for the latest offers on trials and subscriptions.
Can I transfer my Excel files from Windows to Mac?
Absolutely! Excel files created on Windows can be opened and edited on Excel for Mac without any issues. Just make sure to save files in a compatible format. See also leading colleges for data entry.
Are macros available in Excel for Mac?
Yes, Excel for Mac supports macros, but there are some limitations compared to the Windows version. If you rely heavily on VBA (Visual Basic for Applications), you may want to familiarize yourself with any differences in functionality.
How can I learn more about using Excel for Mac?
There are many resources available online, including Microsoft’s support page, YouTube tutorials, and forums dedicated to Excel users. Participating in these communities can help you learn tips and tricks from other users.
13. Additional Tips for Maximizing Excel for Mac
It’s easy to get caught up in the basics of Excel for Mac, but there are a few advanced tips that can help you work smarter, not harder. One useful tip is to use the “What-If Analysis” feature, which lets you experiment with data to see how different scenarios affect outcomes. This can be particularly useful for budgeting or forecasting.
For example, if you want to understand how changes in your sales volume impact your revenue, you can create scenarios and see the projected outcomes right in your spreadsheet. This tool provides a dynamic way to explore data possibilities, which can lead to more informed decision-making.
14. Customizing Your Excel Experience
For many users, personalizing Excel can enhance productivity by making the interface more comfortable. You can customize the Ribbon by adding or removing commands based on your frequently used functions. This streamlining can save you time and help you navigate your tasks more efficiently. (See: Harvard University resources.)
Additionally, consider adjusting your settings for auto-saving and file recovery. By customizing these settings, you can ensure that your work is always saved, reducing the risk of data loss.
15. Using Excel Add-ins for Extended Functionality
Add-ins can significantly enhance your experience with Excel for Mac by providing additional features and functionalities. You can explore various add-ins that cater to specific needs, such as advanced statistical analysis, project management, or financial modeling.
To access add-ins, go to the “Insert” tab, then select “Get Add-ins.” You’ll find a plethora of options designed to help you get the most out of your data management tasks. Using the right add-ins can turn Excel into a more powerful tool tailored to your unique requirements.
16. Understanding Excel for Mac’s Security Features
Security is a crucial part of using any software, especially when handling sensitive data. Excel for Mac comes with built-in security features to help protect your files. You can set passwords for your workbooks to prevent unauthorized access, and the application provides options for encrypting your files as well.
Moreover, always be aware of the types of data you’re sharing with others. When collaborating, you can limit permissions to prevent others from editing certain parts of the workbook. This helps maintain the integrity of your data while allowing for necessary collaboration.
17. Community and Support Resources
Engaging with the community can be one of the best ways to learn and solve problems. There are numerous forums, user groups, and social media platforms where Excel enthusiasts share tips, tricks, and troubleshoot common issues. Platforms like Reddit, Stack Overflow, or even specialized Excel forums can be invaluable resources.
In addition, Microsoft provides extensive documentation and support through its official website. From troubleshooting guides to detailed tutorials, you can find answers to most of your questions through their support pages. Don’t hesitate to reach out to these resources when you encounter challenges.
Excel for Mac offers a plethora of tools that can transform the way you handle data. By familiarizing yourself with the interface, mastering data entry and formatting, utilizing powerful functions, and embracing collaboration, you’ll find that managing spreadsheets becomes a breeze. So, take a deep dive into Excel for Mac, and unlock the full potential of your data today!
“`
Trending Now
Frequently Asked Questions
How do I install Excel on my Mac?
To install Excel on your Mac, you need to purchase a subscription to Microsoft 365, which includes Excel. After purchasing, download the installer from the Microsoft website, open the file, and follow the on-screen instructions to complete the installation.
What are the main differences between Excel for Mac and Windows?
Excel for Mac has a unique interface tailored for macOS, with some features organized differently compared to Windows. The Ribbon layout may vary, and certain keyboard shortcuts are distinct, such as using Command instead of Control for functions like copy and paste.
What keyboard shortcuts are available in Excel for Mac?
Excel for Mac offers several useful keyboard shortcuts, including Command + C for copy, Command + V for paste, and Command + Z for undo. Familiarizing yourself with these shortcuts can significantly enhance your efficiency while working in spreadsheets.
How can I navigate the Excel interface on a Mac?
Navigating the Excel interface on a Mac is straightforward, thanks to its user-friendly layout. The Ribbon consists of tabs like Home, Insert, and Data, each containing specific tools. Explore these tabs to find the functionalities you need for your tasks.
Is Excel for Mac different from other spreadsheet software?
Yes, Excel for Mac is specifically designed for macOS, offering features and an interface that cater to Apple users. While it shares many functionalities with other spreadsheet software, its integration with macOS and unique features set it apart.
Agree or disagree? Drop a comment and tell us what you think.