Master ClickUp Timeline View: Boost Project Productivity
“`html
Project management tools have revolutionized the way teams organize their tasks and collaborate effectively. One of the standout features of ClickUp is its timeline view, which provides teams with a clear visual representation of project timelines, deadlines, and task interdependencies. In this ClickUp timeline tutorial, we’ll explore how to leverage this feature to boost productivity, enhance team collaboration, and keep your projects on track.
1. What is ClickUp?
Before diving into the specifics of the ClickUp timeline, it’s essential to understand what ClickUp itself is and how it functions as a project management tool. Founded in 2017, ClickUp has quickly gained popularity among teams seeking a versatile and customizable platform. It offers a wide range of features including task management, goal tracking, document sharing, and reporting.
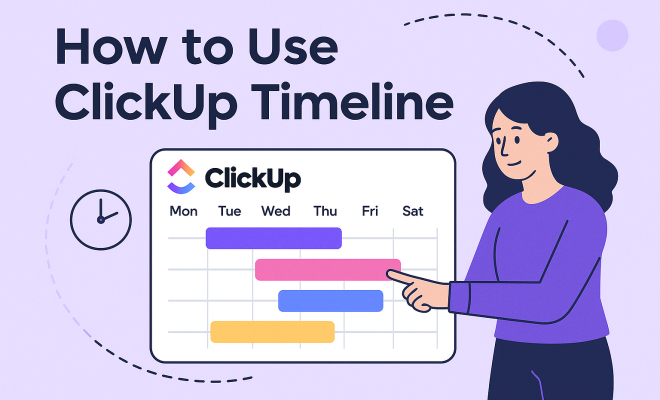
What sets ClickUp apart from competitors like Trello or Asana is its flexibility. Users can tailor their workspaces with different views, such as list, board, calendar, and, notably, timeline views. The timeline feature allows you to see tasks and their durations laid out over a designated period, making it easier to manage deadlines and dependencies.
2. Getting Started with ClickUp Timeline
To begin using the ClickUp timeline, you’ll first need to create a workspace and set up your projects. After signing up for an account, you can create a new Space, which acts as a container for all your projects. Within this Space, it’s straightforward to set up various Lists, which can be individual projects or categories of tasks.
Once your projects are set up, navigate to the timeline view by clicking on the ‘Timeline’ option in the view options menu. This is where you will see your tasks laid out on a horizontal timeline, allowing for a visual representation of your project’s schedule. The timeline can be adjusted to show different time frames, from days to months, depending on your project needs.
3. Creating Tasks and Setting Dates
The first step in populating your timeline is to create tasks. In ClickUp, tasks can be created easily with a few clicks. You can provide each task with a title, description, and assign it to specific team members. One of the key aspects of the timeline is the ability to set start and due dates for each task. This is done by clicking on the task and selecting the dates from the calendar pop-up.
Setting accurate start and due dates is vital for effective project management. It allows other team members to understand the timeline for each task and helps in tracking progress against deadlines. Additionally, you can use ClickUp’s recurring tasks feature if you have tasks that need to be repeated daily, weekly, or monthly.
4. Utilizing Dependencies for Effective Workflow
Dependencies are a critical feature in ClickUp’s timeline that help manage task relationships. By setting dependencies, you can indicate which tasks need to be completed before others can begin. This not only provides clarity but also prevents bottlenecks in your workflow.
To set a dependency, you can click on a task to open its details and look for the dependencies section. Here, you can designate tasks as blocking or dependent on others. This feature is particularly useful in complex projects where multiple tasks are interlinked. By visualizing these dependencies on the timeline, you can better allocate resources and manage timelines to ensure smooth project execution.
5. Customizing Your Timeline View
ClickUp allows you to customize your timeline view to better suit your project’s needs. You can adjust the timeline’s zoom level, which lets you view tasks in varying timeframes — from hours to months. Additionally, you can filter tasks based on assignees, due dates, or priorities to focus on specific areas of your project. There’s a fuller look at better IT project management tips.
Another useful customization is coloring tasks based on status or priority, which can help in quickly identifying urgent tasks or those that are behind schedule. ClickUp also enables you to group tasks by different criteria, making it easier to manage large projects with numerous tasks and team members. (See: Understanding project management concepts.)
6. Integrating ClickUp with Other Tools
One of the advantages of using ClickUp is its ability to integrate with numerous third-party tools. Whether you use Slack for communication, Google Drive for document storage, or Harvest for time tracking, ClickUp has you covered. By integrating these tools, you can streamline your workflow and minimize the need to switch between applications.
For example, if your team uses Google Calendar, you can sync it with ClickUp to ensure that your project deadlines and events are all in one place. This integration helps keep everyone on the same page and reduces the chances of missing critical deadlines. The ability to integrate multiple tools makes ClickUp a central hub for managing tasks and communication, which is especially beneficial for remote teams.
7. Real-Time Collaboration and Comments
Collaboration is at the heart of effective project management, and ClickUp offers several features that enhance team communication. The comments section within each task allows team members to discuss specific items, ask questions, and provide updates without having to leave the platform. This real-time collaboration feature is crucial, especially for remote teams where communication can often become fragmented.
Moreover, you can tag team members in comments to draw their attention to specific discussions or updates. This ensures accountability and encourages prompt responses. The ability to attach files directly to tasks or comments also aids in keeping all relevant information in one place, enhancing the overall efficiency of the project.
8. Tracking Progress and Reporting
Finally, one of the most powerful aspects of using the ClickUp timeline is the ability to track progress and generate reports. ClickUp provides various reporting features that allow you to assess team performance against deadlines. You can view completed tasks, pending tasks, and overall progress at a glance to see where your project stands.
Using these insights, managers can adjust timelines, reallocate resources, or communicate with team members about potential issues. The reporting feature is beneficial not just for tracking progress, but also for providing stakeholders with comprehensive updates on project status. This ensures transparency and fosters trust within the team and with clients.
9. Best Practices for Using ClickUp Timeline
To get the most out of ClickUp’s timeline feature, there are several best practices you should consider. First, always keep your task descriptions detailed and clear. This clarity helps team members understand what is expected of them and can prevent miscommunication.
Another best practice is to regularly review your timeline. Schedule brief weekly check-ins to assess the progress of tasks and update any deadlines as necessary. This practice can help you manage expectations and keep the project on track.
Additionally, ensure that you’re utilizing the filtering and grouping features effectively. By filtering tasks based on priority or assignee during these reviews, you can focus on the most critical tasks that need attention. This can be particularly helpful in busy periods when it’s easy to lose sight of urgent responsibilities.
Finally, encourage your team to provide feedback on the timeline view. ClickUp is designed to be flexible, and insights from team members can lead to improved workflows and better use of the platform’s features. This builds on apps for project management.
10. ClickUp Timeline in Different Industries
The versatility of ClickUp’s timeline makes it suitable for various industries. For instance, in software development, teams can use the timeline to visualize sprints, manage backlogs, and track feature releases. By linking tasks based on their dependencies, developers can ensure that critical tasks are prioritized and completed on time.
In marketing, teams can utilize the timeline to plan campaigns, track deadlines for content creation, and manage promotional activities. Visualizing these tasks helps marketing teams identify overlaps in campaigns and allocate resources efficiently, ensuring that no deadlines are missed.
Furthermore, in education, project timelines can help manage curriculum development, course schedules, and project-based learning. Teachers can outline tasks for students, ensuring that everyone is on track and aware of important dates such as submission deadlines and exam dates. (See: Importance of ergonomics in productivity.)
By understanding how to leverage ClickUp’s timeline feature specific to your industry, you can enhance productivity and collaboration across your unique team environment.
11. Statistics on Effective Project Management
Understanding the impact of effective project management can help you appreciate the benefits of using tools like ClickUp. According to the Project Management Institute, organizations that invest in project management practices see up to 20% increase in project success rates. Additionally, a survey conducted by the Standish Group revealed that 29% of projects fail due to a lack of effective communication and collaboration among team members.
Using ClickUp’s timeline feature can significantly improve communication and collaboration, which are crucial for project success. With visual timelines, teams can better understand their roles and responsibilities, reducing confusion and fostering a more collaborative environment. This ultimately contributes to higher success rates in project completion.
12. Expert Perspectives on Project Management Tools
Industry experts emphasize the importance of having a robust project management tool in place. According to Dr. Harold Kerzner, a prominent project management expert, “Effective project management is not just about tools, but also about the methodology and communication strategies that support it.” ClickUp’s flexibility allows teams to adopt various methodologies, from Agile to Waterfall, while providing the necessary tools for effective communication and collaboration.
Similarly, project management consultant Elizabeth Harrin states, “The right project management tools can make or break a project. They provide transparency and accountability, two elements that are essential for team success.” With features like real-time collaboration and progress tracking, ClickUp aligns perfectly with this sentiment, helping teams maintain clarity and focus throughout their projects.
13. Frequently Asked Questions about ClickUp Timeline
What is the ClickUp timeline view?
The ClickUp timeline view is a visual representation of your project’s tasks over time. It allows you to see the start and due dates of tasks, their durations, and any dependencies that exist between them.
Can I customize the timeline view?
Yes! ClickUp offers extensive customization options for the timeline view. You can adjust the time frame, filter tasks based on different criteria, and even color-code tasks according to their status or priority.
How do I set dependencies in ClickUp?
Setting dependencies in ClickUp is simple. Click on a task to open its details, then find the dependencies section. You can mark tasks as blocking or dependent, helping to visualize the flow of your project’s tasks. For more on this, see enhancing IT project management software.
Is ClickUp suitable for remote teams?
Absolutely! ClickUp is designed with remote teams in mind. Its collaboration features, like real-time comments and integrations with communication tools, make it easy for teams to work together, no matter where they are located.
Are there any limitations to using ClickUp’s timeline feature?
While ClickUp is a powerful tool, some users might find a learning curve when first exploring its extensive features. However, the flexibility and customizable options generally outweigh any initial challenges. Most users find that with practice, they can efficiently utilize the timeline feature to enhance their project management. (See: Impact of remote work on productivity.)
14. Enhancing Team Productivity with ClickUp Timeline
The ClickUp timeline doesn’t just serve as a scheduling tool; it actively enhances team productivity. A study by the International Project Management Association found that effective project scheduling leads to a productivity increase of up to 30%. With ClickUp’s intuitive timeline feature, teams can visualize their workflows, which reduces the time spent on planning and increases the time available for execution.
By using the timeline to break down projects into smaller tasks, it’s easier to assign responsibilities and monitor progress. This approach encourages team members to stay focused on short-term goals while contributing to the larger project objectives. With clear deadlines and visual task tracking, team members can prioritize their work more effectively, leading to improved overall productivity.
15. ClickUp Timeline for Agile Project Management
If you’re working with Agile methodologies, the ClickUp timeline can be a game changer. Agile emphasizes flexibility and responsiveness, and the timeline feature supports this by allowing teams to visualize sprint cycles and backlogs. Teams can plot out their sprints directly on the timeline, marking key milestones and deadlines clearly.
Additionally, the ability to create and manage tasks within the context of Agile sprints allows teams to quickly adjust their plans based on feedback or changing project requirements. This dynamic approach is vital in fast-paced environments where adaptability can determine project success. By integrating the ClickUp timeline into your Agile practices, you can enhance your team’s ability to deliver high-quality results in shorter cycles.
16. Case Studies of Successful ClickUp Users
Many organizations have successfully integrated ClickUp and its timeline feature into their project management processes. For example, a tech startup utilized ClickUp to manage their product development cycle. By implementing the timeline view, they were able to visualize their development stages clearly and manage dependencies effectively. As a result, they completed their product launch three weeks ahead of schedule, significantly boosting their market entry advantages.
Another example is a creative agency that used ClickUp to streamline its campaign management. By utilizing the timeline feature, they could visualize multiple campaigns alongside their respective deadlines. This clarity not only improved their internal workflow but also facilitated better communication with clients, leading to a 40% increase in client satisfaction scores according to their post-campaign surveys.
17. Tips for New Users of ClickUp Timeline
If you’re new to ClickUp, here are some tips to help you hit the ground running with the timeline feature:
- Start Small: Begin with a few projects to get accustomed to the interface and features. As you get comfortable, you can expand your use of the timeline across more complex projects.
- Explore Templates: ClickUp offers a variety of templates for different industries and project types. Utilizing these templates can save you time and provide insight into best practices.
- Utilize ClickApps: ClickApps are additional features that enhance tasks and projects. Experiment with ClickApps like time tracking, priorities, and custom fields to make the most out of your timeline.
- Seek Help: Don’t hesitate to use ClickUp’s resources, including their help center and community forums, if you have questions or need assistance.
18. Conclusion
The ClickUp timeline is a powerful tool for project management that, when used effectively, can enhance team collaboration, streamline workflows, and ensure that projects are completed on time. By following this ClickUp timeline tutorial, you’ll be well-equipped to utilize its features to their fullest potential. Whether you’re managing a small project or coordinating a large team, understanding how to navigate and customize the timeline view can significantly impact your project’s success.
“`
Trending Now
Frequently Asked Questions
What is the ClickUp timeline feature?
The ClickUp timeline feature provides a visual representation of project timelines, deadlines, and task interdependencies. It allows teams to see tasks laid out over a designated period, making it easier to manage deadlines and track progress.
How do I get started with ClickUp timeline?
To start using the ClickUp timeline, create a workspace and set up your projects after signing up. Then, navigate to the timeline view in the options menu to see your tasks organized on a horizontal timeline.
Can I customize the ClickUp timeline view?
Yes, ClickUp allows users to customize the timeline view to display different time frames, ranging from days to months, depending on project requirements. This flexibility helps teams manage their schedules effectively.
What makes ClickUp different from other project management tools?
ClickUp stands out due to its versatility and customization options. Unlike tools like Trello or Asana, ClickUp offers various views, including list, board, calendar, and timeline views, catering to diverse project management needs.
Is ClickUp suitable for team collaboration?
Absolutely! ClickUp is designed for team collaboration, featuring tools for task management, goal tracking, and document sharing, all of which enhance communication and productivity among team members.
What did we miss? Let us know in the comments and join the conversation.