How to transfer photos from iPhone to PC
“`html
If you’re looking to transfer photos from iPhone to PC, you’re not alone. Many iPhone users find themselves needing to move their cherished memories from their devices to a computer for backup, editing, or sharing purposes. Luckily, there are several straightforward methods to accomplish this task, whether you prefer using software like iTunes, the Windows Photos app, or even cloud solutions. Let’s explore the top ways you can seamlessly transfer your photos.
1. Using the Windows Photos App: The Easiest Method
The Windows Photos app is one of the most user-friendly ways to transfer photos from iPhone to PC. It’s built right into Windows 10 and 11, making the process straightforward. Here’s how you can do it:
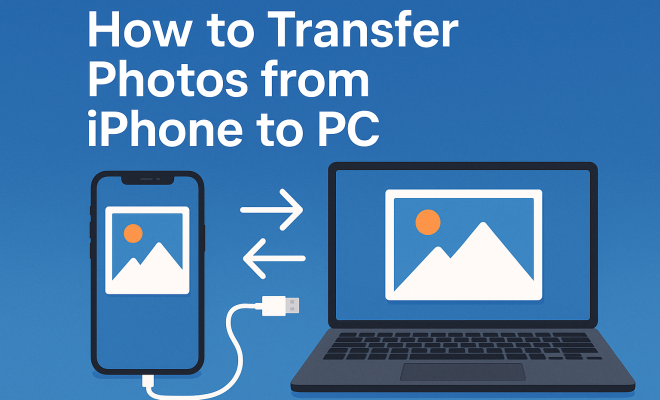
- Connect your iPhone to your PC using a USB cable.
- Unlock your iPhone and make sure to trust the computer if prompted.
- Open the Photos app on your PC.
- Select “Import” located at the top right corner and choose “From a USB device.”
- Follow the prompts to select the photos you wish to import.
Once you click “Import,” the Photos app will handle the rest, allowing you to choose where to save your images on your PC. This method is particularly quick for users who want to transfer multiple photos at once.
2. iTunes: A Tried-and-True Method
If you’re an iTunes user, you might find this method familiar. While iTunes can be cumbersome, it effectively allows you to transfer photos from iPhone to PC. Here’s a step-by-step guide:
- Download and install the latest version of iTunes on your PC.
- Connect your iPhone to your computer using a USB cable.
- Open iTunes and select your device icon from the top left.
- Click on the “Photos” tab in the sidebar.
- Check the box for “Sync Photos” and choose your preferred folders.
- Click “Apply” to begin the sync process.
This method syncs all selected albums and may take time depending on the size of your photo library. It’s particularly useful for those who wish to maintain a consistent photo library across devices.
3. File Explorer: Direct Access to Your Photos
For those who prefer a more hands-on approach, using File Explorer is a fantastic way to directly transfer photos from iPhone to PC. Here’s how:
- Connect your iPhone to the PC with a USB cable and unlock your device.
- Open File Explorer and find your iPhone under “This PC.”
- Navigate to Internal Storage > DCIM where you’ll find your photos.
- Select the photos you want to transfer, right-click, and choose “Copy.”
- Navigate to your desired folder on your PC and right-click to “Paste.”
This method bypasses the need for any software and is ideal for tech-savvy users who want to manage their files directly. It’s fast and gives you complete control over what you transfer.
4. Using iCloud: A Cloud-Based Solution
If you prefer a cloud-based solution, iCloud is an excellent option for transferring photos. By enabling iCloud Photo Library, you can access your photos from any device. Here’s how to set it up:
- On your iPhone, go to Settings > [your name] > iCloud > Photos.
- Toggle on “iCloud Photos.”
- On your PC, download and install the iCloud for Windows app.
- Sign in with your Apple ID and enable “Photos.”
- Your photos will sync automatically, allowing you to access them via File Explorer.
This method is especially useful for users with limited storage on their PC, as it allows you to keep your photos in the cloud while still being accessible on your computer.
5. Third-Party Software: Options Abound
If you find the built-in options limiting, several third-party applications can help you transfer photos from iPhone to PC. Applications like CopyTrans Photo, Syncios, and Tenorshare iCareFone offer robust features that go beyond simple transfers. Here’s how to use them: (See: CDC's information on data transfer safety.)
- Download and install your chosen software on your PC.
- Connect your iPhone to your computer via USB.
- Launch the software and allow it to recognize your device.
- Select the photos you wish to transfer and follow the software’s instructions.
These applications often provide additional functionality such as batch processing, file conversion, and better organization of your photo library. They can be worth the investment if you frequently transfer images or require advanced features.
6. Using Email or Messaging Apps: For a Few Photos
If you only need to transfer a few photos, using email or messaging apps can be a quick fix. Here’s how to do it:
- Open the Photos app on your iPhone.
- Select the photos you want to share.
- Tap the share icon and choose your email or messaging app.
- Send the email to yourself or the desired recipient.
This method is best for transferring a small number of images. Just keep in mind that emailing high-resolution images can result in compression, thus reducing quality. However, for quick sharing, this approach is efficient.
7. AirDrop: Transfer Between Apple Devices
If you have a Mac alongside your iPhone, AirDrop provides a seamless way to transfer photos from iPhone to PC — in this case, a Mac. Here’s how to do it:
- Ensure both devices have Wi-Fi and Bluetooth turned on.
- On your iPhone, open the Photos app and select the photos you want to transfer.
- Tap the share icon and choose your Mac from the AirDrop section.
- On your Mac, accept the photos when prompted.
Once the images have transferred to your Mac, you can then easily move them to your PC. While this method is limited to Apple devices, it’s incredibly fast and doesn’t require any cables or additional software.
8. Using Google Photos: An Alternative Cloud Solution
Google Photos is another excellent option for transferring photos, especially if you’re looking for a versatile cloud solution. Here’s how to use Google Photos for this purpose:
- Download the Google Photos app from the App Store on your iPhone.
- Sign in with your Google account.
- Enable backup and sync to upload your photos to Google Drive.
- On your PC, open a web browser and go to the Google Photos website.
- Sign in with the same Google account to access your photos.
- Select the photos you want to download and click the download button.
This method is great because it allows you to access your photos from any device with internet access. Plus, Google Photos offers advanced features like photo editing and sharing options. You can also store your photos in high quality without worrying about local storage limitations.
9. Transferring Videos: The Same Process
While we focused primarily on photos, the methods for transferring videos from iPhone to PC are often the same. Whether you’re using the Windows Photos app, iTunes, File Explorer, or cloud services, you can apply these same techniques to your videos. Keep in mind that transferring large video files may take more time and bandwidth, so plan accordingly.
10. How to Ensure a Smooth Transfer Process
To avoid common pitfalls when transferring photos, here are some tips to ensure a smooth process:
- Make sure your iPhone is charged and has enough storage before starting the transfer.
- Use a quality USB cable to avoid connectivity issues.
- Close unnecessary applications on your PC to improve performance during the transfer.
- Check for any software updates for your PC, iTunes, or any third-party applications you are using.
- Always eject your iPhone safely after completing the transfer to prevent data corruption.
FAQ: Common Questions About Transferring Photos from iPhone to PC
1. Can I transfer photos without iTunes?
Yes, there are several methods to transfer photos from your iPhone to PC without using iTunes. Options include using the Windows Photos app, File Explorer, cloud services like iCloud or Google Photos, and third-party software.
2. What should I do if my iPhone isn’t recognized by my PC?
If your iPhone isn’t recognized, ensure it is unlocked and that you’ve trusted the computer. Check your USB cable for damage and try a different port on your PC. Sometimes restarting both your iPhone and your computer can also help establish the connection.
3. Are there size limits for transferring photos?
Generally, transferring photos does not have strict size limits, but larger files may take longer to transfer. When using cloud services, check the storage limits of your account, as some plans may restrict the amount of data you can upload.
4. Will transferring photos reduce their quality?
No, transferring photos using methods like File Explorer, Windows Photos app, or iTunes does not reduce their quality. However, if you use email or certain messaging apps, high-resolution images may be compressed, which can affect quality.
5. What’s the best method for regular transfers?
If you transfer photos regularly, cloud solutions like iCloud or Google Photos are often the most convenient. They offer automatic backups and access from multiple devices, making it easier to manage your photo library without the hassle of manual transfers.
11. Exploring Additional Transfer Methods
Aside from the primary methods discussed, there are other ways to transfer photos from your iPhone to a PC that may suit specific needs or preferences:
1. Using Dropbox for Easy Sharing
Dropbox is a cloud storage service that makes file sharing simple. Here’s how to use it:
- Download the Dropbox app from the App Store on your iPhone.
- Create a Dropbox account or log in to your existing account.
- Upload the photos you want to transfer to your Dropbox account.
- On your PC, open a web browser and visit the Dropbox website or use the desktop app.
- Log in to your account and download the photos to your computer.
This method is great for users who are already familiar with Dropbox and appreciate its file-sharing capabilities.
2. Using Microsoft OneDrive
If you’re a Windows user, OneDrive is integrated into the system, making it easy to use:
- Download the OneDrive app from the App Store on your iPhone.
- Sign in with your Microsoft account.
- Upload photos to OneDrive using the app.
- On your PC, navigate to OneDrive via File Explorer to access and download your photos.
OneDrive offers a seamless experience for Windows users, especially if you’re already using Microsoft products.
3. Using Snapchat or Other Social Media Apps
Another unconventional method is using social media platforms. If you share your photos on platforms like Snapchat, Instagram, or Facebook, you can download them back to your PC. Here’s how:
- Upload your photos to the social media app from your iPhone.
- Access the same app on your PC or visit the website.
- Download the images directly to your computer.
This is not the most efficient method, but it can work in a pinch, especially if you’re already using these platforms.
12. Advanced Tips for Managing Your Photo Library
Once you’ve transferred your photos, maintaining an organized photo library is crucial. Here are some advanced tips to help you manage your collection effectively:
- Regular Backups: Always ensure you have backups of your photos. Consider using both a cloud service and an external hard drive for redundancy.
- Organize by Folders: Create folders based on events, dates, or locations to make it easier to find photos later.
- Use Photo Management Software: Consider using software like Adobe Lightroom or Google Photos to edit and organize your images efficiently.
- Tagging and Metadata: Tag your photos with relevant keywords and metadata for easier searching.
- Delete Duplicates: Regularly check for and delete duplicate images to save space and keep your library tidy.
13. Understanding Photo Formats
When transferring photos from iPhone to PC, it’s important to understand the various formats your images might be in:
- JPEG: This is the most common format for photos. It balances file size and quality, making it ideal for everyday use.
- HEIC: Introduced by Apple, HEIC is a newer format that offers better compression without losing quality. Most PCs can open HEIC files by downloading a codec.
- PNG: This format is often used for images that require transparency. However, it typically results in larger file sizes compared to JPEGs.
Understanding these formats will help you choose the right method for transferring and storing your photos.
14. The Importance of Photo Security
In today’s digital world, security is paramount. When transferring photos, consider these security measures:
- Use Strong Passwords: Whether you’re using cloud services or software, ensure your account is protected with a strong password.
- Enable Two-Factor Authentication: This adds an extra layer of security to your accounts, making it harder for unauthorized users to gain access.
- Regularly Update Software: Keep your photo management and transfer software updated to protect against vulnerabilities.
- Be Wary of Public Wi-Fi: Avoid transferring sensitive photos on public networks. Use a VPN if you must.
15. Conclusion: Choose the Right Method for You
Transferring photos from your iPhone to PC doesn’t have to be a daunting task. With multiple methods available, you can select the one that best fits your needs and preferences. Whether you’re using traditional software like iTunes or exploring cloud services, there’s a solution that will work for you. Remember to consider factors like the number of photos you need to transfer, the quality of the images, and your available tools. Now that you’re equipped with these options, you can easily manage your photo library and keep your digital memories safe.
“`
Trending Now
Frequently Asked Questions
How do I transfer photos from my iPhone to my PC?
To transfer photos from your iPhone to your PC, connect your iPhone using a USB cable, unlock it, and trust the computer if prompted. Use the Windows Photos app by selecting 'Import' and choosing 'From a USB device.' Follow the prompts to select and import your desired photos.
Can I use iTunes to transfer photos from iPhone to PC?
Yes, you can use iTunes to transfer photos from your iPhone to your PC. Install the latest version of iTunes, connect your iPhone, and select the device icon. Click on the 'Photos' tab, check the 'Sync Photos' box, choose your folders, and click 'Apply' to start the sync process.
What is the easiest way to transfer photos from iPhone to Windows 10?
The easiest way to transfer photos from an iPhone to Windows 10 is by using the built-in Photos app. Connect your iPhone via USB, open the Photos app, and select 'Import' followed by 'From a USB device.' This method allows you to quickly import multiple photos at once.
Is it possible to transfer photos without using iTunes?
Absolutely! You can transfer photos from your iPhone to your PC without using iTunes by utilizing the Windows Photos app, file explorer, or cloud services like iCloud or Google Photos. Each method offers a straightforward way to move your photos.
What should I do if my iPhone is not recognized by my PC?
If your iPhone is not recognized by your PC, ensure that your USB cable is functioning properly and that you have trusted the computer on your iPhone. Restart both your iPhone and PC, and ensure that your iTunes or drivers are updated. This should help establish the connection.
What’s your take on this? Share your thoughts in the comments below — we read every one.