How to transfer data to new iPhone
“`html
Getting a new iPhone is always an exciting experience, but transferring data from your old device to the new one can often feel daunting. Don’t worry! This guide will walk you through the steps to transfer data to new iPhone, ensuring that you keep all your important information intact. Whether it’s photos, contacts, or apps, you’ll learn the best methods available to make the transition as smooth as possible.
1. Preparation is Key
Before you even think about transferring data, it’s important to prepare both your old and new devices. Start by ensuring that both iPhones are updated to the latest version of iOS. This not only guarantees compatibility but also enhances the security and efficiency of the data transfer process. To check for updates, go to Settings > General > Software Update.
Additionally, ensure that your old iPhone has enough battery life. A device running low on power during a transfer can lead to problems, including loss of data. Ideally, both devices should be charged to at least 50%, and it’s wise to have both plugged into a power source during the process.
2. Using Quick Start for Instant Data Transfer
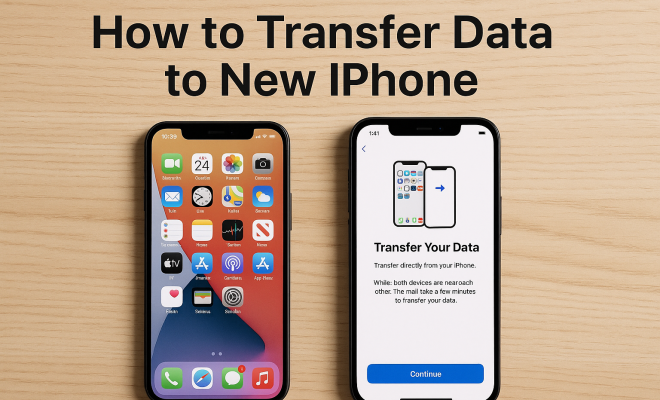
One of the easiest ways to transfer data to new iPhone is by using the Quick Start feature. This method is designed for iOS 11 and later and allows for a seamless transfer of data. To use Quick Start, turn on your new iPhone and place it near your old iPhone. A prompt will appear on your old device asking if you want to use your Apple ID to set up your new iPhone.
After confirming, you’ll need to scan the animation displayed on the new device using the old iPhone’s camera. Follow the on-screen instructions to set up Face ID or Touch ID, then proceed with transferring your data. Quick Start can include everything from apps and settings to photos and messages, making it a comprehensive solution.
3. iCloud Backup and Restore
If Quick Start isn’t an option for you, using iCloud is another great way to transfer data to new iPhone. Start by backing up your old iPhone to iCloud. Go to Settings > Your Name > iCloud > iCloud Backup and tap Back Up Now. Ensure you have enough iCloud storage for the backup process. Once the backup is complete, turn on your new iPhone.
When prompted during the setup process, select Restore from iCloud Backup. Sign in with your Apple ID and choose the most recent backup. Your new iPhone will then download and install all your apps and data. The advantage of this method is that you can access your data from anywhere, as long as you have an internet connection.
4. Using iTunes or Finder for Data Transfer
If you prefer a wired connection, you can use iTunes or Finder (for macOS Catalina and later) to transfer your data. Start by connecting your old iPhone to your computer using a USB cable. Open iTunes (or Finder) and select your device. Click on Back Up Now to create a full backup.
Once the backup is completed, disconnect the old iPhone and connect your new iPhone. Begin the setup process and choose Restore from Mac or PC. Select the backup you just created, and the transfer will commence. This method is particularly useful for those who have a lot of data, as it tends to be faster than other methods. (See: CDC on technology and development.)
5. What to Do if You Have No Internet Connection
Sometimes, you may find yourself in a situation where you have no internet connection available to transfer data to new iPhone. In these cases, using a direct transfer via USB is the best solution. This involves connecting your devices directly to each other using a Lightning to USB Camera Adapter or USB-C to Lightning cable, depending on the models of your iPhones.
Once connected, you can initiate the data transfer by following the on-screen prompts on your new iPhone. This method is quick and does not require an internet connection, making it particularly useful for transferring large amounts of data while traveling or in areas with poor connectivity.
6. Transferring Data from Other Platforms
Are you switching from an Android to an iPhone? Apple has made this transition easier with its Move to iOS app. Download the app on your Android device, and during the setup of your new iPhone, select the Move Data from Android option. Follow the instructions to connect the two devices, and you can transfer your contacts, message history, photos, and more seamlessly.
This app is particularly beneficial as it eliminates the need to manually transfer data, ensuring that you don’t miss any important information. Keep in mind that for this method, both devices need to be on the same Wi-Fi network, or you can connect them directly using a cable.
7. Managing App Data and Settings
One of the common concerns when transferring data is whether app data and settings will also transfer over. When using methods like iCloud backup or Quick Start, most app data is included. However, some apps, particularly those that rely on cloud services, may require you to log in again after the transfer.
For apps that don’t support cloud saving, you may want to check for settings within the app itself or consult the developer’s website for specific instructions. It’s also a good idea to note the apps you use frequently and ensure that they are correctly installed and functional on your new device.
8. Checking Your Data After Transfer
After completing the transfer, it’s essential to check that all your data has been successfully moved to your new iPhone. Go through your photos, contacts, messages, and apps to verify everything has been transferred correctly. If something seems missing, don’t panic. You can always try restoring from your old backup again or manually transferring specific data.
Additionally, keep an eye on your new device’s storage. Sometimes, data can take up more or less space than anticipated, depending on the format or the number of applications installed. If you find that your storage is running low, consider optimizing your storage settings or offloading unused apps.
9. Post-Transfer Optimization
Once you’ve successfully transferred your data to your new iPhone, it’s a great opportunity to optimize your device. Go into your settings and customize notifications, privacy settings, and location services according to your preferences. This can enhance your user experience and help maintain the performance of your device.
Consider enabling features like Optimize iPhone Storage for photos to save space. Additionally, you can set up Family Sharing if applicable, which allows you to share purchases and subscriptions with family members while keeping your accounts separate.
10. Regular Backup Practices
To ensure a hassle-free experience when you decide to upgrade in the future, establish a routine for backing up your data. Regular backups to iCloud or iTunes can save you time and energy in the long run, ensuring that you never lose valuable information. Schedule backups to coincide with your routine—perhaps every month or before significant updates—to keep everything current. (See: New York Times on iPhone data transfer.)
By creating a consistent backup routine, you can easily transfer data to new iPhone in the future without the stress of potentially losing important information. Remember, preparation and regular maintenance are key to a smooth iPhone experience.
11. Understanding Data Transfer Times
When you transfer data to new iPhone, it’s important to know that the time required can vary significantly based on a few factors. These include the amount of data being transferred, the method you choose, and the speed of your internet connection if you’re using iCloud. For instance, transferring a full backup via iTunes can take significantly less time than moving data over a Wi-Fi connection, especially if you have a large amount of data like videos and high-resolution photos.
For a rough estimate, transferring about 1 GB of data may take anywhere from 10 to 30 minutes over Wi-Fi, depending on signal strength and network congestion. On the other hand, a USB connection can allow for much faster transfers—often completed within minutes—making it ideal for users with extensive libraries of photos and apps.
12. Transfer Data Selectively
Not every user needs to transfer all of their data to a new iPhone. Sometimes, you may want to take a selective approach. This is particularly true if you’ve accumulated a lot of data over time that you may no longer need. After backing up your old iPhone, consider manually transferring only the essential items like contacts, photos, and specific apps.
You can manually save important photos or documents to your computer and transfer them to the new iPhone. Using cloud services like Google Drive, Dropbox, or even email can also be effective for selective data transfer. This method not only minimizes clutter on your new device but also allows you to curate what you want to carry forward into your new iPhone experience.
13. Common Issues and Troubleshooting
While transferring data to a new iPhone is generally straightforward, you may encounter some common issues. Here are a few problems you might face, along with helpful troubleshooting tips:
- Transfer Fails or Times Out: If your transfer fails or times out, check your Wi-Fi connection if using Quick Start or iCloud. A weak signal can interrupt the process. For wired transfers, ensure the USB cable is functioning properly.
- Missing Apps: If certain apps didn’t transfer, check if they’re available in the App Store on your new device. Download them again using your Apple ID, and remember to log in to restore any in-app purchases.
- Photos or Videos Missing: If photos or videos didn’t transfer, ensure you selected the ‘Photos’ option in your backup settings. You may also want to check the ‘Recently Deleted’ album to ensure nothing was inadvertently deleted.
14. FAQs About Transferring Data to New iPhone
Q: Can I transfer data from an old iPhone to a new iPhone if they are not on the same iOS version?
A: While it’s recommended to have the same iOS version for a smoother transfer, you can still transfer data. Just ensure that your old iPhone is updated to the latest version that it supports. Your new iPhone will handle the difference during the setup process.
Q: What data can I transfer using the Move to iOS app?
A: The Move to iOS app can transfer various types of data, including contacts, message history, photos, videos, web bookmarks, mail accounts, and calendars. It also transfers your free apps and settings, but you may need to download paid apps again.
Q: What should I do if I encounter an error during the backup process?
A: If you face an error while backing up, check your internet connection and ensure there’s enough storage available on iCloud or your computer. Restarting both devices may also help reset any connection issues. If the problem persists, consult Apple’s support resources for specific error codes.
Q: Is it possible to transfer data without using a computer?
A: Yes, you can transfer data without a computer by using Quick Start, iCloud, or the Move to iOS app. These methods allow for wireless transfers directly between devices, providing flexibility and convenience.
Q: How do I know if my data was transferred successfully?
A: After the transfer, review your contacts, photos, and app functionality on the new iPhone. If anything seems missing, try restoring from backup again or check specific apps to ensure data integrity. You can also verify storage usage to see if it aligns with what you expect.
15. Advanced Tips for a Smooth Transition
To ensure your data transfer process is as smooth as possible, consider these advanced tips:
- Use a High-Speed Wi-Fi Connection: If you opt for the Quick Start or iCloud methods, make sure you’re connected to a high-speed Wi-Fi network. This can significantly reduce the time it takes to transfer your data, making the process more efficient.
- Check App Compatibility: Before transferring, check that all your essential apps are fully compatible with the latest iOS version. This can save you from potential frustrations after the transfer when trying to access important functionality.
- Keep Both Devices Close: If using Quick Start, keep both devices in close proximity to each other during the transfer. This helps maintain a strong connection and reduces the risk of interruptions.
16. Considerations for Privacy and Security
Transferring data involves handling a lot of personal information, so it’s important to think about privacy and security during the process. Use these strategies to help protect your data:
- Secure Your Apple ID: Make sure your Apple ID is secure with a strong password. If you have two-factor authentication enabled, you’ll add an additional layer of security.
- Review App Permissions: After transferring, review the permissions of your apps to ensure that they only have access to the information necessary for their function.
- Regularly Check Security Settings: After setting up your new device, go to Settings > Privacy and review what data each app is allowed to access.
17. Post-Transfer Device Maintenance
After successfully transferring data, it’s crucial to keep your device running smoothly. Here are maintenance tips:
- Update Regularly: Keep your iPhone updated with the latest software updates to improve performance and security.
- Clean Up Unused Apps: Regularly go through your apps and delete the ones you no longer use. This can help free up storage space and enhance your device’s speed.
- Optimize Battery Usage: Regularly check battery health and usage in the settings to manage apps that may drain the battery excessively.
By following these steps and tips, you’ll be equipped to transfer data to new iPhone with confidence. Remember that preparation is key, and don’t hesitate to reach out to Apple Support if you encounter any issues. Happy transferring!
“`
Trending Now
Frequently Asked Questions
How do I transfer data from my old iPhone to a new one?
You can transfer data using the Quick Start feature, which allows for seamless data transfer by placing your new iPhone near your old one. Alternatively, you can use iCloud to back up your old device and restore it on your new iPhone.
What is the Quick Start feature on iPhone?
Quick Start is a feature available on iOS 11 and later that allows users to easily transfer data from an old iPhone to a new one. Simply turn on your new device near your old one, and follow the prompts to transfer settings, apps, and data.
Do I need to update my old iPhone before transferring data?
Yes, it's important to update both your old and new iPhones to the latest version of iOS before transferring data. This ensures compatibility and enhances the security of the transfer process.
Can I transfer data without using iCloud?
Yes, you can transfer data without using iCloud by utilizing the Quick Start feature or by connecting both devices to a computer and using iTunes or Finder for the transfer process.
What should I do if my old iPhone is low on battery during the transfer?
If your old iPhone is low on battery, it is advisable to charge it to at least 50% and keep both devices plugged into a power source during the transfer to prevent any issues or data loss.
What did we miss? Let us know in the comments and join the conversation.