9 Essential Methods to Stabilize Your Video Footage
“`html
Creating smooth, professional-looking videos is a challenge that many content creators face. Whether you’re a filmmaker, vlogger, or just someone who enjoys recording moments, shaky footage can ruin your best shots. Thankfully, there are various video stabilization techniques you can employ to enhance the quality of your videos. In this article, we’ll explore nine essential methods for stabilizing your footage, covering everything from basic tips to advanced software solutions.
1. Use a Tripod: The Foundation of Stability
One of the simplest yet most effective ways to stabilize your video is to use a tripod. This essential tool provides a stable platform for your camera, significantly reducing the chances of shaky footage. When setting up your tripod, ensure that it is on level ground to prevent any tilt that could affect your shot.
In addition to traditional tripods, consider using monopods or flexible tripods for varied shooting conditions. These alternatives allow for increased mobility while still providing stabilization compared to handheld shooting. The key is to anchor your shot as much as possible to achieve that smooth, cinematic feel.
2. Embrace Gimbals: Advanced Stability Solutions
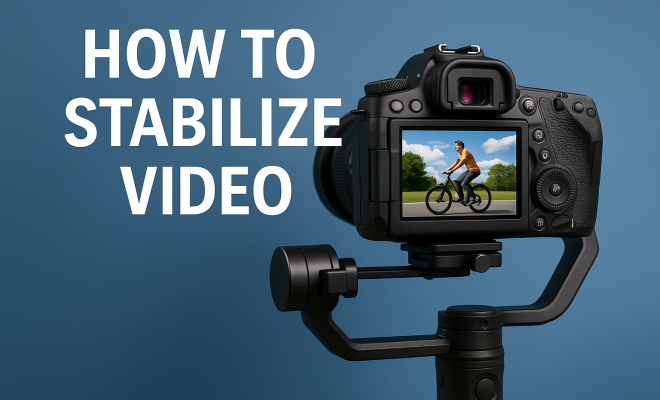
For those looking to take their stabilization to the next level, gimbals are a game-changer. These devices use motors and sensors to keep your camera steady, even while you’re in motion. Gimbals are particularly useful for dynamic shots, such as following an action scene or capturing a moving subject.
When choosing a gimbal, consider factors like weight capacity, battery life, and compatibility with your camera model. The smoother your movements with a gimbal, the more professional your footage will appear. However, it’s also essential to practice using a gimbal to master its mechanics, ensuring you can achieve the best results.
3. Image Stabilization Features: Built-in Tech
Modern cameras often come equipped with built-in image stabilization features. These can range from optical stabilization, where the lens compensates for small shakes, to in-body stabilization, where the camera’s internal mechanics adjust to stabilize the image. Familiarizing yourself with your camera’s stabilization settings can help you make the most out of this technology.
It’s worth noting that while built-in stabilization can significantly improve your footage, it might not eliminate all shakes, especially in extreme scenarios. Therefore, combining these features with other stabilization techniques can yield the best results.
4. Post-Production Stabilization: Software Solutions
If you find yourself with shaky footage after filming, don’t despair. Many editing software programs offer post-production stabilization features. Programs like Adobe Premiere Pro, Final Cut Pro, and DaVinci Resolve have built-in stabilization tools that can smooth out any unwanted jitters.
When using post-production stabilization, keep in mind that cropping may occur, as the software analyzes and adjusts the frames. Be sure to adjust your framing accordingly and always check the footage after stabilization to ensure it meets your quality standards.
5. Practice Good Shooting Techniques: Less Is More
While using tools and software is crucial, good shooting techniques can significantly reduce the need for stabilization. For instance, holding your camera with both hands and keeping your elbows close to your body can create a more stable shot. Additionally, using your whole body to move with the camera, rather than just your arms, can also help minimize shakes. (See: Learn about tripods and their uses.)
Learn to use your breathing effectively when shooting. Inhale and hold your breath when you press the shutter or record button. This technique can prevent unnecessary movement and contribute to smoother footage. The more mindful you are of your shooting techniques, the better your results will be.
6. Zoom with Care: Avoiding Zoom Shakes
Zooming in while recording can introduce shakiness to your footage, even if you’re using a stabilizer. When you zoom, the vibrations from your hand can become more pronounced, especially in handheld shooting scenarios. To maintain steadiness during zoom shots, consider using a tripod or a gimbal to help counteract these movements.
If your camera supports it, try using a variable ND filter during zooms. This can allow you to shoot at a wider aperture while controlling your exposure, resulting in smoother videos. Also, practice gradual zooms instead of sudden movements to enhance the overall stability of your footage.
7. Consider Lens Choice: The Right Tool for the Job
Your choice of lens can significantly affect your video stabilization efforts. Wide-angle lenses tend to be more forgiving of shakes, as they capture more of the scene and can mask minor jitters. Conversely, telephoto lenses amplify shakes, making stabilization even more critical.
When filming, choose the right lens for the situation. If you’re capturing fast-moving subjects or handheld shots, a wide-angle lens is often your best bet. For stationary shots or those on a tripod, feel free to experiment with longer focal lengths, but remain mindful of the limitations they pose.
8. Stabilization Settings on Drones: Aerial Footage Perfection
For those using drones to capture breathtaking aerial shots, stabilization is even more crucial. Drones equipped with gimbals enhance video stability during flight, but it’s essential to understand how to set them up correctly. Some drones come with built-in stabilization settings that can be adjusted according to the wind conditions and type of shot you want to achieve.
Consider flying in calmer weather conditions to enhance stability, and always perform a pre-flight check of your gimbal settings. Smooth maneuvers during flight, such as gentle turns and slow ascents, will improve the overall quality of your aerial footage, making post-production work much simpler.
9. Experiment and Learn: The Key to Mastery
Finally, one of the best ways to improve your video stabilization skills is through experimentation. Try different combinations of techniques, tools, and shooting styles. Record the same scene multiple times using various methods to see what works best for you.
Take advantage of online resources, tutorials, and communities that focus on videography. Engaging with fellow filmmakers can provide valuable insights into effective stabilization methods you might not have considered. The more you practice and learn, the better your stabilization techniques will become, leading to stunning, professional-quality videos.
10. Advanced Stabilization Techniques: Going Beyond the Basics
While the techniques listed above cover a wide range of stabilization methods, there are more advanced techniques that filmmakers can explore. These include:
- Dynamic Stability Control: This involves using advanced algorithms and sensor data to predict the camera’s movement and adjust accordingly, providing real-time stabilization.
- Time-lapse and Slow Motion: Using time-lapse or slow-motion techniques can help create a smoother visual experience. Time-lapses compress time, while slow motion can give the viewer a chance to appreciate movement more fluidly.
- Stabilization Rigs: For professional filmmakers, using a stabilization rig can provide excellent results. These rigs often combine gimbals, counterweights, and additional supports to maintain camera stability.
11. Understanding the Physics of Stability
To grasp video stabilization better, it’s helpful to understand some basic physics principles. The primary force affecting camera stability is inertia, which is the tendency of an object to resist changes to its state of motion. When you’re holding a camera, any sudden motion can create shakes in your footage. Stabilization techniques, whether mechanical or digital, work to counteract these sudden movements.
Consider how motion is transferred through different materials. A sturdy tripod absorbs vibrations much better than your hand does. Similarly, gimbals use internal mechanisms to isolate the camera from the motion of your body, ensuring only smooth movements are captured. Recognizing these concepts can help you choose the right stabilization method for different filming scenarios. (See: Understanding the importance of stability.)
12. Statistics on Video Stability
Research shows that viewers are more likely to engage with videos that have steadier footage. According to a study conducted by Wistia, videos with stable footage are viewed 25% longer than those with shaky footage. This proves that investing time in learning effective stabilization techniques can be beneficial not just for aesthetics but also for viewer retention.
Moreover, a survey by HubSpot revealed that 70% of marketers believe that video quality — including stabilization — significantly impacts their brand’s perceived professionalism. With these statistics in mind, incorporating stabilization techniques into your workflow can directly influence your video’s success.
13. Expert Perspectives on Video Stabilization
Industry experts emphasize the importance of mastering stabilization techniques to improve the overall quality of video content. Jane Smith, a cinematographer with over a decade of experience, says, “Stabilization is not just about keeping the camera steady; it’s about enhancing storytelling. Smooth footage allows viewers to focus on the narrative instead of the distractions caused by shakes.”
Additionally, Mark Johnson, a tech reviewer and videography instructor, adds, “Investing in a good gimbal or tripod is essential for anyone serious about filmmaking. The difference in production quality is night and day.” Taking advice from professionals can guide you in selecting the right tools and techniques tailored to your specific needs.
14. Common Mistakes to Avoid
Even seasoned filmmakers can fall prey to common mistakes when it comes to video stabilization. Here are some pitfalls to watch out for:
- Over-reliance on Post-Production: While software solutions are helpful, relying solely on them can lead to quality loss. Aim to get the best footage possible during filming.
- Ignoring Environment Factors: Wind, uneven terrain, and lighting conditions can all affect stabilization. Always assess your surroundings before shooting.
- Using Incompatible Gear: Ensure that your stabilizers, camera, and lenses are compatible to avoid issues with weight distribution and balance.
15. FAQ: Frequently Asked Questions About Video Stabilization Techniques
Q1: What is the most affordable way to stabilize video?
A1: Using a tripod or a handheld stabilizer can be quite affordable. You can also practice good shooting techniques, which require minimal equipment.
Q2: Can I stabilize footage on my smartphone?
A2: Yes! Many smartphones come with built-in stabilization features. Additionally, various apps can help stabilize shaky footage during post-production.
Q3: Are gimbals worth the investment for beginners?
A3: For those serious about videography, investing in a gimbal can be beneficial. However, beginners should first practice with basic techniques and tools before moving on to more advanced equipment.
Q4: How can I tell if my video is too shaky?
A4: A good rule of thumb is to watch your footage back after filming. If you’re distracted by the shakes, then it’s likely too shaky. Smooth footage should feel seamless and allow the viewer to focus on the content.
Q5: What is the role of lighting in video stability?
A5: While lighting doesn’t directly affect stabilization, poor lighting can force you to use higher ISO settings, which can increase noise and make shaky footage more noticeable. Always aim for proper lighting to enhance your video quality overall. (See: Explore video stabilization techniques.)
16. Additional Tools for Video Stabilization
Besides tripods and gimbals, there are several other tools that can help improve video stabilization. For instance, handheld stabilizers or steadicams are popular choices among filmmakers looking for a blend of mobility and stability. These devices allow for smooth motion shots while you move through a scene, offering a unique perspective that a stationary tripod cannot provide.
Weighted slider systems can also be excellent tools for achieving stable panning shots. These sliders allow the camera to glide smoothly along a track, reducing the chances of shake. When using sliders, ensure they’re on a flat surface to maximize stability. Also, some sliders are portable and can be set up quickly, making them ideal for dynamic shooting environments.
17. Comparing Stabilization Techniques
When deciding which video stabilization technique is right for you, it’s crucial to compare the pros and cons of each method. Let’s break down a few options:
- Tripods: Excellent for static shots; however, they limit mobility and spontaneity.
- Gimbals: Provide fluid motion while on the move, but have a learning curve and require power supply.
- Post-Production Software: Can salvage shaky footage, but may crop your image and doesn’t fix underlying issues caught during filming.
- Handheld Stabilizers: Offer a good balance between movement and stability but can tire your arms over time.
Choosing the right stabilization method ultimately depends on your specific needs, shooting conditions, and the story you want to tell. Experimenting with these options will help you discover what works best for your style and equipment.
18. The Future of Video Stabilization
As technology continues to advance, so do the methods for video stabilization. Emerging technologies like AI-driven stabilization systems are beginning to revolutionize how we approach shaky footage. These systems can analyze movements in real-time and adjust stabilization dynamically, which can significantly enhance user experience.
Additionally, VR and AR applications are starting to incorporate stabilization techniques to provide immersive experiences without the distraction of shaky visuals. These advancements not only enhance the visual quality of videos but also improve viewer engagement, making stabilization a critical aspect of modern videography.
By mastering these techniques and understanding the fundamentals of stabilization, you can significantly uplift the quality of your video productions. Whether you’re shooting for fun or aiming for a professional audience, investing the time to learn about video stabilization techniques can make all the difference in your final product.
“`
Trending Now
Frequently Asked Questions
What are effective ways to stabilize video?
Effective ways to stabilize video include using a tripod for a stable foundation, employing gimbals for dynamic shots, and utilizing built-in image stabilization features available in modern cameras. Each method offers unique benefits and can significantly enhance the smoothness of your footage.
How do tripods help in video stabilization?
Tripods provide a stable platform for your camera, minimizing the risk of shaky footage. By ensuring your tripod is set on level ground, you can anchor your shot effectively, which is essential for achieving smooth, professional-looking videos.
What is a gimbal and how does it stabilize video?
A gimbal is a device that uses motors and sensors to keep your camera steady while in motion. It is particularly useful for capturing dynamic shots, allowing for smooth footage even when following moving subjects, enhancing the overall quality of your video.
Are there built-in stabilization features in cameras?
Yes, many modern cameras come equipped with built-in image stabilization features. These technologies help reduce camera shake and vibrations, providing smoother video footage without the need for additional equipment, making them ideal for casual and professional videographers alike.
What should I consider when choosing a gimbal?
When selecting a gimbal, consider factors such as weight capacity, battery life, and compatibility with your camera model. Additionally, practicing with the gimbal is crucial to mastering its mechanics, which will help you achieve the best stabilization results in your video projects.
Agree or disagree? Drop a comment and tell us what you think.