How to restore iPhone from backup
“`html
As our lives become increasingly digital, the significance of keeping our data safe cannot be overstated. If you’ve ever faced the daunting prospect of losing your iPhone data—be it contacts, photos, messages, or apps—you know just how crucial it is to have a reliable backup. Learning how to restore iPhone from backup is a skill that every iPhone user should master. This guide will walk you through the key steps, options, and insights to ensure your data is always recoverable.
1. Understanding iPhone Backups
Before diving into the restoration process, it’s essential to grasp what iPhone backups entail. An iPhone backup is essentially a copy of your device’s data, which can be stored either in iCloud or on your computer via iTunes or Finder. Understanding the type and scope of the backup you’ve created will affect how you restore your device.
Apple offers two primary backup solutions: iCloud and local backups. iCloud is convenient because it operates wirelessly and automatically, as long as you have enough storage space. On the other hand, local backups via iTunes or Finder require physical access to your computer but can provide a more comprehensive backup of your device, including app data and settings. Knowing how your data is backed up will help you effectively navigate the restoration process.
2. Preparing for Restoration
When you decide to restore iPhone from backup, the first step is ensuring you have a recent backup available. Depending on your preference, you can check your iCloud backup settings by going to Settings > [Your Name] > iCloud > Manage Storage > Backups. If you use iTunes or Finder, connect your iPhone to your computer and check for the latest backup in the software.
It’s also a wise move to back up your current data before restoring, as the restoration process will overwrite anything on the device that isn’t part of the backup. To back up your iPhone, go to Settings > [Your Name] > iCloud > Backup and select Back Up Now. If you’re using iTunes or Finder, simply select Back Up Now after connecting your device. This precaution can save you from losing recent data that might not be included in your backup.
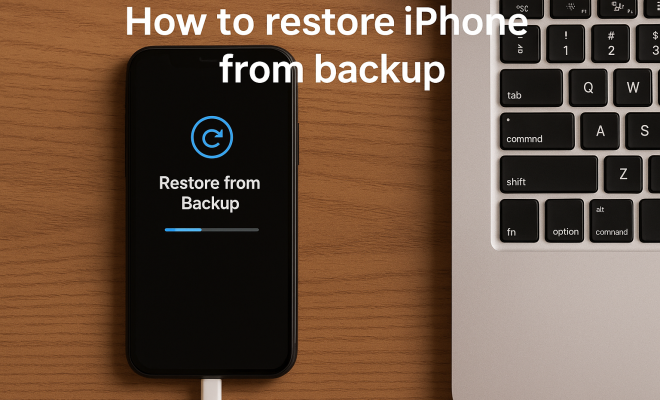
3. How to Restore from iCloud Backup
Restoring from an iCloud backup is straightforward, especially if you’ve previously set up your iPhone with an iCloud account. To initiate the process, start by erasing your iPhone to remove current data and settings. This can be done by going to Settings > General > Transfer or Reset iPhone > Erase All Content and Settings.
Once your iPhone restarts, you’ll be greeted with the initial setup screen. Follow the prompts until you reach the Apps & Data screen. Here, select Restore from iCloud Backup. Sign in to iCloud with your Apple ID, choose the most relevant backup from the list, and let the restoration process begin. Your iPhone will download the backup and may take some time, depending on the size of the backup and your internet connection speed.
4. Using iTunes or Finder to Restore
If you prefer using a computer for the restoration process, you can restore your iPhone from a backup using iTunes (on Windows or older macOS versions) or Finder (on macOS Catalina and later). Start by connecting your iPhone to your computer using a USB cable. Open iTunes or Finder, and select your device from the menu.
In the device summary screen, you’ll see an option titled Restore Backup. Click on this, and a list of available backups will appear. Choose the most recent backup and click Restore. It’s important to let the process complete without disconnecting your device. Once done, your iPhone will restart and sync any additional content, such as apps and media, that may need to be reinstalled.
5. What to Do After Restoring Your iPhone
After successfully restoring your iPhone from backup, it’s essential to check that everything transferred properly. Start by verifying that your contacts, photos, and messages are intact. Open your apps and make sure they function correctly, especially those that depend on cloud data.
You may also want to re-enable settings that might have been disabled during the restoration process, such as Wi-Fi networks, Bluetooth connections, and location services. Don’t forget to check for app updates in the App Store, as some apps may require updates to work efficiently after restoring.
6. Troubleshooting Common Issues
Even with a well-laid plan, issues can arise during the restoration process. One common problem is the incompatibility of backups. If you attempt to restore a backup made from a newer version of iOS to an older version, you may encounter problems. To avoid this, ensure your iPhone is updated to the latest iOS version before starting the restoration.
Another frequent issue is a failed backup. If your backup didn’t complete successfully, you might see errors during the restoration. To mitigate this, always verify your backup’s integrity before proceeding. Look for any prompts or notifications on your iPhone or computer that indicate issues during the backup process.
7. Restoring Selective Data Using Third-Party Tools
While restoring an entire backup is straightforward, sometimes you may only need specific data—like contacts or messages. Third-party tools can help you selectively restore content without wiping your entire device. Some popular options include iMazing, Dr.Fone, and AnyTrans.
These tools often come with features that allow you to preview backups and pick only the data you want to restore. For instance, if you lost a few important messages but still have your entire backup, using a third-party tool can save you time and hassle compared to restoring everything. Just be sure to choose trustworthy software to avoid compromising your data’s security.
8. Best Practices for Future Backups
To avoid data loss in the future, it’s vital to establish a regular backup routine. Whether you opt for iCloud or local backups, aim to back up your iPhone at least once a week or before significant updates. If you frequently take photos and videos, consider adjusting your iCloud storage plan to accommodate larger backups.
Additionally, enable automatic backups in iCloud by going to Settings > [Your Name] > iCloud > iCloud Backup and turning on iCloud Backup. This ensures your data is always up to date without you having to remember to do it manually. Lastly, periodically check your backups to confirm they are being completed successfully and are accessible when you need them.
9. The Importance of Data Security
In today’s digital age, the importance of data security cannot be overstated. When restoring your iPhone from a backup, always ensure your backup is secured—whether it’s via encryption with iTunes or using strong passwords for your iCloud account. This layer of protection is critical in safeguarding sensitive information from unauthorized access.
As you navigate the backup and restoration process, remember that keeping your data secure is as crucial as having it backed up. Regularly update your passwords and consider enabling two-factor authentication on your Apple ID for an extra layer of security. By treating your data with the care it deserves, you can enjoy peace of mind knowing that your information is safe and recoverable.
10. Understanding Different Backup Options
When considering how to restore iPhone from backup, it’s helpful to understand the differences between the available backup options. iCloud backups are convenient and accessible from anywhere, but they do have some limitations. For instance, if you have a lot of data—like photos or videos—the free iCloud storage plan may not be sufficient. You can upgrade your iCloud storage for a monthly fee, which is often worth it for those who rely heavily on their devices.
Local backups via iTunes or Finder, on the other hand, can provide a more comprehensive snapshot of your device at a specific point in time. They can include app data, messages, and settings that might not be saved in an iCloud backup. However, they do require you to physically connect your device to your computer, which might not be as convenient if you’re on the go.
Choosing between these options depends significantly on your usage habits and needs. If you travel frequently or often find yourself without reliable internet access, having a local backup can be a lifesaver. Conversely, if you prefer the ease of automatic backups, iCloud might be the way to go.
11. Comparing iCloud and Local Backups
For many users, deciding whether to rely on iCloud or local backups can be challenging. Let’s break down some of the key differences:
- Accessibility: iCloud backups can be accessed from any device with Internet connectivity, making it convenient if you have multiple Apple devices.
- Storage Limits: Each Apple ID comes with 5GB of free iCloud storage, but larger backups may require a paid plan. Local backups are limited to your computer’s available storage.
- Data Types: Local backups can include data types not always backed up on iCloud, such as certain app data and settings.
- Speed: Restoring from a local backup can often be faster, especially with large amounts of data, compared to downloading from iCloud.
In many cases, users find a combination of both methods works best for their needs—using iCloud for regular, automatic backups, while relying on local backups for more comprehensive snapshots before major updates or changes.
12. Statistics on Backup Usage
Understanding backup usage can provide helpful context for why you should take backups seriously. According to a survey conducted by Backblaze, about 30% of people have never backed up their devices, with a significant percentage relying solely on their devices without any backup for important data. These statistics underscore the inherent risk of data loss that comes from neglecting backups.
Additionally, a report by the Ponemon Institute highlights that 60% of small to medium-sized businesses that experience data loss shut down within six months. This serves as a reminder that both individual users and businesses should prioritize backup strategies to ensure data integrity and availability.
13. Frequently Asked Questions (FAQ)
What should I do if I can’t find my backup?
If you can’t locate your backup, ensure that you’re logged into the correct iCloud account. For local backups, check the default location on your computer (for iTunes, typically in the “MobileSync” folder). Additionally, you can search for backup files directly on your computer to confirm their existence.
Can I restore my iPhone from a backup made on a different device?
Yes, you can restore an iPhone from a backup made on a different device, provided the backup was created in the same family of devices and is compatible. iCloud and iTunes backups are device-specific, but if you are restoring to the same model series, the process should work smoothly.
Will restoring from a backup delete my current data?
Yes, restoring from a backup will erase all current data on your device. To prevent data loss, make sure to back up any current data that you want to keep before proceeding with the restoration process.
How often should I back up my iPhone?
It’s recommended to back up your iPhone at least once a week or before significant updates. If you frequently add photos, documents, or other important data, consider adjusting your backup frequency to daily.
What types of data are included in an iCloud backup?
An iCloud backup typically includes your app data, device settings, home screen and app organization, iMessage, text (SMS) and multimedia (MMS) messages, photos and videos in your Camera Roll, purchase history from Apple services, and ringtones. However, it doesn’t include data already stored in iCloud, like contacts, calendars, notes, and iCloud Photos.
Is it safe to use third-party tools for restoring data?
Using third-party tools can be safe if you choose reputable software with good reviews. Always research the tool to confirm its credibility and effectiveness. Some widely recognized tools include iMazing and Dr.Fone, which have established a good reputation for user safety and data integrity.
14. What to Do When You Can’t Restore from Backup
Sometimes, you may find yourself facing a situation where you can’t restore your iPhone from backup. This can be frustrating, but there are steps you can take to troubleshoot the issue. First, check your internet connection if you’re restoring from iCloud. A weak or unstable connection can disrupt the process.
If you’re using iTunes or Finder, make sure your software is up to date. An outdated version might not work well with newer iOS devices. Additionally, ensure that your backup is intact and not corrupted. You can check this by trying to access the backup on your computer. If you see any warnings or issues, it might be time to create a fresh backup and attempt the restoration again.
In some cases, restoring from a backup might require erasing your device first. Make sure to follow the proper steps to erase your iPhone before attempting to restore. If all else fails, reaching out to Apple Support can provide you with personalized help and guidance.
15. New Features in iOS and Backup Practices
With each new iOS release, Apple introduces features that can improve the backup and restoration process. For instance, iOS 15 introduced improved iCloud features, making backups faster and more efficient. One notable enhancement is the ability to back up to iCloud even when your phone is in Low Power Mode, which wasn’t possible in earlier versions.
Additionally, the introduction of the “Family Sharing” feature allows multiple users to share storage plans. This means that if you have a family of iPhone users, you can collectively manage and back up your devices, ensuring that everyone’s data is secure without incurring separate storage costs.
These innovations highlight how Apple is continuously looking to streamline the user experience. Keeping your iPhone updated not only guarantees access to the latest features but also ensures that your backup and restore processes are as efficient and reliable as possible.
16. Legal Considerations Around Data Management
When backing up and restoring your iPhone data, it’s important to consider the legal aspects of data management. With personal data laws becoming stricter worldwide—like GDPR in Europe and CCPA in California—users must be aware of how their data is stored and handled.
For instance, if you’re using third-party backup tools, ensure that they comply with relevant data protection laws. This means they should offer transparent privacy policies and be able to inform you about how they manage and protect your data. Failing to comply with these laws can result in hefty fines and legal consequences for both individuals and businesses.
Furthermore, if you’re backing up sensitive information, such as financial records or personal identifiers, consider using encryption features provided by iCloud or iTunes. This adds a layer of security that can help protect you against data breaches.
17. Conclusion
Ensuring that you can easily restore iPhone from backup is an essential skill in today’s digital age. By understanding your backup options, preparing effectively, and following best practices for data security, you can safeguard your device against unforeseen mishaps. Whether you choose iCloud, local backups, or a combination of both, prioritizing data backups can save you time, stress, and potential loss of precious memories.
“`
Trending Now
Frequently Asked Questions
How do I restore my iPhone from a backup?
To restore your iPhone from a backup, first ensure you have a recent backup available either in iCloud or on your computer via iTunes or Finder. Then, follow the prompts on your device to erase it and set it up again, choosing the backup option when prompted to restore your data.
What is the difference between iCloud and local backups?
iCloud backups are stored online and can be done wirelessly, while local backups are saved on your computer using iTunes or Finder. iCloud is convenient and automatic, but local backups can be more comprehensive, including app data and settings, especially if you need to restore a lot of information.
Can I restore my iPhone without losing data?
To avoid losing data, it's crucial to back up your current iPhone data before restoring from a backup. When you restore, the existing data on your device will be overwritten by the backup data, so having a recent backup ensures you can recover important information that may not be included in the older backup.
How can I check if my iPhone has a backup?
To check if your iPhone has a backup, go to Settings > [Your Name] > iCloud > Manage Storage > Backups. Here, you'll see the devices listed along with the date and size of the most recent backup. If you're using iTunes or Finder, connect your iPhone to your computer and check the software for backup details.
What should I do if my iPhone won't restore from backup?
If your iPhone won't restore from backup, ensure that the backup is not corrupted and that you have a stable internet connection for iCloud backups. If using iTunes or Finder, check for updates to the software. You may also try restarting your device or checking for any error messages during the process.
What did we miss? Let us know in the comments and join the conversation.