How to record webcam and screen simultaneously
“`html
In today’s digital landscape, the ability to record webcam and screen simultaneously has become increasingly essential. Whether you’re a teacher crafting online lessons, a gamer sharing gameplay, or a professional conducting webinars, mastering this skill can enhance your content’s quality and engagement. This comprehensive guide will explore effective methods, tools, and tips for achieving high-quality recordings that combine both your screen and webcam feed seamlessly.
1. Understanding the Importance of Recording Both Webcam and Screen
Recording your webcam and screen simultaneously allows you to create more immersive and informative content. Imagine teaching a complex topic while showing slides or demonstrating software on your screen, all while your audience can see your expressions and reactions. This dual recording approach is particularly valuable in several contexts:
- Educational Purposes: Instructors can deliver lectures that feel more personal, helping to maintain student engagement.
- Gaming: Streamers often include their webcam feed so viewers can see their reactions during gameplay, making the experience more entertaining.
- Corporate Training: Companies can provide training videos that clearly explain processes while demonstrating the software in real-time.
By intertwining visual instructions with personal engagement, you not only convey information but also build a connection with your audience. This leads to improved learning outcomes and a more enjoyable viewing experience.
2. Choosing the Right Software for Your Needs
Several software options allow you to record webcam and screen simultaneously. The best choice depends on your specific needs, budget, and technical expertise. Here are some popular options:
- OBS Studio: Open Broadcaster Software (OBS) is a free and open-source option that’s highly customizable. It supports various platforms and can handle multiple sources of video and audio. With a bit of setup, you can create professional-quality recordings.
- Camtasia: This is a paid software platform favored by educators and marketers. Camtasia provides intuitive editing tools and templates that streamline the recording process. You can easily add effects, transitions, and annotations to enhance your videos.
- Zoom: While primarily a video conferencing tool, Zoom allows you to record meetings, including your webcam feed and screen sharing. This is particularly useful for remote training sessions and webinars.
- Bandicam: A solid choice for gamers and tutorial creators, Bandicam is easy to use and offers high-quality recordings with minimal lag. It allows you to overlay your webcam on your screen recordings.
- ScreenFlow: Available for Mac users, ScreenFlow combines screen recording and video editing in one application. It’s particularly well-suited for creating high-quality tutorials and presentations.
Before making a choice, consider factors such as ease of use, compatibility with your operating system, and the level of support you might need. Reading user reviews can also provide insight into the software’s performance and reliability.
3. Setting Up Your Recording Environment
Creating an optimal recording environment is crucial for producing high-quality video. Here are some key considerations:
- Lighting: Ensure that your face is well-lit without harsh shadows. Natural lighting is ideal, but you can also invest in softbox lights or ring lights for consistent illumination.
- Background: Your background should be tidy and relevant to your content. Consider using a green screen if you want to create a specific overlay or virtual background.
- Audio Quality: Good audio is just as important as good video. Invest in a quality microphone to ensure your voice is clear. Background noise can be distracting, so record in a quiet space.
- Camera Positioning: Position your webcam at eye level to create a more intimate and engaging experience for viewers. Avoid shooting from awkward angles which can be distracting.
When your recording environment is set up thoughtfully, you’ll minimize distractions and make it easier for your audience to focus on your content.
4. Preparing for Recording
Preparation can make or break your recording session. Here’s how to get ready: (See: Educational resources and guidelines.)
- Script or Outline: Having a clear script or outline helps organize your thoughts. It keeps the recording fluid and reduces the chance of forgetting key points.
- Rehearsal: Practice your presentation a few times. This helps you become comfortable in front of the camera and allows you to refine your delivery.
- Test Runs: Before the actual recording, conduct test runs to check audio levels, video quality, and the overall flow of your presentation.
- Gather Resources: Make sure you have all the necessary resources ready, such as slides, software, or any demonstration materials you may need during your recording.
Your audience deserves your best work, and taking time to prepare ensures that you deliver content that is polished and professional.
5. Recording Techniques to Enhance Engagement
Once you’re set up and ready to record, consider employing various techniques to keep your audience engaged:
- Eye Contact: Look directly at the camera when speaking. This mimics eye contact and helps you connect with your audience.
- Expressiveness: Use facial expressions and gestures to convey enthusiasm and emotion. A monotone delivery can be off-putting, so be animated!
- Interactive Elements: Encourage viewer interaction by asking questions or suggesting they follow along with the video. For example, if you’re demonstrating software, let them know to pause the video and try it themselves.
- Call to Action: Include clear calls to action throughout your video, directing viewers to subscribe, like, or check out additional resources related to the content.
By employing these techniques, you can create a more lively and engaging video that keeps viewers interested from start to finish.
6. Editing Your Videos for Professionalism
Post-production is where you can really polish your video. Here are some editing tips:
- Cut Out Mistakes: Use editing software to trim any mistakes or awkward pauses. Keeping your content concise is key to retaining viewer attention.
- Add Annotations: Incorporate text overlays or graphics to emphasize important points. This is especially useful for tutorials.
- Background Music: Adding subtle background music can enhance the mood of your video. Just make sure it doesn’t overpower your voice.
- Transitions: Use smooth transitions between different sections of your video to maintain flow and keep the viewer’s attention.
- Color Correction: Adjust the colors in your video to create a more visually appealing product. This can make a significant difference in the overall look of your recordings.
Effective editing can transform a good video into a great one, so take your time to refine the final product.
7. Sharing and Promoting Your Content
Finally, once your video is ready, it’s time to share it with the world. Consider these promotion strategies:
- Social Media: Share your video on platforms like Facebook, Twitter, and LinkedIn to reach a broader audience.
- YouTube: Upload your videos to YouTube, which is one of the biggest platforms for video content. Optimize your video titles and descriptions with keywords like record webcam and screen simultaneously for better visibility.
- Email Marketing: Send out your video to your mailing list with a compelling subject line to encourage clicks. Highlight what viewers will learn or experience by watching your video.
- Collaborations: Partner with other creators in your niche. This can help introduce your content to a wider audience and build your network.
Promotion is key to getting your content seen. The more effort you put into sharing your videos, the larger your audience will grow.
8. Advanced Techniques for Superior Recording Quality
If you’re already familiar with the basics of recording and want to take your skills to the next level, consider these advanced techniques:
- Using Multiple Cameras: If your setup allows, incorporating multiple camera angles can provide a dynamic viewing experience. You can switch between your main camera and a secondary one focused on a specific action, like sharing your screen or demonstrating a product.
- Live Streaming: Platforms like Twitch and YouTube Live allow you to broadcast your screen and webcam in real-time. This requires a different approach, such as engaging with live chat while presenting, which can significantly boost viewer interaction.
- Using Overlays and Graphics: Incorporate graphics, logos, and other visual elements into your recordings. This not only provides branding opportunities but also helps to emphasize key points or guide viewers through your content.
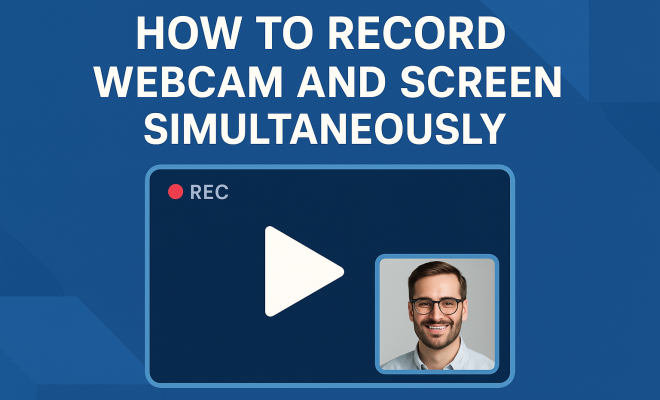
- Picture-in-Picture (PiP): Consider using a PiP effect where your webcam feed is a smaller window over the main screen content. This is a popular approach in tutorials and gaming streams.
These advanced techniques may take a bit more time and setup, but they can elevate your content significantly and make it stand out in a crowded space. (See: Teaching strategies for engagement.)
9. The Role of Analytics in Improving Your Content
After sharing your videos, it’s crucial to analyze their performance. Platforms like YouTube provide detailed analytics that can help you understand viewer behavior, including:
- Watch Time: This metric shows how long viewers are staying on your video. If you notice a drop-off at a certain point, you may need to tweak your content or pacing.
- Engagement Rate: Likes, comments, and shares indicate how well your content resonates with your audience. High engagement suggests that viewers find your content valuable.
- Traffic Sources: Understanding where your views come from can inform future promotion strategies. Are viewers coming from social media, search, or referrals?
- Demographics: Knowing who your audience is can help tailor your content to their interests and preferences, making future videos even more relevant.
Using analytics effectively allows you to adapt your content strategy to better meet your audience’s needs, improving your chances of success over time.
10. Frequently Asked Questions (FAQ)
Q1: What are the best settings for recording webcam and screen simultaneously?
A1: Optimal settings typically vary based on the software you choose, but a good starting point is to record at 1080p resolution with a frame rate of 30 fps. Adjust your audio bitrate to ensure clear sound quality, usually around 128 kbps.
Q2: Can I record using my laptop’s built-in webcam?
A2: Yes, you can use a laptop’s built-in webcam for recording. However, if you want higher quality, consider investing in an external webcam that offers better resolution and adjustable settings.
Q3: How much storage space do I need for recordings?
A3: The amount of storage you’ll need depends on the length and quality of your recordings. For example, a one-hour recording in 1080p might take up 1-2 GB of storage. It’s wise to have ample space available, so consider external storage options if needed.
Q4: Is it possible to edit videos after recording?
A4: Absolutely! Most recording software includes editing features, or you can use standalone video editing software to refine your recordings, add effects, and incorporate transitions.
Q5: How do I ensure good audio quality while recording?
A5: Use an external microphone if possible, as they typically provide better sound quality than built-in options. Additionally, record in a quiet environment and consider using soundproofing materials to reduce background noise.
Q6: Can I use free software to record webcam and screen simultaneously?
A6: Yes, there are several free options available, including OBS Studio and ShareX. These tools are feature-rich and suitable for most recording needs. (See: Research on multimedia learning.)
Q7: What platforms can I use to share my videos?
A7: You can share your videos on platforms like YouTube, Vimeo, Facebook, and your website. Each platform has its audience and offers different engagement opportunities.
Q8: How can I improve viewer retention on my videos?
A8: To improve viewer retention, focus on creating engaging content, using storytelling techniques, and keeping your videos concise. Also, use hooks at the beginning of your videos to grab attention and maintain interest throughout.
Q9: What are some common mistakes to avoid when recording?
A9: Common mistakes include poor lighting, inadequate audio quality, not preparing a script, and failing to do test recordings. Taking the time to address these aspects can significantly enhance your final product.
Q10: How often should I post new content?
A10: Consistency is key. Depending on your audience and capacity, aim to post new content regularly, whether that’s weekly, bi-weekly, or monthly. The important factor is to maintain quality while building a reliable posting schedule.
In Summary
Recording your webcam and screen simultaneously is a powerful way to create engaging content that resonates with viewers. From selecting the right software to preparing your environment and promoting your finished product, each step is crucial to ensuring a successful outcome. By following the techniques and tips outlined in this guide, you’ll be well-equipped to produce high-quality recordings that effectively communicate your message and connect with your audience. So, roll up your sleeves and get started on your next recording adventure!
“`
Trending Now
Frequently Asked Questions
What software can I use to record webcam and screen at the same time?
There are several software options to record webcam and screen simultaneously, including OBS Studio, Camtasia, and Bandicam. OBS Studio is a popular free choice, offering extensive customization and support for various platforms. Your choice should depend on your specific needs, budget, and level of technical expertise.
Why is it important to record both webcam and screen?
Recording both webcam and screen enhances content engagement by providing a personal touch. This approach is particularly beneficial for educators, gamers, and corporate trainers, as it allows viewers to see both visual instructions and the presenter's reactions, leading to improved learning outcomes and a more enjoyable viewing experience.
Can I use free software to record my screen and webcam?
Yes, there are free software options available for recording your screen and webcam, with OBS Studio being one of the most popular. It is open-source and highly customizable, making it suitable for various recording needs without any cost.
What are the best practices for recording webcam and screen simultaneously?
To achieve high-quality recordings, ensure good lighting for your webcam, choose a quiet environment, and test audio levels before recording. Additionally, plan your content to maintain viewer engagement and use reliable software that allows for seamless integration of both video feeds.
How can I improve the quality of my webcam and screen recordings?
To enhance the quality of your recordings, invest in a good webcam and microphone, use proper lighting, and ensure your computer has sufficient processing power. Additionally, familiarize yourself with the software settings to optimize video resolution and frame rates for clearer output.
What’s your take on this? Share your thoughts in the comments below — we read every one.