Master Screen Recording with VLC Media Player
“`html
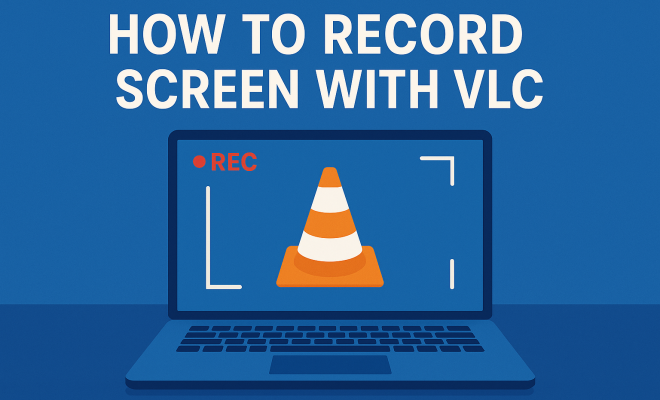
Introduction: Screen recording has become an essential tool for a variety of tasks, from creating tutorial videos to capturing video calls or gameplay. Among the software options available, VLC Media Player stands out not only as a versatile media player but also as a powerful tool for recording your screen. In this article, you’ll learn how to record screen with VLC, along with tips, tricks, and insights to enhance your recording experience. Whether you’re a beginner or looking to refine your skills, this guide will walk you through everything you need to know.
1. Understanding VLC Media Player
VLC Media Player is an open-source multimedia player that supports a wide range of audio and video formats. Developed by the VideoLAN project, it’s available on multiple platforms, including Windows, macOS, and Linux. The appeal of VLC lies not only in its playback capabilities but also in its rich set of features, one of which includes the ability to record your screen.
Unlike many dedicated screen recording applications, VLC is a lightweight solution that doesn’t require additional installations or subscriptions. It’s particularly useful for those who want to capture screen activity without cluttering their workflow with more software. This article will guide you through the steps to harness this functionality.
2. Preparing to Record: System Requirements
Before you start your screen recording with VLC, ensure your system meets the necessary requirements. VLC is compatible with a wide range of operating systems, but having the latest version installed will provide the best experience. You can download the latest version from the official VLC website.
Here are a few system requirements to keep in mind:
- Operating System: Windows 7/8/10, macOS, or a Linux distribution.
- RAM: At least 2 GB (4 GB recommended for smooth operation).
- Processor: Dual-core processor or better for optimal performance.
Once you have the right version of VLC installed, you’re ready to start recording!
3. Step-by-Step Guide to Record Screen with VLC
Now that you’re all set up, let’s dive into the step-by-step process of recording your screen with VLC. Follow these instructions carefully to ensure a successful recording.
- Open VLC Media Player: Launch the application on your computer.
- Access the Capture Device Menu: Go to the “Media” tab in the top menu and select “Convert / Save.”
- Select Capture Device: In the new window, click on the “Capture Device” tab. Under the “Capture mode” dropdown menu, choose “Desktop.”
- Set Frame Rate: Adjust the desired frame rate (15 fps is a good starting point for general recordings, while higher rates like 30 fps are better for action or gaming).
- Choose Output Format: Click on the “Convert / Save” button at the bottom. In the next dialogue, choose a destination file name and format (such as MP4).
- Start Recording: Finally, click on “Start” to begin your screen recording. To stop the recording, simply click on the “Stop” button in VLC.
With this straightforward procedure, you can effortlessly record your screen with VLC. However, there are additional settings and features worth exploring to enhance your recordings.
4. Optimal Settings for Recording
While the basic settings can get you started with recording your screen, tweaking the options can significantly improve the quality of your output. Here are some recommendations:
- Frame Rate: For most casual recordings, a frame rate of 15 to 30 fps is sufficient. However, for high-speed action or games, consider increasing it to 60 fps.
- Output Format: VLC supports a variety of output formats, with MP4 being the most universally compatible. If you need a different format, explore options like AVI or MKV.
- Audio Input: If you’re recording a tutorial or commentary, make sure to capture audio as well. Go to the “Audio device name” dropdown in the Capture Device tab to select your microphone.
Experimenting with these settings will help you find the right balance between quality and file size, making your recordings more effective for your intended purpose. (See: VLC Media Player on Wikipedia.)
5. Recording Audio Along with Video
In many cases, simply recording the screen isn’t enough; you’ll want to capture audio as well. This is particularly crucial for tutorials, gaming videos, or presentations, where your voice adds context to the visuals. Here’s how to ensure your audio is included when you record screen with VLC:
After selecting the “Desktop” capture mode, you’ll need to set up audio input. In the same “Capture Device” tab, look for the “Audio device name” dropdown. Select your microphone from the list to capture your voice during the recording. Make sure your microphone is connected and functioning before you start.
Remember to do a quick test recording to check both audio and video quality. Adjust your microphone settings if necessary to ensure clarity without background noise.
6. Editing Your Recorded Video
After finishing your screen recording, you might want to perform some editing to enhance the final product. While VLC isn’t primarily an editing tool, it does offer some basic functionalities. However, if you need more advanced editing features, consider using dedicated video editing software.
For simple edits, you can trim the beginning or end of your video using VLC’s built-in tools. Here’s how:
- Open your recorded video in VLC.
- Navigate to the “View” tab and enable “Advanced Controls.”
- Use the red record button to mark the start and end points for trimming.
For more complex edits, you may want to export your recording to software like Adobe Premiere Pro, Final Cut Pro, or open-source programs such as Shotcut or OpenShot, which provide comprehensive editing tools.
7. Common Issues and Troubleshooting
While recording your screen with VLC is generally straightforward, you might encounter a few hiccups along the way. Here’s how to troubleshoot common issues:
- No Audio: If you’re not capturing audio, double-check your audio device settings in VLC. Make sure the correct microphone is selected and that your system’s audio settings allow VLC to access the microphone.
- Low Frame Rate: If your recording appears choppy, ensure that your frame rate is set appropriately. Reducing the number of running applications can also help free up resources for smoother recording.
- Poor Video Quality: Check your output settings. If the video resolution looks off, consider adjusting the capture resolution in VLC settings.
By familiarizing yourself with these potential issues and their solutions, you can avoid frustration and make your recording process smoother.
8. Use Cases for Recording Your Screen with VLC
Understanding how to record screen with VLC opens up a range of applications. Here are some of the most popular use cases:
- Tutorial Videos: Educators and creators often use screen recording to create instructional videos that guide viewers through software or processes.
- Gaming Videos: Gamers frequently record gameplay to share on platforms like YouTube or Twitch, providing commentary and insights to viewers.
- Presentations: Recording presentations allows you to share your ideas with a broader audience, providing a more engaging format compared to static slides.
- Video Calls: Recording video calls can be useful for meetings or interviews, enabling you to revisit discussions later.
These examples illustrate the versatility of VLC as a screen recording tool, accommodating a variety of needs and creative pursuits.
9. Understanding Video Formats and Compression
When you record screen with VLC, understanding video formats and compression techniques can help you create more efficient videos. VLC supports numerous formats, and each has its own advantages. For example, MP4 is widely supported across devices and platforms, making it a great choice for sharing. However, it’s worthwhile to note that certain formats like AVI can offer higher quality at the cost of larger file sizes. (See: CDC on screen recording tools.)
Compression is another crucial consideration. While recording, you may encounter options for compressing your output file. This is particularly beneficial when your goal is to share the video online, as smaller file sizes reduce upload times and storage requirements. Tools like HandBrake can help compress videos after recording as well, allowing you to balance quality with size effectively.
10. Advanced Features in VLC
VLC offers more advanced features that can elevate your screen recording experience. For example, you can integrate overlays such as logos or text during the recording. To do this, you might need to use additional software for stream mixing, like OBS Studio, which can capture both your screen and other media inputs simultaneously.
Another advanced option is the ability to set up hotkeys in VLC for starting and stopping recordings. This can be a game changer, especially during gameplay or live presentations, where you want to capture specific moments without navigating away from your screen. To configure hotkeys, go to the “Tools” > “Preferences” > “Hotkeys” section, where you can customize them to suit your preferences.
11. Expert Insights: What Professionals Say
Many professionals and content creators have shared their thoughts on using VLC for screen recording. According to video production experts, VLC’s strength lies in its simplicity and versatility. “It’s a great tool for quick recordings and experimenting with different formats,” says Maria Johnson, a freelance video editor. “For casual users or those just starting, VLC is a fantastic entry point.”
On the other hand, some assert that while VLC is excellent for basic needs, it lacks certain advanced features found in dedicated screen recording software. “If you’re looking for extensive editing options or live streaming capabilities, you’re better off with software designed specifically for those purposes,” notes David Chen, a gaming content creator. This perspective is essential to consider depending on your recording objectives.
12. Frequently Asked Questions (FAQ)
Can I record my screen with audio using VLC?
Yes, you can record your screen with audio. After selecting the “Desktop” capture mode, make sure to choose your microphone as the audio device in the settings.
Is there a limit to how long I can record with VLC?
There isn’t a strict limit on recording length, but practical factors like storage space and system performance can affect your ability to record for extended periods. It’s good to monitor your available disk space during long recordings.
What is the best format to save my recordings?
MP4 is generally the best format to save your recordings due to its compatibility and balance between quality and file size. However, depending on your needs, formats like AVI or MKV may also be suitable.
Can I use VLC on mobile devices for screen recording?
Currently, VLC does not support screen recording on mobile devices like smartphones or tablets. You would need to use dedicated screen recording apps available on platforms like iOS or Android. (See: New York Times on screen recording.)
What should I do if VLC crashes during recording?
If VLC crashes, try reducing the capture settings (lower frame rate or resolution) to lessen the load on your system. Ensuring that your VLC is updated to the latest version can also help mitigate crashes.
13. Best Practices for Effective Screen Recording
To achieve the best results when you record screen with VLC, consider these best practices:
- Plan Your Content: Before recording, outline what you want to cover. This helps keep your video focused and engaging.
- Keep Background Activity Minimal: Close unnecessary applications to allocate more resources for your recording. This can help maintain a smooth performance.
- Maintain Good Lighting: If you’re recording a tutorial that involves showing your face, good lighting can enhance video quality significantly.
- Use Clear Audio: Invest in a decent microphone for clearer sound quality. Background noise can distract your audience, so record in a quiet environment.
- Review Your Recordings: After recording, watch your videos to assess quality. This allows you to make adjustments for future recordings.
14. Creating Engaging Content: Tips for Better Screen Recordings
Creating engaging content goes beyond just recording. To captivate your audience, consider the following tips:
- Be Clear and Concise: Speak clearly and avoid jargon unless necessary. If you must use technical terms, provide explanations.
- Use Visual Cues: Highlight important areas on your screen or use annotations to draw attention to specific parts of your presentation.
- Keep It Interactive: If possible, encourage viewer interaction by asking questions or prompting them to follow along.
- Add Background Music: Consider enhancing your recordings with background music at a low volume. It can set the mood and keep viewers engaged.
- Encourage Feedback: Always invite your viewers to leave comments or suggestions. This interaction can help you improve future content.
15. The Future of Screen Recording: Trends and Technologies
Screen recording technology continues to evolve, with new trends emerging in the field. Here are a few trends to watch:
- Increased Use of AI: Artificial intelligence is being integrated into screen recording tools to provide features like automatic editing, content enhancement, and improved voice recognition.
- Cloud-Based Solutions: Many users are moving towards cloud-based screen recording solutions that allow for easy storage, sharing, and collaboration on videos.
- Interactive Video Content: As demand for interactive learning increases, tools that allow for clickable elements within videos are becoming more popular.
- Enhanced Integration: Screen recording tools are increasingly being integrated with other applications, making workflows smoother and more efficient across various platforms.
Staying updated on these trends can help you choose the right tools and techniques for your specific needs.
16. Conclusion: Get Creative with VLC
In summary, learning how to record screen with VLC not only empowers you to capture video but also enhances your ability to communicate ideas effectively through visual means. Whether you’re creating tutorials, showcasing gameplay, or sending follow-up presentations, VLC offers a robust solution that’s easy to use and accessible.
As you become more comfortable with VLC’s screen recording features, don’t hesitate to experiment with different settings and techniques to find what works best for you. With a little practice, you’ll master the art of screen recording and produce high-quality videos that engage and inform your audience.
“`
Trending Now
Frequently Asked Questions
How do I record my screen using VLC?
To record your screen with VLC, open the software, go to 'Media' > 'Convert / Save', select the 'Capture Device' tab, choose 'Desktop' as the capture mode, and set your desired frame rate. Click 'Convert / Save', select a destination file, and start recording by clicking 'Start'.
What are the system requirements for recording with VLC?
To record your screen with VLC, ensure your system meets the following requirements: Windows 7/8/10, macOS, or Linux, with at least 2 GB of RAM (4 GB recommended) and a dual-core processor for optimal performance.
Can VLC record video calls?
Yes, VLC can record video calls. By following the screen recording steps, you can capture the video call window on your screen, allowing you to save and review the conversation later.
Is VLC a good screen recording tool?
VLC is a lightweight and versatile tool for screen recording, making it a good option for users who want to capture their screen without installing additional software. It supports various formats and offers a straightforward recording process.
Do I need to install additional software to record with VLC?
No, you do not need to install additional software to record with VLC. VLC Media Player itself includes screen recording features, allowing you to capture your screen without any extra installations or subscriptions.
What's your take on this? Share your thoughts in the comments below — we read every one.