Lay Pavers Like a Pro: Your Ultimate Installation Guide
Laying pavers can be a rewarding project that enhances the beauty and functionality of your outdoor spaces. Whether you’re looking to create a stunning patio, a new driveway, or a clean walking path, understanding how to lay pavers correctly is crucial for achieving a long-lasting and aesthetically pleasing result. This guide will walk you through the essential steps, tools, and insights needed for a successful paver installation.
1. Understanding the Basics of Pavers
Pavers are durable, versatile materials used for surfaces such as driveways, walkways, patios, and pool decks. They come in various shapes, sizes, and materials, including concrete, brick, and natural stone. Depending on your project’s aesthetic and functional requirements, you’ll want to choose the right type of paver. For example, concrete pavers are often more cost-effective and customizable, while natural stone offers a unique, rustic appeal.
When considering how to lay pavers, it’s important to understand the advantages of using them. Pavers are designed to withstand heavy loads, resist cracking, and provide excellent drainage options, which help prevent water accumulation and frost heave. Their interlocking design allows for slight movement, making them less likely to buckle compared to traditional concrete slabs.
Types of Pavers: A Deeper Dive
Let’s break down the most common types of pavers you’ll encounter and why you might choose one over another:
- Concrete Pavers: These are probably the most popular choice due to their versatility and affordability. Manufacturers can mold concrete into virtually any shape, size, or color, mimicking natural stone, brick, or even wood. They’re excellent for driveways, patios, and walkways because they’re strong and can handle heavy traffic. The customization options mean you can achieve almost any design aesthetic you’re aiming for.
- Brick Pavers (Clay Pavers): Made from clay fired in a kiln, brick pavers offer a classic, timeless look. They’re incredibly durable and resistant to fading, making them a good long-term investment. Brick pavers are often smaller than concrete pavers, which can create a more intricate pattern. They’re perfect for traditional patios, garden paths, and even some driveways, though you’ll want to ensure they’re rated for vehicular traffic.
- Natural Stone Pavers: These include materials like flagstone, granite, travertine, bluestone, and slate. Natural stone offers unparalleled beauty and a unique, organic feel. Each piece has its own variations in color and texture, giving your project a high-end, custom appearance. While often more expensive and sometimes trickier to install due to irregular shapes, their aesthetic appeal and longevity are unmatched. They’re ideal for luxurious patios, pool decks, and garden paths where you want a truly distinctive look.
- Permeable Pavers: These are a special type of paver designed to allow rainwater to filter through the paver surface and into the ground below. They’re often made of concrete but have larger joints filled with aggregate, or they might be designed with voids that allow water to pass. Permeable pavers are an excellent choice for eco-conscious homeowners or in areas with strict stormwater management regulations. They help reduce runoff, recharge groundwater, and can even help mitigate localized flooding.
2. Planning Your Project
Before you get your hands dirty, careful planning is key. Start by choosing the area where you want to lay your pavers. Take precise measurements to determine how many pavers you’ll need, accounting for cuts and waste. A good rule of thumb is to order about 10% more than your calculations suggest to account for this factor.
Next, consider the design and layout. You can go for a simple grid pattern or a more intricate design like a herringbone or circular layout. Sketching your plan out on paper can help visualize the final result and ensure you have a clear roadmap to follow when laying the pavers.
Designing Your Paver Layout: Beyond the Basics
Beyond simple grid patterns, there are many design choices that can elevate your paver project. Here are a few popular patterns and considerations:
- Running Bond: This is a simple, classic pattern where pavers are laid in parallel rows, with each paver offset by half its length from the one next to it. It’s great for walkways and offers a clean, linear look.
- Herringbone: A very strong and stable pattern, ideal for driveways and high-traffic areas. Pavers are laid at a 45-degree or 90-degree angle, creating a zig-zag effect. This interlocking nature distributes weight effectively.
- Basket Weave: This pattern involves alternating pairs of pavers, with one pair laid vertically and the next horizontally. It creates a woven appearance and is often seen in traditional patios and paths.
- Stacked Bond: The simplest pattern, where pavers are laid in straight lines with all joints aligned. While easy to install, it’s generally not recommended for driveways as it’s less stable under heavy loads. Best for decorative accents or very light-traffic areas.
- Circular Patterns: These require specialized pavers or careful cutting, but they create stunning focal points, often used for fire pit areas or garden features.
When planning, also think about color combinations. You can use different colored pavers to create borders, patterns, or even functional zones within a larger paved area. Don’t forget to consider how the paver color will complement your home’s exterior and existing landscaping.
Permits and Regulations: Don’t Skip This Step
Before you even break ground, it’s crucial to check with your local municipality or homeowner’s association (HOA) about any necessary permits or regulations. This is especially true for larger projects like driveways or significant patio expansions. Factors to consider:
- Building Permits: Some jurisdictions require permits for impervious surface additions, especially if they exceed a certain square footage. This helps manage stormwater runoff.
- Setback Requirements: There might be rules about how close your paved area can be to property lines, easements, or public sidewalks.
- Drainage Plans: Local codes often dictate how you must manage drainage to prevent water from flowing onto neighboring properties or into public storm drains untreated. Permeable pavers can sometimes help satisfy these requirements.
- Utility Lines: Always call 811 (or your local “dig safe” number) a few days before you plan to dig. They will mark the location of underground utility lines (gas, water, sewer, electric, communication) to prevent accidental damage, which can be dangerous and costly.
- HOA Rules: Many HOAs have specific guidelines regarding materials, colors, and even approved patterns for exterior hardscaping. It’s always best to get approval in writing before you start.
Skipping these checks can lead to fines, forced removal, or even legal disputes. A little foresight here can save you a lot of headaches later.
3. Gathering Essential Tools and Materials
Having the right tools will make your project go smoothly. Essential tools for laying pavers include:
- Shovel and rake for site preparation
- Level to ensure an even surface
- Paver edging to hold the pavers in place
- Rubber mallet for placing pavers
- Compactor (plate compactor for larger areas or hand tamper for smaller projects)
- Jointing sand for filling gaps between pavers
- Measuring tape and string line for accurate layout
- Safety gear including gloves and goggles
In addition to tools, make sure to have your pavers, base material (like crushed stone), and edge restraints ready before you start working. Quality materials will ensure your patio or walkway stands the test of time.
Beyond the Basics: Specialized Tools and Materials
For a truly professional finish and to make the job easier, consider these additional items: (See: paving stone overview on Wikipedia.)
- Wet Saw or Paver Splitter: While a paver splitter is great for straight cuts on many types of pavers, a wet saw with a diamond blade is indispensable for precise, clean cuts, especially with natural stone or when intricate shapes are needed. You can often rent these from equipment rental stores.
- Wheelbarrow: Essential for moving large quantities of aggregate, sand, and pavers around your site.
- Screed Boards/Pipes: These are crucial for creating a perfectly level and consistent sand setting bed. You’ll typically use two pieces of conduit or straight lumber set at the correct grade to pull a straight board across, leveling the sand.
- Geotextile Fabric (Landscape Fabric): While not always mandatory, a layer of geotextile fabric placed beneath your base material can help prevent the sub-base soil from mixing with your gravel base, maintaining the integrity of your foundation, and inhibiting weed growth from below.
- Polymeric Sand: This isn’t just regular jointing sand. Polymeric sand contains additives (like polymers) that, when activated by water, harden to create a durable, flexible joint. It resists weed growth, insect infestation, and erosion much better than traditional sand, significantly reducing future maintenance. It’s highly recommended for most paver projects.
- Edge Restraints: These are vital. They can be plastic, metal, or even concrete haunches that are installed around the perimeter of your paved area to prevent the pavers from migrating outwards over time. Don’t skip these; they’re the unsung heroes of a stable paver installation.
- Sprinkler System (or hose with fine mist nozzle): For activating polymeric sand.
4. Preparing the Site
Preparing the site is one of the most critical steps in learning how to lay pavers effectively. Begin by removing any existing grass, debris, and topsoil in the area where you’ll be laying pavers. You should dig down at least 6-8 inches to allow space for both the base material and the pavers themselves.
Once the area is cleared, level the ground using a rake. It’s essential that the area has a slight slope to facilitate drainage away from buildings and prevent water pooling. A good rule of thumb is to aim for a slope of about 1 inch for every 4 feet of distance from the structure.
Excavation and Grading: Getting it Right
Let’s talk more about excavation depth. The total depth you need to dig depends on several factors:
- Paver Thickness: Standard pavers are usually 2-3 inches thick.
- Sand Setting Bed: Typically 1 inch thick.
- Base Material (Crushed Stone/Gravel): This is the variable. For walkways and light-use patios, 4-6 inches might be sufficient. For driveways or heavy-traffic areas, you’ll want 8-12 inches of compacted base.
- Optional Geotextile Fabric: This adds negligible thickness but is important to consider.
So, for a driveway with 3-inch pavers, a 1-inch sand bed, and an 8-inch base, you’re looking at a total excavation depth of 12 inches. Always calculate this precisely for your project.
Regarding the slope: while 1 inch for every 4 feet (or 2%) is a good general guideline, ensure this slope directs water away from your home’s foundation or any other structures. You can use string lines and a line level to establish your desired grade accurately. It’s better to have a slightly steeper slope than too flat, as a flat surface inevitably leads to pooling.
After initial excavation, compact the subgrade (the soil beneath where your base will go). This foundational compaction helps prevent future settling of the entire system. A plate compactor is ideal for this, even on the soil itself.
Addressing Soil Types and Drainage Challenges
The type of soil you have can significantly impact your paver installation:
- Clay Soil: This soil type retains water and expands when wet, contracts when dry, which can lead to shifting pavers. If you have heavy clay, you might need to excavate deeper and use a thicker, well-compacted base layer, or even incorporate a drainage system beneath the base. A layer of geotextile fabric is highly recommended to prevent clay from migrating into your base.
- Sandy Soil: Sandy soils drain well but offer less inherent stability. A well-compacted base is still crucial, and again, geotextile fabric can help keep the sand from leaching into your gravel base.
- Loamy Soil: Generally the easiest to work with, as it offers a good balance of drainage and stability. Standard base depths usually work well with loamy soil.
If your site has particularly poor drainage or is prone to standing water, you might need to consider installing a subsurface drainage system, such as a French drain, around or beneath your paver area. This is a more advanced step but essential for long-term success in challenging environments.
5. Installing the Base Layer
The base layer is crucial for providing stability and support to your pavers. After preparing the site, add a layer of compacted crushed stone or gravel. This layer should be about 4-6 inches deep. Use a plate compactor to compact the stone firmly, ensuring a solid foundation that will help prevent shifting.
After compacting, you may want to add a layer of sand (1 inch thick) on top of the base layer. This sand layer helps to create a level surface for the pavers and allows for minor adjustments during installation. Before laying pavers, lightly moisten the sand for better compaction and stability.
The Importance of Compaction and Proper Base Materials
Let’s refine the base layer discussion. The crushed stone or gravel used for the base should be a specific type: typically “dense graded aggregate” or “crusher run,” which contains a mix of stone sizes from dust to 3/4 inch. This mix allows for excellent compaction, creating a very stable, interlocked layer. Avoid using round pea gravel, which won’t compact effectively and will shift over time.
When installing the base, lay it in lifts (layers) of no more than 2-4 inches at a time. Each lift must be thoroughly compacted with a plate compactor. Run the compactor over the surface multiple times in different directions until it no longer settles. This multi-lift approach ensures maximum density and prevents soft spots. For a 6-inch base, you’d lay 3 inches, compact, then lay another 3 inches and compact again.
The sand layer you mentioned is critical. It’s called the “setting bed” or “bedding course.” It should indeed be about 1 inch thick, but it’s crucial to use coarse concrete sand, sometimes called “paver sand.” Avoid play sand or mason sand, which are too fine and can wash out. This sand should be screeded, not compacted, before laying pavers. Screeding involves using screed rails (like 1-inch diameter pipes or wood strips) and a straight edge to pull the sand evenly, creating a perfectly flat and consistent surface at the correct grade. Once the sand is screeded, carefully remove the rails and fill the voids with sand. Do not walk on the screeded sand bed!
Lightly moistening the sand *before* screeding can sometimes help it compact a bit better, but the primary goal for the bedding course is a consistent, uncompacted layer that allows the pavers to settle into it during the final compaction. (See: New York Times on patio pavers.)
6. How to Lay Pavers: The Installation Process
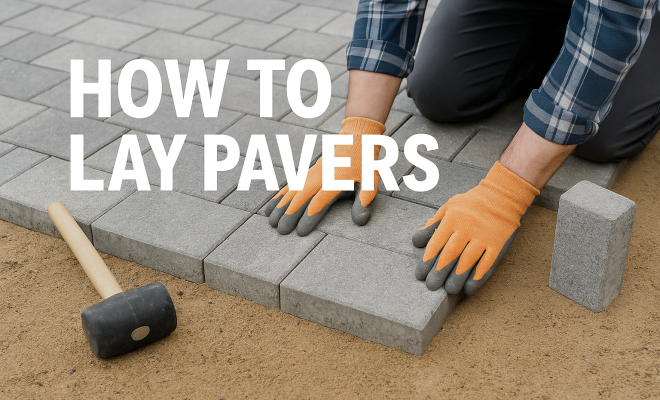
Now comes the exciting part—laying the pavers! Start from a corner or edge and work your way across the area. Place your first paver in the desired position and tap it gently with a rubber mallet to set it in place. Remember to leave gaps between each paver for jointing sand, which will help keep them from shifting.
Continue laying pavers in your chosen pattern, keeping them tight against each other. Use a level to ensure they are even and adjust as necessary. Once you reach the edges of the area, you may need to cut pavers to fit. A wet saw or paver splitter can be useful for this task. Aim for a clean, smooth edge to maintain a professional look.
Precision Paver Placement and Cutting Techniques
When you begin laying pavers, it’s incredibly important to establish a perfectly straight starting line. Use a string line stretched taut between stakes to guide your first row. This first row sets the tone for the entire project. As you lay subsequent pavers, constantly check for straightness and levelness, both across individual pavers and over larger sections.
Most pavers have small spacer bars on their sides. These are designed to create the ideal gap for jointing sand. Don’t push pavers so tightly together that these spacers are crushed or the pavers are touching; you need those gaps for proper interlocking and flexibility. Tap each paver gently with a rubber mallet to seat it firmly into the sand bed, but avoid heavy blows that might shift the surrounding pavers or create an uneven surface.
When it comes to cutting pavers, safety is paramount. Always wear eye and ear protection, and appropriate gloves. A paver splitter works well for most straight cuts on concrete pavers. For more intricate shapes, angles, or for natural stone, a wet saw is your best friend. A wet saw uses water to cool the diamond blade and suppress dust, providing very clean cuts. If you’re renting one, make sure you get a diamond blade suitable for the material you’re cutting.
Plan your cuts carefully to minimize waste. Often, you can use the off-cut from one paver to start a new row or fill a different edge spot. This reduces both material cost and disposal efforts.
7. Filling Joints and Compaction
After all the pavers are laid, it’s time to fill the joints. Pour jointing sand over the surface and use a broom to sweep it into the gaps between the pavers. This sand locks the pavers in place and prevents weed growth.
Next, use the plate compactor again to ensure that the pavers are set firmly into the base. This step is critical to prevent settling and shifting over time. Be sure to cover your freshly laid pavers with a tarp if rain is in the forecast, as excessive water can wash away the sand.
The Final Compaction and Polymeric Sand Application
The compaction after laying all the pavers is a crucial step to “seat” the pavers into the sand bed and achieve proper interlock. Before compacting, ensure all joint lines are as clean as possible. Sweep off any loose debris or sand from the paver surface. When compacting, make several passes over the entire paved area in different directions. This final compaction helps create a solid, stable surface that can withstand traffic and weather. For delicate pavers or if you’re concerned about scratching, some plate compactors have a protective pad you can attach to the base.
Now, let’s talk about polymeric sand. As mentioned earlier, it’s a superior choice for joint filling. Here’s how to apply it properly:
- Ensure Dry Conditions: The pavers and joints must be completely dry before applying polymeric sand. Moisture can prematurely activate the polymers, leading to clumping or poor hardening.
- Spread and Sweep: Pour the polymeric sand over the dry pavers and use a stiff broom to sweep it into all the joints, ensuring they are completely filled from top to bottom.
- Vibrate and Refill: Once the joints appear full, run the plate compactor over the area again (if your paver type can handle it, or use a hand tamper for smaller areas). This vibrating action helps settle the sand deep into the joints. Sweep more sand into any gaps that appear. Repeat until the joints are densely packed.
- Clean the Surface: This is perhaps the most critical step for polymeric sand. Use a leaf blower (on low setting) or a fine-bristled broom to meticulously remove *every single grain* of sand from the surface of the pavers. Any sand left on the paver surface will harden and create a hazy film that’s very difficult to remove later.
- Mist with Water: Once the surface is perfectly clean, gently mist the entire paved area with a fine spray of water. Do not blast it with a hose! The goal is to activate the polymers by allowing water to slowly seep into the joints. Keep the water moving to avoid pooling. You’ll usually see the sand darken slightly as it absorbs water. Continue misting until the water begins to pool on the surface, indicating the joints are saturated.
- Cure Time: Allow the polymeric sand to cure for the time specified by the manufacturer, usually 12-24 hours without rain or heavy traffic.
Polymeric sand is an investment that pays off in reduced weed growth and long-term joint stability. Always follow the specific instructions on the polymeric sand packaging, as brands can vary slightly. (See: Scientific research on paving materials.)
8. Maintaining Your Paver Installation
Once you’ve successfully laid your pavers, it’s essential to maintain them to extend their lifespan. Start by regularly sweeping away debris, leaves, and dirt to prevent stains and moss growth. You should also check for any shifting pavers and top off the jointing sand as needed to keep gaps filled.
Regular power washing can help keep your pavers looking fresh, but be cautious with the pressure settings as too high can damage the surface.
If you notice weeds popping up between the pavers, consider applying a weed killer or pulling them out by hand. Sealants are also an option to protect your pavers from stains and fading over time, making maintenance easier.
Advanced Maintenance and Troubleshooting Common Issues
Beyond regular cleaning, proactive maintenance can prevent larger problems. Here’s a deeper look:
- Weed Control: Even with polymeric sand, persistent weeds can sometimes find a way. For small weeds, a weed puller tool is effective. For larger areas, a targeted weed killer formulated for hardscapes can be used. Avoid broad-spectrum weed killers that might stain pavers or harm nearby plants. Re-sanding joints every few years can also help refresh the weed barrier.
- Stain Removal: Different stains require different approaches. Oil stains might need a degreaser, rust stains an acid-based cleaner (use with extreme caution), and organic stains (like moss or mildew) often respond well to oxygen bleach solutions or specialized paver cleaners. Always test cleaners on an inconspicuous area first.
- Efflorescence: This is a common white, powdery haze that can appear on concrete pavers, especially new ones. It’s caused by naturally occurring salts rising to the surface and crystallizing. It’s usually harmless and often disappears over time with rain and weathering. If persistent, specialized efflorescence removers are available, but ensure they are safe for your paver type.
- Settling or Shifting Pavers: This is usually a sign of an inadequate base or poor compaction. For isolated areas, you might be able to carefully remove the affected pavers, add more bedding sand or base material, re-level, and reinstall. For widespread issues, a professional might be needed to assess the base integrity.
- Paver Sealants: Applying a high-quality paver sealant can offer several benefits:
- Stain Protection: Creates a barrier against oil, grease, and other spills.
- Color Enhancement: “Wet look” sealants can deepen the color of your pavers, making them more vibrant.
- Erosion Prevention: Helps lock jointing sand in place, especially beneficial for non-polymeric sand.
- UV Protection: Reduces fading from sun exposure.
Sealants should typically be applied after the pavers and jointing sand are completely dry and cured (usually 30-60 days after installation). Always choose a sealant compatible with your paver type and follow the manufacturer’s instructions for application and reapplication frequency (typically every 2-5 years).
9. The Benefits of Laying Pavers Yourself
Learning how to lay pavers yourself has many advantages. Not only does it save money compared to hiring a professional, but it also gives you the opportunity to personalize your outdoor space exactly as you envision it. Furthermore, the sense of accomplishment at the end of the project is incredibly rewarding.
By following these steps, you can achieve professional results and create a beautiful area that enhances your home’s curb appeal. Plus, the skills you gain from this project can be applied to various other DIY landscaping and construction projects in the future. So, pick up those tools and get started on laying pavers today—your outdoor space will thank you!
10. Expert Perspectives: When to Call a Professional
While laying pavers is a rewarding DIY project, there are situations where calling in a professional is not just advisable, but often necessary. Recognizing these scenarios can save you time, money, and frustration in the long run.
- Large or Complex Projects: If you’re planning a sprawling driveway, an intricate multi-level patio, or a project involving significant changes to your property’s grade, the sheer scale and complexity often warrant professional expertise. Professionals have the heavy equipment, experience, and manpower to handle these jobs efficiently and correctly.
- Challenging Site Conditions: Very steep slopes, extremely poor drainage, or highly unstable soil conditions (like expansive clay or fill dirt) can turn a DIY project into a nightmare. Professionals can design and implement specialized drainage solutions, retaining walls, and reinforced bases that are beyond the scope of most DIYers.
- Structural Requirements: If your paver project needs to support extremely heavy loads, integrate with existing structures in a complex way, or requires specific engineering considerations, a licensed contractor ensures structural integrity and safety.
- Time Constraints: Laying pavers is a time-consuming process. If you have a strict deadline or simply don’t have weeks or months to dedicate to the project, hiring a crew can get the job done much faster.
- Warranty and Guarantees: Professional installers often provide warranties on their workmanship, giving you peace of mind that if issues arise, they’ll be addressed. DIY projects, by nature, come with no such guarantees.
- Lack of Confidence or Physical Limitations: If you’re not confident in your ability to perform all the steps correctly, or if physical limitations prevent you from heavy digging, lifting, and compacting, it’s safer and smarter to hire someone.
A good compromise for some DIYers is to hire a professional for the excavation and base preparation, then take over for the paver laying and finishing touches. This way, you ensure the most critical part of the foundation is done right while still getting to enjoy the hands-on aspect.
11. Comparing Pavers to Other Hardscaping Options
When you’re considering hardscaping your outdoor space, pavers aren’t your only option. Understanding how they stack up against alternatives like poured concrete and asphalt can help you make the best decision for your specific needs.
Pavers vs. Poured Concrete
- Aesthetics: Pavers offer a vast array
Trending Now
Frequently Asked Questions
What are the best types of pavers for a patio?
The best types of pavers for a patio include concrete pavers for their affordability and versatility, and natural stone pavers for their unique aesthetic. Concrete pavers can mimic the look of stone or brick, while natural stone offers a rustic appeal. Your choice should depend on your design preferences and budget.
How do you prepare the ground for laying pavers?
To prepare the ground for laying pavers, first clear the area of any grass, rocks, or debris. Then, excavate the soil to a depth that allows for a base layer of gravel and sand, ensuring proper drainage. Compact the soil and base materials to create a stable foundation for the pavers.
Can you lay pavers on dirt?
While it's technically possible to lay pavers on dirt, it is not recommended. A solid base of gravel and sand provides better stability, drainage, and prevents shifting. Laying pavers directly on dirt can lead to uneven surfaces and increased wear over time.
How do you maintain pavers after installation?
To maintain pavers after installation, regularly sweep away debris and wash them with water to prevent staining. For weeds, use a weed killer or pull them out manually. Resealing pavers every few years can also help protect them from the elements and maintain their appearance.
What tools do I need to lay pavers?
Essential tools for laying pavers include a shovel, rake, tamper, level, rubber mallet, and a saw for cutting pavers. Additionally, a measuring tape and a string line can help ensure proper alignment and spacing during installation.
What did we miss? Let us know in the comments and join the conversation.