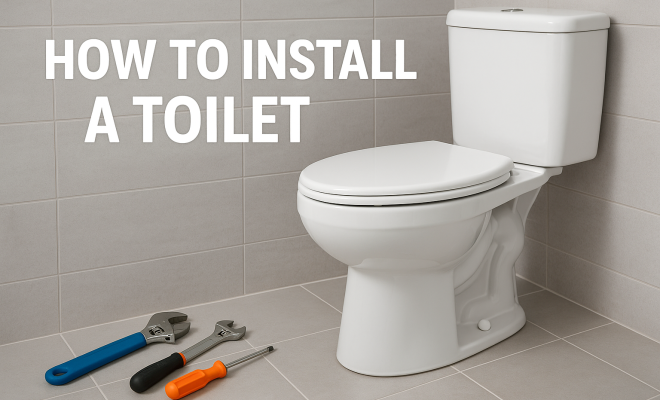
How to install toilet
“`html
When it comes to home improvement, few tasks can seem as daunting as toilet installation. Whether you’re replacing an old unit or putting in a new one, the prospect of tackling plumbing can be intimidating. But fear not! This comprehensive toilet installation guide will break down the process into manageable steps, arming you with the knowledge and confidence to get the job done.
1. Understanding the Basics of Toilet Installation
Before diving headfirst into the project, it’s essential to grasp the basic mechanics of how a toilet works and the components involved in its installation. A toilet consists of two main parts: the tank and the bowl. The tank holds water, which is used for flushing, while the bowl is where waste is collected. Understanding these components is crucial for a successful installation.
Additionally, you’ll need to familiarize yourself with the necessary tools and materials, including a wax ring, toilet bolts, a wrench, and a level. Being prepared with the right tools will simplify the installation process and make your life a lot easier.
2. Gather Your Tools and Materials
Effective toilet installation requires a specific set of tools. Here’s a checklist to ensure you have everything you need before you begin:
- Adjustable wrench: For securing the nuts on the supply line and floor bolts.
- Screwdriver: Flathead and Phillips for various fittings.
- Level: To ensure your toilet is sitting properly.
- Wax ring: This provides a watertight seal between the toilet and the floor.
- Toilet bolts: These secure the toilet to the floor.
- Plumber’s tape: For sealing threaded connections.
- Bucket and sponge: To catch any residual water during removal.
Having these tools on hand will streamline your work and minimize complications.
3. Preparing the Area for Installation
Preparation is key when installing a toilet. Start by turning off the water supply to the existing toilet and then flushing it to empty the tank. Use a sponge to soak up any remaining water in the tank and bowl. This step prevents messy surprises once you start disassembling the toilet.
Next, disconnect the water supply line from the toilet tank and remove the toilet by unbolting it from the floor. Make sure to keep track of the nuts and bolts, as you may need them for the new toilet. Once removed, clean the floor and inspect the flange for any damage. A damaged flange may require replacement before the new toilet is installed.
4. Installing the New Toilet Flange
If your toilet flange is damaged or broken, it’s crucial to replace it before installation. The flange is essential, as it secures the toilet to the floor and connects it to the plumbing. To install a new flange, follow these steps:
- Position the new flange over the existing drainpipe and ensure it’s level.
- Secure it to the floor using screws; make sure it’s firmly in place.
- Check that the top of the flange is level with the finished floor for a proper seal.
This preparation work ensures that your new toilet will be stable and leak-free.
5. Setting the Wax Ring
With the flange firmly in place, the next step in this toilet installation guide is to set the wax ring. The wax ring creates a watertight seal between the toilet and the flange, preventing leaks. Here’s how you do it:
- Take the wax ring and position it directly on the flange, ensuring it covers the entire surface.
- Some homeowners prefer to place the wax ring on the toilet’s horn (the bottom part of the toilet that connects to the flange), but both methods are effective.
- Ensure that the wax ring is properly aligned and doesn’t have any gaps.
Once the wax ring is set, you’re ready to position the toilet. (See: Understanding toilet mechanics and components.)
6. Attaching the Toilet Bowl
Now comes the moment of truth: placing the toilet bowl onto the wax ring. With help if needed, lift the toilet bowl and align the holes at the base with the bolts in the flange. It’s important to apply even pressure as you lower the toilet onto the wax ring, allowing it to compress and form a seal.
Once the toilet is in position, press down firmly to ensure it sits flush against the floor and the wax ring is properly compressed. After that, secure the toilet by tightening the nuts onto the bolts. Be careful not to overtighten, as this can crack the porcelain.
7. Installing the Toilet Tank
With the bowl securely attached, it’s time to install the tank. The tank should come with a set of bolts and a gasket. Begin by placing the gasket on the bottom of the tank and positioning the tank over the bowl. Align the holes in the tank with the corresponding holes on the bowl.
Using a wrench, secure the bolts from below the tank. Again, avoid overtightening. Once the tank is firmly attached, connect the water supply line to the tank. Make sure to use plumber’s tape on the threads to prevent leaks.
8. Testing for Leaks
Before celebrating your successful installation, it’s crucial to test for leaks. Turn the water supply back on and allow the tank to fill. Check around the base of the toilet and at the connections for any signs of water leakage. If you notice any leaks, tighten the connections gently until they stop.
Once everything appears to be leak-free, flush the toilet a few times to ensure proper operation. It’s the moment of truth; you want to be confident that everything functions smoothly.
9. Final Touches and Cleanup
After verifying that your toilet is operating correctly and leak-free, it’s time to focus on the finishing touches. Install the toilet seat according to the instructions provided with your new unit. Make sure it’s aligned correctly and secure, as a wobbly seat can be an annoyance.
Finally, clean up the workspace. Dispose of any old materials, including the old toilet and wax ring, and ensure that any tools are put away. A clean workspace not only looks good but is also safer.
10. Maintenance Tips for Longevity
Congratulations! You’ve successfully installed your new toilet. But the journey doesn’t end here; proper maintenance can extend the life of your toilet and prevent future issues. Regularly check for leaks and inspect the condition of the flapper in the tank. A worn flapper can lead to water wastage and increased bills.
Additionally, avoid flushing items that could clog the system, such as paper towels, feminine hygiene products, or non-biodegradable items. Regular cleaning with appropriate products will also keep your toilet looking fresh and functioning efficiently.
11. Why Choose a New Toilet?
Before diving into the installation process, you might wonder why you should replace your existing toilet. Modern toilets offer several advantages over older models, including improved efficiency and enhanced features. Here are some key reasons to consider a new toilet:
- Water Efficiency: Newer toilets are designed to use less water per flush, which can save you money on your water bill. For instance, many models use only 1.6 gallons per flush compared to older versions that may use 3.5 gallons or more.
- Better Performance: Improved flushing technology ensures that waste is effectively removed, reducing the likelihood of clogging.
- Comfort and Aesthetics: Modern toilets come in various designs and heights, allowing you to choose one that fits your bathroom’s style and your comfort preferences.
- Eco-Friendly Options: Many new models are designed with environmental considerations in mind, using advanced technologies that minimize water usage while maximizing performance.
12. Common Toilet Installation Mistakes to Avoid
As with any DIY project, there are common pitfalls that you should be aware of during the installation process. Here are some mistakes to avoid: (See: Home water treatment and plumbing safety.)
- Ignoring the Size: Measure your bathroom carefully to ensure that the new toilet will fit comfortably in the space. Pay attention to the distance from the wall to the flange, as well as the overall height and width of the toilet.
- Neglecting the Flange: Always inspect the toilet flange for damage and replace it if necessary. A compromised flange can lead to leaks and instability.
- Improperly Positioned Wax Ring: Ensure that the wax ring is centered and properly aligned to create a watertight seal. Misalignment can lead to leaks that are difficult to fix later.
- Overtightening Bolts: When securing the toilet, be cautious not to overtighten the bolts, as this can crack the toilet bowl.
- Rushing the Process: Take your time during installation. Rushing can lead to mistakes that may require you to redo parts of the job.
13. Frequently Asked Questions (FAQ)
Q1: How long does it take to install a toilet?
A1: Depending on your experience level, the installation can take anywhere from 2 to 4 hours. If you’re doing it for the first time, allocate more time to read the instructions and follow each step carefully.
Q2: What do I do if the toilet still leaks after installation?
A2: If you notice leaks after installation, double-check your connections. Make sure the bolts are tight but not overtightened. Check the wax ring for proper positioning and replace it if necessary. If the problem persists, consult a plumber.
Q3: Can I install a toilet by myself?
A3: Yes, many homeowners choose to install their own toilets. If you feel comfortable with basic tools and follow the steps outlined in this guide, you should be able to complete the task successfully. However, don’t hesitate to seek help if you’re unsure.
Q4: What should I look for when purchasing a new toilet?
A4: Key factors to consider include the toilet’s height, design, water efficiency rating, and flushing technology. Make sure to choose a model that fits your bathroom’s style while meeting your personal needs.
Q5: Is it necessary to use a wax ring for installation?
A5: Yes, the wax ring is essential for creating a watertight seal between the toilet and the flange. Some newer models use a rubber seal instead, which can be easier to work with and less messy. However, the traditional wax ring is still a reliable option.
Q6: How can I maintain my toilet after installation?
A6: Regularly check for leaks and inspect the flapper in the tank. Clean the toilet with appropriate cleaning solutions and avoid flushing non-biodegradable items. A little maintenance goes a long way in extending the life of your toilet.
14. The Importance of Proper Toilet Height
Choosing the right toilet height is often overlooked but can significantly impact comfort and accessibility. Standard toilets typically measure around 15 inches from the floor to the seat, which may not be ideal for everyone. For taller individuals or those with mobility issues, a comfort height toilet, which measures about 17 to 19 inches, can provide easier access and a more comfortable seating position.
Some manufacturers even offer adjustable height options, allowing you to customize the toilet height to fit your specific needs. If you’re replacing an old toilet, take the time to assess whether the height is comfortable for you and your family.
15. The Role of Toilet Technology in Modern Bathrooms
In recent years, toilets have evolved far beyond the traditional models. New technologies like dual-flush systems, smart toilets with heated seats, and integrated bidets are becoming increasingly popular. Dual-flush toilets allow users to choose between a full flush and a reduced flush, promoting water conservation without sacrificing performance.
Smart toilets incorporate advanced features such as automatic flushing, self-cleaning capabilities, and even built-in air dryers. While these toilets come with a higher upfront cost, they can save money in the long run through reduced water usage and lower maintenance needs. (See: Step-by-step toilet installation guide.)
When selecting a toilet, consider how these modern conveniences can enhance your bathroom experience. You might find that the added investment pays off in both comfort and utility.
16. Eco-Friendly Toilet Options
As environmental awareness grows, so does the demand for eco-friendly plumbing fixtures. Low-flow and dual-flush toilets are excellent choices for reducing water usage. Many modern toilets use advanced flushing technologies that effectively remove waste while using minimal water, often just 1.28 gallons per flush or less.
Look for toilets that have the EPA’s WaterSense label, which identifies products that meet specific water efficiency criteria without sacrificing performance. Additionally, consider materials and manufacturing processes when choosing a toilet. Many companies are now using recycled materials or adopting sustainable practices to lessen their environmental impact.
17. How to Remove an Old Toilet
Removing an old toilet can be a straightforward process if done correctly. Start by turning off the water supply and flushing the toilet to empty the tank and bowl. Disconnect the water supply line and remove the nuts securing the toilet to the flange. Carefully lift the toilet off the flange and set it aside. It’s a good idea to have a helper for this step, as toilets can be heavy and awkward to manage.
Once the toilet is removed, check the flange and wax ring for any residue. Clean the area thoroughly to prepare for the new installation. If the wax ring is damaged or the flange is rusted, consider replacing them to ensure a proper seal with your new toilet.
18. What to Expect After Toilet Installation
After successfully installing your new toilet, you might notice a few things as you adapt to your new fixture. First, pay attention to how often you need to flush. If your new toilet is a low-flow model, you may find that it requires fewer flushes to clear waste, which can save you water and money.
Additionally, keep an eye on the flushing performance. If you find that the toilet clogs frequently, it might be worth checking the installation of the wax ring or the alignment of the toilet. Lastly, listen for any unusual noises after flushing, which could indicate a problem with the tank or the fill valve.
19. Final Words on Toilet Installation
Completing a toilet installation is a satisfying accomplishment that not only saves money but also enhances the functionality and comfort of your bathroom. By following the steps outlined in this toilet installation guide, you’re equipped to handle the task confidently. Just remember to take your time, follow the instructions, and don’t hesitate to ask for help if you need it. With the right approach, you’ll have a newly installed toilet that meets your needs for years to come.
“`
Trending Now
Frequently Asked Questions
What tools do I need to install a toilet?
To install a toilet, you'll need an adjustable wrench, screwdrivers (flathead and Phillips), a level, a wax ring, toilet bolts, plumber’s tape, and a bucket with a sponge. Having these tools ready will simplify the installation process and help ensure a successful setup.
How do I prepare for toilet installation?
Preparation for toilet installation includes turning off the water supply to the existing toilet and flushing it to empty the tank. Make sure the area is clean and accessible, and gather all necessary tools and materials before starting the installation.
What are the main components of a toilet?
A toilet primarily consists of two parts: the tank and the bowl. The tank holds water for flushing, while the bowl collects waste. Understanding these components is essential for a successful installation and maintenance.
How do I ensure my toilet is installed correctly?
To ensure correct toilet installation, use a level to check that the toilet sits properly on the floor. Secure it with toilet bolts and a wax ring to create a watertight seal. Following the proper steps and using the right tools will help achieve a secure installation.
What is a wax ring used for in toilet installation?
A wax ring is used to create a watertight seal between the toilet and the floor. It prevents leaks and ensures that waste is contained within the plumbing system. Proper installation of the wax ring is crucial for the toilet's functionality.
Have you experienced this yourself? We’d love to hear your story in the comments.