The Tech Edvocate

Top Menu

  • Advertisement
  • Apps
  • Home Page
  • Home Page Five (No Sidebar)
  • Home Page Four
  • Home Page Three
  • Home Page Two
  • Home Tech2
  • Icons [No Sidebar]
  • Left Sidbear Page
  • Lynch Educational Consulting
  • My Account
  • My Speaking Page
  • Newsletter Sign Up Confirmation
  • Newsletter Unsubscription
  • Our Brands
  • Page Example
  • Privacy Policy
  • Protected Content
  • Register
  • Request a Product Review
  • Shop
  • Shortcodes Examples
  • Signup
  • Start Here
    • Governance
    • Careers
    • Contact Us
  • Terms and Conditions
  • The Edvocate
  • The Tech Edvocate Product Guide
  • Topics
  • Write For Us
  • Advertise

Main Menu

  • Start Here
    • Our Brands
    • Governance
      • Lynch Educational Consulting, LLC.
      • Dr. Lynch’s Personal Website
      • Careers
    • Write For Us
    • The Tech Edvocate Product Guide
    • Contact Us
    • Books
    • Edupedia
    • Post a Job
    • The Edvocate Podcast
    • Terms and Conditions
    • Privacy Policy
  • Topics
    • Assistive Technology
    • Child Development Tech
    • Early Childhood & K-12 EdTech
    • EdTech Futures
    • EdTech News
    • EdTech Policy & Reform
    • EdTech Startups & Businesses
    • Higher Education EdTech
    • Online Learning & eLearning
    • Parent & Family Tech
    • Personalized Learning
    • Product Reviews
  • Advertise
  • Tech Edvocate Awards
  • The Edvocate
  • Pedagogue
  • School Ratings

logo

The Tech Edvocate

  • Start Here
    • Our Brands
    • Governance
      • Lynch Educational Consulting, LLC.
      • Dr. Lynch’s Personal Website
        • My Speaking Page
      • Careers
    • Write For Us
    • The Tech Edvocate Product Guide
    • Contact Us
    • Books
    • Edupedia
    • Post a Job
    • The Edvocate Podcast
    • Terms and Conditions
    • Privacy Policy
  • Topics
    • Assistive Technology
    • Child Development Tech
    • Early Childhood & K-12 EdTech
    • EdTech Futures
    • EdTech News
    • EdTech Policy & Reform
    • EdTech Startups & Businesses
    • Higher Education EdTech
    • Online Learning & eLearning
    • Parent & Family Tech
    • Personalized Learning
    • Product Reviews
  • Advertise
  • Tech Edvocate Awards
  • The Edvocate
  • Pedagogue
  • School Ratings
  • 100 Best Revenue Recognition Apps

  • Dramatic: AI Surveillance Giant Cuts Hundreds of Jobs Amid Privacy Backlash

  • Dramatic: Anthropic Claude AI Just Banned ‘Cruel’ Behavior — Here’s Why It Matters

  • This One Shift in Gaming VC Could Reshape the Entire Industry

  • The AI Doctor Is Coming: Is It a Miracle or a Menace?

  • Unmasking the AI Deepfake Threat: Why Corporate America’s Billions Are at Risk

  • Shocking: China’s AI Programmers Collapse — A Disturbing Glimpse Into Our Future?

  • Dramatic Spike: College Costs Projected to Soar 7.5% — Are You Ready?

  • 20 Million Records Exposed: The Reckless Truth Behind the Oracle Health Data Breach

  • The AI Cybersecurity Threat: A Dangerous New Frontier

Digital & Mobile Technology
Home›Digital & Mobile Technology›How to Install Android Debug Bridge (ADB)

How to Install Android Debug Bridge (ADB)
By Matthew Lynch
July 6, 2023
0
Spread the love

If you’re an Android developer or simply a power user who likes to tinker with their devices, you might have heard of Android Debug Bridge (ADB). This utility tool allows you to communicate with your Android device through your computer, enabling you to perform various tasks such as installing apps, accessing the device’s file system, and debugging issues.

In this article, we’ll guide you through the process of installing ADB on your computer to get started.

Step 1: Download and Install the Android SDK Platform Tools

The first step to installing ADB is to download and install the Android SDK Platform Tools. These tools include ADB and Fastboot, another command-line utility used for flashing firmware images and modifying partitions.

To download the Android SDK Platform Tools, visit the Android Developers website and scroll down to the “Command line tools only” section. From there, select your platform (Windows, Mac, or Linux), and download the appropriate package.

After downloading, extract the contents of the package to a convenient location on your computer, for example, C:\android-sdk\platform-tools.

Step 2: Enable USB Debugging on Your Android Device

Next, you need to enable USB debugging on your Android device. This allows your device to communicate with your computer through ADB.

To enable USB debugging:

  1. Enable Developer mode on your Android device. Go to Settings > About phone and tap the “Build number” option 7 times until you see a message saying “You are now a developer!”
  2. Go back to the main Settings menu and select “Developer options.”
  3. Scroll down to the “Debugging” section and toggle on the “USB debugging” option.
  4. If prompted, confirm your choices.

Step 3: Connect Your Android Device to Your Computer

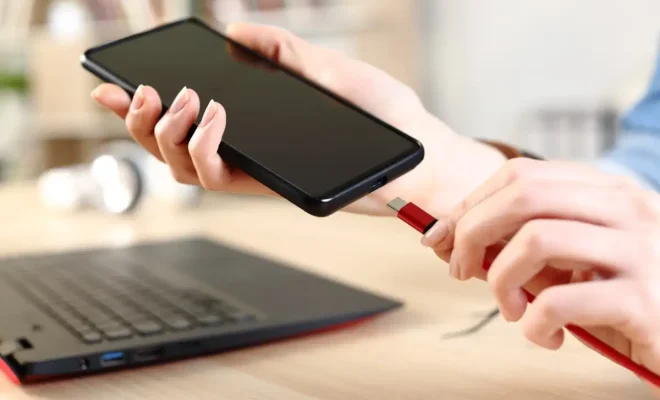
Connect your Android device to your computer using a USB cable. Make sure that your device is unlocked and that the screen is on.

If prompted on your device, select “Allow USB debugging” to authorize your computer to connect to your device.

Step 4: Open a Command Prompt Window

Now that you have downloaded and installed the Android SDK Platform Tools, enabled USB debugging on your device, and connected it to your computer, it’s time to open a command prompt window.

On Windows, press the Windows key + R to open the Run dialog box. Type “cmd” and then press Enter.

On Mac or Linux, open the Terminal app.

Step 5: Navigate to the Platform Tools Folder

In the command prompt window, navigate to the platform-tools folder using the cd (change directory) command. For example, if you extracted the contents of the Android SDK Platform Tools package to C:\android-sdk\platform-tools, type:

cd C:\android-sdk\platform-tools

On Mac or Linux, replace the backslashes with forward slashes, like this:

cd /android-sdk/platform-tools

Step 6: Test the ADB Connection

Now that you’re in the platform-tools folder, it’s time to test the ADB connection between your computer and your Android device. Type the following command in the command prompt window:

adb devices

This command will list all the devices connected to your computer that have USB debugging enabled. If you see your device’s serial number, you’re good to go!

Step 7: Use ADB Commands

Congratulations, you’ve successfully installed ADB and connected it to your Android device. Now, you can start using ADB commands to perform various tasks.

Here are a few examples of what you can do with ADB:

– Install an app: adb install app.apk

– Uninstall an app: adb uninstall com.package.name

– Access the device’s file system: adb shell

– Take a screenshot: adb shell screencap /sdcard/screenshot.png

– Copy a file from the device to your computer: adb pull /sdcard/file.txt

C:\Users\YourUsername\Downloads

Just remember, ADB commands can be powerful and potentially risky if you don’t know what you’re doing, so be careful and consult the official ADB documentation if you’re unsure.

Overall, ADB is a valuable tool for Android developers and advanced users alike. By following these steps, you can easily install ADB and start exploring its capabilities.

Previous Article

How to Fix a Computer Screen That ...

Next Article

What Is a TEX File?

Matthew Lynch

Related articles More from author

  • Digital & Mobile Technology

    What Is Hardware Hacking and Should You Be Worried?

    June 13, 2023
    By Matthew Lynch
  • Digital & Mobile Technology

    How to Use Firefox’s Privacy and Security Features

    July 14, 2023
    By Matthew Lynch
  • Digital & Mobile Technology

    How to Force Restart an iPhone and Enter Recovery Mode

    June 23, 2023
    By Matthew Lynch
  • Digital & Mobile Technology

    Safari vs. Chrome for Mac: Reasons You Shouldn’t Use Chrome

    August 5, 2023
    By Matthew Lynch
  • Digital & Mobile TechnologyOnline Learning & eLearning

    The Best JBL Bluetooth Speakers

    June 13, 2023
    By Matthew Lynch
  • Digital & Mobile Technology

    How to Use the Track Changes Tool in Microsoft Word

    June 13, 2023
    By Matthew Lynch

Search

Login & Registration

  • Log in
  • Entries feed
  • Comments feed
  • WordPress.org

Newsletter

Signup for The Tech Edvocate Newsletter and have the latest in EdTech news and opinion delivered to your email address!

About Us

Since technology is not going anywhere and does more good than harm, adapting is the best course of action. That is where The Tech Edvocate comes in. We plan to cover the PreK-12 and Higher Education EdTech sectors and provide our readers with the latest news and opinion on the subject. From time to time, I will invite other voices to weigh in on important issues in EdTech. We hope to provide a well-rounded, multi-faceted look at the past, present, the future of EdTech in the US and internationally.

We started this journey back in June 2016, and we plan to continue it for many more years to come. I hope that you will join us in this discussion of the past, present and future of EdTech and lend your own insight to the issues that are discussed.

Newsletter

Signup for The Tech Edvocate Newsletter and have the latest in EdTech news and opinion delivered to your email address!

Contact Us

The Tech Edvocate
910 Goddin Street
Richmond, VA 23231
(601) 630-5238
[email protected]

Copyright © 2026 Matthew Lynch. All rights reserved.