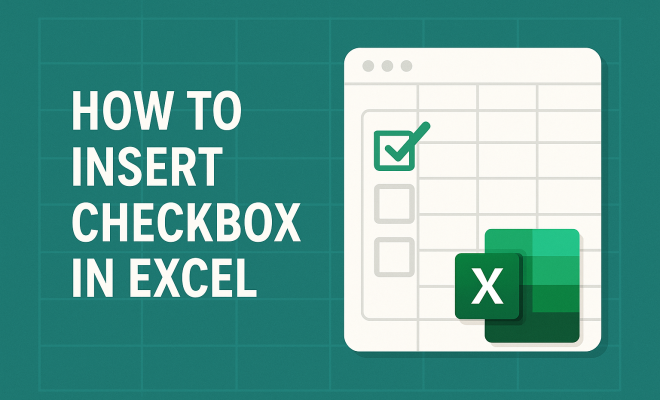
How to insert checkbox in Excel
“`html
In the world of data management and organization, Excel stands out as one of the most powerful tools available. Among its numerous features, the ability to insert checkbox in Excel is particularly useful for creating interactive spreadsheets, to-do lists, and forms. This guide will walk you through everything you need to know about checkboxes in Excel, including their practical applications, step-by-step instructions for inserting them, and tips for maximizing their use.
1. Understanding Checkboxes in Excel
Before diving into the technical aspects, it’s essential to understand what checkboxes are and how they function in Excel. A checkbox is a graphical element that allows users to make selections. It can either be checked (selected) or unchecked (deselected). In Excel, checkboxes can be beneficial for tracking tasks, options in forms, or even controlling data visibility based on user input.
Think of checkboxes as a way to add interactivity to your spreadsheets. Instead of merely displaying information, you can allow users to interact with the data dynamically. This functionality is particularly useful for project management, status tracking, and form completion, making your spreadsheets not only informative but also engaging.
2. Preparing Your Excel Worksheet
Before you can insert checkbox in Excel, it’s advisable to prepare your worksheet. Start by determining where you want the checkboxes to appear. You’ll want to ensure there’s enough space for them without overcrowding your existing data. Adjust the row heights or column widths if necessary, so the checkboxes fit well without overlapping other elements.
Additionally, consider the purpose of your checkboxes. Will they be used for a to-do list, a survey, or perhaps project tracking? Knowing their intended use will help you format your worksheet more effectively. Organizing your data with clear labels and sections will enhance usability and visibility for anyone who interacts with your spreadsheet.
3. Accessing the Developer Tab
To insert a checkbox in Excel, you first need to access the Developer tab, which is often hidden by default. Here’s how to reveal it:
- Click on the “File” menu in the upper left corner.
- Select “Options” from the menu.
- In the Excel Options dialog box, click on “Customize Ribbon.”
- On the right side, check the box next to “Developer” and click “OK.”
Once the Developer tab is visible, you’re ready to move ahead with adding checkboxes to your worksheet. This tab not only provides access to form controls like checkboxes but also offers tools for programming and advanced features.
4. Inserting the Checkbox
With the Developer tab now visible, you can go ahead and insert checkbox in Excel. Here’s a simple step-by-step process:
- Click on the “Developer” tab in the ribbon.
- In the Controls group, click on “Insert.”
- Under Form Controls, select the checkbox icon.
- Click on the cell where you want to place the checkbox. You can also click and drag to size the checkbox as you wish.
Once you’ve added the checkbox, you can see it in the selected cell. You can move it by clicking and dragging or resize it by pulling its corners. If you need multiple checkboxes, you can simply copy and paste them into other cells.
5. Customizing the Checkbox
After inserting a checkbox, you might want to customize its appearance and functionality to suit your needs. Right-click on the checkbox and select “Edit Text” to change the label that appears next to it. This is particularly useful when creating a to-do list, where you can label each checkbox according to the task it represents.
You can also format the checkbox to make it more visually appealing. Right-click on the checkbox, select “Format Control,” and explore options like font size, color, and alignment. This customization can enhance the overall aesthetics of your spreadsheet, making it more engaging for users.
6. Linking Checkboxes to Cells
A powerful feature of checkboxes in Excel is the ability to link them to specific cells. Linking a checkbox to a cell allows you to display its checked or unchecked status (TRUE or FALSE) in that cell. This functionality can be useful for creating dynamic dashboards or summary reports. Here’s how to link a checkbox to a cell: (See: Overview of Microsoft Excel features.)
- Right-click on the checkbox and select “Format Control.”
- In the Format Control dialog, navigate to the “Control” tab.
- In the “Cell link” field, enter the reference of the cell you want to link (e.g., B1) or select it directly from the worksheet.
- Click “OK.”
Now, whenever you check or uncheck the checkbox, the linked cell will automatically update to show TRUE or FALSE. This can be used in conjunction with other formulas for powerful data analysis directly within your Excel sheets.
7. Using Checkboxes for Data Analysis
Checkboxes can play an important role in data analysis, especially when combined with Excel’s powerful formulas. For example, you can create a checklist for tasks and use the COUNTIF function to count how many tasks are completed based on the checkbox values. This allows for quick and easy progress tracking without requiring complex formulas.
Additionally, you can also filter data based on checkbox selections. By creating a dynamic dashboard with checkboxes, you can allow users to filter data visually, making it easier to analyze trends or focus on specific subsets of information. It’s a simple yet effective way to enhance your data management capabilities.
8. Best Practices for Using Checkboxes
While checkboxes offer fantastic benefits, there are some best practices to keep in mind for optimal use. First, keep your checkboxes organized. Avoid scattering them randomly throughout your spreadsheet; instead, group them logically, either in rows or columns, depending on your data layout.
Second, ensure clarity in labeling. Use concise and clear descriptions for each checkbox to minimize confusion. You want users to understand at a glance what each checkbox represents. Lastly, test the functionality. If you’re sharing the spreadsheet with others, ensure that all checkboxes are working properly and linked correctly to their respective cells.
9. Troubleshooting Common Issues
Even the best tools can sometimes encounter issues. When working with checkboxes in Excel, you might come across a few common problems. If a checkbox doesn’t seem to work, check if it’s properly linked to a cell. If the linked cell isn’t updating, ensure that the cell reference is correct and that you haven’t inadvertently locked the cell.
Another issue might be related to formatting. If your checkboxes appear misaligned or too small, try resizing them or adjusting the row height/column width. If you encounter persistent issues, consider removing and reinserting the checkbox. Sometimes, a fresh start is all you need.
In summary, being able to insert checkbox in Excel expands your spreadsheet’s interactivity and functionality. Whether you’re tracking tasks, gathering survey responses, or managing project lists, checkboxes are a fantastic tool for enhancing user engagement and data analysis. By following the steps outlined in this guide, you’ll be well-equipped to utilize checkboxes to their fullest potential.
10. Advanced Uses of Checkboxes
Beyond basic task tracking, checkboxes can be used in more advanced applications, particularly in project management and data visualization. For example, you could combine checkboxes with conditional formatting to visually represent the progress of tasks. When a checkbox is checked, you can set a conditional format to change the background color of the cell or the entire row. This creates an immediate visual reference for task completion.
Another advanced application is using checkboxes within data validation lists. If you have several options to choose from, linking a checkbox to a dropdown menu can create a more interactive experience. Users can check off items, which then adjusts the options available in a dependent dropdown. This interactivity enhances user experience and facilitates more dynamic data entry.
11. Integrating Checkboxes with Macros
For users looking to elevate their Excel spreadsheets even further, checkboxes can be integrated with macros. Macros are sequences of instructions that automate tasks, and by connecting them to checkboxes, you can streamline processes significantly. For instance, you might have a checkbox that, when checked, triggers a macro to compile data or generate a report. This can save time and ensure accuracy in repetitive tasks. To do this:
- Record a macro that performs the desired action.
- Link the macro to the checkbox by right-clicking on it, selecting “Assign Macro,” and choosing your macro from the list.
- Now, when the checkbox is checked, the macro will run automatically, executing the tasks you’ve recorded.
This feature is particularly useful in scenarios where action needs to be taken based on user input, such as project approvals or status updates.
12. Checkboxes in Excel Online vs. Desktop
It’s also worth noting that while using checkboxes is quite straightforward in the Excel desktop application, there are some differences when using Excel Online. In Excel Online, the Developer tab is not available, which means inserting checkboxes isn’t as direct as in the desktop version. However, you can still create forms utilizing Microsoft Forms, which integrates with Excel for collecting data. This method allows for a broader range of question types, including checkboxes, without needing to set them up directly in Excel.
Moreover, users working in Excel Online may rely on the interactive features of the cloud to track responses and data entries without needing to manage checkbox controls manually. This can be particularly beneficial for collaborative projects where multiple users are interacting with the data simultaneously. (See: Ergonomics in office software use.)
13. Real-world Examples of Checkboxes in Use
Real-world applications of checkboxes in Excel can be diverse. Consider a project management team that uses checkboxes to track the implementation of tasks. Each member could have their own checklist, with checkboxes representing their assigned tasks. Once a task is completed, they check the box, and a summary cell reflects the total tasks completed, enabling immediate insight into project progress.
In a sales environment, checkboxes could be used to track customer follow-ups. Each time a follow-up is made, the sales representative checks the corresponding box in their lead tracking spreadsheet. This not only keeps track of who has been contacted, but they can also analyze which leads have yet to be followed up on, allowing for strategic planning and resource allocation.
14. Frequently Asked Questions
How to create a checklist in Excel using checkboxes?
To create a checklist, simply insert multiple checkboxes in a column next to the list of items. Label each checkbox with the task name, and link each checkbox to a separate cell. This will allow you to monitor which tasks are completed.
Can I use checkboxes in Excel for surveys?
Yes, checkboxes can be used in surveys to allow respondents to select multiple options. However, you might find using forms created in Microsoft Forms or Google Forms to be more user-friendly for this purpose. These forms can then be linked to Excel for data analysis.
What if I want to remove a checkbox?
To remove a checkbox, simply select it and press the delete key on your keyboard. If you’ve linked it to a cell, the link will also be removed, but the cell will still retain its previous information unless you choose to clear it.
Can checkboxes be used in combination with other Excel features?
Absolutely! Checkboxes can be combined with various Excel functions, such as COUNTIF, SUMIF, and conditional formatting. This allows for more complex data management and analysis, enabling you to create dynamic reports based on user interactions with the checkboxes.
Are there any limitations to using checkboxes in Excel?
While checkboxes are versatile, they can become cumbersome in larger datasets. Each checkbox is an object that can slow down spreadsheet performance if overused. It’s important to balance the use of checkboxes with other Excel features to maintain efficiency.
Can I customize the style of checkboxes in Excel?
Yes, checkboxes can be customized in terms of size, font, and color. Right-click the checkbox and select “Format Control” to access various customization options, allowing you to match the design of your spreadsheet.
Is it possible to create dependent checkboxes in Excel?
While Excel does not support dependent checkboxes natively, you can achieve a similar effect through the use of VBA (Visual Basic for Applications) to create custom functionality. However, this requires more advanced knowledge of Excel’s programming capabilities.
15. Enhancing User Experience with Interactive Checklists
An effective way to enhance user experience is by creating interactive checklists using checkboxes. For example, in a project management scenario, you can develop a detailed checklist that not only tracks task completion but also allows users to add comments or notes directly adjacent to each checkbox. This could involve using adjacent cells to provide additional information about the tasks, enhancing clarity.
You could also consider incorporating data validation to restrict what can be entered in the comments section. This ensures that feedback remains concise and relevant, which can greatly improve collaboration among team members. (See: Tips for using Excel effectively.)
16. Using Checkboxes to Create Interactive Dashboards
Checkboxes can also serve as a great tool for creating interactive dashboards in Excel. Imagine having a dashboard that presents various metrics or KPIs for a business, and users can filter these metrics based on their selections from checkboxes. This interactive functionality can make data presentation much more engaging.
For instance, if you have sales data segmented by region, you can use checkboxes for users to select which regions they want to view on the dashboard. This provides a customizable experience, allowing users to focus on the metrics that matter most to them.
17. Combining Checkboxes with Conditional Logic
Incorporating conditional logic with checkboxes can provide powerful insights and functionalities. For example, if a checkbox is checked, you could set up a formula that automatically fills a related cell with a specific value. This could be used in scenarios like expense tracking, where checking a box could auto-fill a cell with the corresponding expense amount.
To set this up, you can use an IF statement in conjunction with your linked cell. For instance, =IF(A1=TRUE, 100, 0) would fill the cell with 100 if the checkbox in A1 is checked, helping to automate data entry and reduce errors.
18. Using Checkboxes for Reporting
Checkboxes can be an excellent asset for reporting purposes. By linking checkboxes to specific data points, you can create a reporting tool where selecting the checkbox displays specific metrics or summaries. For instance, if you have a sales report, you can create checkboxes for different product categories, and when checked, the report filters to show only the sales data relevant to those categories.
This method not only streamlines reporting but also gives users control over the data they’re viewing, enhancing their overall experience and ensuring they can access the information they need quickly.
19. Future Trends: Checkboxes and Automation
The future of using checkboxes in Excel may also lean towards automation. As Excel integrates more with AI and machine learning technologies, checkboxes could be part of more advanced user interfaces that allow for predictive analytics based on user interactions. Imagine a scenario where your checkbox selections influence predictive models, providing insights tailored to your specific needs.
As tools like Power Automate become more integrated with Excel, the ability to trigger actions based on checkbox selections could become commonplace. This means that simple tasks can automate responses or other processes, making spreadsheets more dynamic and responsive to user needs.
20. Conclusion
The ability to insert checkbox in Excel opens up a world of possibilities for users looking to enhance their spreadsheets. Whether for tracking tasks, gathering feedback, or creating dynamic reports, checkboxes provide a straightforward yet powerful way to engage users and improve data management. Exploring the various applications and best practices mentioned in this guide will empower you to make the most of checkboxes in your Excel projects. Happy spreadsheeting!
“`
Trending Now
Frequently Asked Questions
How do I insert a checkbox in Excel?
To insert a checkbox in Excel, go to the 'Developer' tab, click on 'Insert', and then select the checkbox option from the form controls. Click on the desired location in your worksheet to place the checkbox. If the Developer tab is not visible, you can enable it through Excel Options.
What are the uses of checkboxes in Excel?
Checkboxes in Excel are commonly used for creating interactive to-do lists, surveys, and project tracking tools. They allow users to make selections, which can help in managing tasks and data visibility dynamically, enhancing the overall interactivity of your spreadsheets.
Can you format checkboxes in Excel?
Yes, checkboxes in Excel can be formatted for size, color, and position. You can right-click on the checkbox to access formatting options, allowing you to adjust its appearance to better fit your spreadsheet design and improve visibility.
How do I link a checkbox to a cell in Excel?
To link a checkbox to a cell in Excel, right-click on the checkbox and select 'Format Control'. In the Control tab, enter the cell reference you want to link to in the 'Cell link' box. This allows the checkbox to reflect TRUE or FALSE based on its state.
Is there a shortcut to insert checkboxes in Excel?
While there is no direct keyboard shortcut to insert checkboxes in Excel, you can speed up the process by creating a macro if you frequently need checkboxes. This automates the insertion process and can save time when working with multiple checkboxes.
What’s your take on this? Share your thoughts in the comments below — we read every one.