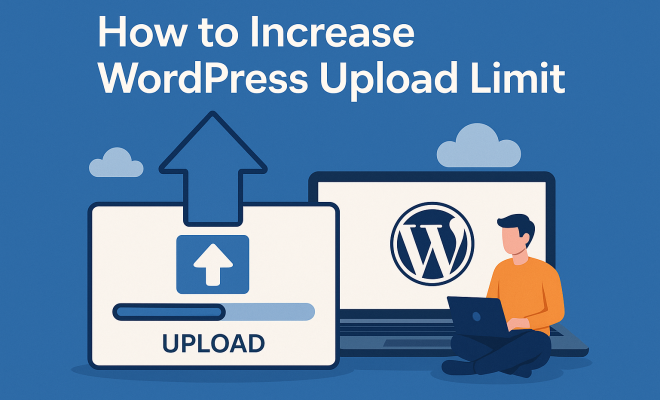
How to increase WordPress upload limit
“`html
If you’re a WordPress user, you may have encountered the frustrating message when trying to upload a file that exceeds your current upload limit. This can happen when you want to add images, videos, or other media files to your site. The good news? Increasing your WordPress upload limit is not as daunting as it may seem. In this article, we’ll explore the methods you can use to easily expand that limit and enhance your site’s functionality.
1. Understanding the WordPress Upload Limit
The default upload limit in WordPress is typically set to 2MB. This can vary depending on your hosting provider, but many users find themselves facing this restriction. The upload limit is primarily determined by PHP settings in your web server configuration. For many users, this limit can be frustrating, especially when dealing with high-resolution images, audio files, or video content that often exceed this size.
It’s crucial to know that increasing your upload limit is not just about convenience. It can significantly impact user experience, especially if you’re running an e-commerce site or a blog that relies heavily on multimedia content. Ensuring that your site can handle larger files helps maintain a professional appearance and keeps your visitors engaged.
2. Checking Your Current Upload Limit
Before making any changes, it’s a good idea to check your current upload limit. You can do this by navigating to the WordPress dashboard. Go to Media and select Add New. At the top of the upload area, you’ll see a note that indicates the maximum upload file size. Knowing this number will help you determine how much you need to increase your limit.
Another way to check the PHP settings directly is by creating a PHPinfo file. This file provides detailed information about your server’s configuration, including the file upload limit. To do this, create a new file called phpinfo.php and paste the following code into it:
<?php phpinfo(); ?>
Upload it to your WordPress directory, then access it via your browser. Look for the upload_max_filesize and post_max_size entries to see your current limits.
3. Methods to Increase WordPress Upload Limit
Numerous methods can help you increase your WordPress upload limit, and the best method for you depends on your level of access to server settings and your hosting environment. Here are several effective approaches:
- Edit the .htaccess File: If you’re using an Apache server, you can increase your upload limit by editing the .htaccess file in your WordPress root directory. Add the following lines:
 php_value upload_max_filesize 64M
php_value post_max_size 64M
php_value memory_limit 128M
php_value max_execution_time 300
php_value max_input_time 300
This code adjusts the limits to 64MB and increases the memory limit, which can help your site run more smoothly.
- Modify php.ini File: If you have access to your server’s php.ini file, you can directly change the PHP settings. Look for the lines that control upload_max_filesize, post_max_size, and memory_limit. If they’re set to low values, change them as follows:
 upload_max_filesize = 64M
post_max_size = 64M
memory_limit = 128M
Save the changes and restart your server for them to take effect.
- Use a Plugin: If you’re not comfortable editing server files, using a plugin might be the best solution. Plugins like Increase Max Upload Filesize and WP Maximum Upload File Size allow you to change the upload limit from the WordPress dashboard. These plugins are user-friendly and can save you from the potential errors of manual configuration.
- Contact Your Hosting Provider: Sometimes the easiest solution is to simply reach out to your hosting provider. Many hosts have default upload limits set for performance reasons. They may be able to increase your limit upon request, so don’t hesitate to ask.
4. Common Issues and Troubleshooting
After trying to increase your WordPress upload limit, you may still run into issues. If your changes don’t seem to take effect, there are a few common culprits to consider. First, check if your web host has restrictions in place that override your changes. Some shared hosting environments enforce strict limits for performance and security reasons.
Another possibility is caching. If you’re using caching plugins or server-side caching, you may need to clear the cache after making changes to see the new limits. Additionally, remember that the changes you make might not propagate immediately, depending on your server configuration. Allow some time for changes to reflect across your site.
5. Adjusting Memory Limits
Besides increasing the upload limit, it’s often beneficial to adjust memory limits to ensure that your site runs smoothly when handling larger files. WordPress recommends a minimum of 64MB, but for media-heavy sites, you might want to consider increasing it to 128MB or more, especially if you have many plugins or themes active.
You can adjust the memory limit by modifying the wp-config.php file. Add the following line before the line that says That’s all, stop editing! Happy blogging:
define('WP_MEMORY_LIMIT', '128M');
This simple tweak can enhance your website’s performance and reduce the likelihood of encountering memory limit errors.
6. Why Not Increase Limits Too Much?
While it might be tempting to set your upload limit to a very high value, it’s crucial to consider the implications. Setting limits too high can lead to server overload, especially if you’re on a shared hosting plan. When too many large files are uploaded simultaneously, it can slow down your website and negatively impact other users on the same server.
Moreover, a higher upload limit might expose your site to certain risks, such as the potential for users uploading large malicious files. Always balance the need for higher limits with the performance and security of your site. Establish a reasonable limit based on the typical media you plan to upload. (See: WordPress overview on Wikipedia.)
7. Security Considerations
When increasing the upload limit in WordPress, security should be a top priority. Increased upload limits can make your site more susceptible to certain types of attacks, particularly if you allow user-generated content. To mitigate these risks, make sure you have robust security measures in place.
Consider using security plugins that offer features like file scanning and firewall protection. Regularly updating your WordPress core, themes, and plugins is also crucial, as outdated software can be a weak point for hackers to exploit. Monitoring your site for any unusual activity can help you catch problems before they escalate.
8. Best Practices for Managing Media Files
Beyond just increasing the upload limit, managing your media files effectively can improve your site’s performance. One of the best practices is to optimize images before uploading them to WordPress. This can significantly reduce their file sizes without compromising quality. Tools like Adobe Photoshop, TinyPNG, or online compressors can help.
Additionally, consider implementing a digital asset management strategy. Organizing your media files with proper naming conventions and categories can make it easier to find and manage them later. Using a media library plugin can also enhance your control over media files, improving the user experience on your site.
9. Monitoring Your Changes
Once you’ve successfully increased your WordPress upload limit, it’s important to monitor how these changes affect your site. Keep an eye on your site’s performance metrics and loading times, especially after uploading larger files. Tools like Google PageSpeed Insights or GTmetrix can provide valuable insights into how your changes impact overall site performance.
Additionally, be mindful of user feedback. If visitors report slow load times or difficulties accessing media files, it might indicate that your current hosting plan or configuration isn’t sufficient to handle the increased limits. Staying attuned to these metrics will help you make necessary adjustments over time.
10. Common Questions About Increasing WordPress Upload Limit
It’s not uncommon to have a few questions when it comes to increasing your WordPress upload limit. Here are some frequently asked questions, along with their answers:
What is the maximum upload limit for WordPress?
The maximum upload limit varies depending on your hosting provider and server configuration. The default is often set to 2MB, but some hosts may allow limits as high as 128MB or more.
Will increasing the upload limit slow down my website?
Not necessarily, but it can if your hosting plan is not equipped to handle large files being uploaded or if multiple users are uploading at once. Always monitor your site’s performance after making changes.
Can I increase the upload limit without accessing server files?
Yes, you can use plugins designed to help increase the upload limit without needing to access or modify server files. This is a convenient option for those who aren’t comfortable with technical adjustments.
Is there a risk in allowing higher upload limits?
Yes, allowing higher upload limits can increase the risk of users uploading malicious files or large files that could overload your server. It’s important to balance convenience with security.
How often should I check my upload limit?
It’s a good idea to check your upload limit whenever you make significant changes to your site’s content strategy or after updating your hosting plan. Regular checks can help ensure you’re not running into restrictions unexpectedly.
11. The Importance of a Backup Before Changes
It’s crucial to back up your site before making any changes to server settings, including increasing your upload limit. This ensures that you can restore your site in case something goes wrong during the process. Many WordPress backup plugins, such as UpdraftPlus or BackupBuddy, can simplify this job. Regular backups are part of good site maintenance and can save you from potential headaches in the future. (See: CDC website for technical guidelines.)
12. Future Proofing Your Site
As you consider increasing your WordPress upload limit, think about your site’s future needs as well. If your site is growing, you might find that your media requirements will increase significantly over time. It can be wise to choose a hosting plan that allows for scalability. Some managed WordPress hosts offer scalable solutions that adapt to your site’s growth, ensuring that performance remains optimal even as you increase file sizes.
13. Beyond File Uploads: Enhancing User Experience
While increasing your upload limit is important, it’s equally vital to ensure that the overall user experience on your site is top-notch. This includes optimizing your site for speed and performance, which can be affected by large files. Utilizing a Content Delivery Network (CDN) can help improve loading times by serving your media files from locations closer to your visitors. Additionally, using lazy loading techniques can ensure that images load only when they are visible to the user, further improving performance.
Implementing a responsive design is another way to enhance user experience. Ensure that your media files adapt well to different screen sizes and devices. This practice not only improves accessibility but also helps with SEO, as Google prioritizes mobile-friendly sites in search rankings.
14. Final Thoughts
Increasing your WordPress upload limit can significantly enhance your website’s functionality and user experience. Whether you’re a blogger, an e-commerce site owner, or a creative professional, having the ability to upload larger files without hassle is essential.
Remember to choose the method that best suits your technical comfort level and hosting environment. Always balance the need for higher limits with performance and security considerations. By keeping your site optimized and secure, you can ensure that your visitors enjoy a seamless experience. Don’t let upload limits hold you back — take control of your WordPress site today!
15. Understanding File Types and Their Impact
When considering how to increase your WordPress upload limit, it’s useful to understand the different types of files you may want to upload and their implications. Common file types include images (JPEG, PNG, GIF), documents (PDF, DOCX), videos (MP4, AVI), and audio files (MP3, WAV). Each of these file types has its own characteristics and may impact your site differently.
For instance, images often represent the bulk of uploads, especially in visually-oriented sites. JPEGs are typically smaller and good for photos, whereas PNGs offer transparency but can be larger in size. When uploading videos, keep in mind that video files can be significantly larger than images, which is why your upload limit may need to be higher if video content is a core part of your site.
Understanding these nuances can help you set more appropriate upload limits based on the specific content you plan to feature on your site.
16. Statistics on Site Performance and User Engagement
Studies have shown that site speed can directly affect user engagement and conversion rates. According to Google, 53% of mobile users will abandon a site that takes longer than three seconds to load. Additionally, a report by Akamai found that a 100-millisecond delay in website load time can lead to a 7% decrease in conversions. This highlights the importance of not only increasing your upload limit but also optimizing the way files are handled on your site.
Moreover, if you run an e-commerce site, having high-quality images and videos can be the difference between making a sale and losing a customer. In fact, a study by Adobe found that 38% of users will stop engaging with a website if the content/layout is unattractive. By increasing your upload limit and ensuring your media files are top-notch, you can create a more visually appealing and faster-loading site that encourages users to stay longer and convert at higher rates.
17. Expert Opinions on Media Management
Experts in the field of web development and digital marketing have emphasized the importance of managing media effectively. According to a WordPress expert, “Managing media files properly can significantly enhance your site’s performance. It’s not just about increasing the upload limit; it’s about ensuring that your site can handle the influx of larger files without compromising speed.” This perspective underscores the need for a balanced approach to file uploads, considering both user experience and technical limitations.
Additionally, a digital marketing strategist mentions, “The quality of your visuals can impact brand perception. High-resolution images can help convey professionalism, but they need to be optimized to ensure they don’t slow down the site.” This quote highlights the importance of not merely focusing on upload limits but also on the optimization of files after they are uploaded. (See: New York Times technology articles.)
18. Frequently Asked Questions (FAQ) Expanded
In addition to the common questions about increasing your WordPress upload limit, users often have further inquiries. Here are expanded answers to additional questions that you might find helpful:
Can I set different upload limits for different user roles in WordPress?
WordPress does not provide a native way to set upload limits based on user roles. However, there are plugins available that can help you manage user permissions and potentially set different upload limits for different roles on your site.
What should I do if my hosting provider cannot increase the upload limit?
If your hosting provider cannot accommodate an increase, it may be time to consider upgrading your hosting plan or switching to a different provider. Managed WordPress hosting options often come with higher limits and better support for multimedia.
How can I ensure that my files are secure after increasing my upload limit?
To enhance security, consider implementing file type restrictions using plugins that allow you to specify which file types can be uploaded. Additionally, regularly scan your media library for malicious files and ensure that your security plugins are always updated.
Is there a way to monitor file uploads to ensure they meet my quality standards?
Yes, using a media library plugin that offers detailed reporting can help you keep track of uploads. Some plugins also provide insights into file sizes, formats, and even performance metrics, allowing you to maintain quality control over your media assets.
19. The Long-term Benefits of Increasing Your Upload Limit
Increasing your WordPress upload limit isn’t just a one-time fix; it can yield long-term benefits for your site. For instance, higher upload limits can support growth as your content expands, allowing you to incorporate richer multimedia into your posts and pages. This can lead to enhanced user engagement and growth opportunities for your brand.
Additionally, as you optimize and manage large media files effectively, you’ll likely notice improvements in your site’s SEO performance. Search engines favor websites that load quickly and provide relevant, high-quality content. By ensuring that your media is not only accessible but also optimized for performance, you enhance your chances of ranking higher in search results.
In today’s digital landscape, where content is king, being able to adapt and improve your upload capabilities can set you apart from competitors. It allows you to present your brand in the best light possible, showcasing high-quality visuals that resonate with your audience.
“`
Trending Now
Frequently Asked Questions
How can I increase the upload limit in WordPress?
You can increase the upload limit in WordPress by modifying your site's PHP settings. This can be done by editing the php.ini file, .htaccess file, or wp-config.php file, depending on your server configuration. Additionally, you can check with your hosting provider for options to increase the limit.
What is the default upload limit in WordPress?
The default upload limit in WordPress is typically set to 2MB. However, this limit can vary based on your hosting provider and server settings. It's essential to verify your current limit before attempting to increase it.
How do I check my current upload limit in WordPress?
To check your current upload limit in WordPress, go to your dashboard, navigate to Media, and select Add New. At the top of the upload area, you will see a note indicating your maximum upload file size. Alternatively, you can create a phpinfo file to view detailed PHP settings.
Why is my upload limit so low in WordPress?
A low upload limit in WordPress is often due to PHP settings configured by your hosting provider. Many providers set a default limit of 2MB, which may not be sufficient for high-resolution images or videos. You can increase this limit by adjusting the server settings.
What files can I upload to WordPress?
In WordPress, you can upload various file types including images (JPEG, PNG, GIF), audio files (MP3, WAV), video files (MP4, AVI), and documents (PDF, DOCX). However, the ability to upload these files may be restricted by your upload limit.
What’s your take on this? Share your thoughts in the comments below — we read every one.