
How to finish wood
“`html
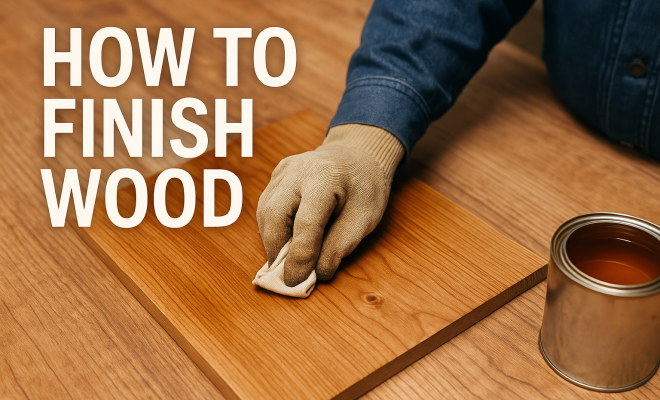
Woodworking is not just about creating furniture or home decor; it’s about enhancing the natural beauty of the material through various wood finishing techniques. Finishing wood can transform bland surfaces into stunning pieces that highlight the grain, protect against wear, and ensure longevity. In this guide, we’ll explore 10 essential wood finishing techniques that will elevate your woodworking projects, offering practical insights and expert advice.
1. Sanding: The Foundation of a Great Finish
Sanding is the cornerstone of any wood finishing process. Before applying any finishes, it’s crucial to prepare the surface properly. Start with coarse sandpaper (around 80-120 grit) to remove rough spots, then progressively use finer grits (up to 220 grit or higher) for a smooth finish. This step not only removes imperfections but also opens up the wood pores, allowing finishes to penetrate better.
To ensure uniform results, sand in the direction of the wood grain. Cross-sanding can lead to scratches that become visible after the finish is applied. Remember, dust created during sanding can affect the finish, so a thorough cleaning with a vacuum and tack cloth is essential before moving on to the next step.
2. Staining: Adding Color and Depth
Staining is a popular technique that enhances the wood’s natural beauty while adding color. Wood stains come in two main types: oil-based and water-based. Oil-based stains penetrate deeper and provide a richer color, while water-based stains dry faster and are easier to clean up.
When applying stain, use a brush or cloth to work the stain into the wood. It’s essential to wipe off any excess after a few minutes to avoid blotchiness. Test the stain on a scrap piece of wood to ensure you achieve the desired color before applying it to your project. Remember that different woods absorb stain differently; for instance, pine can turn out much lighter than mahogany.
3. Sealing: The Protector of Your Finish
Sealers play a crucial role in the finishing process by creating a barrier that protects the wood from moisture, dust, and grime. They help prevent the finish from absorbing into the wood, which can result in uneven coloring. Common sealers include polyurethane, lacquer, and shellac.
Applying a seal coat before the final finish can also help prevent grain raise, which occurs when water-based finishes swell the wood fibers. Sealers should be applied with a brush or spray in thin, even coats, and allow adequate drying time before moving on to the next finishing step.
4. Applying Varnish: A High-Gloss Finish
Varnish is a versatile finish that provides a hard, protective coating. It comes in various sheens — from matte to high gloss — allowing you to choose the perfect look for your project. Varnish is particularly suitable for high-traffic areas or outdoor furniture due to its durability.
When applying varnish, use a high-quality brush or a spray gun for an even application. Multiple thin coats will yield better results than a single thick coat. Always sand lightly between coats with fine-grit sandpaper to ensure proper adhesion and to smooth out any imperfections.
5. Oil Finishes: Emphasizing Natural Beauty
Oil finishes, such as tung oil or linseed oil, are favored for their ability to enhance the natural texture and grain of the wood. They penetrate deeply into the wood, offering a warm, natural look. However, oil finishes typically require more maintenance than other finishes, as they can wear away over time.
To apply an oil finish, use a clean cloth to rub the oil into the wood. Allow it to soak in for a few minutes, then wipe off any excess. Repeat this process several times to build up a finish that will protect the wood while showcasing its beauty.
6. Shellac: A Traditional Finish
Shellac is a natural resin that has been used as a wood finish for centuries. It dries quickly and provides a warm, amber tone to the wood. Shellac is easy to apply and can be layered for a more robust finish, although it may not hold up as well under certain conditions compared to modern finishes. (See: Wood finishing techniques overview.)
One of the advantages of shellac is its ease of repair; you can simply apply another coat over an existing finish without sanding. To apply shellac, use a brush or a pad, and work quickly as it dries rapidly. This technique is particularly great for fine furniture and musical instruments where a traditional look is desired.
7. Lacquer: Quick-Drying and Versatile
Lacquer is a fast-drying finish that provides a hard, durable surface. It’s commonly used in commercial settings due to its ability to dry quickly and withstand wear and tear. Lacquer comes in various sheens and can be sprayed on for an even application, making it a favorite among professionals.
Applying lacquer requires careful technique, as it can be prone to runs and sags. It’s best to apply multiple thin coats rather than a single heavy coat. Allow adequate drying time between coats, typically 30 minutes to an hour, before sanding lightly and applying the next coat.
8. Wax Finishes: Soft and Natural
Wax finishes offer a unique softness and depth to wood, emphasizing its natural beauty. They are easy to apply and can be used over other finishes to add a layer of protection and luster. However, wax finishes are less durable and may require frequent reapplication, especially in high-use areas.
To apply wax, use a clean cloth or a soft brush to rub it into the wood. Allow it to dry for a few minutes, then buff it with a soft cloth to achieve a sheen. Wax is often used on furniture and decorative items where a soft, natural look is desired.
9. Hybrid Finishing Techniques: Combining Methods for Optimal Results
Many woodworkers opt for hybrid finishing techniques, combining multiple finishes to achieve a specific look or level of protection. For example, you might first apply a stain, followed by a seal coat, and finish with a topcoat of varnish for increased durability and a rich appearance.
When using hybrid techniques, it’s crucial to understand how different finishes interact. Always test your combination on scrap wood to avoid unexpected results. This approach allows for greater creativity and personalization in your woodworking projects, making your finished pieces truly one-of-a-kind.
10. Maintenance of Finished Wood: Keeping Your Projects in Top Shape
After finishing your wood projects, maintenance is essential to keep them looking their best. Regular dusting and cleaning with a soft, damp cloth can prevent dirt buildup. If you’ve applied a finish like oil or wax, periodic reapplication is necessary to maintain the protective layer and luster.
For lacquer or varnish finishes, avoiding harsh chemicals during cleaning will extend the life of the finish. Instead, opt for gentle, pH-balanced cleaners. Understanding the specific needs of your finish will help you take care of your projects effectively, ensuring they age gracefully.
11. Understanding Different Wood Types and Their Finishing Needs
Each wood species has its own characteristics that affect how finishes are absorbed and how they will ultimately appear. For instance, hardwoods like oak and cherry tend to absorb stains deeply and may require fewer coats of finish compared to softer woods like pine. Knowing the wood type you’re working with can save you time and materials.
Pine, while beautiful, can be challenging due to its tendency to absorb stain unevenly, leading to a blotchy appearance. One solution is to use a pre-stain conditioner, which helps to evenly distribute the stain. On the other hand, hardwoods, though more resistant to wear, can present challenges when it comes to achieving that perfect sheen, often requiring multiple coats of finish to achieve the desired result.
12. Color Theory in Wood Finishing
Color theory plays a vital role in woodworking, especially when choosing stains and finishes. Understanding the color wheel can help you create stunning contrasts between different woods or harmonize colors for a unified look. For example, pairing warm tones like cherry or walnut with cool tones such as ash can create visual interest in your projects.
Additionally, the choice of finish can enhance or alter the appearance of the wood color. A clear finish on a dark wood can bring out its richness, while an opaque finish can mute the color and change its overall look. It’s beneficial to experiment with different combinations to find what feels right for your project.
13. Environmental Considerations in Finishing Techniques
As awareness of environmental issues grows, many woodworkers are turning to eco-friendly wood finishing techniques. Water-based finishes are often less harmful than their oil-based counterparts, producing fewer volatile organic compounds (VOCs) that contribute to air pollution and health problems. (See: Health effects of wood dust exposure.)
Moreover, natural oil finishes made from renewable resources, such as linseed or tung oil, are gaining popularity. These finishes not only protect the wood but are also safer for the environment and your health. When selecting finishes, consider both their performance and their environmental impact, opting for those that align with your values.
14. Expert Perspectives on Advanced Finishing Techniques
To gain deeper insights into wood finishing, we spoke with professional woodworkers and finishing experts. One expert emphasized the importance of patience: “Finishing can be an art form. Rushing through it will only lead to disappointment. Take your time and pay attention to details.” This advice highlights the necessity of proper technique and consideration of each step in the finishing process.
Another expert pointed out the growing trend of using hybrid finishes: “Combining different techniques allows for a unique finish that can be tailored to the specific needs of a project. It’s about finding the right balance and creating something that truly stands out.” This perspective encourages woodworkers to experiment and innovate, pushing the boundaries of traditional finishing methods.
15. Common Mistakes to Avoid in Wood Finishing
Even seasoned woodworkers can fall into traps when it comes to finishing. Common mistakes include skipping the sanding step or not cleaning the surface thoroughly, which can lead to a less-than-perfect finish. Another pitfall is applying too thick a coat of finish; this can cause runs or excessive drying time.
To avoid these issues, ensure you prep your surface meticulously and read the instructions thoroughly for each product used. Keeping an eye on environmental conditions, such as temperature and humidity, is also crucial, as they can affect drying times and the appearance of the finish.
16. Frequently Asked Questions About Wood Finishing Techniques
What is the best finish for outdoor furniture?
For outdoor furniture, look for finishes that offer UV protection and water resistance. Marine varnish or spar urethane are excellent choices as they are designed to withstand harsh weather conditions while providing a durable finish.
Can I apply a finish over an existing one?
Yes, but ensure the existing finish is clean and properly sanded. For oil-based finishes, you can often apply a new coat directly over the old one. Always test on a small area first to check compatibility.
How can I achieve a glossy finish on wood?
To achieve a glossy finish, use a high-gloss varnish or lacquer and apply multiple thin coats. Buffing between coats can also enhance the sheen. For the final touch, use a polishing compound after the last coat dries completely.
Is it necessary to use a sealer before finishing?
While not strictly necessary, a sealer helps to lock in the stain and creates a smoother finish. It’s especially beneficial when working with porous woods that tend to absorb finishes unevenly.
What are some eco-friendly finishing options?
Eco-friendly options include water-based finishes and natural oils like linseed or tung oil. These options minimize VOC emissions and are safer for both health and the environment.
How do I maintain my finished wood surfaces?
Regular dusting and gentle cleaning with a pH-balanced cleaner is essential. Additionally, reapply oil or wax finishes periodically to maintain their luster and protective qualities.
17. Advanced Techniques: Exploring Specialty Finishes
In addition to the basic techniques discussed, there are several specialty finishing techniques that can add unique character to your woodworking projects. For instance, you might consider using a glaze to create an antiqued effect or a gel stain for better control when applying color. (See: New York Times article on wood finishing.)
Glazing involves applying a translucent layer over a dried stain or finish, which can enhance depth and dimension. This technique is often used on cabinets and furniture to achieve a more refined aesthetic. Gel stains, on the other hand, are thicker than traditional stains and can be applied in a more controlled manner, making them ideal for vertical surfaces and intricate carvings.
Another advanced technique is French polishing. This traditional method involves applying multiple thin layers of shellac using a cloth pad to create a high-gloss finish, perfect for fine furniture. It requires time and skill but results in a beautiful, deep sheen that many woodworkers admire.
18. The Role of Finish in Wood Durability
Choosing the right finish can significantly impact the durability of your woodworking projects. Different finishes offer varying levels of protection against moisture, scratches, and UV light. For example, while oil finishes provide a natural look, they may not be as protective as varnish or lacquer when it comes to water resistance.
Modern finishes such as polyurethane provide excellent durability, making them suitable for high-traffic areas. They can resist heat, alcohol, and water, ensuring that your furniture can withstand everyday use. In contrast, traditional finishes like shellac may not offer the same level of protection, but they create a warm, classic look that is highly valued in antique restoration.
19. Finishing Techniques for Different Projects
Different woodworking projects may require specific finishing techniques to achieve the desired results. For example, a dining table may benefit from a durable, water-resistant finish like polyurethane, while a decorative piece might look best with a soft wax finish that emphasizes the wood’s natural beauty.
For musical instruments, choosing a finish that enhances resonance without dampening sound is crucial. Many luthiers opt for finishes that are thin but protective, allowing the wood to vibrate freely. Similarly, for cabinetry, a hard finish that can withstand daily wear is often preferred, so consider using a lacquer or a high-quality varnish in these cases.
20. Resources for Further Learning
If you’re looking to expand your knowledge of wood finishing techniques, there are numerous resources available. Books such as “Understanding Wood Finishing” by Bob Flexner provide in-depth insights into the science of finishes and practical application techniques. Online platforms like YouTube host countless tutorials from experienced woodworkers demonstrating various finishes and techniques.
Participating in woodworking forums or local workshops can also offer valuable hands-on experience and tips from seasoned professionals. Engaging with the woodworking community can greatly enhance your skills and inspire your creativity.
By mastering these wood finishing techniques, you can greatly enhance the aesthetics and longevity of your woodworking projects. Whether you’re a novice woodworker or an experienced craftsman, learning about different finishes will allow you to express your creativity and achieve stunning results.
“`
Trending Now
Frequently Asked Questions
What is the best way to finish wood?
The best way to finish wood involves several key techniques including sanding, staining, and sealing. Sanding prepares the surface, staining enhances the wood's natural beauty, and sealing protects the finish. Each step is crucial for achieving a professional-looking result.
How do you prepare wood for finishing?
Preparing wood for finishing starts with sanding to remove rough spots and imperfections. Use progressively finer sandpaper, starting from around 80 grit and moving up to 220 grit or higher. Cleaning the surface thoroughly after sanding is also essential to ensure a smooth finish.
What types of wood stains are there?
There are two main types of wood stains: oil-based and water-based. Oil-based stains penetrate deeper and provide richer colors, while water-based stains dry faster and are easier to clean up. The choice depends on your project needs and desired finish.
Why is sealing important in wood finishing?
Sealing is crucial in wood finishing as it protects the wood from moisture, dirt, and wear. A good sealant enhances the durability of the finish, ensuring that the wood maintains its beauty and integrity over time.
How can I avoid blotchiness when staining wood?
To avoid blotchiness when staining wood, always test the stain on a scrap piece first. Additionally, apply the stain evenly and wipe off any excess after a few minutes. Different woods absorb stains differently, so adjusting your technique based on the type of wood is important.
What’s your take on this? Share your thoughts in the comments below — we read every one.
