How to fill in eyebrows
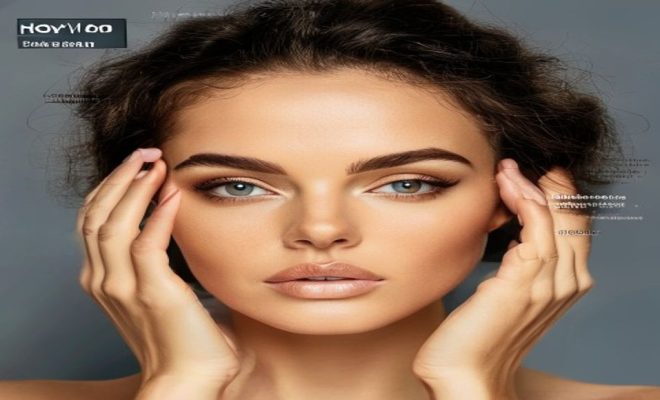
Eyebrows have become a central focus in makeup routines, with well-defined arches framing the face and enhancing overall appearance. But not everyone is born with perfect brows, and that’s where eyebrow filling techniques come into play. Whether you’re looking to enhance your natural shape or completely redefine your brows, mastering these techniques is crucial. Here’s a detailed exploration of ten eyebrow filling techniques that can transform your look.
1. Understanding Your Brow Shape
Before diving into the nitty-gritty of eyebrow filling techniques, it’s essential to understand your natural brow shape. Your brow shape impacts how you fill them in, as filling should enhance your natural features rather than disguise them. To determine your brow shape, start by examining the three key points: the start of the brow, the arch, and the tail. The ideal brow should begin directly above the inner corner of your eye, peak about two-thirds of the way out, and taper off gently towards the end.
Identifying your eyebrow shape also helps in choosing the right filling technique. For example, if you have a round brow, you might want to create more angular shapes to elongate your face. Conversely, if you have a strong arch, softening it with filling techniques can create balance.
There are generally five common brow shapes: S-shaped, soft angled, hard angled, straight, and rounded. An S-shaped brow has a slight curve at the front before it rises to an arch. Soft angled brows have a gentle, subtle arch, giving a natural lift. Hard angled brows feature a more defined, sharper arch, which can add structure to the face. Straight brows run horizontally with minimal arch, often creating a youthful look. Rounded brows have a soft, curved arch without any sharp angles. Knowing which of these you naturally have, or which you aspire to, will guide your product choices and application methods. For instance, if you have naturally straight brows but desire a soft-angled look, you’ll focus on creating a subtle peak using a pencil or powder to build up the upper edge of the brow.
2. Pencil Filling
Pencil filling is one of the most popular eyebrow filling techniques, favored for its versatility and ease of use. Choose a pencil that matches your natural brow color for the most natural look. Start by lightly sketching in the outline of your brow, focusing on the areas where hair is sparse. Use short, flicking motions to mimic the appearance of hair, filling in gaps without creating harsh lines.
After outlining, you can blend the pencil by using a spoolie brush. This will soften any harsh lines and allow the color to meld with your natural brow hairs, creating a seamless finish. For added durability, consider using a brow gel or setting spray after filling.
When selecting an eyebrow pencil, consider not just the color, but also the texture. Waxy pencils offer more grip and definition, great for creating precise hair-like strokes. Softer, creamier pencils are easier to blend and can provide a more diffused, natural fill. The tip of the pencil also matters: a fine-tipped pencil is excellent for detail work, while a thicker, slanted tip can cover larger areas quickly. For those with oily skin, a waterproof or long-wear pencil can prevent smudging throughout the day, ensuring your carefully crafted brows stay put from morning to night. Remember, less is often more with pencils; building up the color gradually prevents an overly drawn-on appearance.
3. Powder Filling
If you’re aiming for a softer, more diffused look, powder filling might be your best bet. Eyebrow powders come in various shades and can be applied with an angled brush. Start by using a light hand to apply the powder, building up the color gradually to avoid overdoing it.
For more defined brows, you can still use powder. Simply focus more on the arch and tail, while keeping the front section lighter to maintain a natural gradient. Finish with a clear or tinted brow gel to hold the shape and add a bit of shine.
Powders are particularly forgiving for beginners because they’re easier to blend and correct than pencils or pomades. Many brow powder kits come with two shades, allowing you to create that natural gradient effect we talked about, using the lighter shade at the front and darker at the tail. This multi-tonal approach mimics the natural variation in hair color, making your brows look more authentic. When applying, tap off any excess powder from your brush before touching it to your brows to prevent fallout and over-application. Using a small, stiff angled brush is key for precision. If you find your powder isn’t adhering well, a tiny dab of brow primer can create a tacky surface for better color payoff and longevity.
4. Gel Filling
Eyebrow gels are ideal for those who want to keep things quick and easy. They often come tinted and can fill in brows while simultaneously keeping them in place. They’re especially useful for those with thicker brows that need minimal filling.
To use eyebrow gel, simply brush it through your brows in the direction of hair growth. You can use a small amount to add color or build it up for a more dramatic look. This technique is quick and can be completed in just a few seconds, making it perfect for busy mornings.
Tinted brow gels are a fantastic multi-tasker, offering color, volume, and hold all in one swipe. For those with very sparse brows, a gel with fibers can be a game-changer. These tiny fibers cling to existing hairs and skin, instantly adding thickness and density. The applicator brush on gels is usually a small spoolie, similar to a mascara wand, designed to comb through hairs and deposit product evenly. When applying, start at the arch and work outwards towards the tail, then use whatever residual product is left on the brush to lightly fill the front of the brow. This technique ensures the front remains softer, avoiding a blocky look. Clear brow gels are also essential for setting other products or simply taming unruly hairs without adding color, providing a polished finish.
5. Microblading
Microblading is a semi-permanent technique that involves using a small blade to create hair-like strokes on the skin. This technique is perfect for those who want more defined and fuller brows without the daily maintenance of filling in their eyebrows. The results can last anywhere from one to three years, depending on skin type and aftercare. (See: Understanding facial features and beauty.)
Choosing a qualified professional for microblading is crucial. Look for someone with good reviews and a portfolio of their work to ensure that you’ll be satisfied with the outcome. Keep in mind that while microblading can be a great solution, it also requires a commitment to maintenance and occasional touch-ups.
Beyond the initial procedure, understanding the microblading healing process is vital. Immediately after, your brows will appear darker and more defined, but this fades as the skin heals. You might experience some redness, mild swelling, and flaking over the next week or two. Adhering strictly to your technician’s aftercare instructions – typically involving keeping the area dry, avoiding direct sun exposure, and applying a thin layer of healing balm – is paramount for optimal color retention and avoiding infection. Factors like sun exposure, oily skin, and certain skincare ingredients (like retinoids or AHAs) can cause the pigment to fade more quickly. Regular touch-ups, usually every 12-18 months, are necessary to maintain the vibrancy and definition of microbladed brows.
6. Ombre Brows
Ombre brows combine the benefits of both powder and gel techniques, creating a gradient effect that looks natural and soft. This technique starts lighter at the front of the brow and gradually deepens toward the tail, mimicking the natural hair growth pattern.
To achieve ombre brows, you can use either a powder or gel, but the key is to use two shades: one lighter and one darker. Apply the lighter shade to the front and gradually blend into the darker shade towards the arch and tail. This technique not only adds dimension but also creates a more three-dimensional look.
While ombre brows can be achieved with makeup, the term often refers to a semi-permanent cosmetic tattoo technique similar to microblading, but using a machine to create a soft, powdered effect rather than individual hair strokes. This method is often preferred by those with oilier skin types, as the pigment tends to last longer and heal more consistently than microblading. The resulting look is less about hyper-realistic hair strokes and more about a perfectly powdered brow that gradually lightens towards the front. It offers a more “makeup-ready” look without the daily effort. The process involves multiple sessions, including an initial appointment and a touch-up a few weeks later, to ensure even color and shape. As with microblading, careful selection of a certified artist is non-negotiable for safety and desired results.
7. Soap Brow Technique
The soap brow technique has gained popularity in recent years, especially among beauty influencers. It involves using a bar of soap to set and hold the brows in place, offering a fuller appearance. This technique is particularly great for those with unruly brows that need control.
To execute the soap brow technique, dampen a spoolie brush and rub it against a bar of clear soap to gather product. Brush your brows upward and outward, shaping them as you go. The soap helps to hold the hairs in place, giving a fluffy and natural appearance.
The magic of the soap brow technique lies in the glycerin content of clear soaps. Glycerin acts as a humectant, drawing moisture from the air and creating a slight tackiness that effectively laminates the brow hairs in an upward, fluffy position. This technique is fantastic for creating the illusion of thicker, fuller brows by maximizing the visibility of every single hair. It’s also an incredibly cost-effective method compared to specialty brow waxes or gels. For best results, ensure the soap is clear and glycerin-based to avoid any white residue. After brushing, you can gently press down on your brows with your finger or the back of the spoolie to really lock them into place. This also helps to flatten the hairs against the skin, giving a more laminated look. Once dry, you can then go in with a pencil or powder to fill in any sparse areas, as the soap mainly provides hold and texture.
8. Tinting
Tinting is another effective way to enhance your eyebrows, particularly for those with lighter hair. It involves applying a semi-permanent dye that lasts several weeks. Tinting can help fill in sparse areas and create a more uniform color across the brow.
While you can do at-home tinting, visiting a professional is advisable for the best results. They will ensure that the color complements your skin tone and that the application process is safe. After tinting, you’ll wake up with fuller-looking brows every day without the need for daily filling.
Professional brow tinting uses specially formulated dyes that are safe for use around the eyes. A skilled technician will mix a custom shade to perfectly match your hair color and desired intensity, preventing an unnatural or too-dark result. The process typically takes about 10-15 minutes, with the dye applied and left to develop before being wiped away. The effect of tinting is particularly noticeable for those with fine or light-colored brow hairs, as it darkens even the lightest vellus hairs, making the brow appear much fuller and more defined. The results usually last between 3-6 weeks, depending on your hair growth cycle and how often you wash your face. It’s a low-commitment, high-impact solution for effortlessly polished brows.
9. Combination Techniques
Sometimes the best results come from using a combination of techniques. For instance, you might start with microblading for a base, then use powder or pencil to fill in any sparse areas. Combining techniques can yield a more realistic look, giving you the flexibility to customize your brows according to the occasion.
Experimenting with different combinations can help you find what works best for your unique brow shape and personal style. Don’t hesitate to mix and match until you find the perfect balance that enhances your features without looking overly done.
A common and highly effective combination is using a brow pencil for precise hair-like strokes in sparse areas, followed by a brow powder to create a soft, overall fill and a gentle gradient. Then, finish with a clear or tinted brow gel to set everything in place and add texture. This layering approach allows for maximum customization: the pencil gives definition, the powder adds fullness, and the gel provides hold and polish. For a more dramatic evening look, you might even incorporate a brow pomade for intense definition, then soften the front with a powder. The key is to understand the strengths of each product and how they can complement each other to achieve your desired brow aesthetic. Don’t be afraid to play around; your bathroom mirror is your laboratory!
10. Aftercare and Maintenance
No matter which eyebrow filling technique you choose, aftercare and maintenance are essential for keeping your brows looking their best. For methods like microblading and tinting, following your technician’s aftercare instructions is crucial. This often includes avoiding moisture, heat, and certain skincare products for a period after the procedure.
For daily techniques, ensure that you clean your brows gently at the end of the day to remove product buildup. Regularly comb through your brows and trim any stray hairs to maintain the shape. Additionally, consider using brow serums to promote healthy hair growth and keep your brows looking full and vibrant. (See: The science of beauty and attractiveness.)
Beyond daily cleaning and product removal, consider the long-term health of your brow hairs. Just like the hair on your head, brow hairs can benefit from conditioning. A tiny drop of castor oil or a specialized brow serum applied nightly can nourish the follicles, potentially leading to thicker, stronger growth over time. When trimming, always use small, sharp brow scissors and a spoolie brush. Brush the hairs straight up and trim only the very tips that extend beyond your desired upper brow line. Never cut into the main body of the brow. Regular grooming, whether it’s tweezing stray hairs or getting a professional wax/thread, helps maintain the clean lines and overall shape that your filling techniques enhance. Consistent care ensures that your natural brows are always in their best condition, making any filling technique you choose even more effective.
11. Pomade Filling for Bold Definition
If you’re after brows that make a statement, pomade filling is your go-to technique. Brow pomades are typically creamy, highly pigmented formulas that offer intense color and impressive staying power. They’re excellent for creating sharp, defined lines and filling in very sparse areas with a rich, opaque finish.
To use a brow pomade, you’ll need a small, stiff, angled brush. Dip the brush lightly into the pomade, making sure not to pick up too much product initially. Outline the bottom edge of your brow, creating a clean line. Then, create the top edge, leaving the very front of the brow untouched for now. With the remaining product on your brush, fill in the sparse areas using short, hair-like strokes. Finally, using a very light hand and minimal product, gently feather the front of your brow upwards to create a natural transition. Blend with a spoolie to soften any harsh edges. Pomades are often waterproof and smudge-proof once set, making them ideal for long-lasting wear, especially in humid climates or for active lifestyles.
Working with pomade requires a bit of practice to master the amount of product and pressure. A common mistake is applying too much pomade at once, which can lead to a heavy, unnatural look. Start with a tiny amount and build up the intensity. If you find the pomade is drying out on your brush too quickly, a drop of mixing medium or even a facial oil can revive its creamy texture. For a super crisp finish, a touch of concealer applied with a flat brush along the bottom edge of your brow can clean up any imperfections and make your brows really pop. This technique is fantastic for creating that “Instagram brow” look, but can also be adapted for a slightly softer, more everyday definition by using less product and blending extensively.
12. Brow Lamination: The Salon Secret
Brow lamination is a relatively newer salon treatment that has taken the beauty world by storm. It’s essentially a perm for your eyebrows, designed to give you that fluffy, brushed-up look without needing brow gel every day. This technique involves chemically straightening and setting your brow hairs into an upward direction, creating the illusion of fuller, thicker brows and a more defined shape.
During the lamination process, a lifting solution is applied to the brow hairs to make them more pliable. Then, the hairs are brushed into the desired upward shape and a setting solution is applied to fix them in place. Finally, a nourishing oil is used to rehydrate the brows. The results typically last 6-8 weeks. Brow lamination is particularly beneficial for those with unruly, downward-growing, or sparse brows, as it can redirect hairs to cover gaps and create a more uniform, lifted appearance. It’s important to seek out a certified and experienced technician for this treatment, as improper application can damage brow hairs. Aftercare usually involves keeping brows dry for 24-48 hours and applying a nourishing oil daily to maintain their health and shine.
13. Brow Stencils for Symmetrical Shaping
For those who struggle with achieving symmetrical brows or are new to filling techniques, brow stencils can be a fantastic tool. These reusable templates come in various shapes and sizes, helping you create a consistent and balanced brow every time. They take the guesswork out of shaping and provide a clear guide for where to apply your product.
To use a brow stencil, simply hold it against your brow, aligning it with the natural start, arch, and tail of your existing brow. Choose a stencil that closely matches your desired shape. Then, using either a brow powder or a soft pencil, gently fill in the stencil opening. Once you remove the stencil, you’ll have a perfectly outlined or filled brow. You can then use a spoolie to blend and soften the edges, or freehand tiny hair-like strokes where needed. Stencils are particularly helpful for quickly outlining your shape before going in with a more detailed filling technique, or for ensuring both brows are sisters, not distant cousins. They’re also great for identifying areas where you might need to pluck or trim stray hairs to achieve a cleaner line.
14. Expert Perspectives on Brow Trends
The world of eyebrows is constantly evolving, with trends shifting from thin, over-plucked arches to bold, bushy statements. Beauty experts often emphasize that the “perfect” brow isn’t about following a trend blindly, but about finding a shape and fullness that complements your unique facial features. Celebrity brow artists like Anastasia Soare, founder of Anastasia Beverly Hills, champion the “Golden Ratio” method, which uses precise measurements to determine the ideal start, arch, and end points of the brow for each individual. This mathematical approach ensures a harmonious balance with your bone structure, rather than a one-size-fits-all look.
Another popular perspective from makeup artists is the importance of texture. While a perfectly filled, smooth brow was once the ideal, many now advocate for a more natural, textured look, often achieved with the soap brow technique or brow lamination. This focus on individual hair strands and a slightly undone finish gives a youthful, modern aesthetic. Additionally, dermatologists and estheticians often stress the importance of brow health. Over-plucking or harsh chemical treatments can damage follicles, leading to permanent sparse areas. They recommend nourishing serums and gentle grooming practices to encourage healthy growth, providing a better canvas for any filling technique. Ultimately, the consensus among experts is that well-groomed, healthy brows, tailored to your face, will always be in style, regardless of fleeting trends.
15. Comparing Permanent and Temporary Brow Solutions
When considering eyebrow filling techniques, it’s helpful to weigh the pros and cons of temporary daily makeup solutions versus more permanent or semi-permanent treatments. Each option caters to different needs, budgets, and commitment levels.
Temporary Solutions (Pencil, Powder, Gel, Pomade, Soap Brows):
- Pros:
- Flexibility: You can change your brow shape, color, and intensity daily to match your mood or outfit.
- Low Commitment: If you don’t like a look, you can wash it off.
- Cost-Effective: Products are generally affordable and last a long time.
- No Pain/Recovery: Application is simple and non-invasive.
- Cons:
- Daily Application: Requires time and effort every day.
- Smudging/Fading: Can be prone to smudging, especially in humidity or with oily skin.
- Skill Required: Takes practice to achieve a polished look.
- Product Dependence: You’re reliant on having your products handy.
Semi-Permanent/Permanent Solutions (Microblading, Ombre Brows, Tinting, Lamination):
- Pros:
- Time-Saving: Wake up with perfectly shaped brows, no daily effort needed.
- Long-Lasting: Results can last weeks, months, or even years.
- Waterproof/Smudge-proof: Ideal for active lifestyles, swimming, or hot climates.
- Corrective: Can significantly improve sparse areas, asymmetry, or lack of shape.
- Cons:
- High Commitment: The results are long-term, so choose wisely.
- Costly: Initial investment is significantly higher than daily products.
- Pain/Recovery: Invasive procedures involve some discomfort and a healing period.
- Risk of Dissatisfaction: If not done well, correcting permanent makeup can be difficult and expensive.
- Maintenance: Requires touch-ups for lasting results.
Your choice depends on your lifestyle, budget, desired longevity, and comfort with cosmetic procedures. Many people find a hybrid approach works best, using daily products to enhance their professionally tinted or microbladed brows.
Frequently Asked Questions About Eyebrow Filling Techniques
Q1: How do I choose the right brow color?
A: For a natural look, choose a brow product that is one to two shades lighter than your hair color if your hair is dark, and one to two shades darker if your hair is very light or blonde. If you have red hair, opt for a warm taupe or soft brown. The goal is to enhance, not overpower, your natural brows. (See: Eyebrow shaping techniques and health.)
Q2: My brows are very sparse. Which technique is best for me?
A: For very sparse brows, microblading or ombre brows (semi-permanent options) can provide a foundational shape and fullness. For daily makeup, a combination of a fine-tipped pencil to draw individual hair strokes and a fiber brow gel to add volume can work wonders. Pomades also offer excellent coverage for sparse areas.
Q3: How can I make my eyebrow makeup last all day?
A: Start with a clean, oil-free brow area. Use waterproof or long-wear products (pencils, pomades). Finish with a clear or tinted brow gel to set the hairs in place. A setting spray applied lightly over your finished makeup can also help lock everything down.
Q4: What’s the difference between microblading and microshading (ombre brows)?
A: Microblading creates individual hair-like strokes with a manual tool, ideal for a natural, feathery look. Microshading (often referred to as ombre brows in the semi-permanent world) uses a machine to create a soft, powdered effect, similar to filling in your brows with powder. Some techniques combine both for a “combo brow.”
Q5: Can I tint my eyebrows at home?
A: While at-home tinting kits are available, professional tinting is highly recommended. Professionals use salon-grade products, customize the color precisely, and ensure safe application, minimizing the risk of irritation or an unnatural result. If you do attempt it at home, always do a patch test first.
Q6: How do I prevent my brows from looking “drawn on”?
A: The key is to use a light hand. Start with minimal product and build up gradually. Keep the front of your brows lighter and softer, using hair-like strokes rather than a solid line. Blend thoroughly with a spoolie brush after application to diffuse any harsh edges.
Q7: Is brow lamination suitable for everyone?
A: Brow lamination is generally safe for most people, but it’s not recommended for those with very thin or brittle brow hairs, or certain skin conditions like eczema or psoriasis around the brow area. Always consult with a professional technician to assess if it’s right for you.
Q8: What tools do I need for basic eyebrow filling?
A: A good quality angled brush for powder or pomade, a spoolie brush for blending and grooming, and your chosen brow product (pencil, powder, gel, or pomade) are the essentials. Small brow scissors and tweezers are also useful for maintenance.
Q9: How often should I get my eyebrows professionally shaped?
A: This depends on your hair growth, but typically every 3-4 weeks is ideal for maintaining a clean, defined shape. Regular professional shaping can make daily filling much easier.
Q10: Can brow serums really help grow my eyebrows?
A: Many brow serums contain ingredients like peptides, vitamins, and plant extracts that can nourish hair follicles and promote healthier, stronger growth. While results vary, consistent use over several weeks or months can lead to noticeable improvements in brow density and overall health, providing a better base for any filling technique.
Whether you opt for pencils, gels, or more permanent solutions like microblading, understanding these eyebrow filling techniques will empower you to create the brows of your dreams. With practice and experimentation, you can find the method that complements your unique features and enhances your overall beauty. So get ready to fill in those brows and step out with confidence!
Trending Now
Frequently Asked Questions
What are the different eyebrow shapes?
There are generally five common eyebrow shapes: S-shaped, soft angled, hard angled, straight, and rounded. Each shape has distinct features, such as the degree of arch and curvature, which can influence your overall look and how you choose to fill them in.
How do I determine my natural brow shape?
To determine your natural brow shape, examine three key points: the start of the brow above the inner corner of your eye, the peak of the arch about two-thirds out, and the tail that tapers gently. This will help you understand how to enhance your features with filling techniques.
What techniques can I use to fill in my eyebrows?
There are various eyebrow filling techniques that can enhance your natural shape or redefine your brows. Techniques include using pencils, powders, gels, and pomades. The method you choose should align with your desired brow shape and personal style.
How can I make my eyebrows look more defined?
To make your eyebrows look more defined, start by understanding your natural shape and then use products like brow pencils or gels to fill in sparse areas. Focus on creating clean lines and a well-defined arch to enhance your overall appearance.
What is the best way to fill in sparse eyebrows?
The best way to fill in sparse eyebrows is to use a combination of brow pencil and powder for a natural look. Start by lightly sketching the shape, then fill in with powder to create dimension. Finish with a brow gel to set the look.
What's your take on this? Share your thoughts in the comments below — we read every one.